These videos complement this setup guide to show you how to configure and set up supported Emlid receivers (RS2, RS2+, RS3) for use with Emesent's Backpack or Vehicle RTK units, view the RTK status in Commander, and process your scan in Aura.
Overview
This document shows how to configure and setup supported Emlid receivers for use with Emesent's Backpack or Vehicle RTK units and then monitor and process the RTK data.
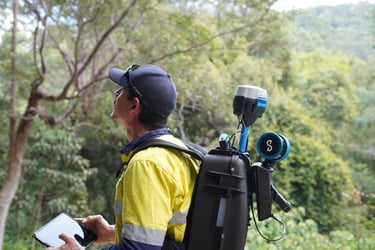
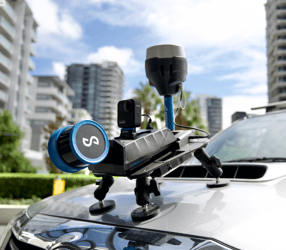
Backpack and Vehicle RTK automates high-accuracy georeferencing and drift correction for scans, allowing for rapid and precise scans without the need for ground control points.
 |
 |
Always make sure to drive safely when operating a vehicle. Do not be distracted or use the phone/tablet to change settings while driving. Only check the GPS status when it is safe to do so.
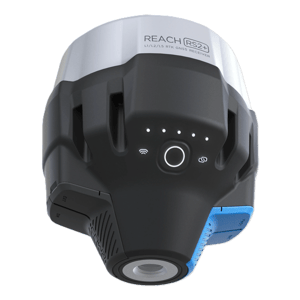
The term "Emlid receiver", used throughout this guide, refers specifically to the Emlid devices supported by Vehicle RTK and Backpack RTK devices. Currently, these include the Emlid RS2, RS2+, and RS3 receivers.
Scope
Follow the instructions in this document once you have setup your Emlid device according to Emlid documentation. This document does not cover how to perform an initial setup on an Emlid RS2, RS2+, or RS3 receiver or how to connect to a base station or network corrections service.
To perform these actions, please refer to Emlid’s official documentation for the Emlid RS2+.
The Georeferencing articles and videos in Knowledge Base expand on the information and instructions presented in this document, including:
Requirements
Hardware
The following hardware is required to set up the Emlid receiver:
|
Hardware |
Details |
|---|---|
|
Computer |
|
|
Emesent RTK unit |
|
|
Cable |
|
Emesent can supply vehicle or backpack RTK kits, please see the articles Backpack RTK Hardware or Vehicle RTK Hardware for details.
Software
|
Software |
Version / Download Link |
|---|---|
|
Emesent Aura |
Backpack: version 1.7 or later Vehicle: version 1.6 or later |
|
Emesent Cortex |
Backpack: version 3.3 or later Vehicle: version 3.2.2 or later |
|
Emesent Commander (optional) |
version 1.5 or later |
|
Emlid Flow (App Store) |
|
|
Emlid Flow (Google Play) |
https://play.google.com/store/apps/details?id=com.emlid.reachview3&hl=en_AU&gl=US |
Raw scan data from a Hovermap that uses Emesent Cortex version 3.3 (or later) can only be processed in Emesent Aura 1.7 (or later).
Process
Step 1: Setup the RTK Base Station
To setup the base station for Emlid GNSS receiver, please refer to the article Setup Emlid RS2, RS2+ and RS3 with the RTK base station or Emlid’s official documentation for the Emlid RS2+.
Step 2: Configure the Emlid Receiver
Hovermap cannot detect an incorrectly set antenna height so ensure it is properly configured.
Use the following configuration settings in Emlid Flow, while connected to your receiver, to ensure RTK data is correctly processed.
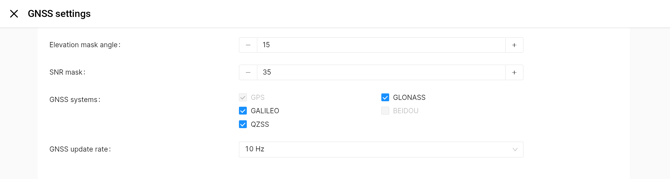
1. Navigate to Settings → GNSS settings. Configure the following:

|
Setting |
Value |
|---|---|
|
Positioning mode |
Kinematic (only on Firmware version 30.2 or older) |
|
GNSS Systems |
|
|
GNSS update Rate |
10Hz |
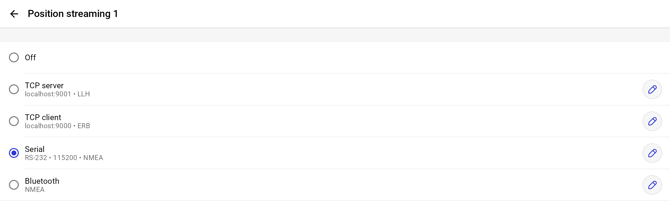
2. Navigate to Settings → Position Streaming 1. Configure the following:

|
Setting |
Value |
| Position Streaming 1 | Serial |
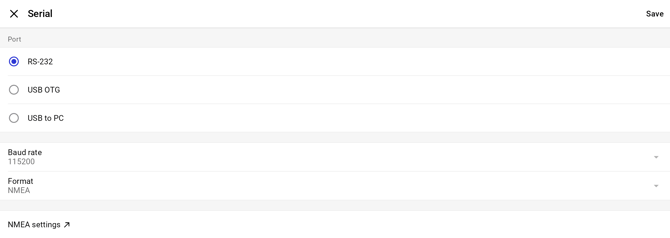
3. Navigate to Settings → Position Streaming 1 → Edit Serial. Configure the following:

| Setting | Value |
| Port | RS232 |
|
Baud rate |
115200 |
| Format | NMEA |
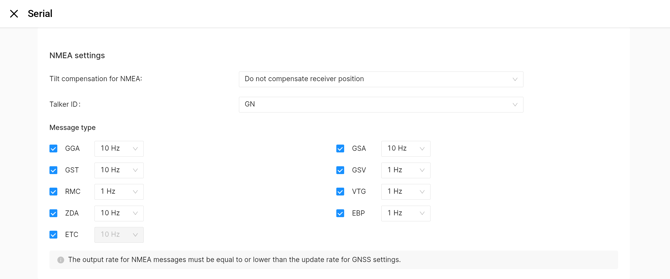
| Setting | Value |
| Talker ID | GN |
| Message Type |
Where not specified, set to: 1Hz |
7. (Emlid RS3 only) Go to Settings → IMU, then ensure both the IMU Tilt sensor is disabled when use with Emesent Hovermap Backpack and Vehicle RTK configurations.


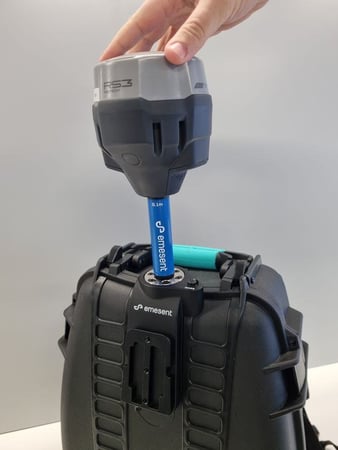
Step 3: Setup the RTK Mount and Receiver
Refer to these Knowledge Base articles for instructions for how to setup the Backpack or Vehicle RTK Mount and attach the GNSS receiver.
Setup the Backpack RTK Mount and Receiver
Setup the Vehicle RTK Mount and Receiver
Step 4: Connect to Hovermap
1. The Hovermap and GNSS receiver should be attached to the Vehicle RTK or Backpack RTK mount.

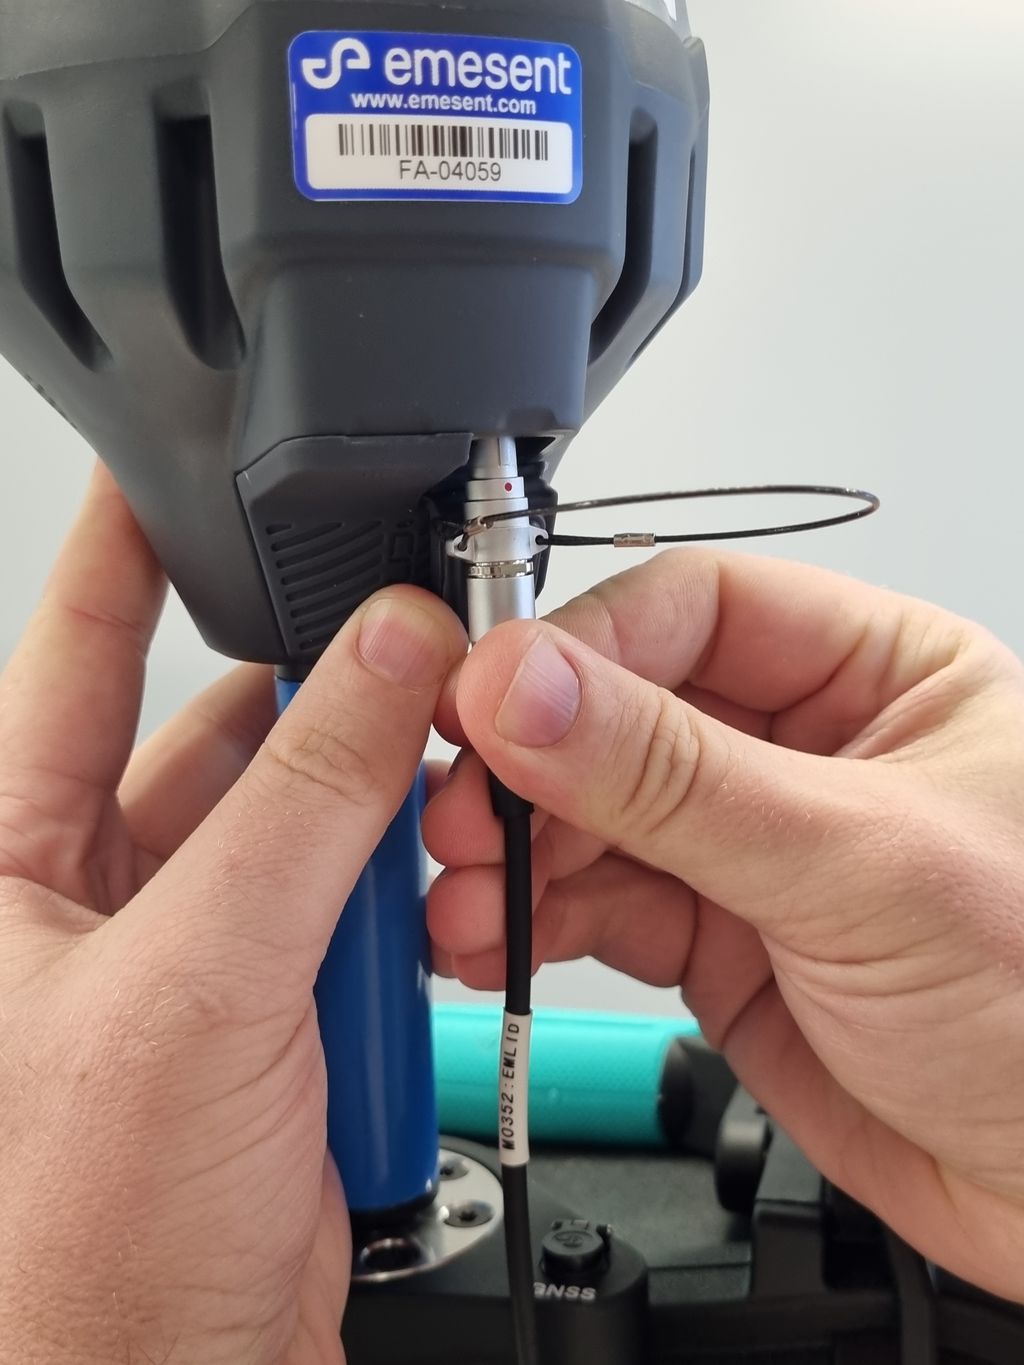
2. Plug the Emlid cable with the wire loop into the receiver and the other end (black LEMO) into the Backpack port. The Emlid receiver should now be set up to work with your Vehicle RTK or Backpack RTK unit.
Step 5: Monitor RTK Status
The Emesent Commander application provides clear visibility of the RTK status before and during the mission. This enables you to monitor RTK quality without leaving the Commander app to reference the GNSS receiver’s native application.
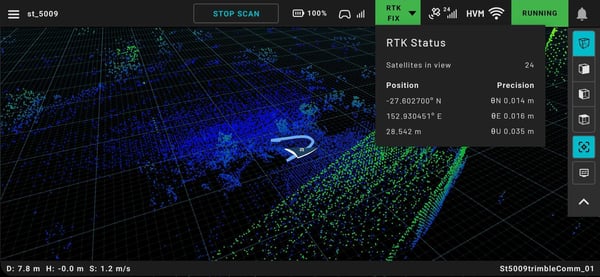
If the settings are configured correctly and the GNSS receiver is properly connected, Emesent Commander will display the Position and Accuracy without errors. Any communication errors are displayed in the app as a warning notification.
Refer to this article for more information on how you can Monitor RTK Status and the expected RTK accuracy.
Process RTK Scans in Aura
Once RTK scan data has been captured, you can process it using Emesent Aura to create a point cloud, colorize the scan, clean or reproject the point cloud, and view an RTK accuracy report.
See this article on how to Process RTK Scans in Aura.
Troubleshooting
Please refer to our comprehensive guide for help resolving RTK issues: Troubleshooting RTK.