Setup the Vehicle RTK Mount and Receiver
Setup the Vehicle RTK Mount and attach the GNSS receiver
-
Upgrade to the latest Emesent Cortex version (3.2.2 or later). For instructions, see the article Upgrade Emesent Cortex.
-
Turn on the GNSS receiver and check that the device settings are correctly configured.
The settings only need to be set up if using the GNSS receiver for the first time or if the settings have been changed for another use case.
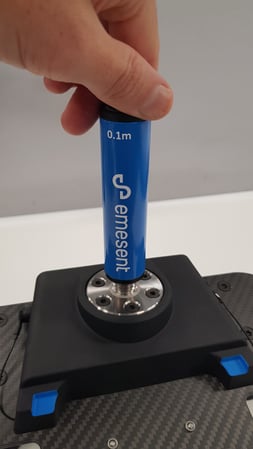
3. Attach the spacer pole to the Vehicle RTK Mount until fully screwed in.
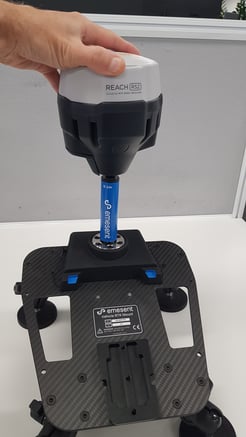
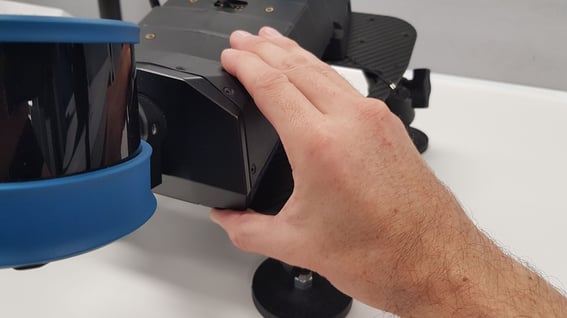
7. Holding onto the sides, lower the mount until the magnets stick to the surface.
8. Realign the mount body and legs so that all magnetic feet are fastened and the Hovermap is at a desired angle.
The RTK receiver should be roughly facing upwards but does not need to be exactly level.
9. Tighten the legs using the side handles until secure.
10. Gently pull the mount upwards to check that all feet are secure.
Once the device is attached, avoid sliding it across the surface of your vehicle, as this could scratch the paint. Instead, lift and reposition it as needed. Instructions for safely and properly removing the mount are provided in the next section.
Removing the magnetic feet from the vehicle
-
Park your vehicle safely in a clear area away from traffic.
-
Ensure the Hovermap is turned off.
-
Examine the magnetic feet for any debris or obstructions that could cause any problems during removal.
-
Firmly grasp two of the Vehicle RTK Mount legs, ensuring a stable hold.
-
Apply steady and even pressure to lift one of the legs off the vehicle's surface, without twisting or jerking to avoid damaging the paint or injuring yourself. The remaining legs should detach easily.
-
Store the Vehicle RTK Mount with the rear legs facing up and the front legs facing toward the rear legs. This minimizes the chance of the magnets aligning in a way that causes them to attract each other.

Using the Vacuum Feet
First-time setup
1. Remove the vacuum feet from the packaging.

2. Connect one end of the threaded adaptor to the ball joint assembly and the other end to the suction cup.
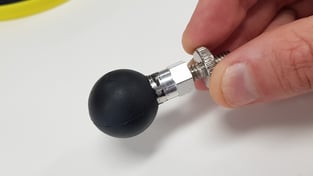
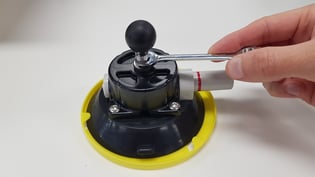
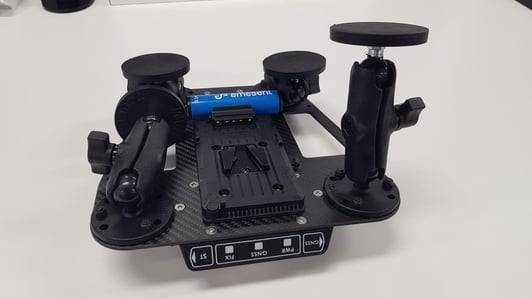

Do not loosen the leg too far or it will fall apart and require re-assembly.
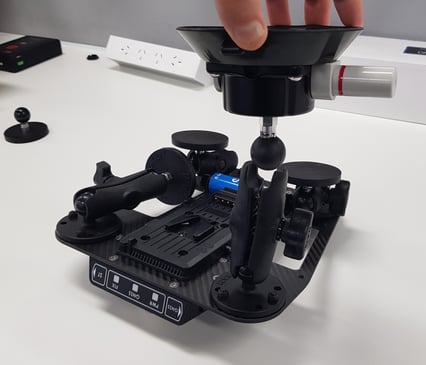
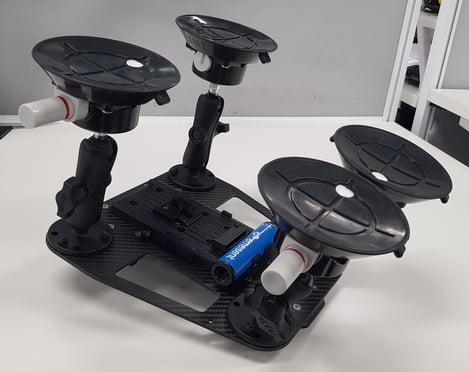
Attaching the vacuum feet to the vehicle
-
Ensure that the surface is clean and free from debris.
-
Slightly loosen all four legs using the side handles until they move freely.
-
Place the mount on the vehicle and move the legs until the vacuum feet are flat on the surface.
-
Press the suction pump multiple times until the red line disappears and the foot is securely attached.
-
Tighten the legs using the side handles until secure.
-
Gently pull the mount upwards to check that all feet are secure.
-
Periodically check the attachment to ensure the device remains securely fastened, especially after driving on rough roads.
Do not begin scanning if the red line shows on the suction pump or if the suction is lost quickly.
Removing the vacuum feet from the vehicle
-
Park your vehicle safely in a clear area away from traffic.
-
Ensure the Hovermap is turned off.
-
Pull any of the release valve tabs, on the side of the suction cup, upwards to release. Do this for all the vacuum feet.

