
This article explains how to configure the Boston Dynamics Spot robot to communicate with Hovermap. The procedure pairs Hovermap to Spot through the Spot app, authorises the Hovermap payload, and creates the Start Scan and Stop Scan actions for scanning missions.
Before proceeding, ensure familiarity with operating the Spot robot.
What you will need
A Boston Dynamics Spot robot with the Hovermap Spot Cage installed (see Install the Hovermap Spot Cage).
The Spot controller with the Spot app installed.
A Boston Dynamics admin account with credentials to access the Admin Console.
Optional: Long Range Radio (LRR) hardware and its Wi-Fi network for extended range operations.
Procedure
Step 1: Pair Hovermap to Spot
Ensure all cables are connected securely.
Power on the Spot robot and Hovermap. If Hovermap does not power on automatically, switch it on manually.
Launch the Spot application from the controller.
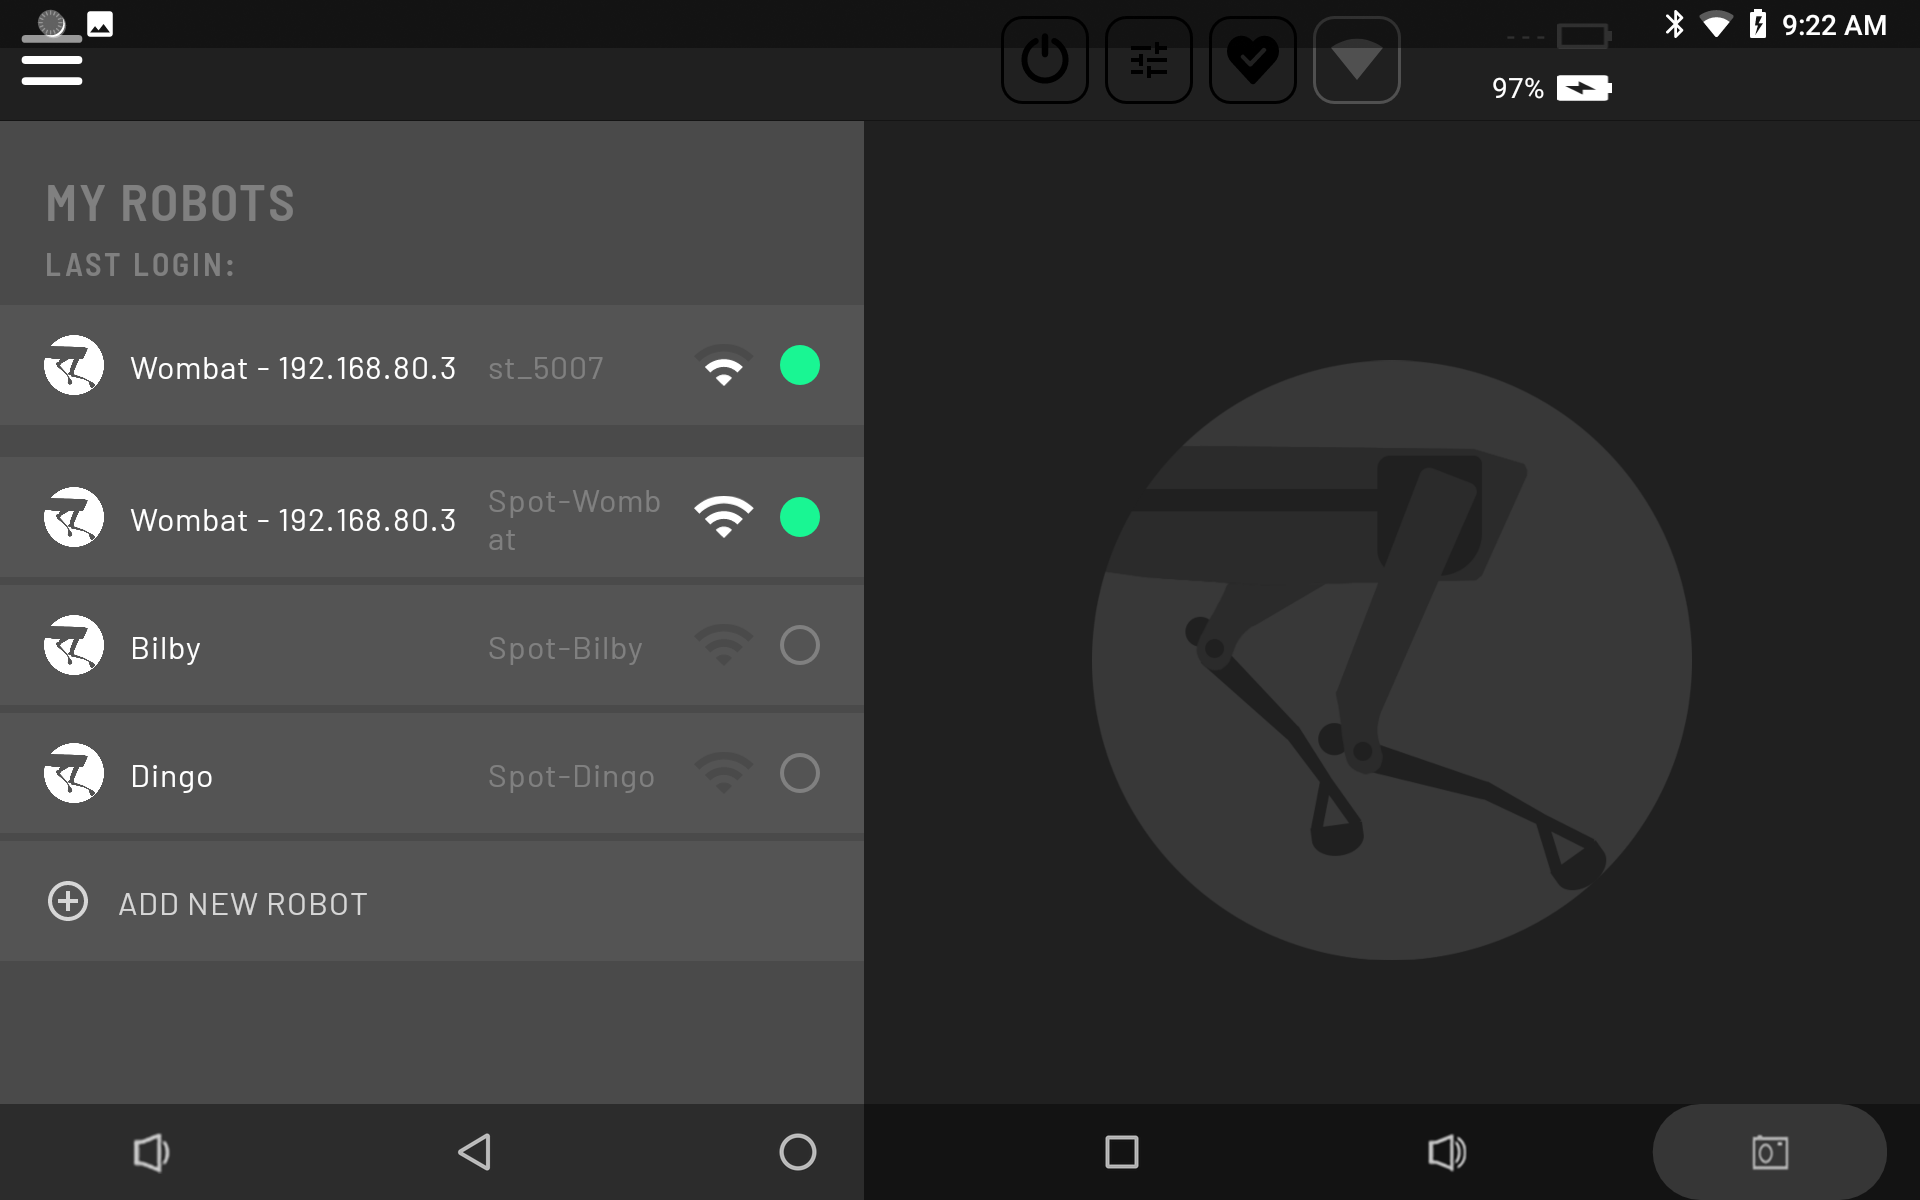
Go to the My Robots page. The page lists all robots with their corresponding networks shown alongside each robot name.
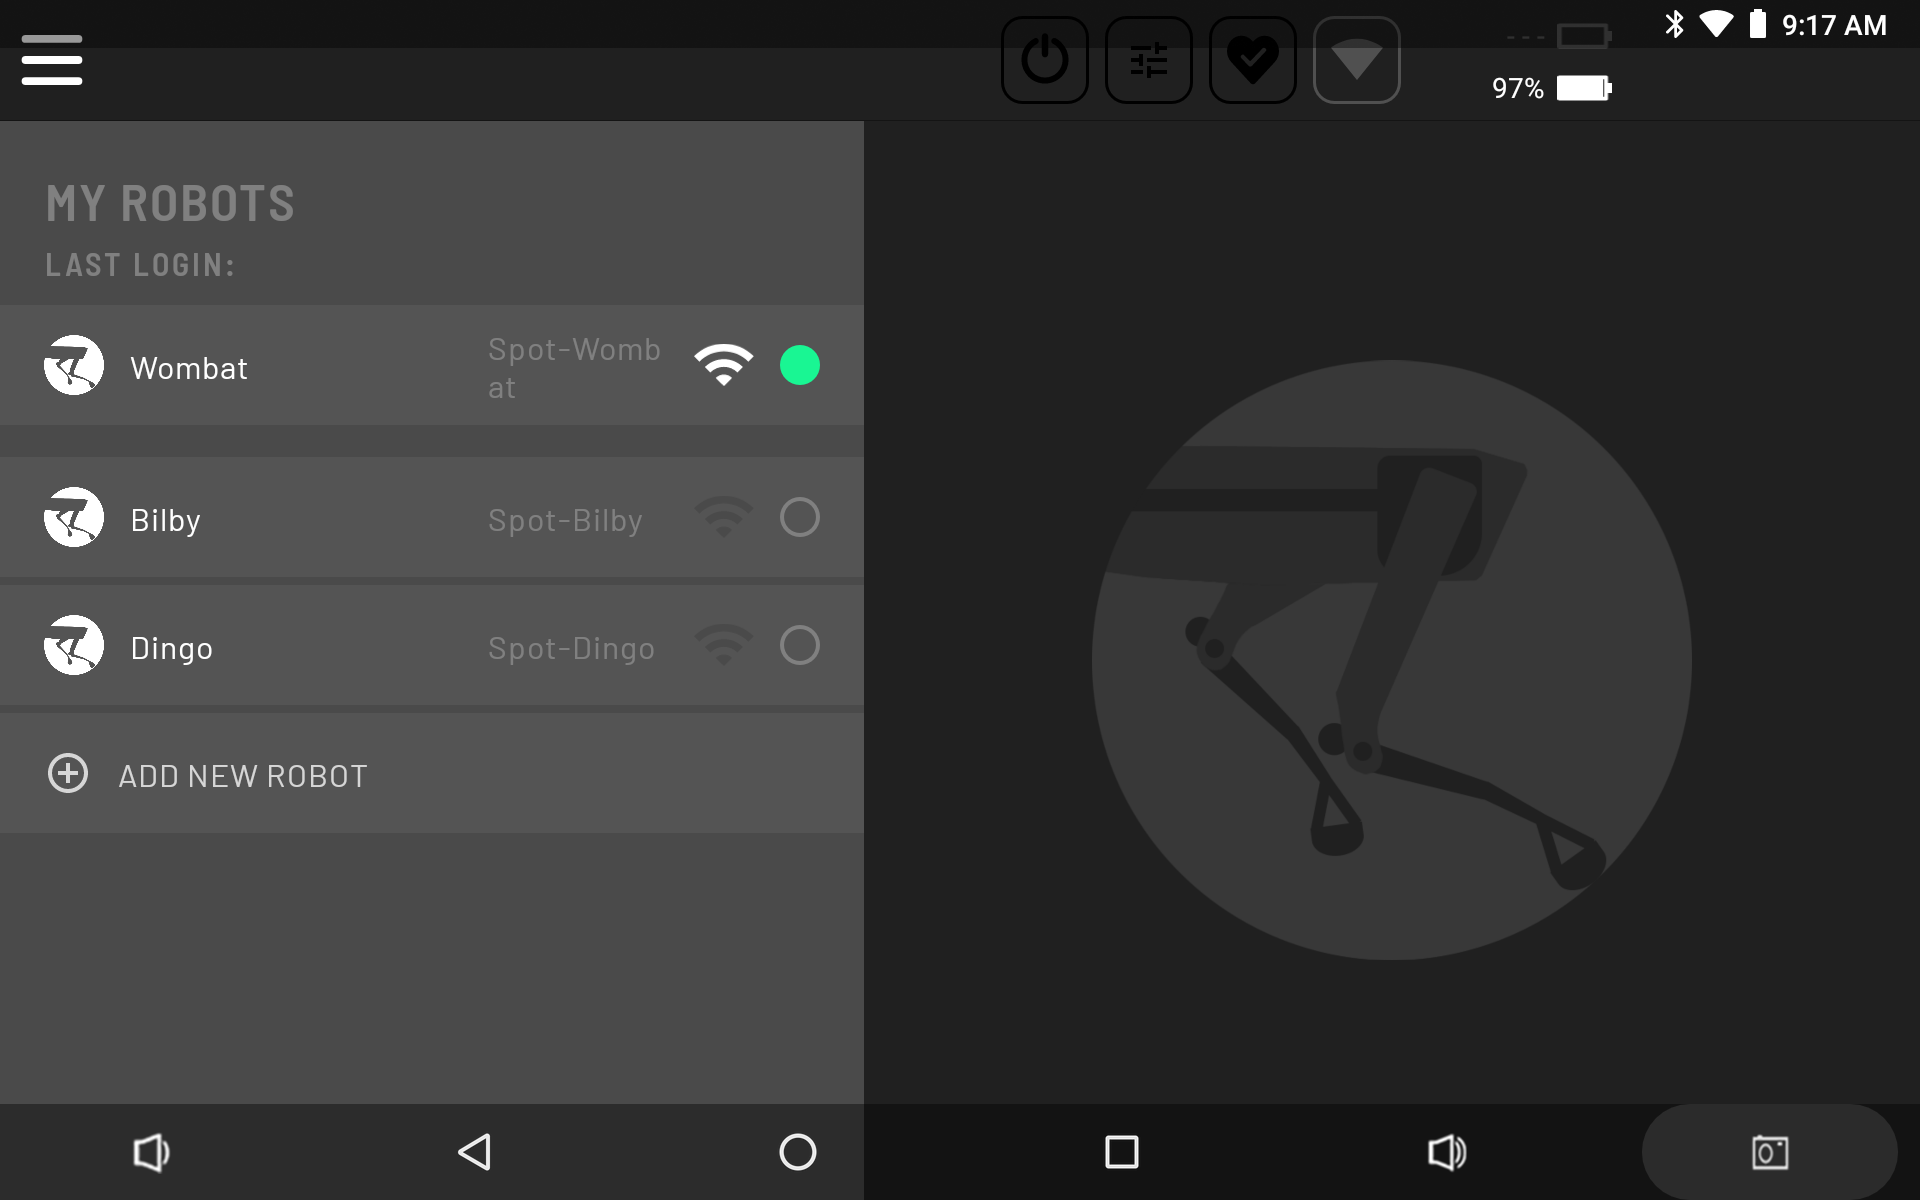
Tap Add New Robot at the bottom of the list.
Select a Hovermap network to connect to on the left, then view the list of detected robots on the right side.
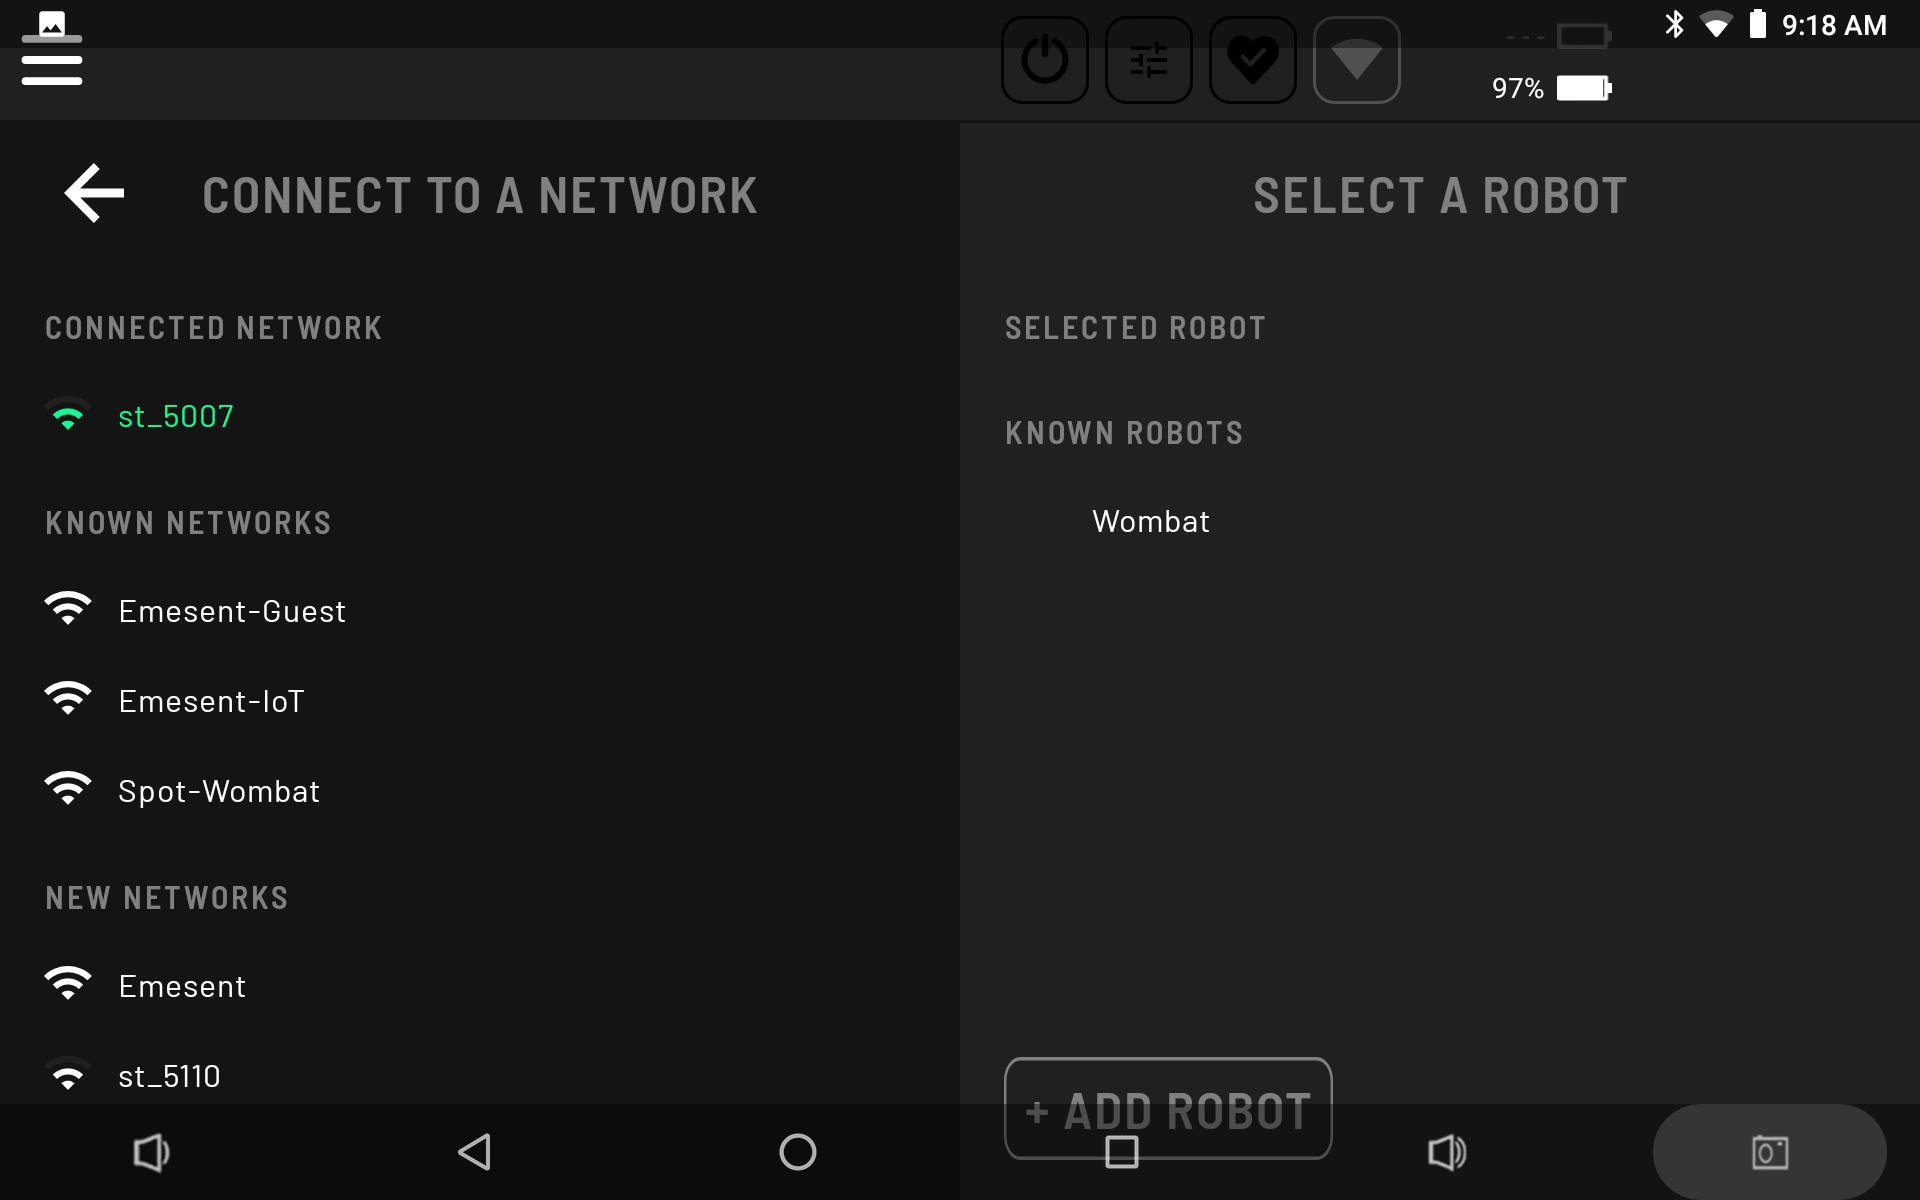
Choose a robot from that list, then tap Add Robot.
On the My Robots page, tap the newly added robot to log in.
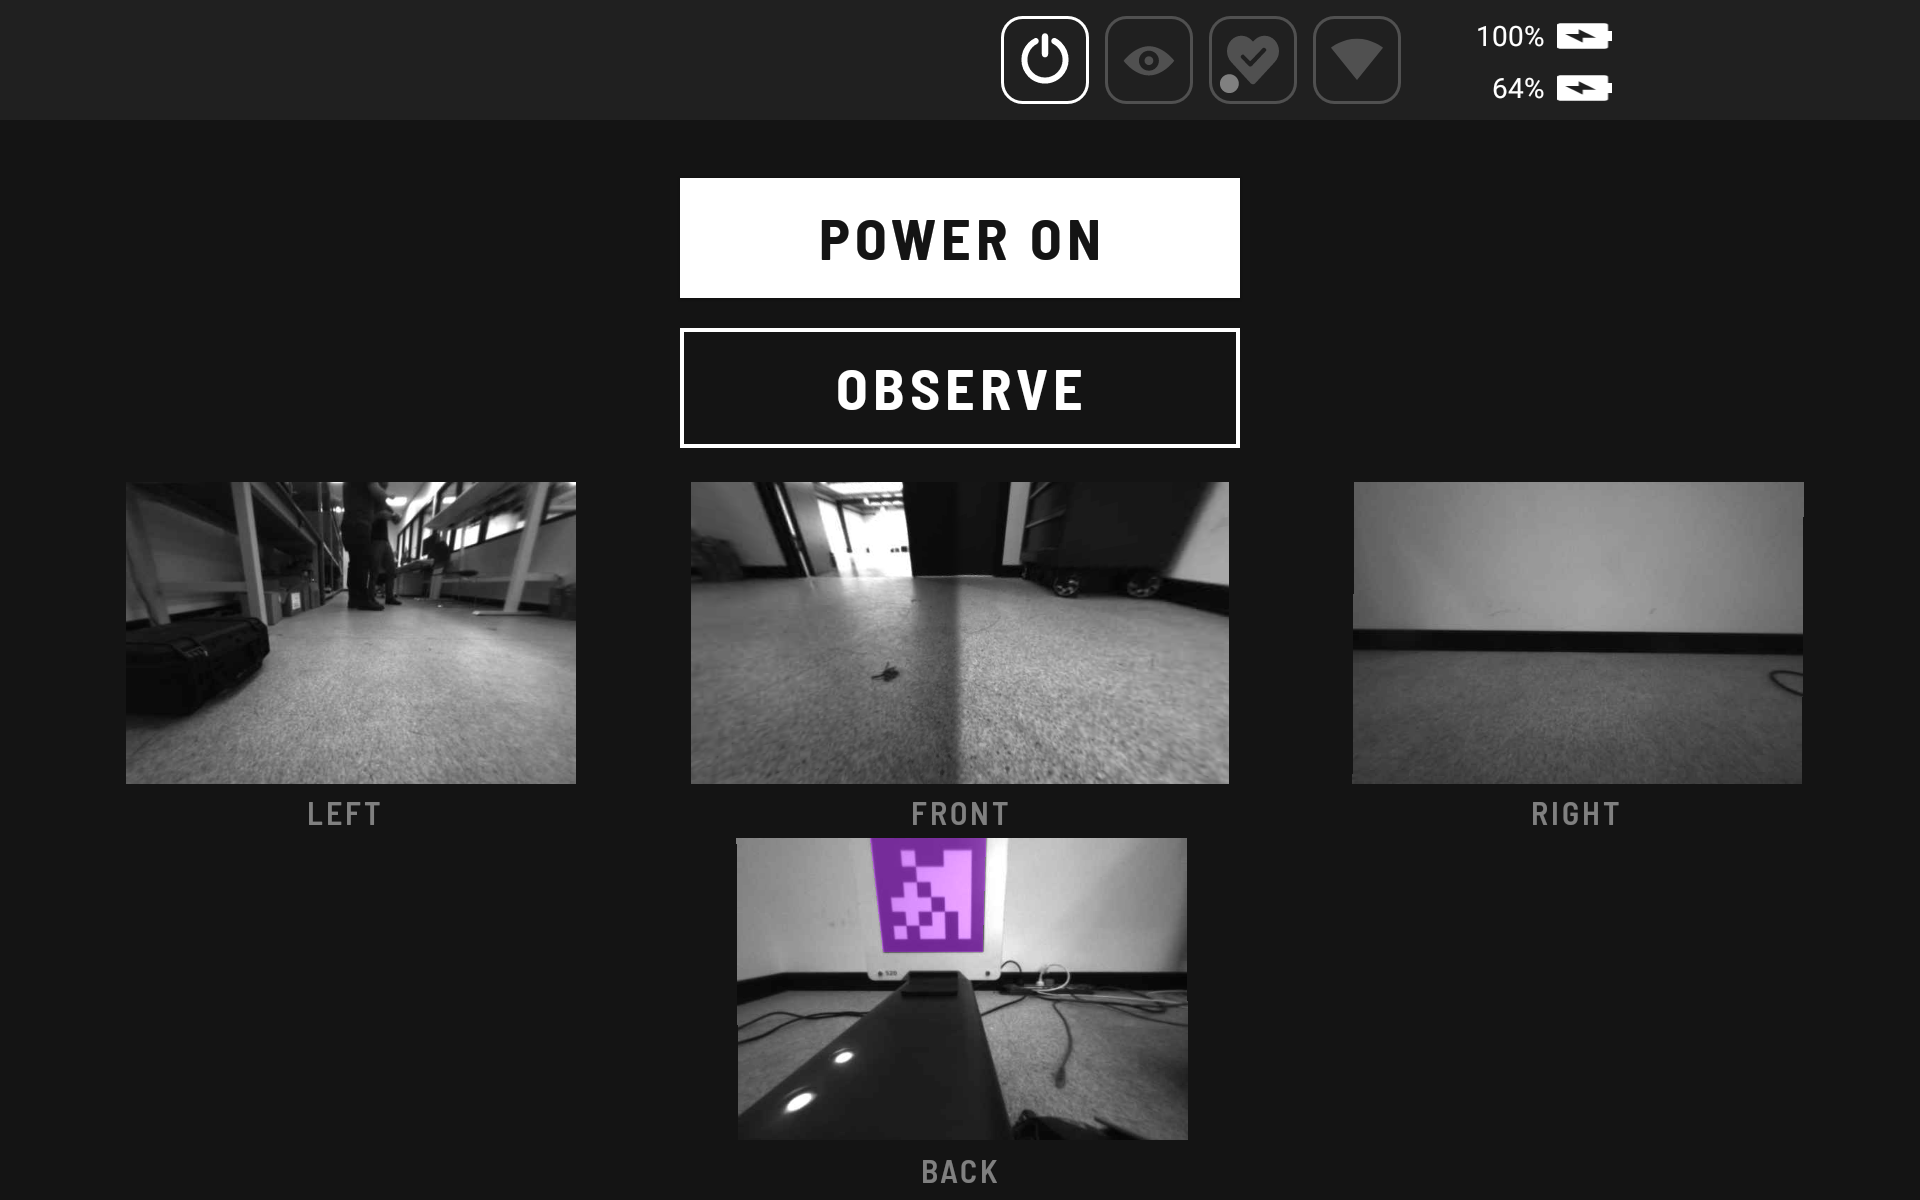
Select Power On.
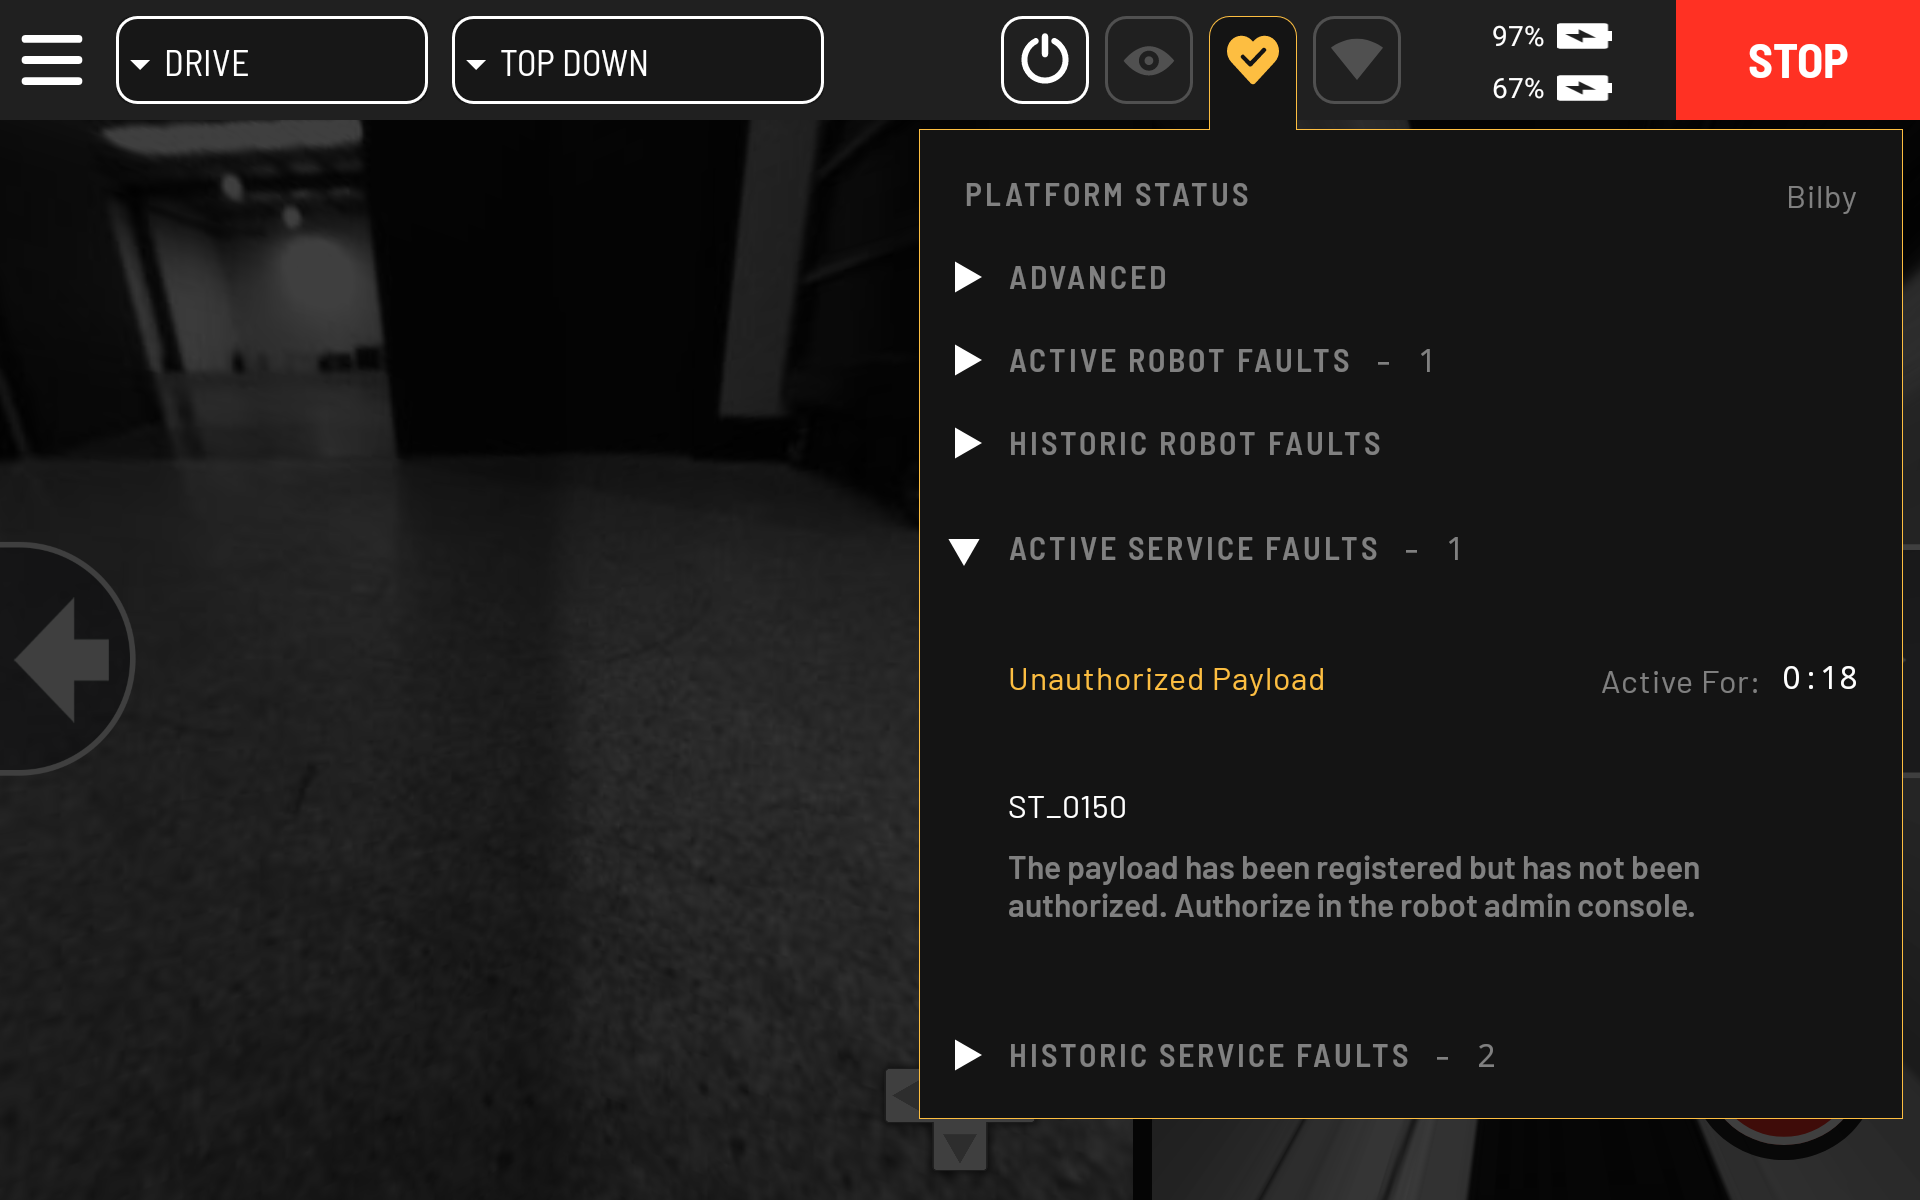
Once Hovermap and Spot are powered on, a flashing amber alert appears on the Status Bar for the Platform Status, reporting an Active Service Fault - Unauthorized Payload. This indicates that Hovermap has been successfully detected and requires authorisation.
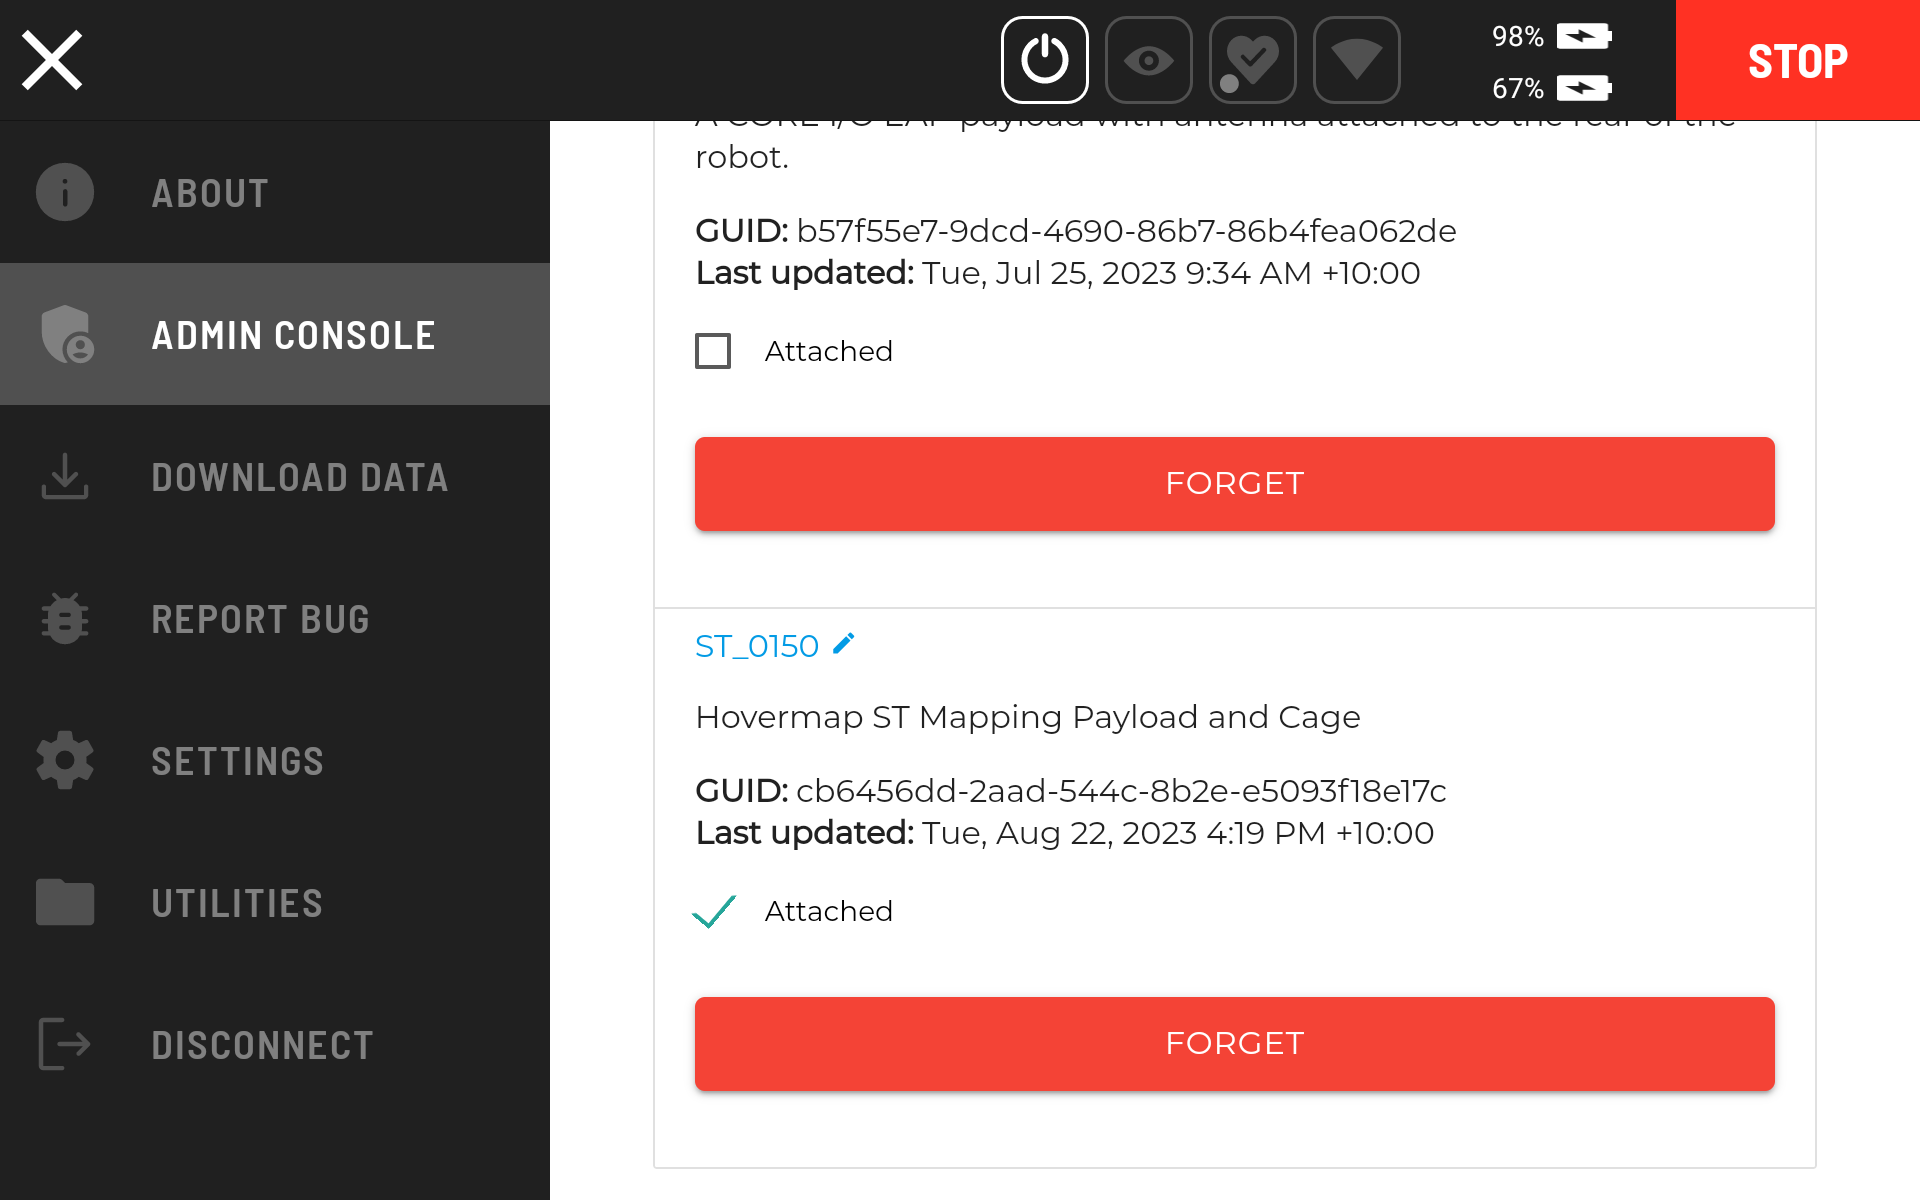
Step 2: Authorise the Hovermap payload
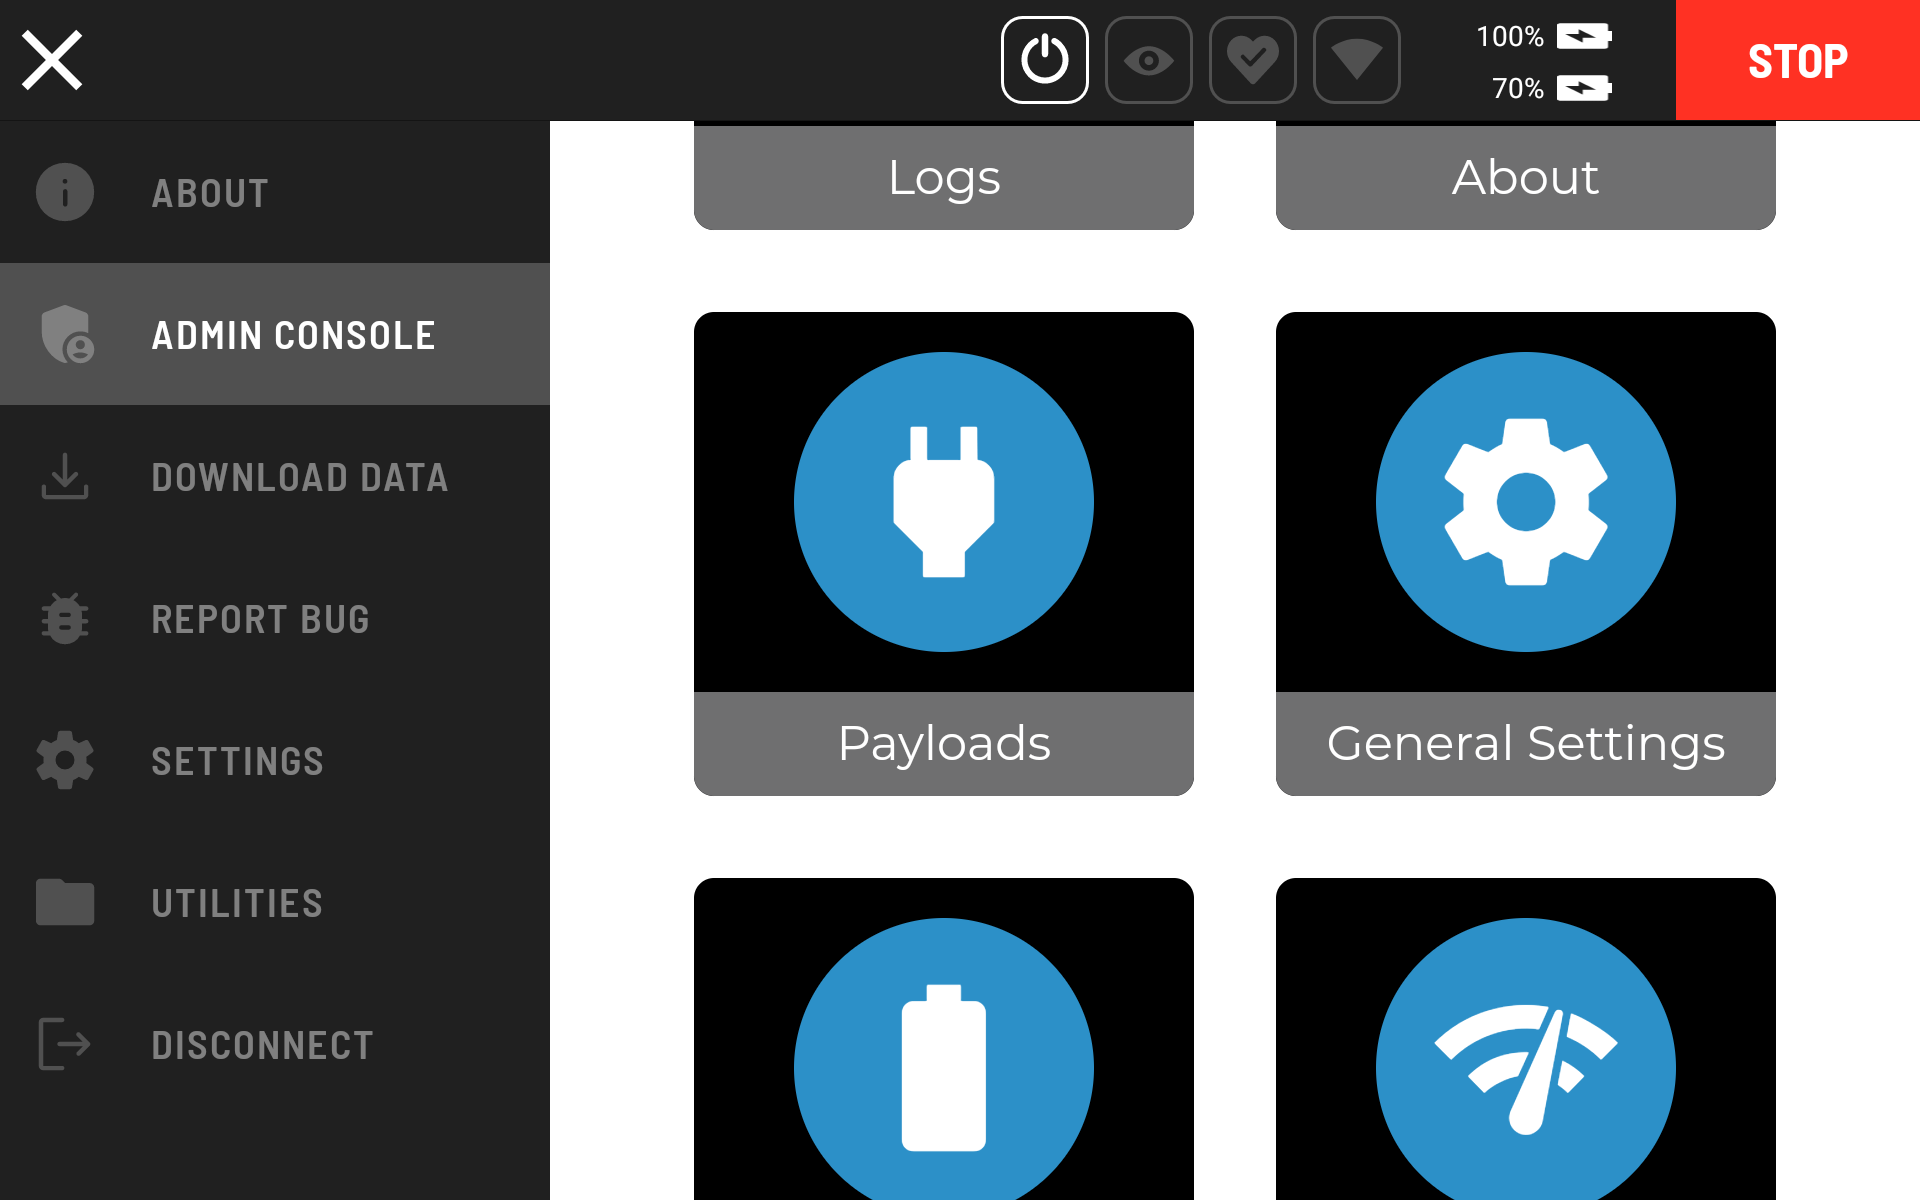
Tap the Settings Menu at the top left, then navigate to the Admin Console.
Enter the credentials when prompted.
Select the Payloads icon.
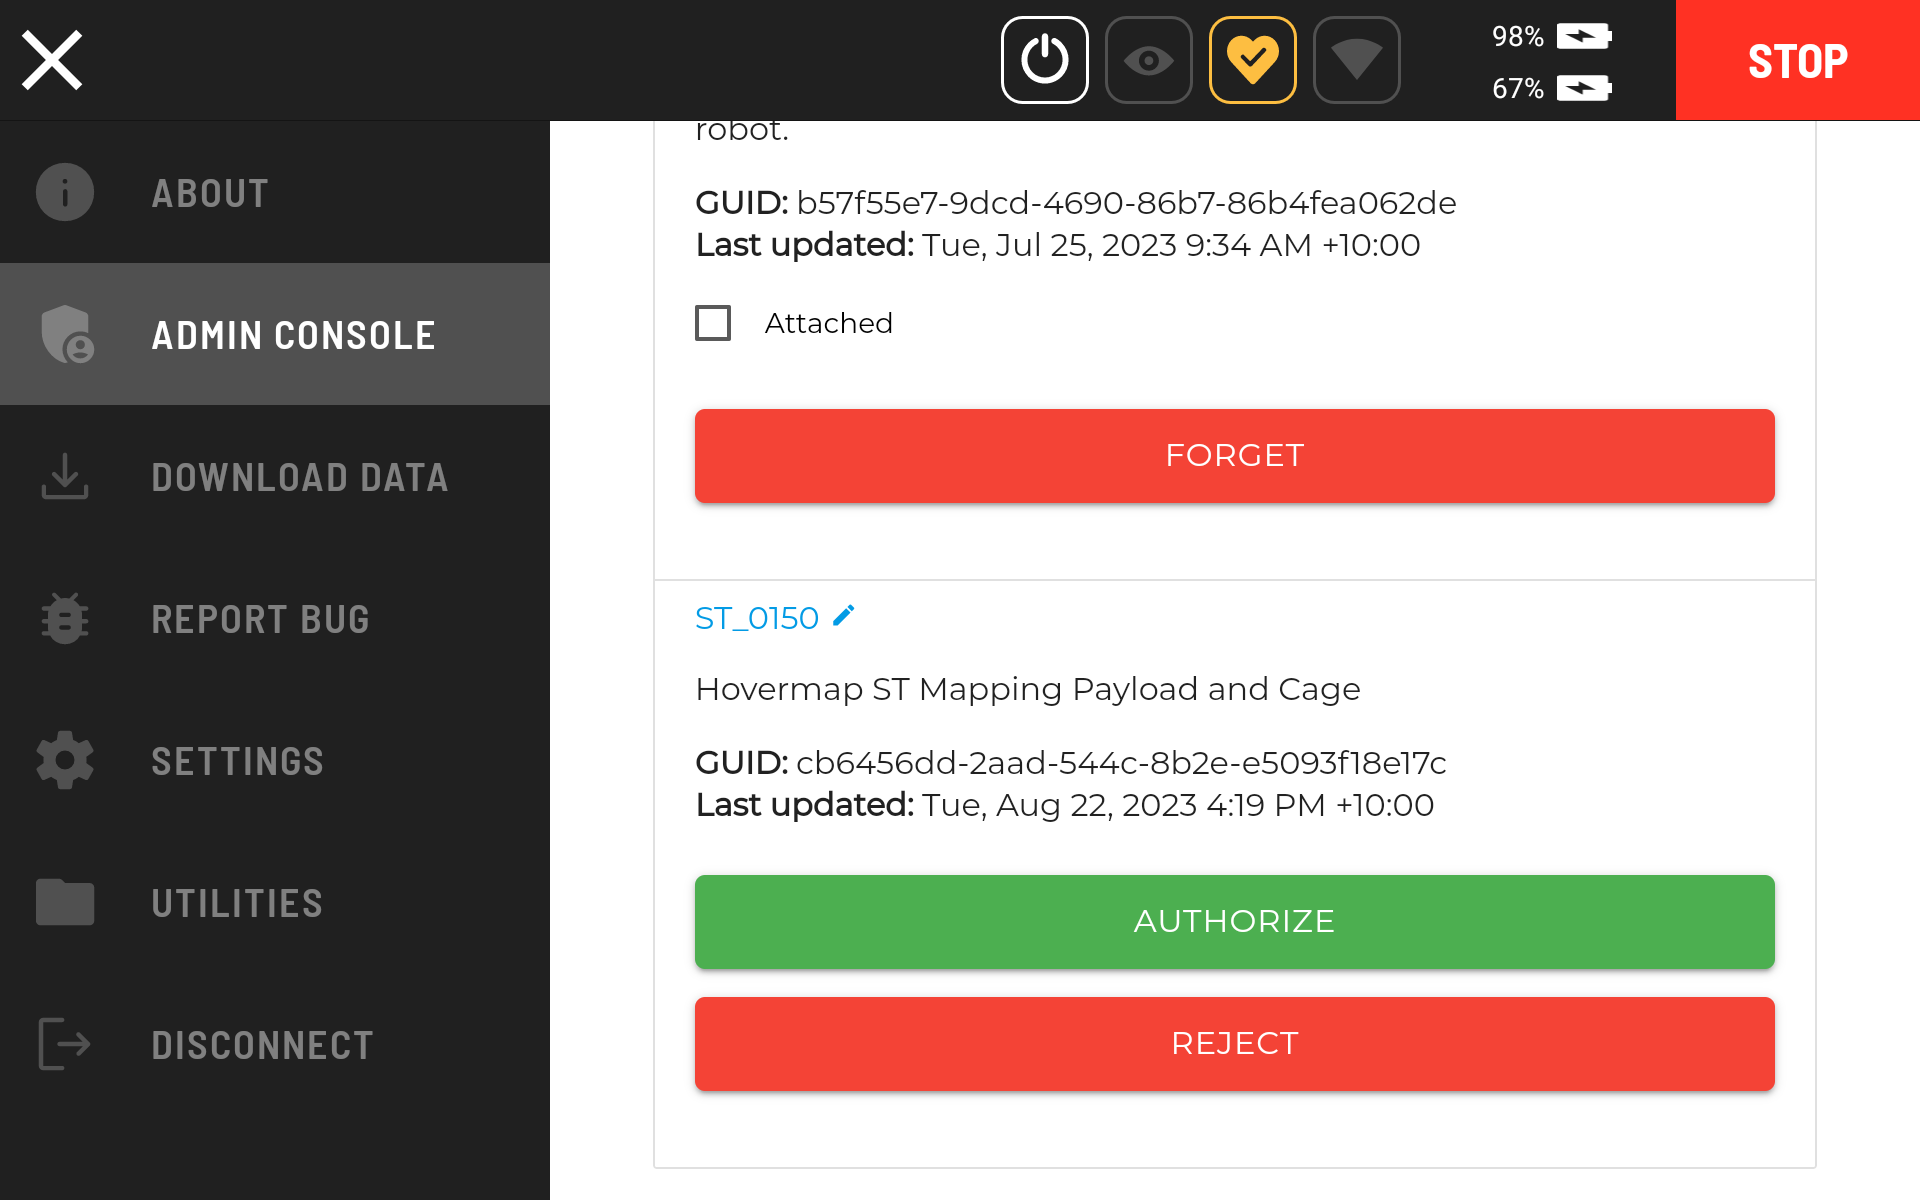
Scroll down until the Hovermap payload is shown, then tap Authorize.
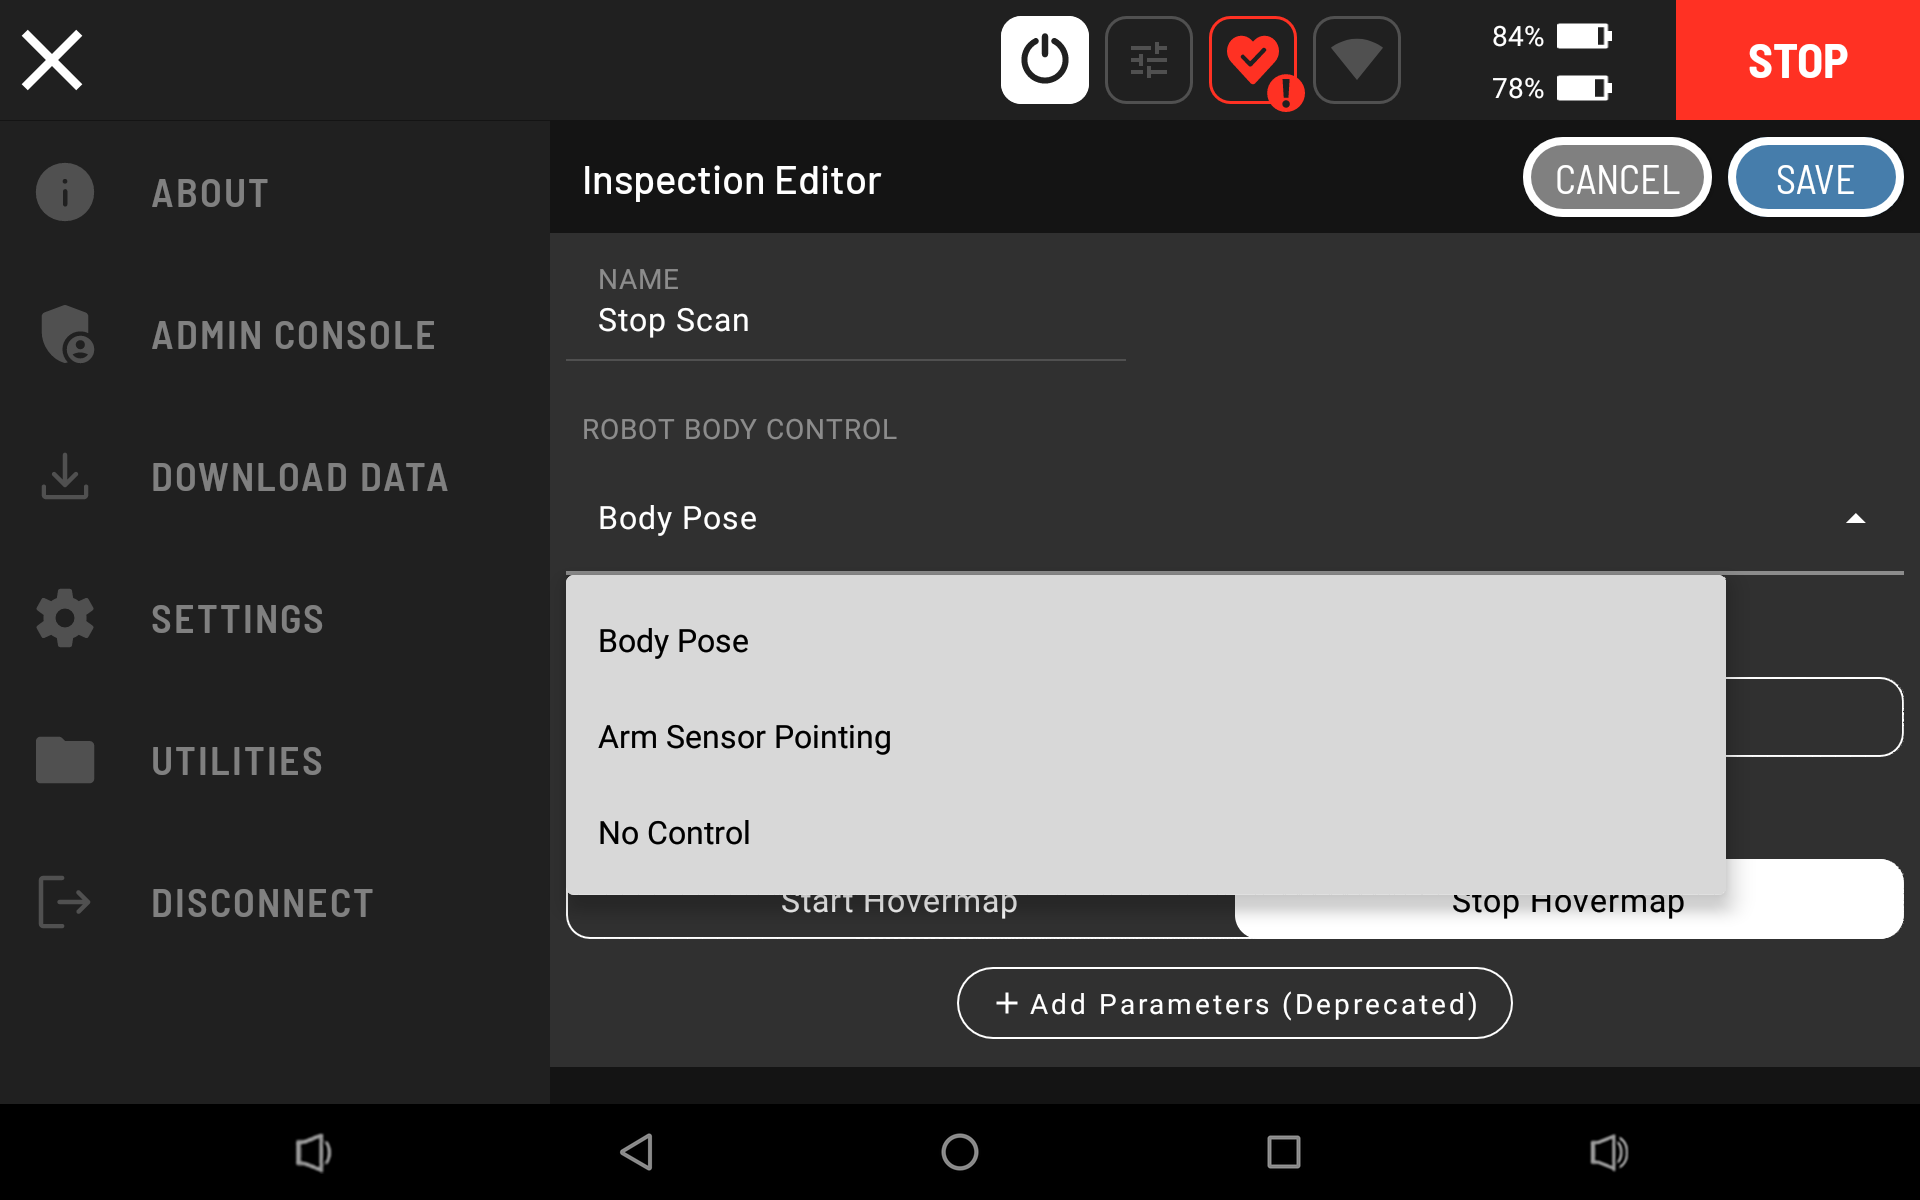
Step 3: Create the Start Scan action
In the Settings Menu, navigate to Settings > Actions to configure the Start and Stop Scan actions.
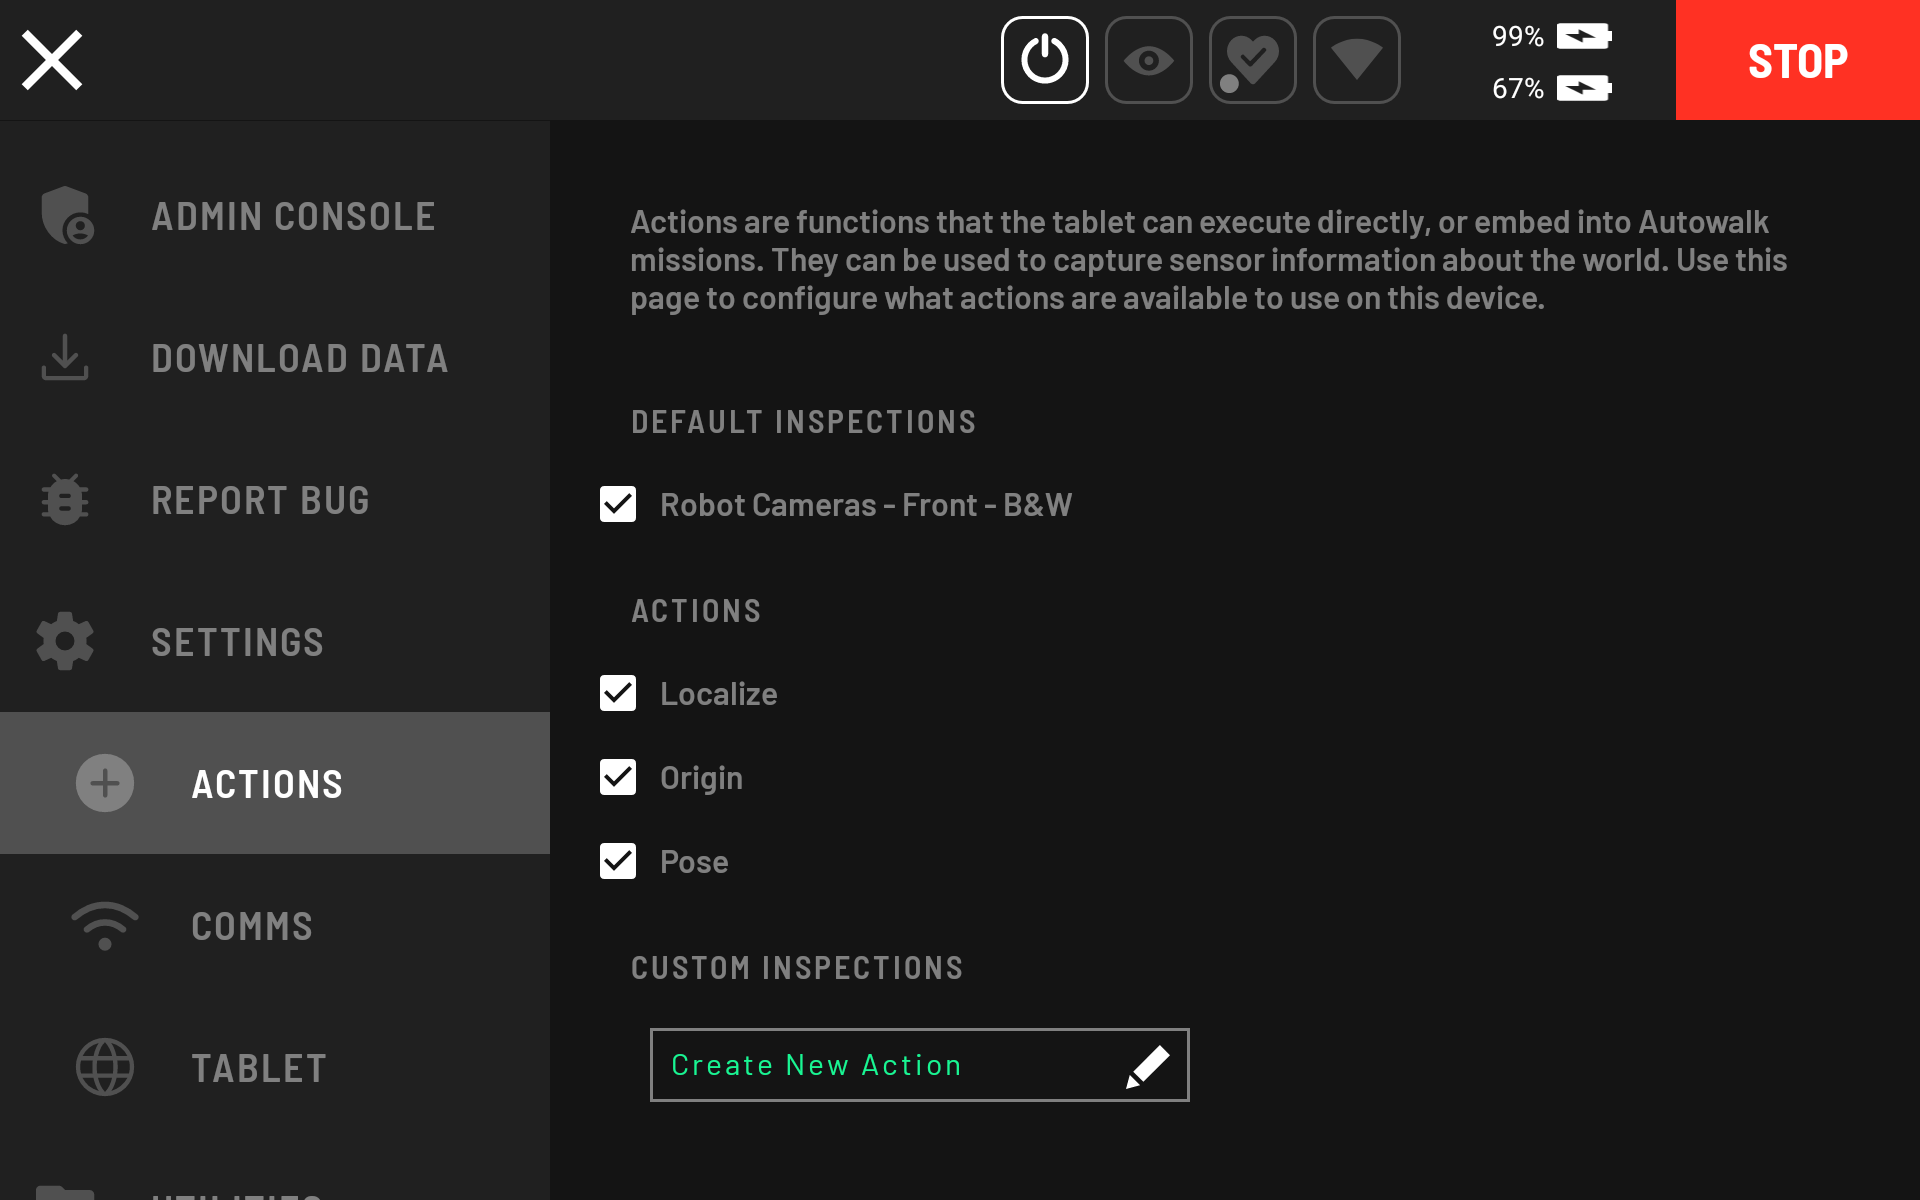
Under Custom Inspections, tap Create New Action.
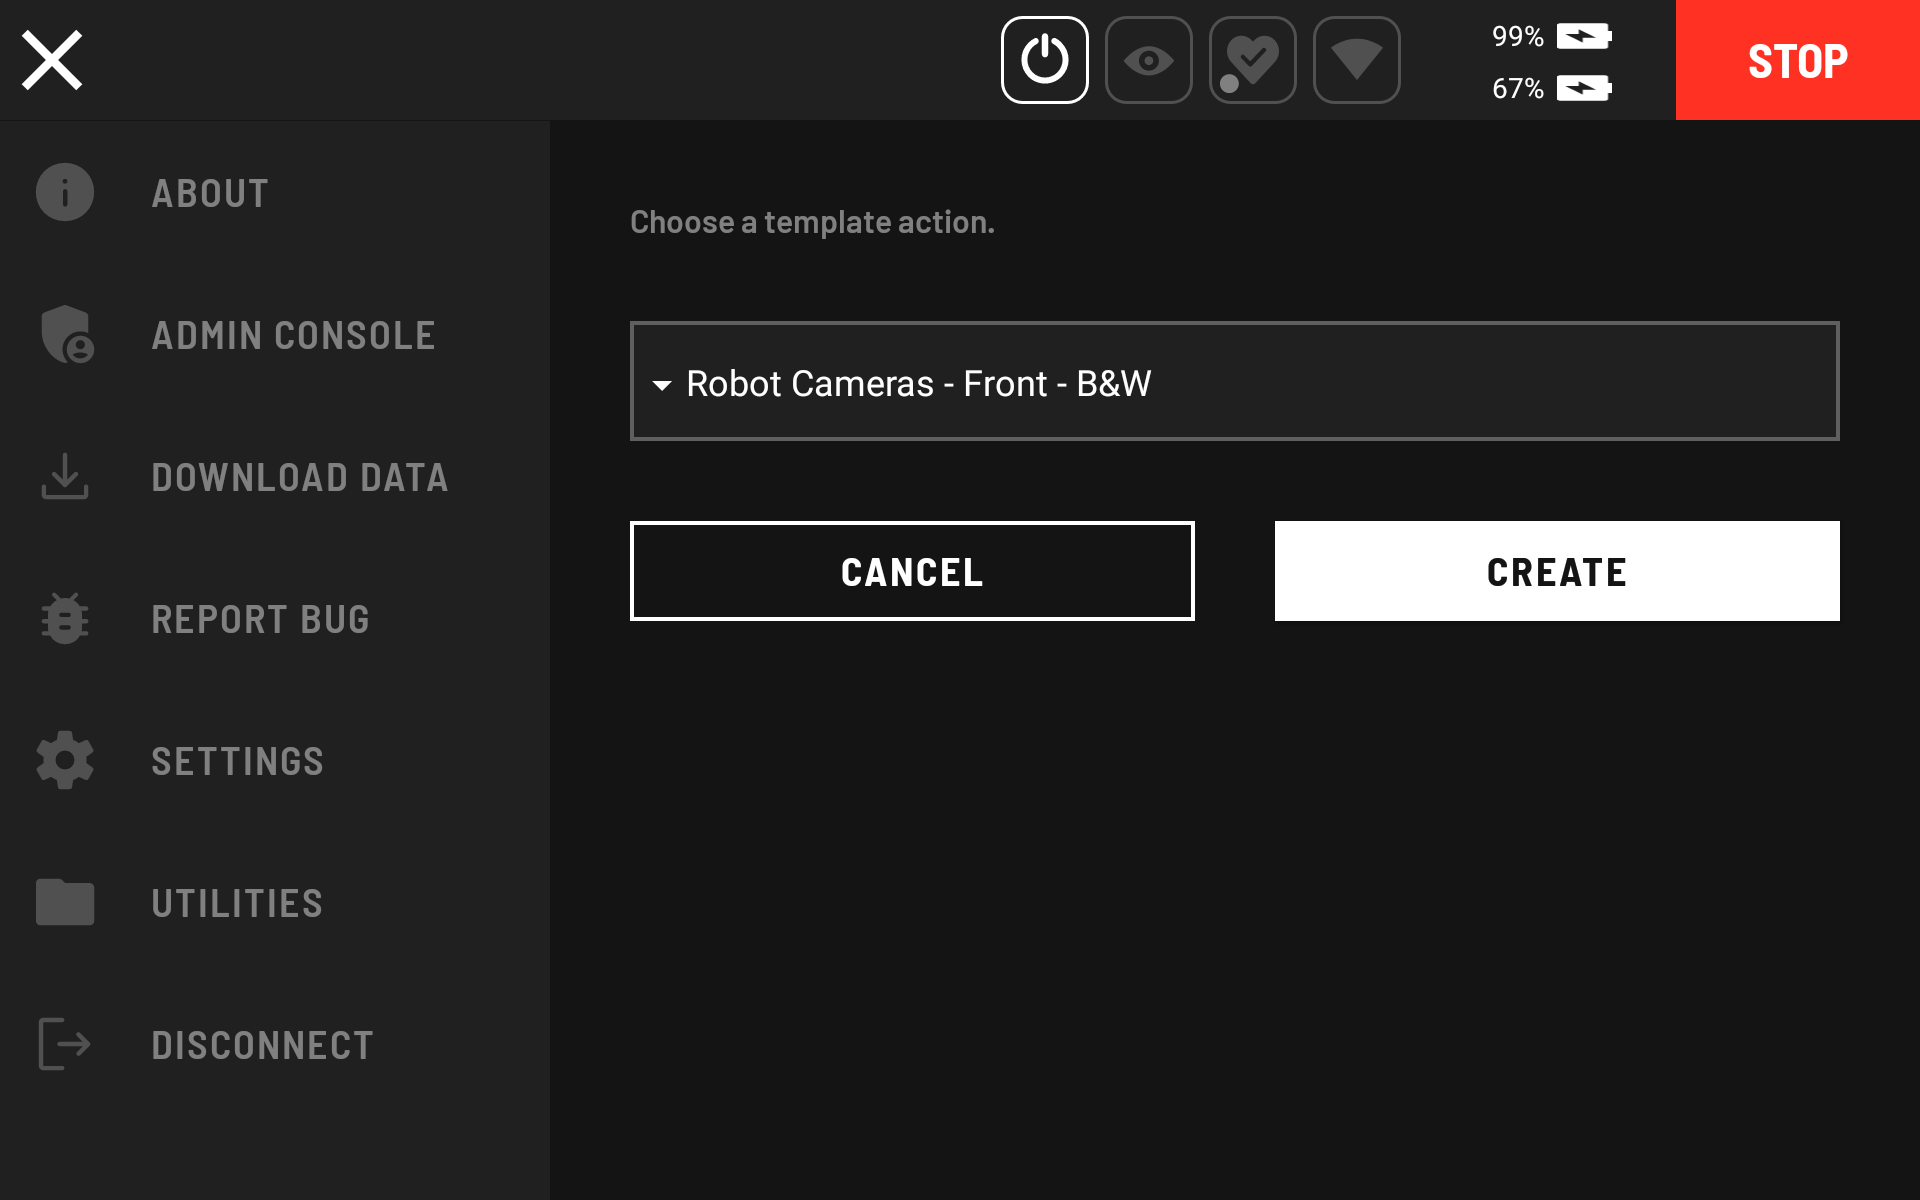
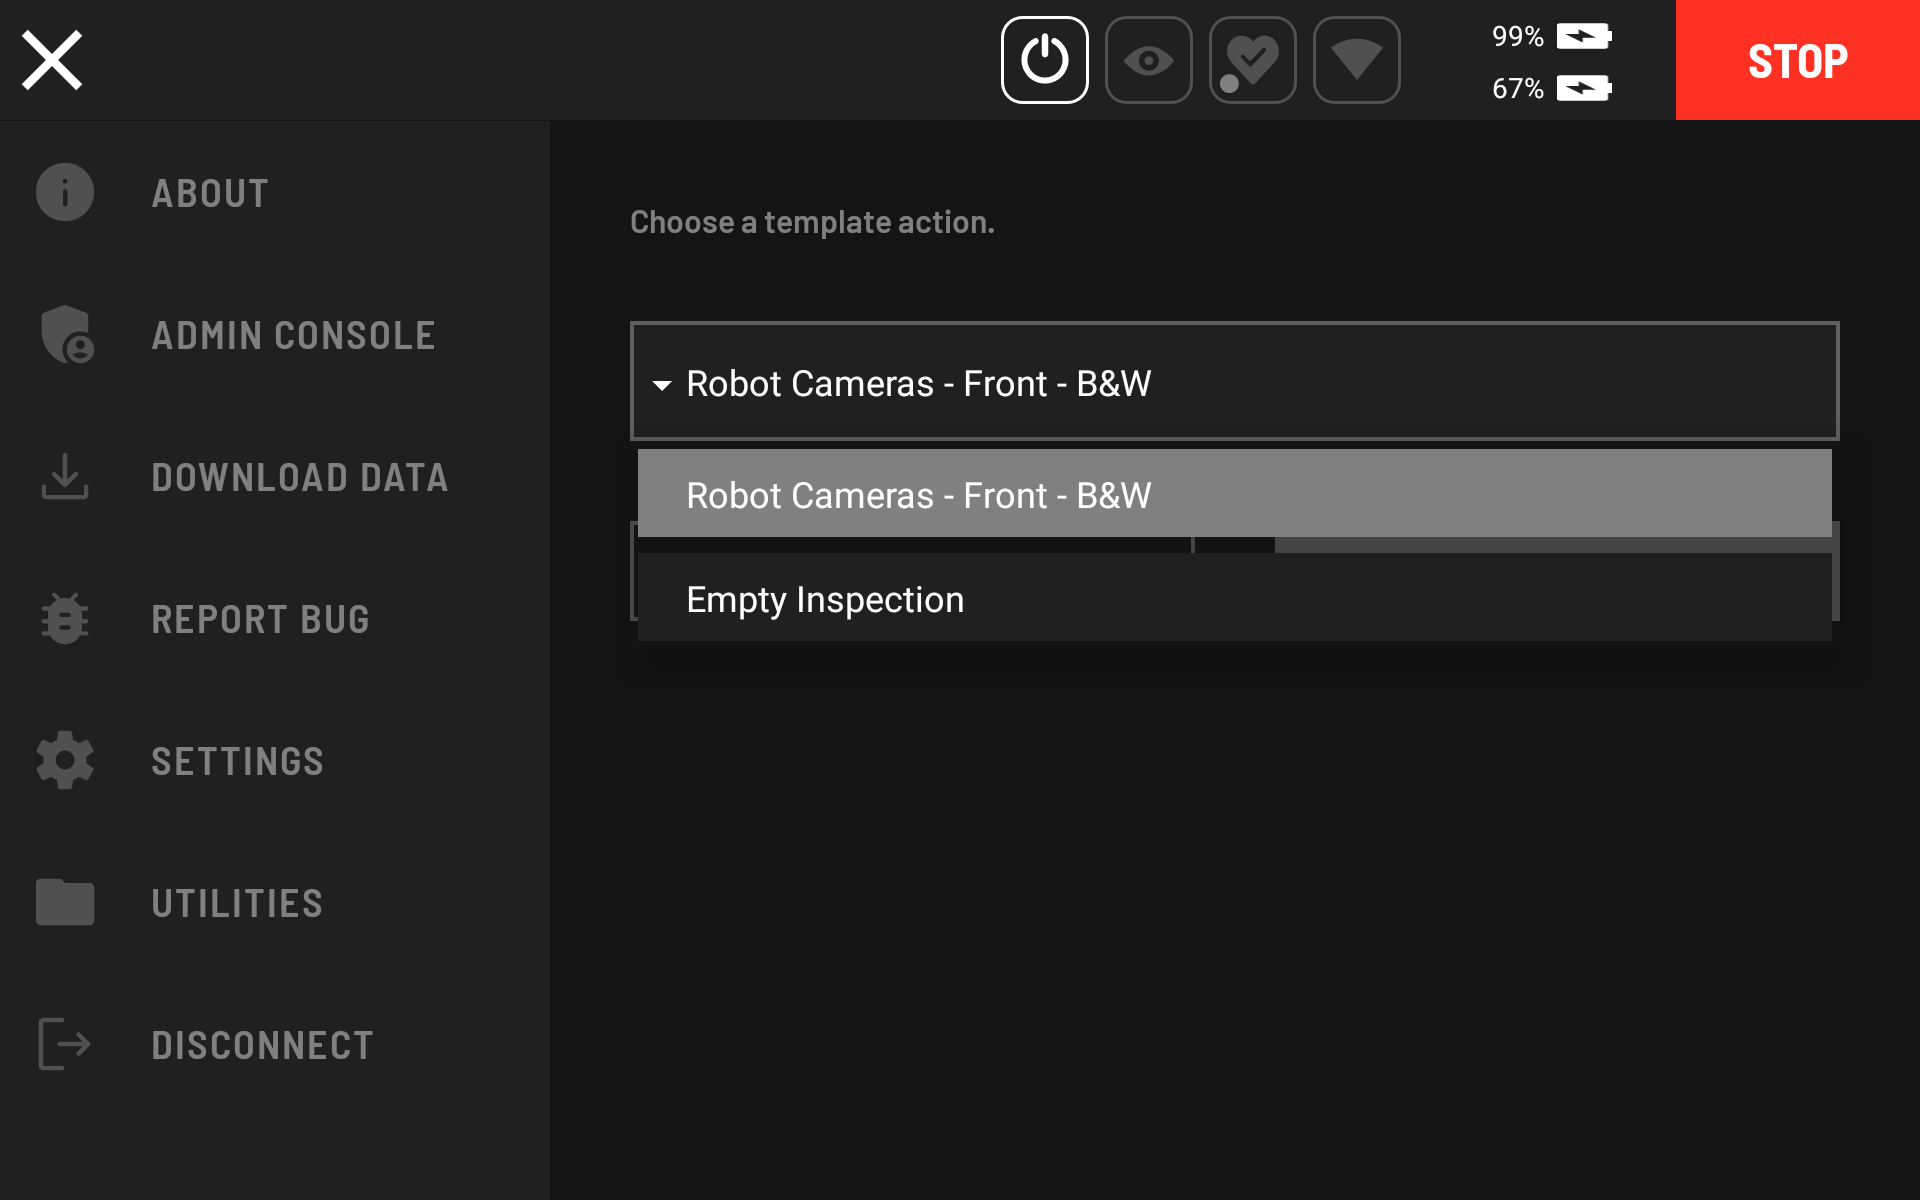
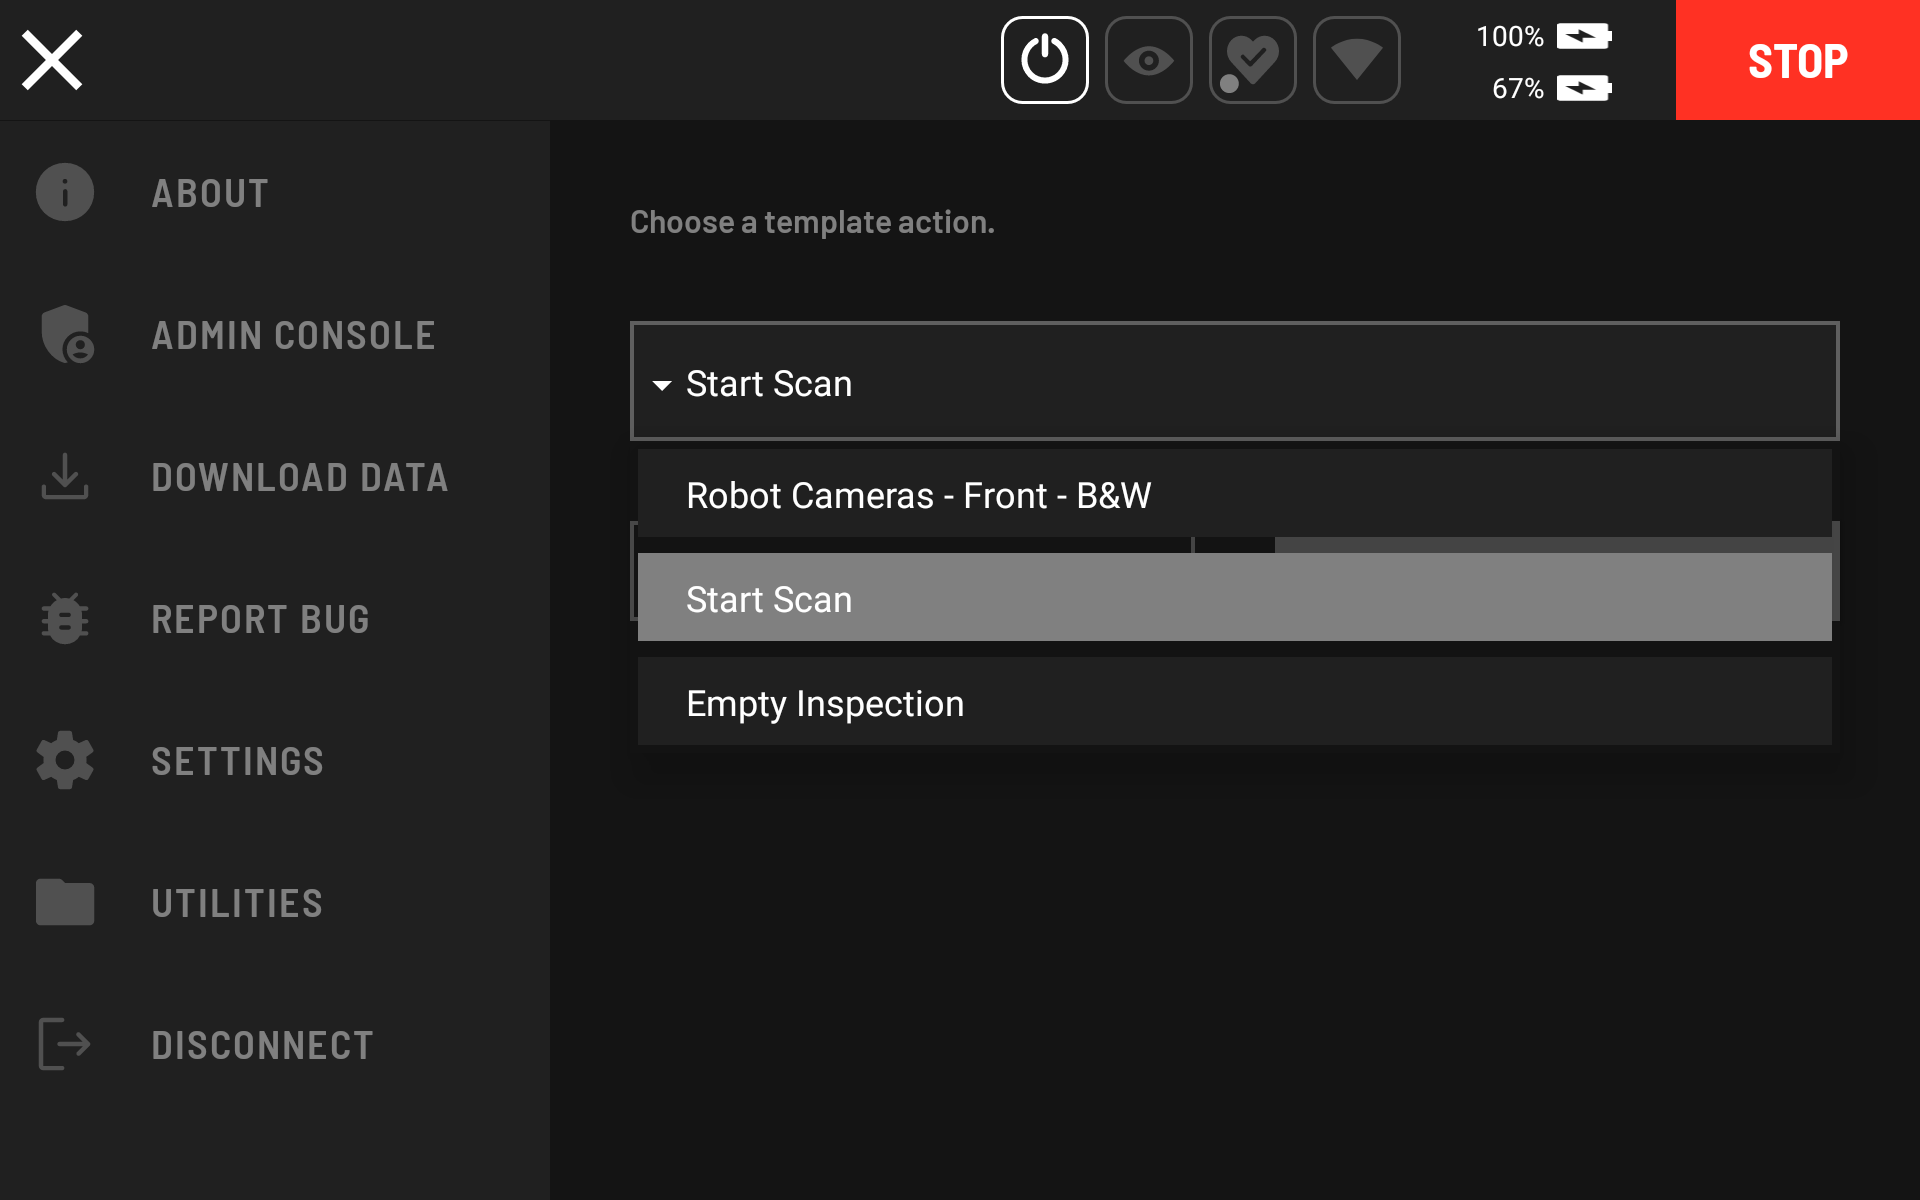
Select Empty Inspection as the template action from the dropdown.
Enter a name in the Inspection Editor (for example, "Start Scan").

Select Remote GRPC, then select Start Hovermap.
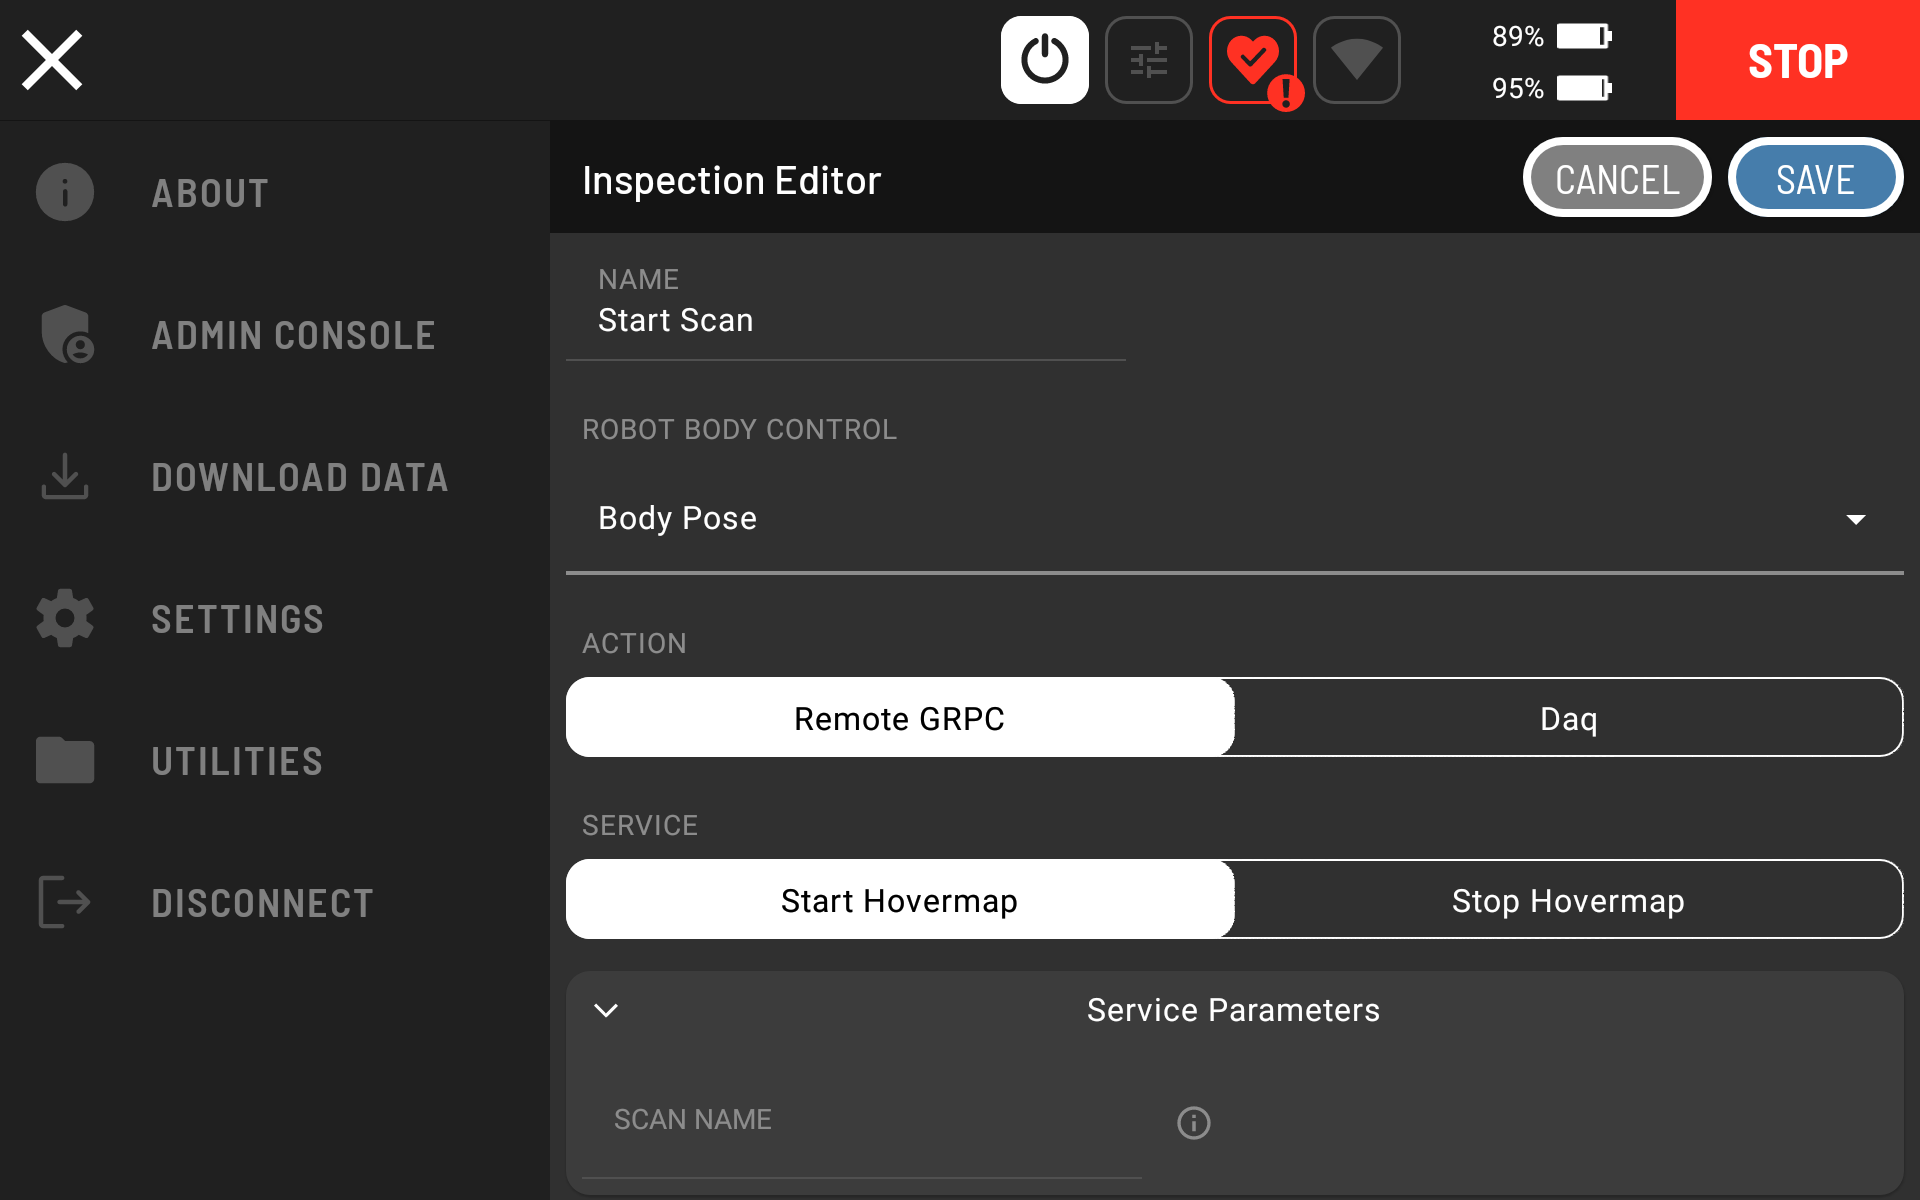
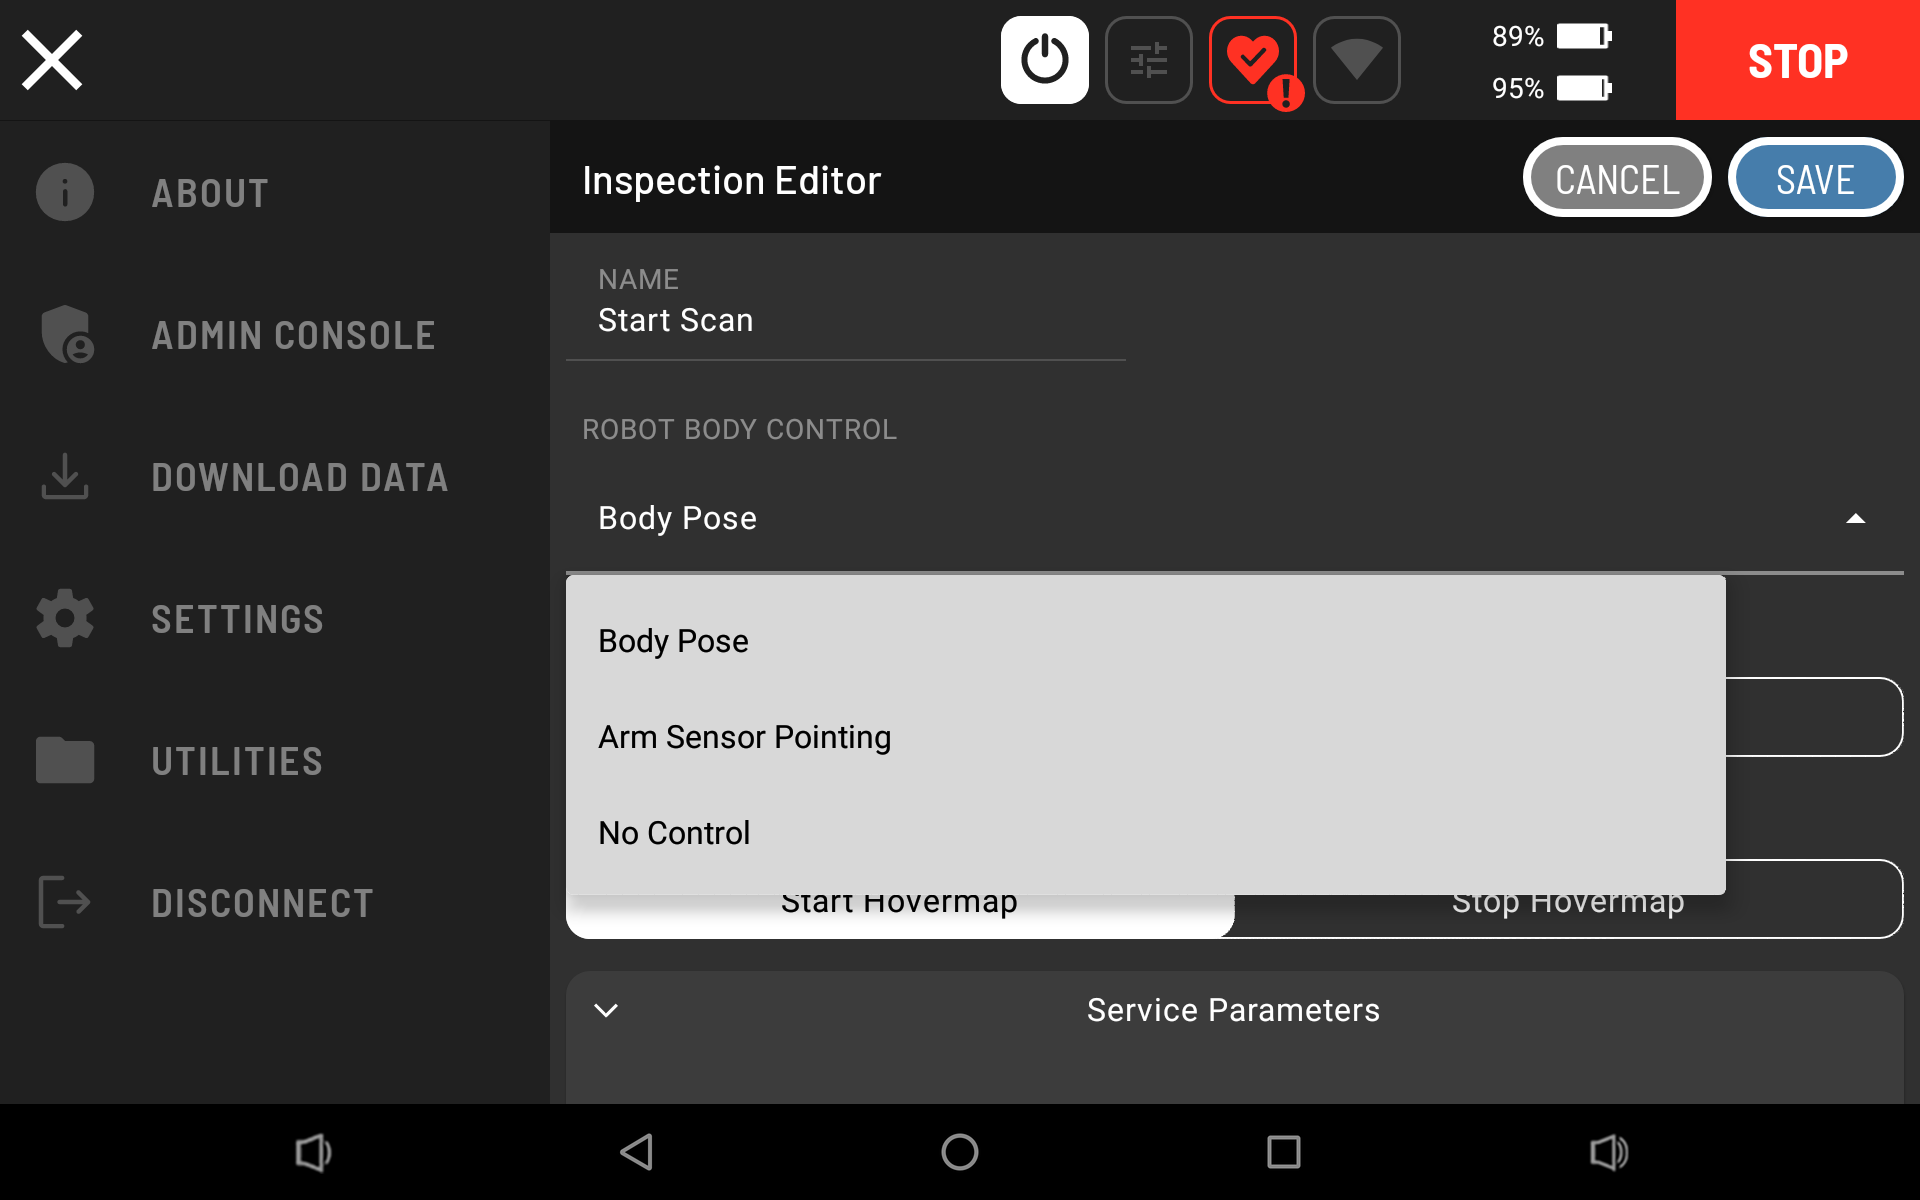
Change the Robot Body Control parameter from the default Body Pose setting to No Control.

Tap Save on the top right of the Inspection Editor window.
Step 4: Create the Stop Scan action
In the Settings Menu, navigate to Settings > Actions, then select Create New Action.
For the Stop Scan action, use Start Scan as the template.
Enter a name in the Inspection Editor (for example, "Stop Scan").
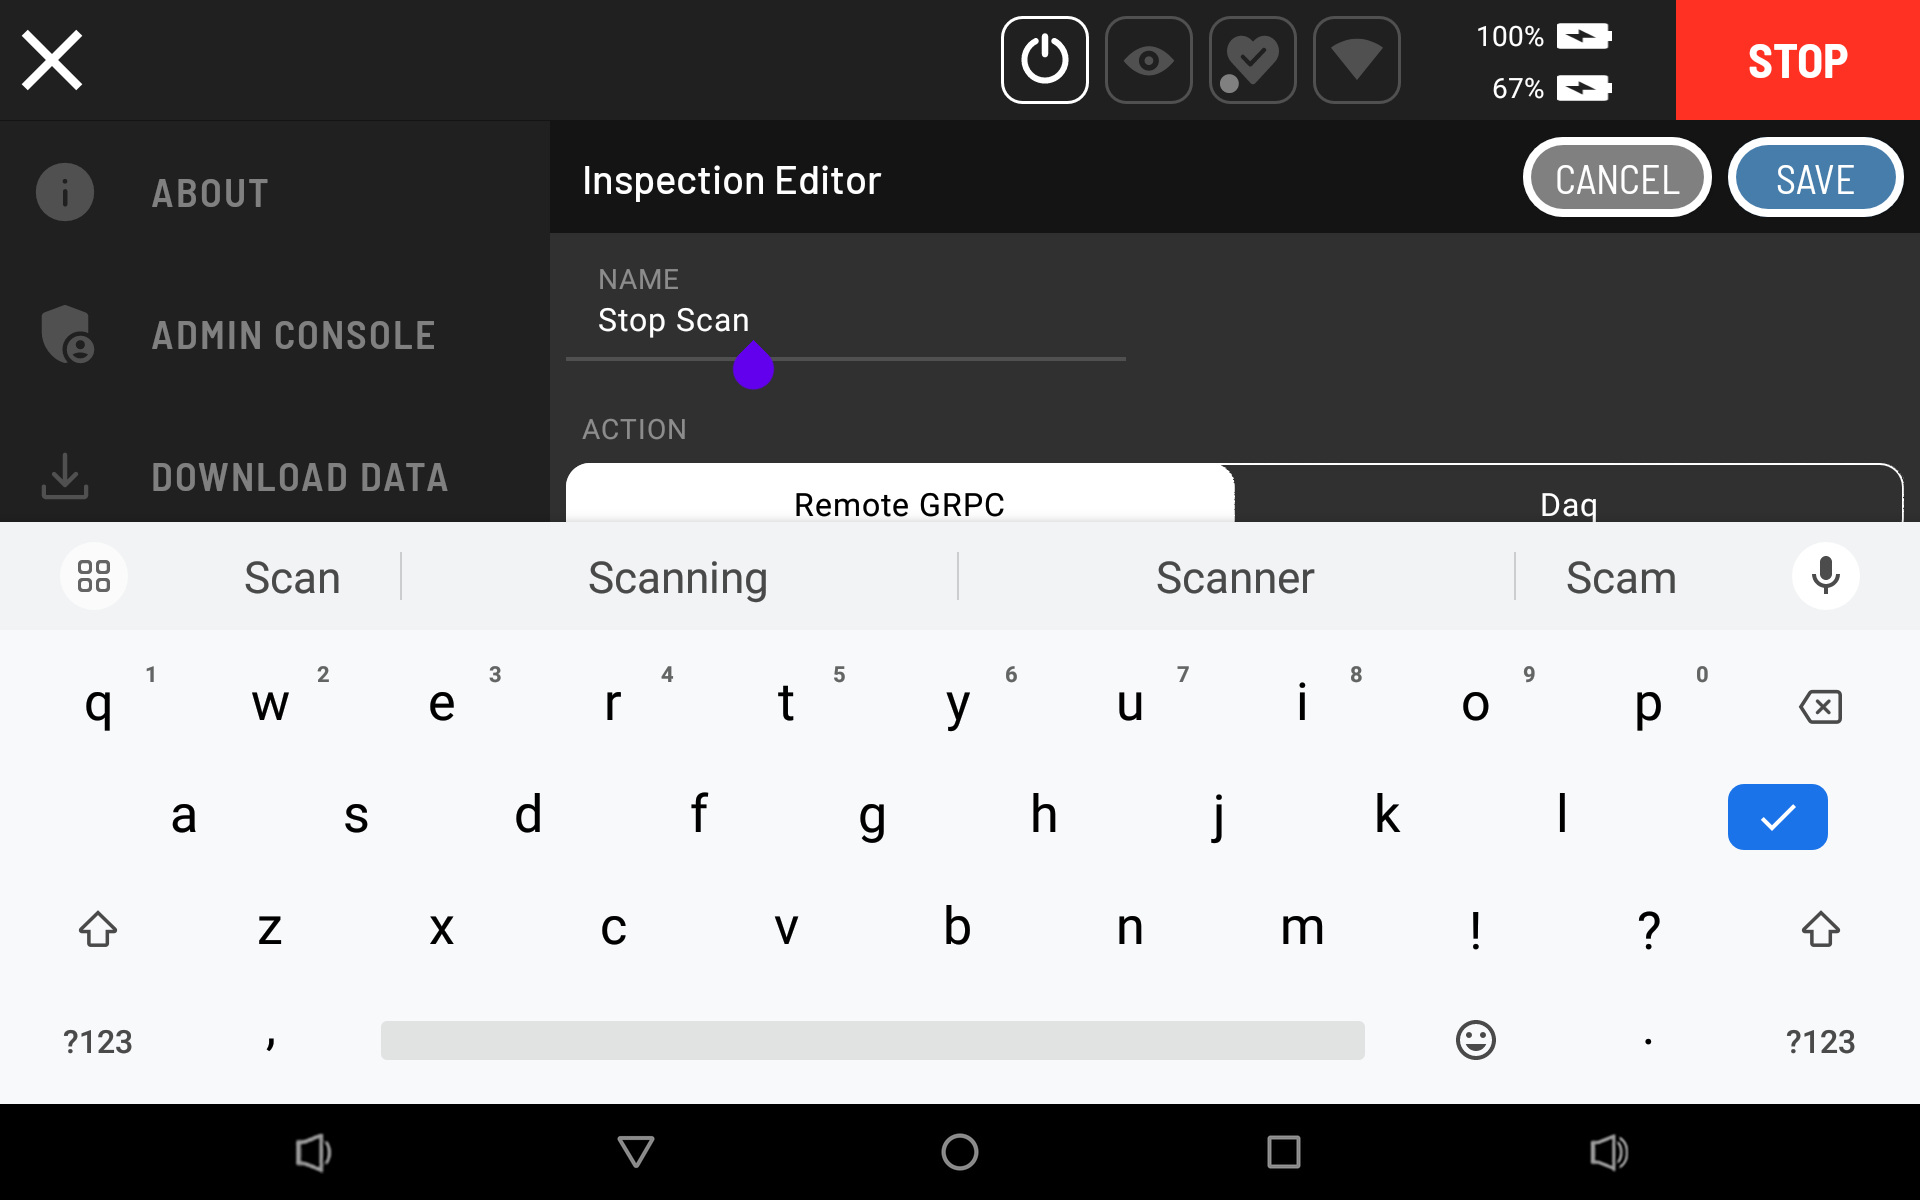
Select Remote GRPC, then select Stop Hovermap.

Change the Robot Body Control parameter from the default Body Pose setting to No Control.
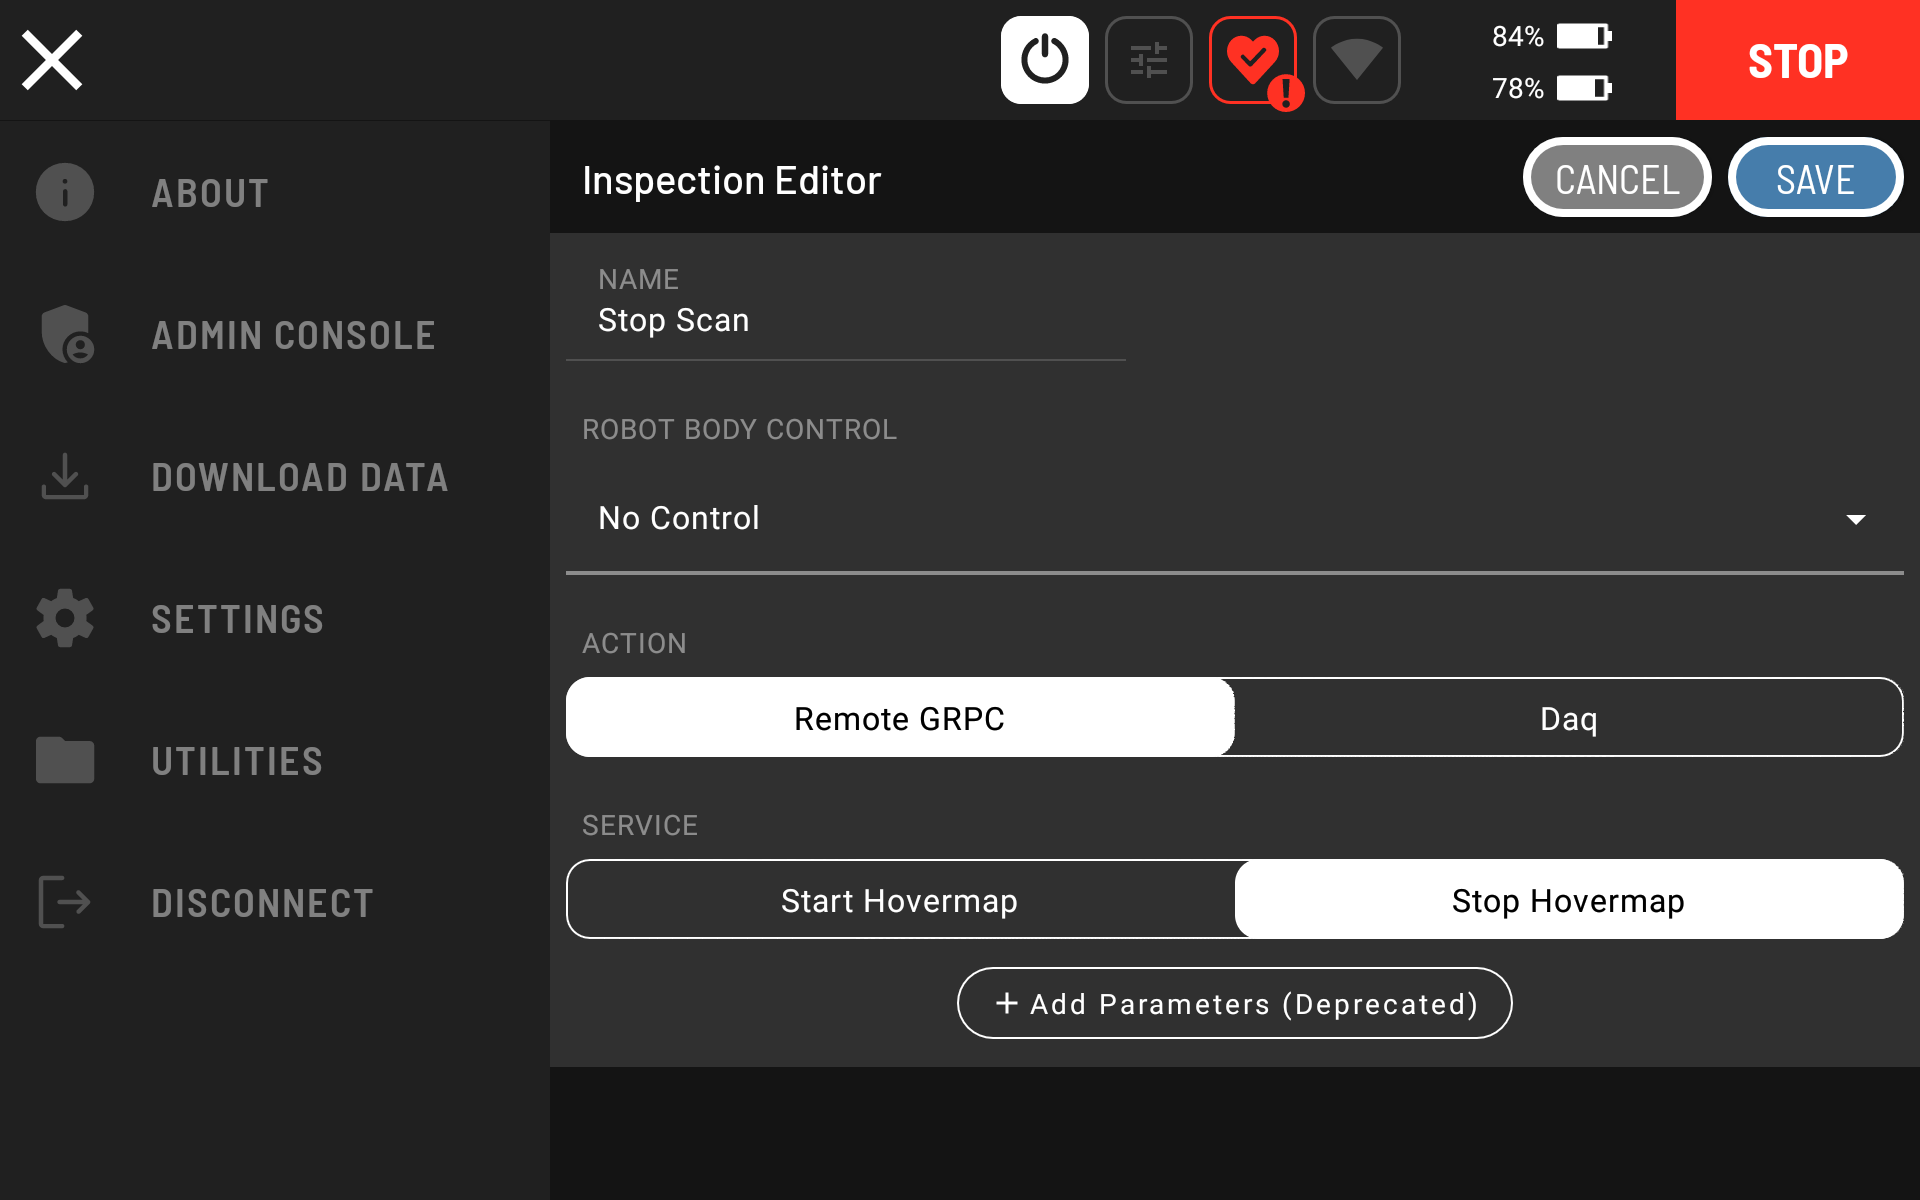
Tap Save on the top right of the Inspection Editor window.
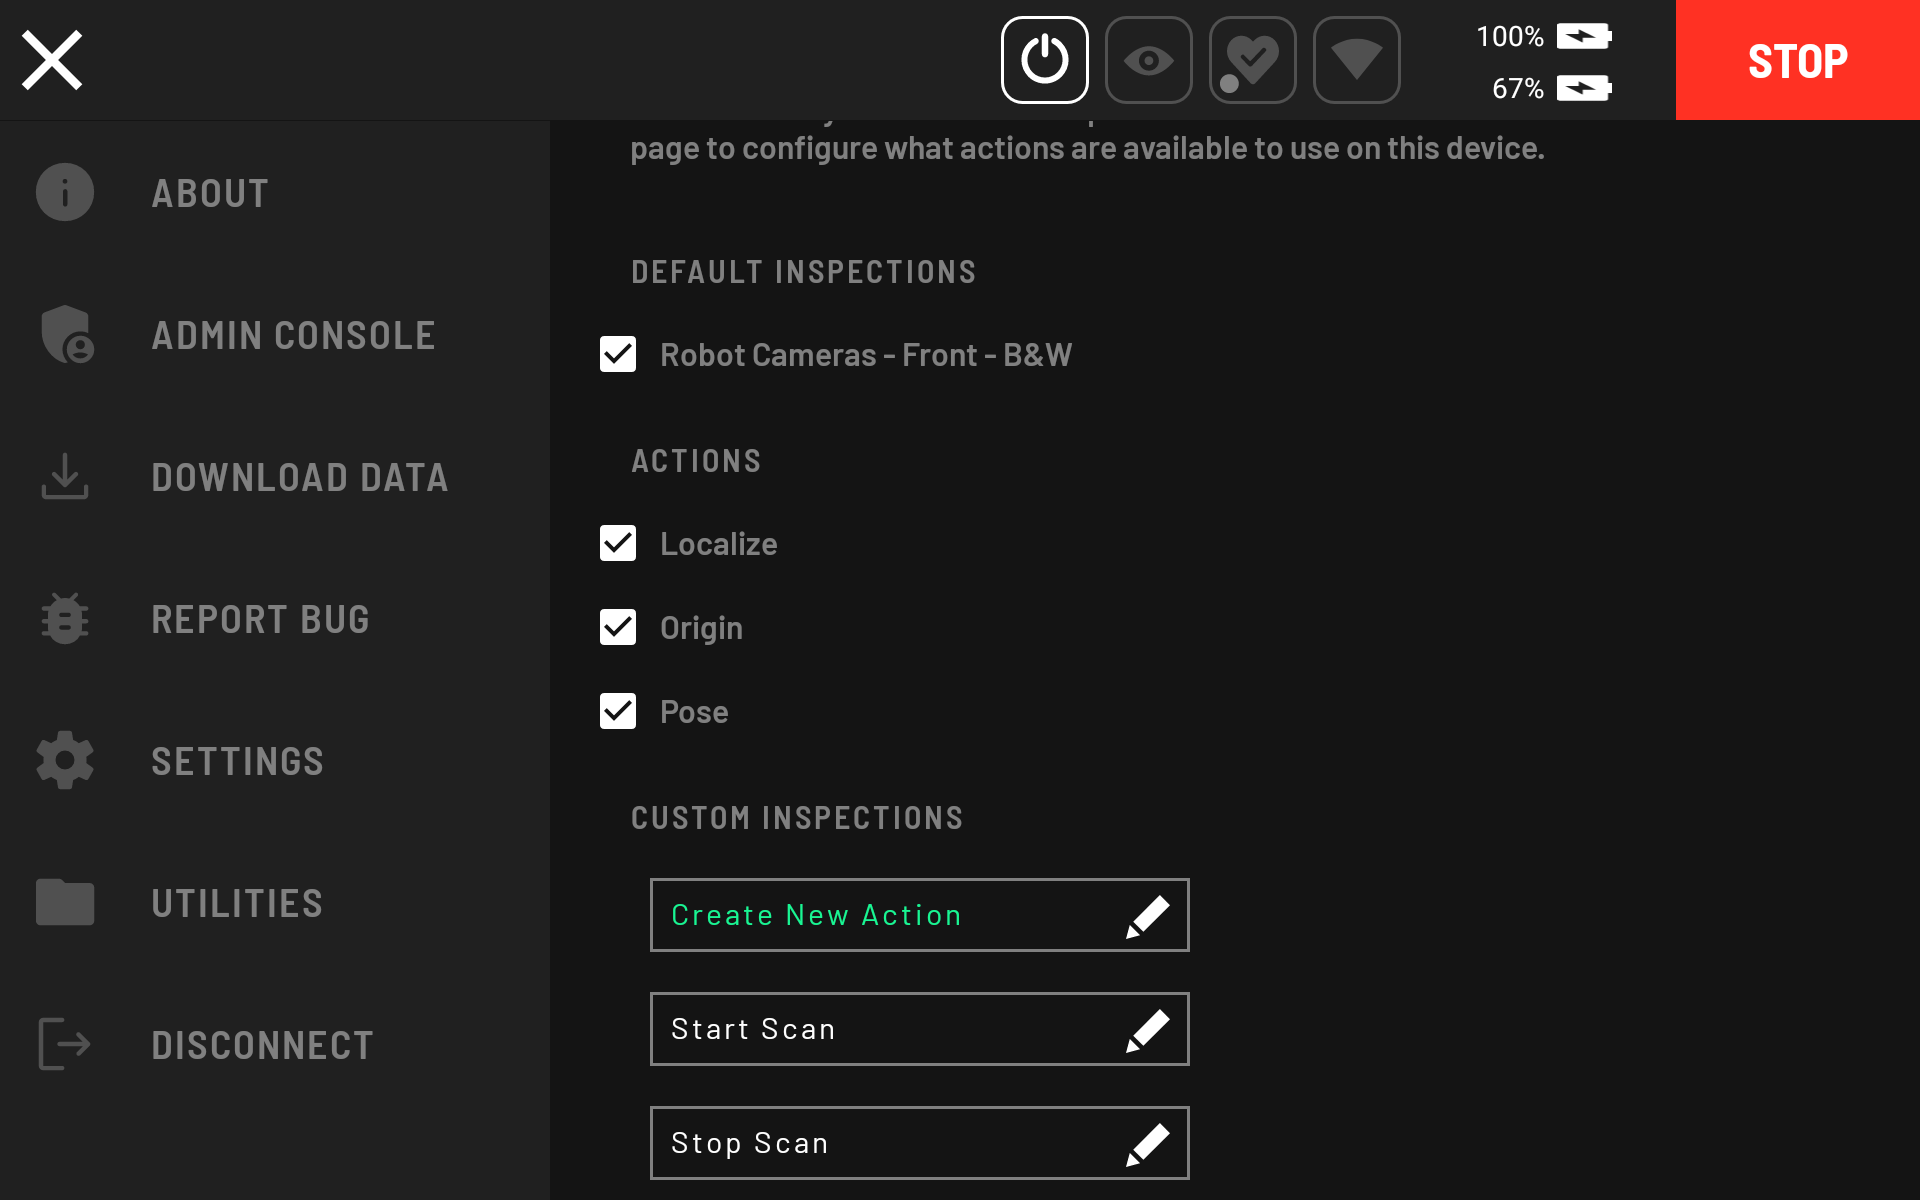
Step 5: Confirm the configuration
Navigate to Settings > Actions. Confirm that two extra inspection actions have been added: one to start a scan and another to stop a scan.
The Spot payload setup is complete. A mapping mission can now be conducted.
Connect to the Long Range Radio (LRR)
The Long Range Radio (LRR) is an auxiliary radio system that extends the data connection to Hovermap over a longer range than conventional Wi-Fi. This results in operational and safety improvements by allowing access to the streaming point cloud and critical safety telemetry over longer distances.
Connect the tablet to the LRR Wi-Fi.
Open the Spot app.
If the LRR device has already been added, select it from the list of networks. Otherwise, tap Add New Robot.
Enter the Hovermap IP address on the LRR network:
192.168.50.9. Once connected, stay at least 5 m away from the Spot robot to ensure a solid LRR connection.
As of Cortex version 4.0.2, the Hovermap IP address changed from
10.233.0.1to192.168.50.9.
Outcome
Spot is paired with Hovermap, the Hovermap payload is authorised, and the Start Scan and Stop Scan actions are configured. The system is ready for scanning missions.
Related documentation and support
For assistance, contact the regional Emesent partner or the Emesent Client Support team.