
This article explains how to conduct a Hovermap scanning mission on a Boston Dynamics Spot robot. Spot supports two scanning modes: Drive Mode for manually piloted scans, and Autowalk Mode for autonomous repeatable scans.
What you will need
A Boston Dynamics Spot robot with the Hovermap Spot Cage installed and Hovermap configured (see Install the Hovermap Spot Cage and Configure Spot and Hovermap).
The Spot controller with the Spot app installed and the Start Scan and Stop Scan actions configured.
Hovermap and Spot powered on and connected through the Spot app.
Scan in Drive Mode
Drive Mode is for manually piloted scans, where the operator drives Spot through the environment while Hovermap captures the scan.
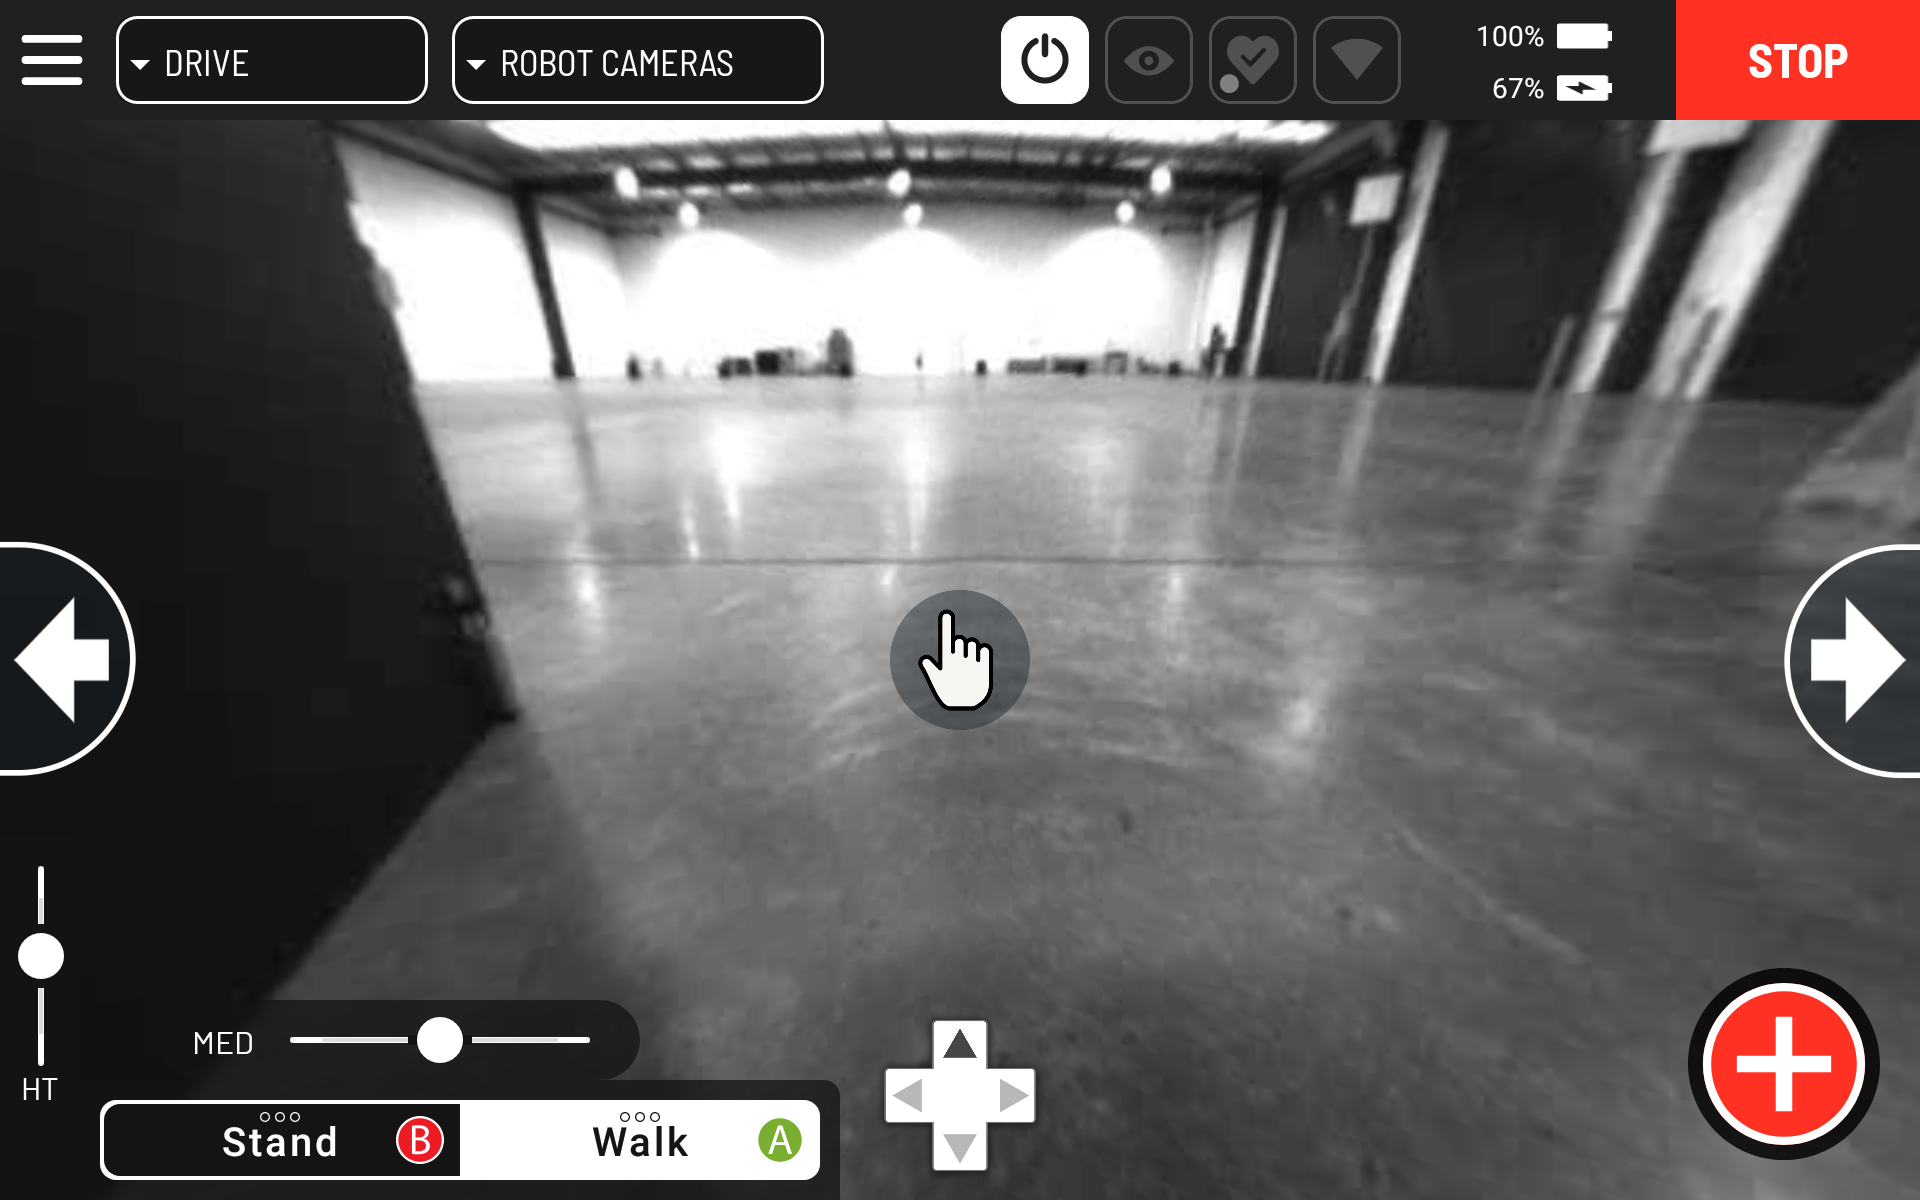
Step 1: Start the scan
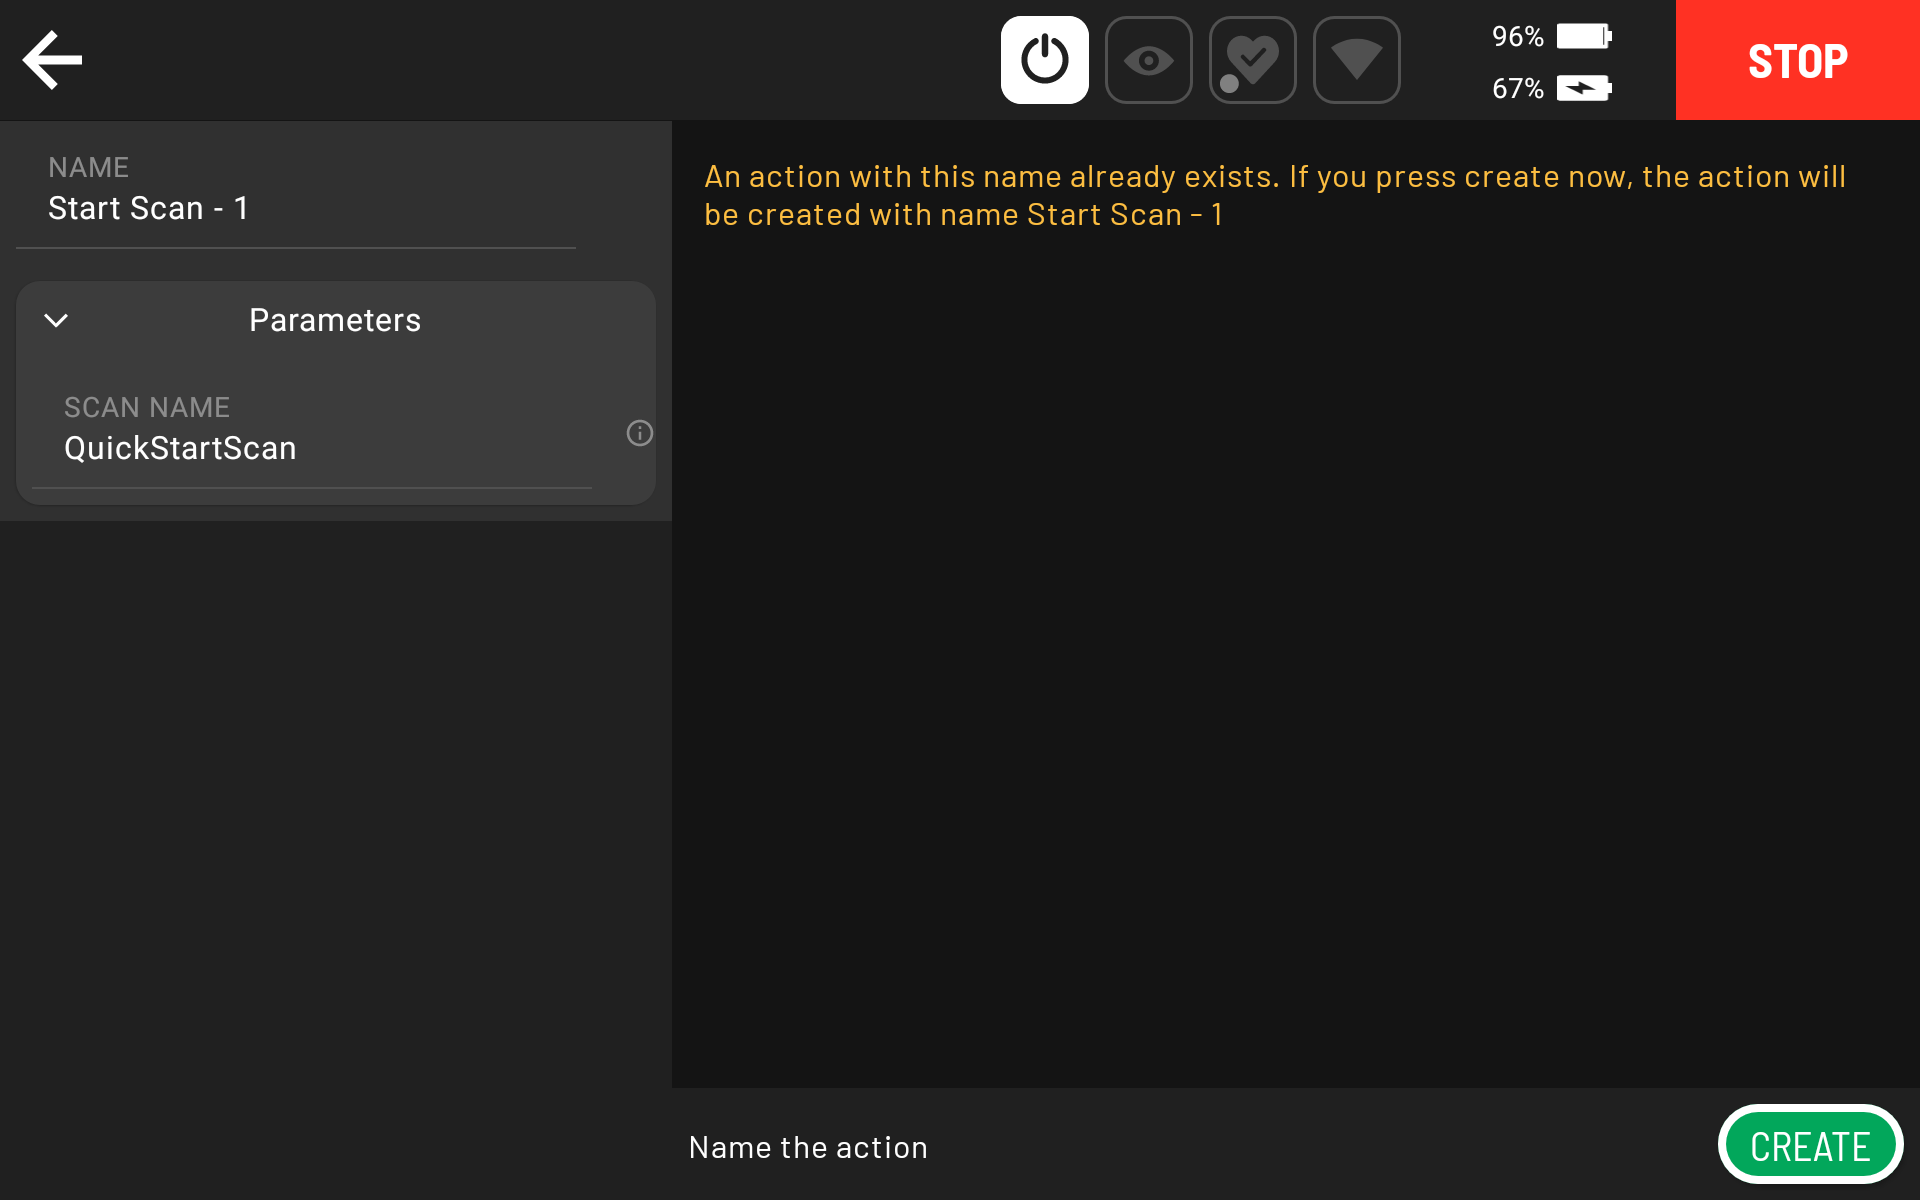
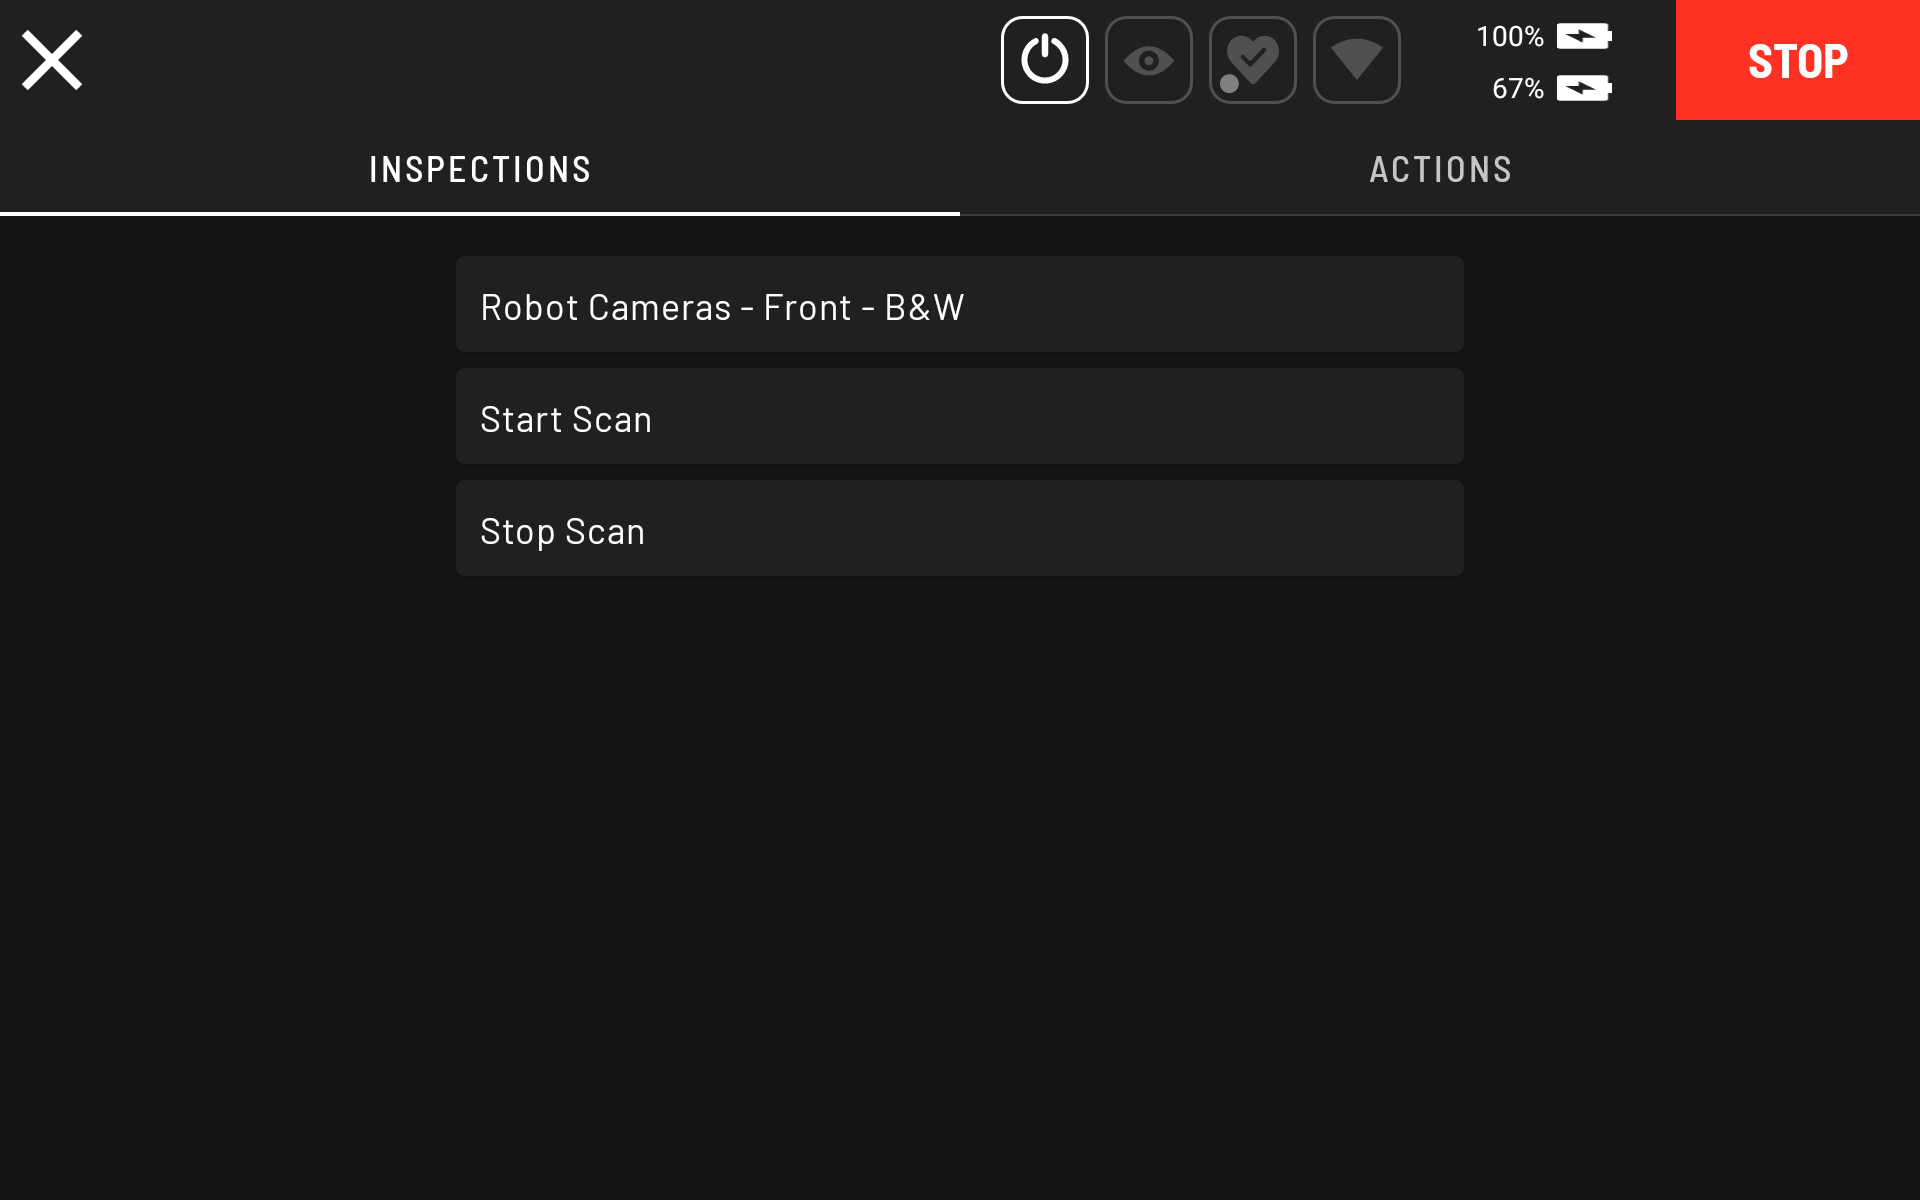
To start a scan, tap the red plus icon at the bottom right of the Spot controller.
Select the Start Scan option.

Name the scan.
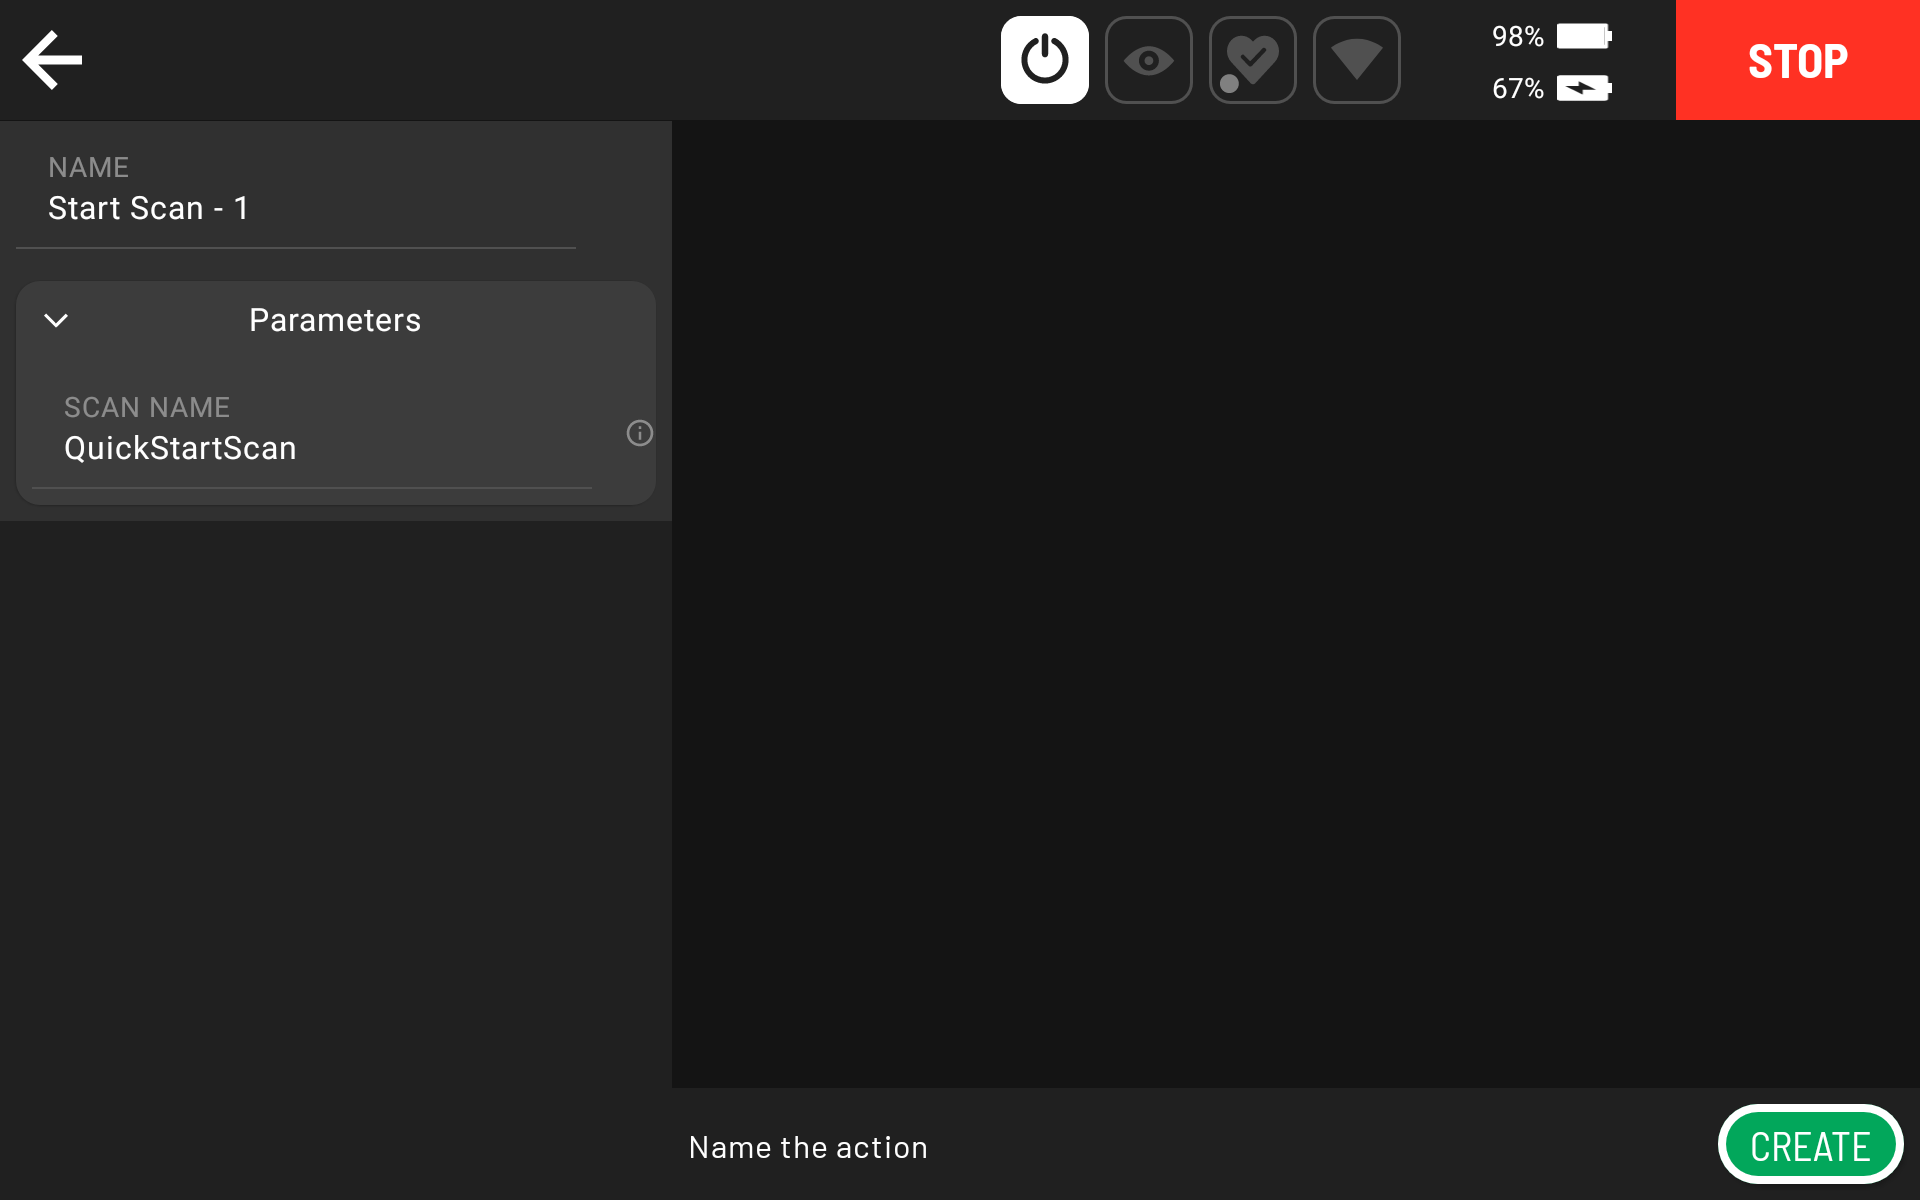
Tap Create on the bottom right of the controller screen to start the scan. The scan takes around 30 seconds to fully initiate. Hovermap then starts flashing green and the LiDAR starts to rotate.

The controller display returns to the previous screen. Tap the back button on the top left to return to the main screen where Spot can be operated.

Proceed with the scanning mission.
Step 2: Stop the scan
To stop the scan, press the red plus icon on the bottom right of the controller.
Select the Stop Scan option.

Tap Create to stop the scan.

Press the back button on the top left to return to the main Spot screen.
Scan in Autowalk Mode
Autowalk Mode is for autonomous repeatable scans. An operator records an Autowalk mission with Start Scan and Stop Scan actions embedded, and Spot then plays back the recording to repeat the mission autonomously.
Before proceeding, ensure familiarity with Spot's Autowalk mode and that the environment is properly configured for successful navigation. For more information, refer to the Boston Dynamics Autowalk documentation.
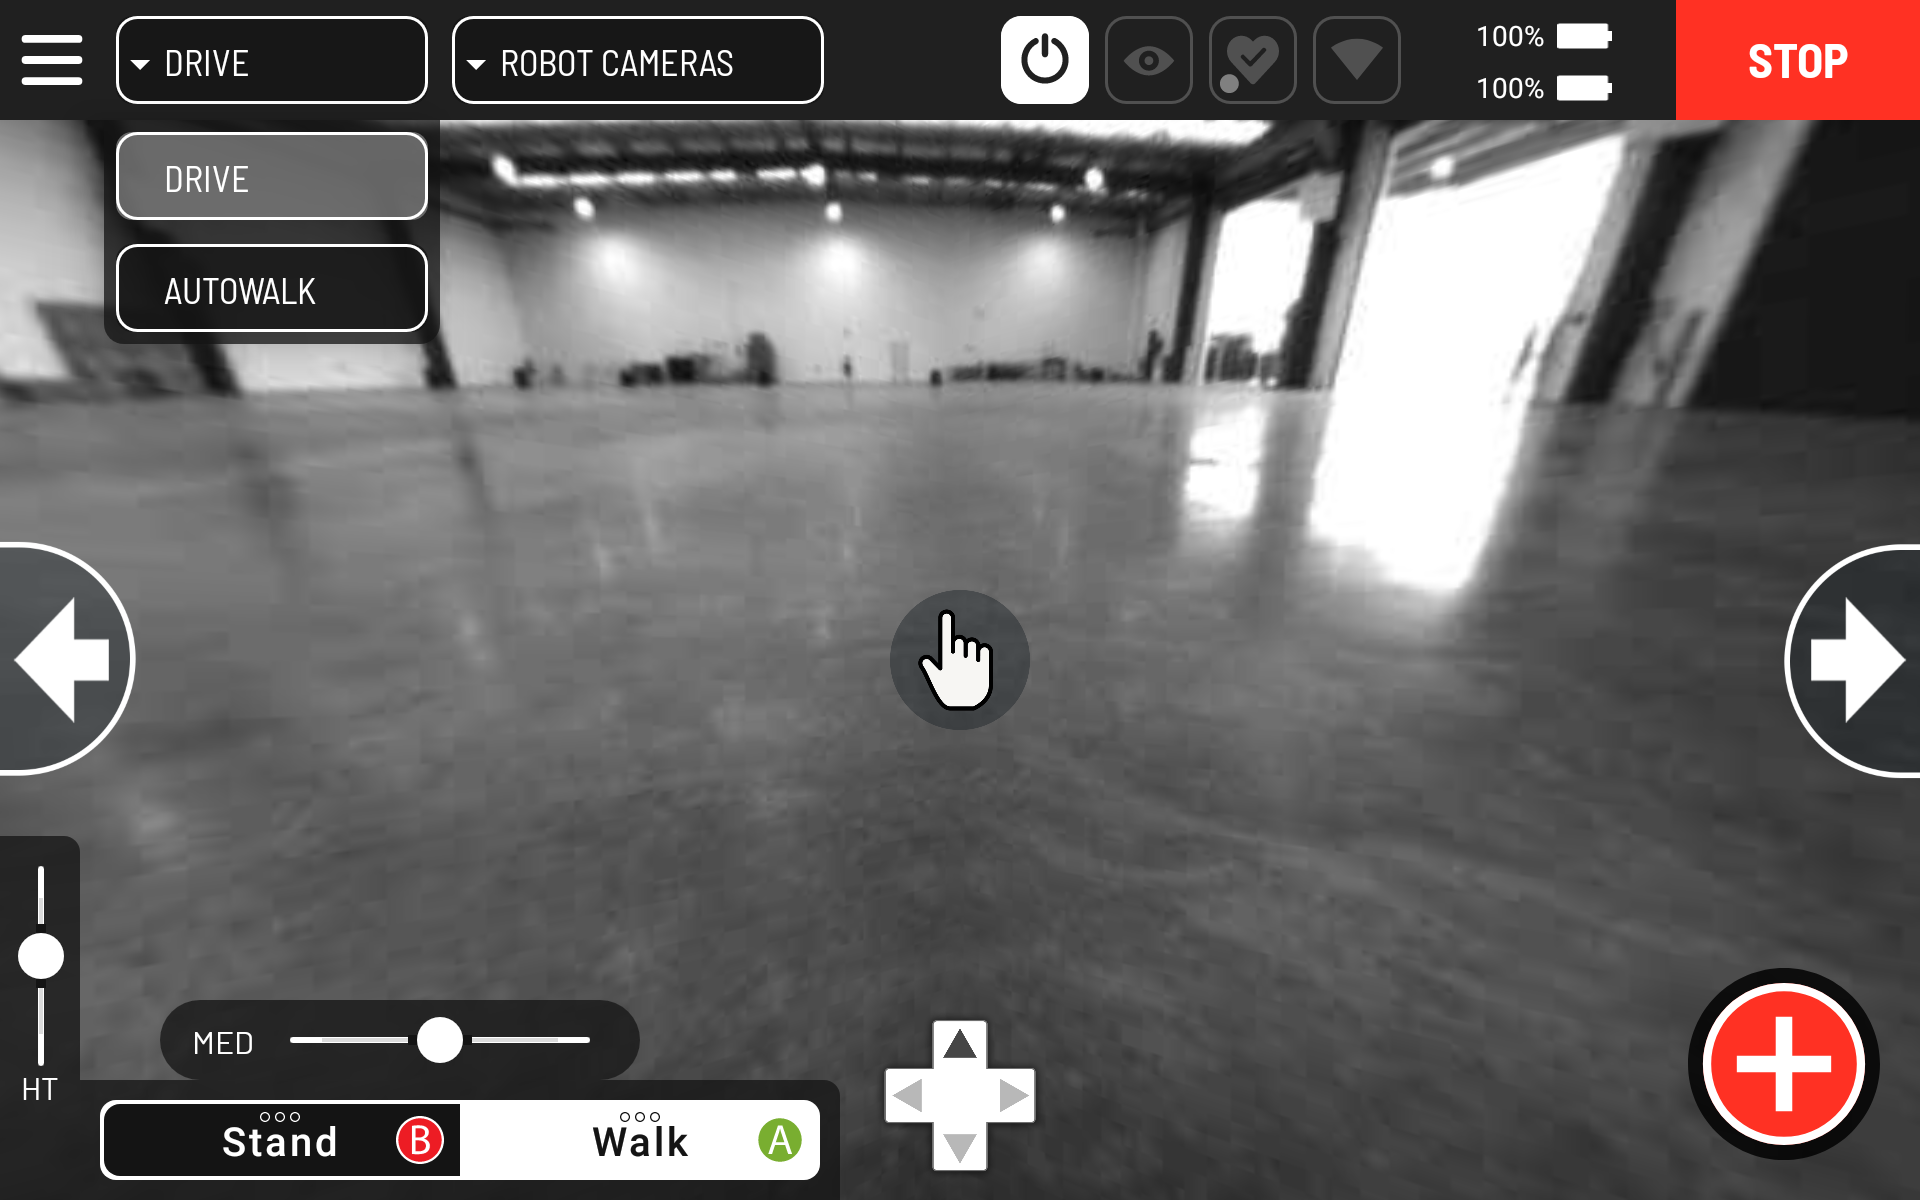
Step 1: Start recording an Autowalk mission
Select Autowalk from the main screen.
From the Autowalk Options menu, select Record.
Name the Autowalk mission (include a reference to a Hovermap scan if helpful). Ensure Execute Actions is toggled On.
Begin recording the Autowalk mission. Refer to the Boston Dynamics Autowalk documentation for instructions on conducting an Autowalk mission.
Step 2: Add the Start Scan action to the Autowalk
At any point during the Autowalk recording, tap the red plus icon at the bottom right of the controller to start a Hovermap scan.
Select the Start Scan option.

Name the scan.
Tap Create on the bottom right of the controller screen.
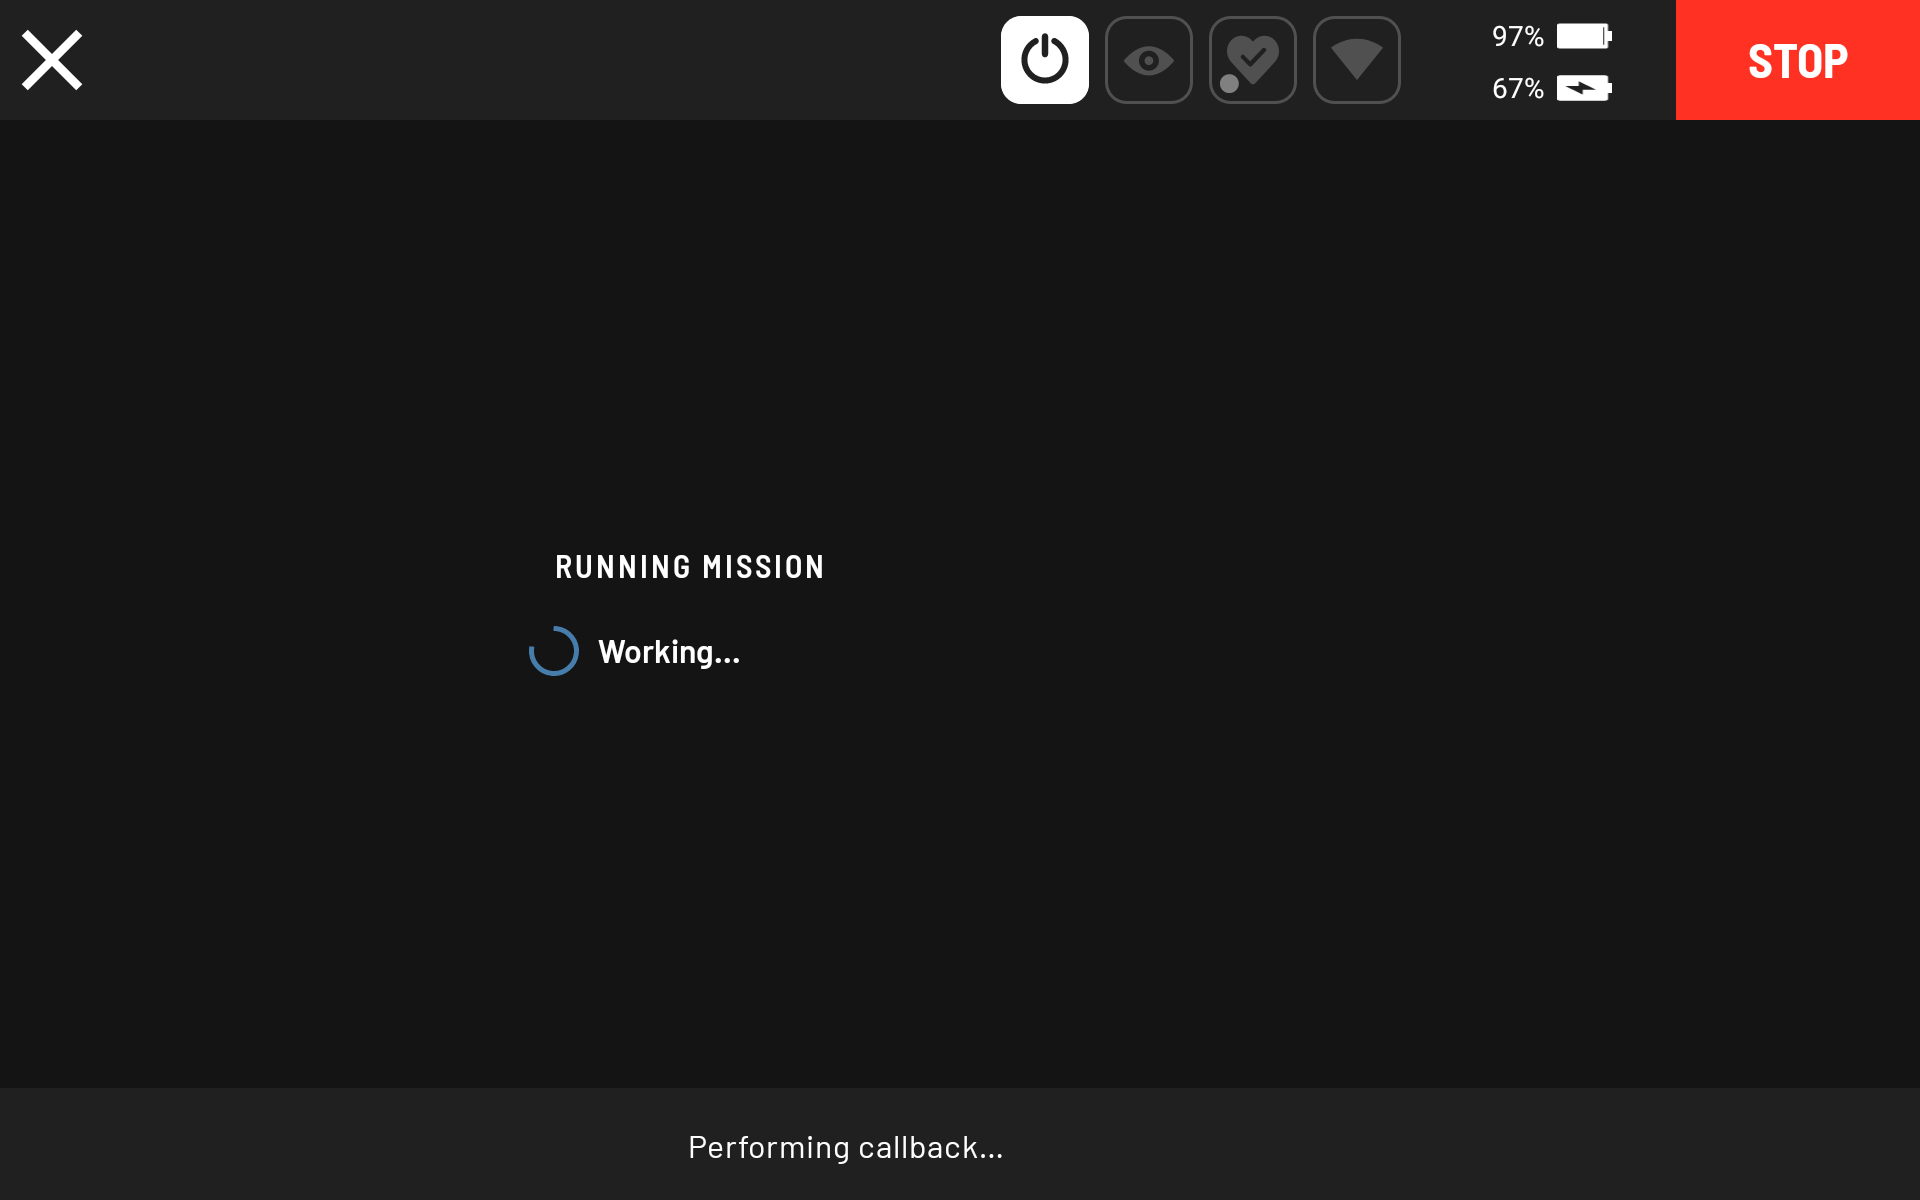
The scan does not commence while the Autowalk is being recorded. The scan starts once the recording is played back. The scan takes around 30 seconds to fully initiate, after which Hovermap starts flashing green and the LiDAR starts to rotate.
The controller display returns to the previous screen. Tap the back button on the top left to return to the main screen and continue the Autowalk mission while the Hovermap scan runs.
Step 3: Add the Stop Scan action and finish recording
To stop the scan, press the red plus icon on the bottom right of the controller.
Select the Stop Scan option.
Tap Create to stop the scan.

Tap the back button on the top left to return to the Autowalk mission recording on the main screen.
Tap Finish Recording to stop the Autowalk mission recording. Configure the remaining options as needed. Refer to the Boston Dynamics Autowalk documentation for more information.
Outcome
The Hovermap scan has been completed. In Drive Mode, the scan data is available on Hovermap for offloading. In Autowalk Mode, the recorded mission can be played back to repeat the scan autonomously, with Spot following the recorded path and triggering Start Scan and Stop Scan at the points configured during recording.
Related documentation and support
For assistance, contact the regional Emesent partner or the Emesent Client Support team.