Step 1: Power Supply Configuration
The Emesent LHD Mount for Hovermap supports two power supply configurations that can be connected simultaneously:
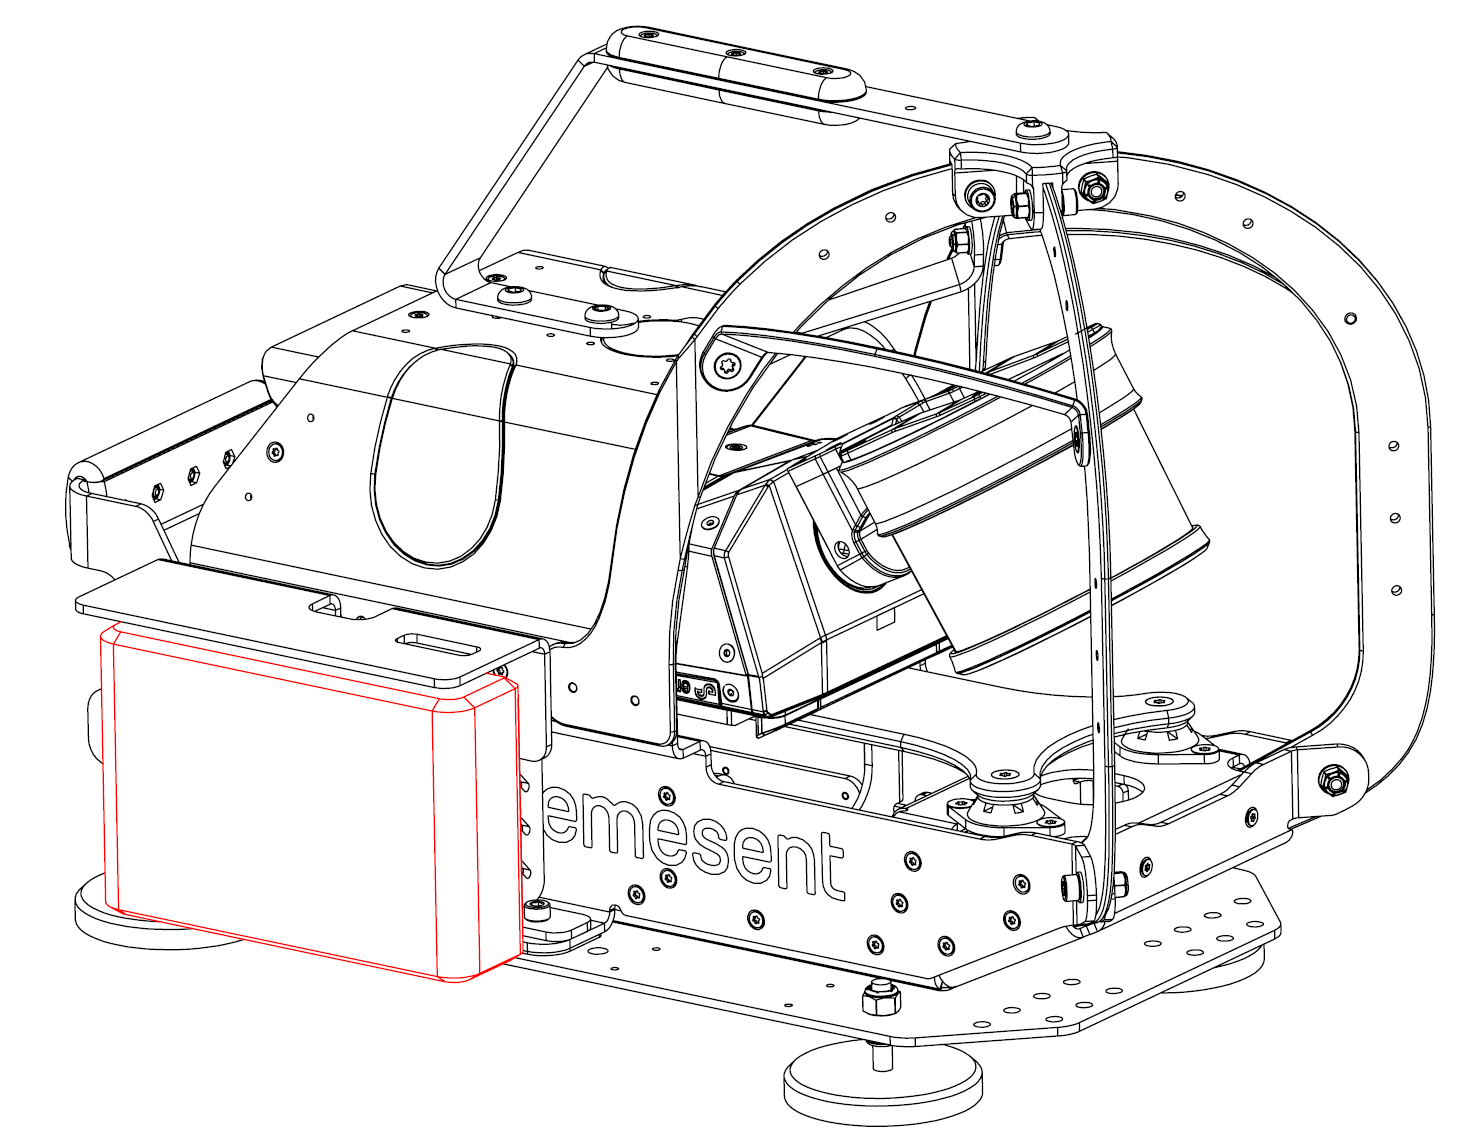
The Hovermap is powered by a portable V-mount battery.
Hovermap is powered by a portable V-mount battery. | Hovermap is powered externally through an M12 connect |
|---|---|
|
|
Step 2: Network Configuration
The LHD mount incorporates two network configuration options:
Connection over the Hovermap Wi-Fi Access Point (AP).
Connection over an existing network infrastructure (using the ETH port).
Network requirements:
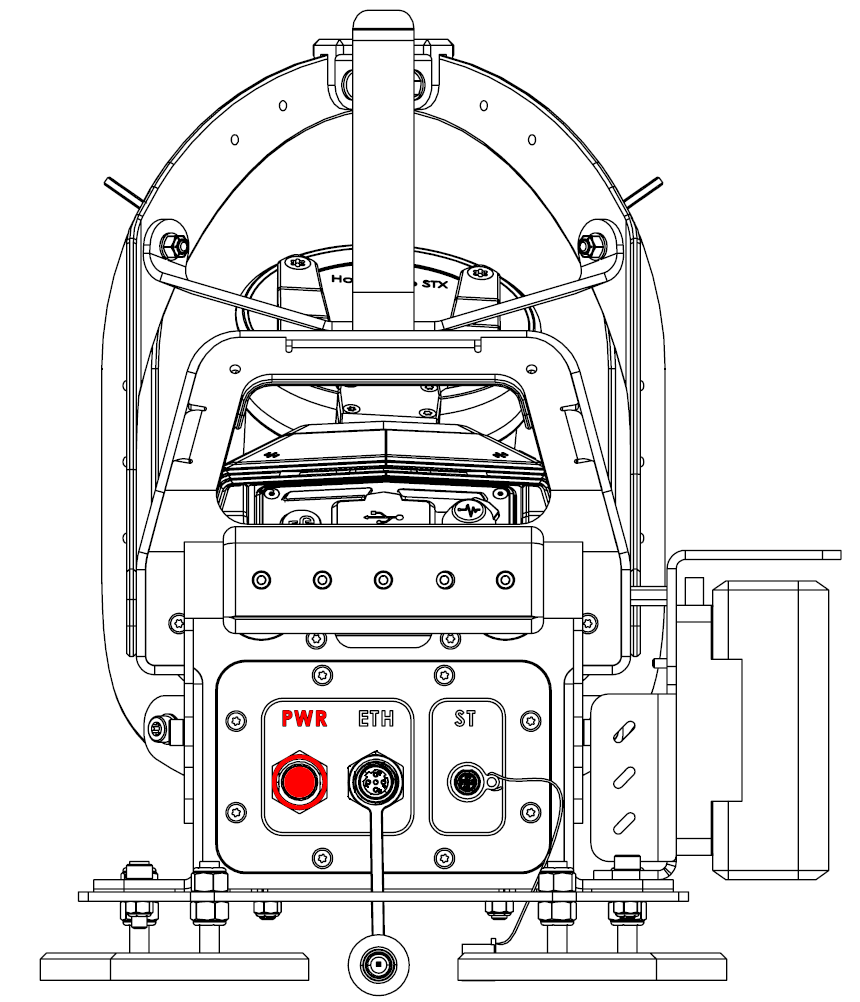
Hovermap rarely requires more than 20Mbps bandwidth, but as a minimum you will need an M-12 (A) connector – ETH 100Mbps (BASE100-TX) – as described in section 2.3 ‘M12 Connector Pinouts’ of this manual.
At the IP layer the configured network on the Web UI (user interface) page must be unblocked on the network (default is 192.168.2.115/24).
Step 3: Hovermap Installation
Ensure the mounting location is clear of dirt and debris that could interfere with the magnetic connection.
Place the Hovermap ST/ST-X in the LHD Mount from the front until seated on the dovetail.

Ensure that the two dovetail locks are secured.
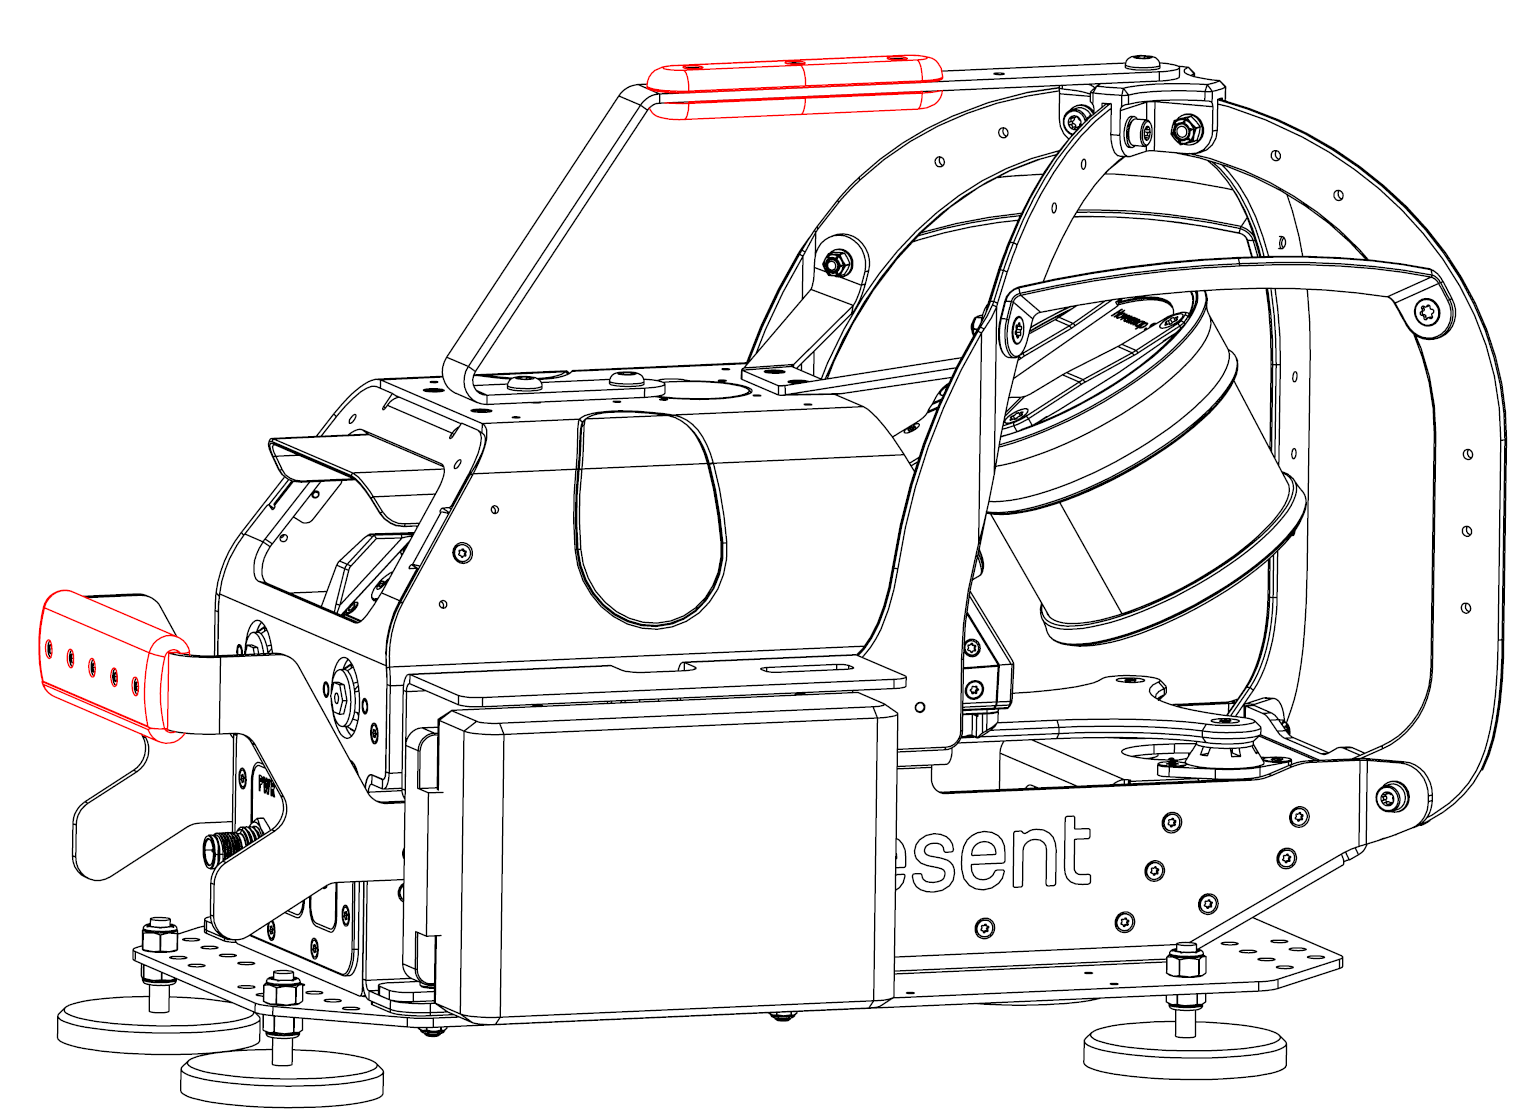
Pick up the LHD Mount using the provided grab handles.
Carefully place the LHD Mount onto a steel surface on the vehicle by slowly lowering the rear feet and then the front feet (or vice versa).
DO NOT allow the magnets to forcefully slam down, as this could damage either the magnets or the Hovermap.
Check that all magnets are positively secured to the mounting surface by performing a light pull test and checking for gaps.
If the mounting location is not flat and gaps are present, reposition the mount until all feet make contact.
The height of each magnet can be adjusted using 2x 7/16” wrenches, although this is recommended only if the mounting surface is severely uneven.
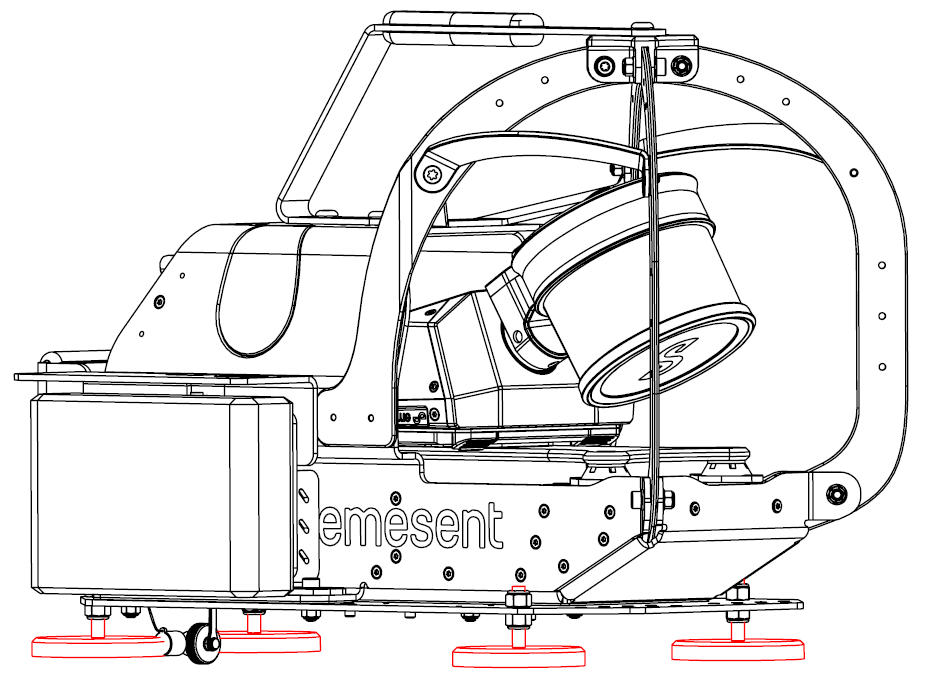
Connect one end of the the Hovermap Power Cable to the ST port on the LHD Mount, and the other to the Hovermap.
Connect a fully charged battery into the battery bay of the LHD Mount, or power the mount through the PWR connector. Ensure that the battery latch is secured.
If using the system over existing network infrastructure, connect the LHD Mount to the network via an M12-RJ45 cable to the “ETH” port.
Power on the Hovermap and wait for the status lights to switch to a slow pulsing Emesent blue.
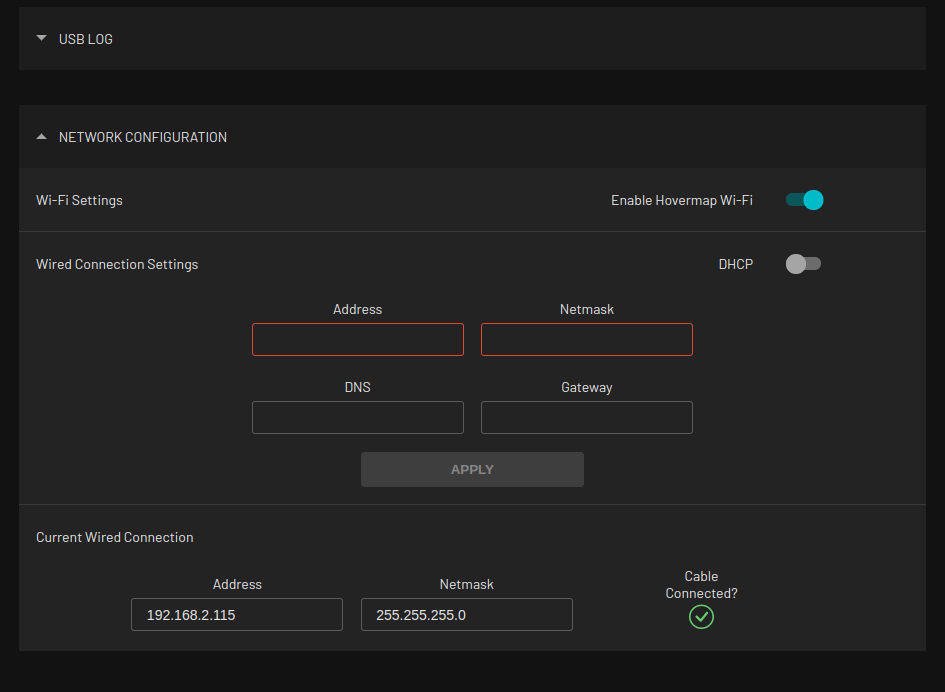
Step 4: Set up the Hovermap network connection.
Connect the tablet to the Hovermap via Wi-Fi (look for STxxxx in the list of Android WiFi networks)
In the tablet’s web browser, navigate to hover.map and open Network Configuration.
Under Wired Connection Settings, enter the desired IPv4 Address and Netmask.
Click Apply.
Confirm the connection is successful under Current Wired Connection.
`The Address and Netmask should match the values entered in the previous step
Cable Connected? should have a green tick underneath