
What you will need
Hovermap unit
Vehicle RTK or Backpack RTK mount
Trimble cable with wire loop (black Lemo connector)
GNSS adaptor cable
Procedure
Step 1: Setup the RTK Mount and Receiver
Refer to the appropriate Knowledge Base article for instructions on how to set up your mount and attach the GNSS receiver:
Step 2: Connect to Hovermap
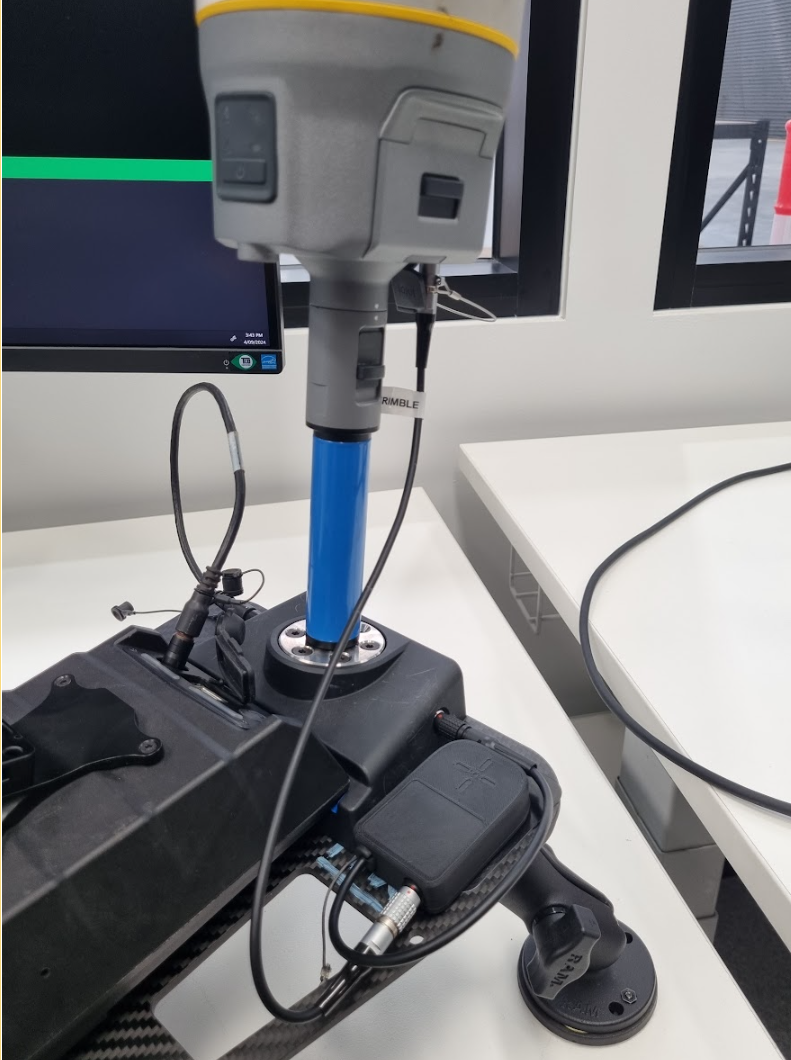
Confirm the Hovermap and GNSS receiver are attached to the Vehicle RTK or Backpack RTK mount.
Plug the GNSS adaptor cable into the RTK mount and fasten the adaptor to the magnetic plate.
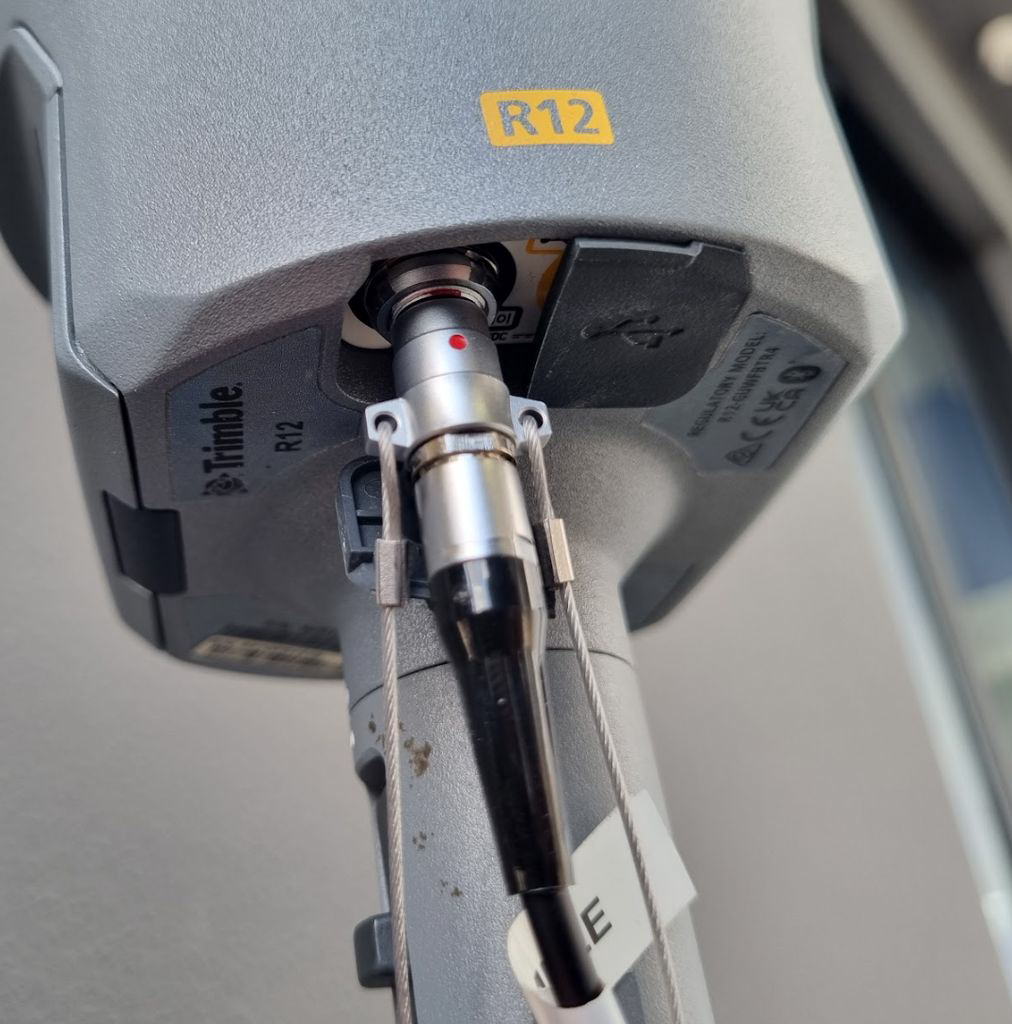
When using the R12, use the Trimble 50 mm quick-release spacer and the 100 mm Emesent spacer to ensure the correct offset in Aura.
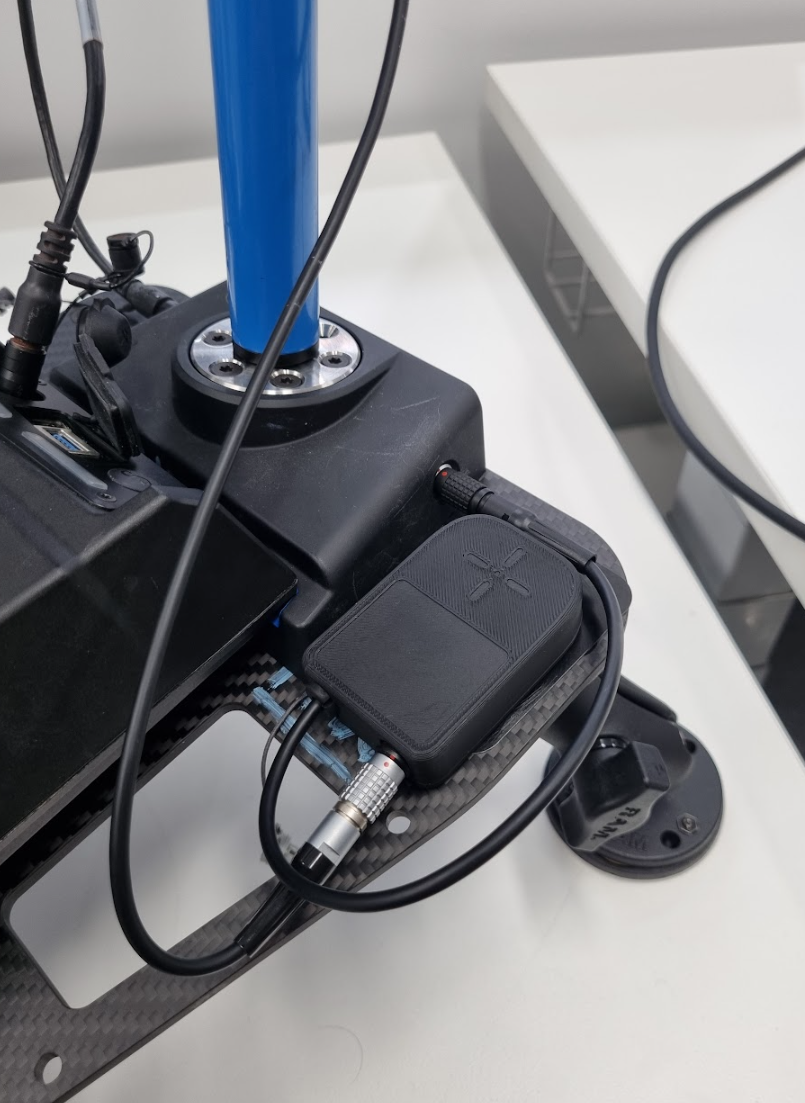
Step 3: Connect the cable to Hovermap
Plug the Trimble cable with the wire loop into the receiver.
Step 4: Connect the Trimble cable
Plug the other end (black Lemo connector) into the adaptor port.
Outcome
The Trimble receiver is now physically connected to Hovermap and ready for configuration.