
This article explains how to plan a ground control point (GCP) layout for a site. It also explains how to attach and survey the targets before a scan. A good layout lets Aura georeference the point cloud and decreases drift across the dataset.
Plan the layout before the scan.
What you will need
A minimum of 3 reflective GCP targets, 25 cm (10 in) or 50 cm (20 in). One side of each target is reflective.
A survey instrument, for example a GNSS receiver or a total station. The Hovermap kit does not include a survey instrument.
Velcro, adhesive tape or an equivalent method to attach the targets.
Procedure
Step 1: Decide how many targets to use
Use a minimum of 3 targets.
Add more targets to increase the accuracy and the redundancy.
Use the table below to set the distance between the targets.
Environment | Distance between targets |
|---|---|
Most environments | 40 m (130 ft) |
Feature-rich environments | 50 m (165 ft) |
Feature-poor environments | 10 m (33 ft) |
For example, a 50 m (165 ft) tunnel in a feature-poor environment needs a target every 10 m. That is 6 targets. The same tunnel in a feature-rich environment needs only the minimum of 3.
For more than one scan of a site, see Scan a large outdoor area with Hovermap for the number of targets in each overlap area.
Step 2: Plan the layout of the targets
The number of targets is not sufficient on its own. The layout of the targets decides how much of the point cloud Aura can control. The accuracy decreases as the distance from the nearest target increases.
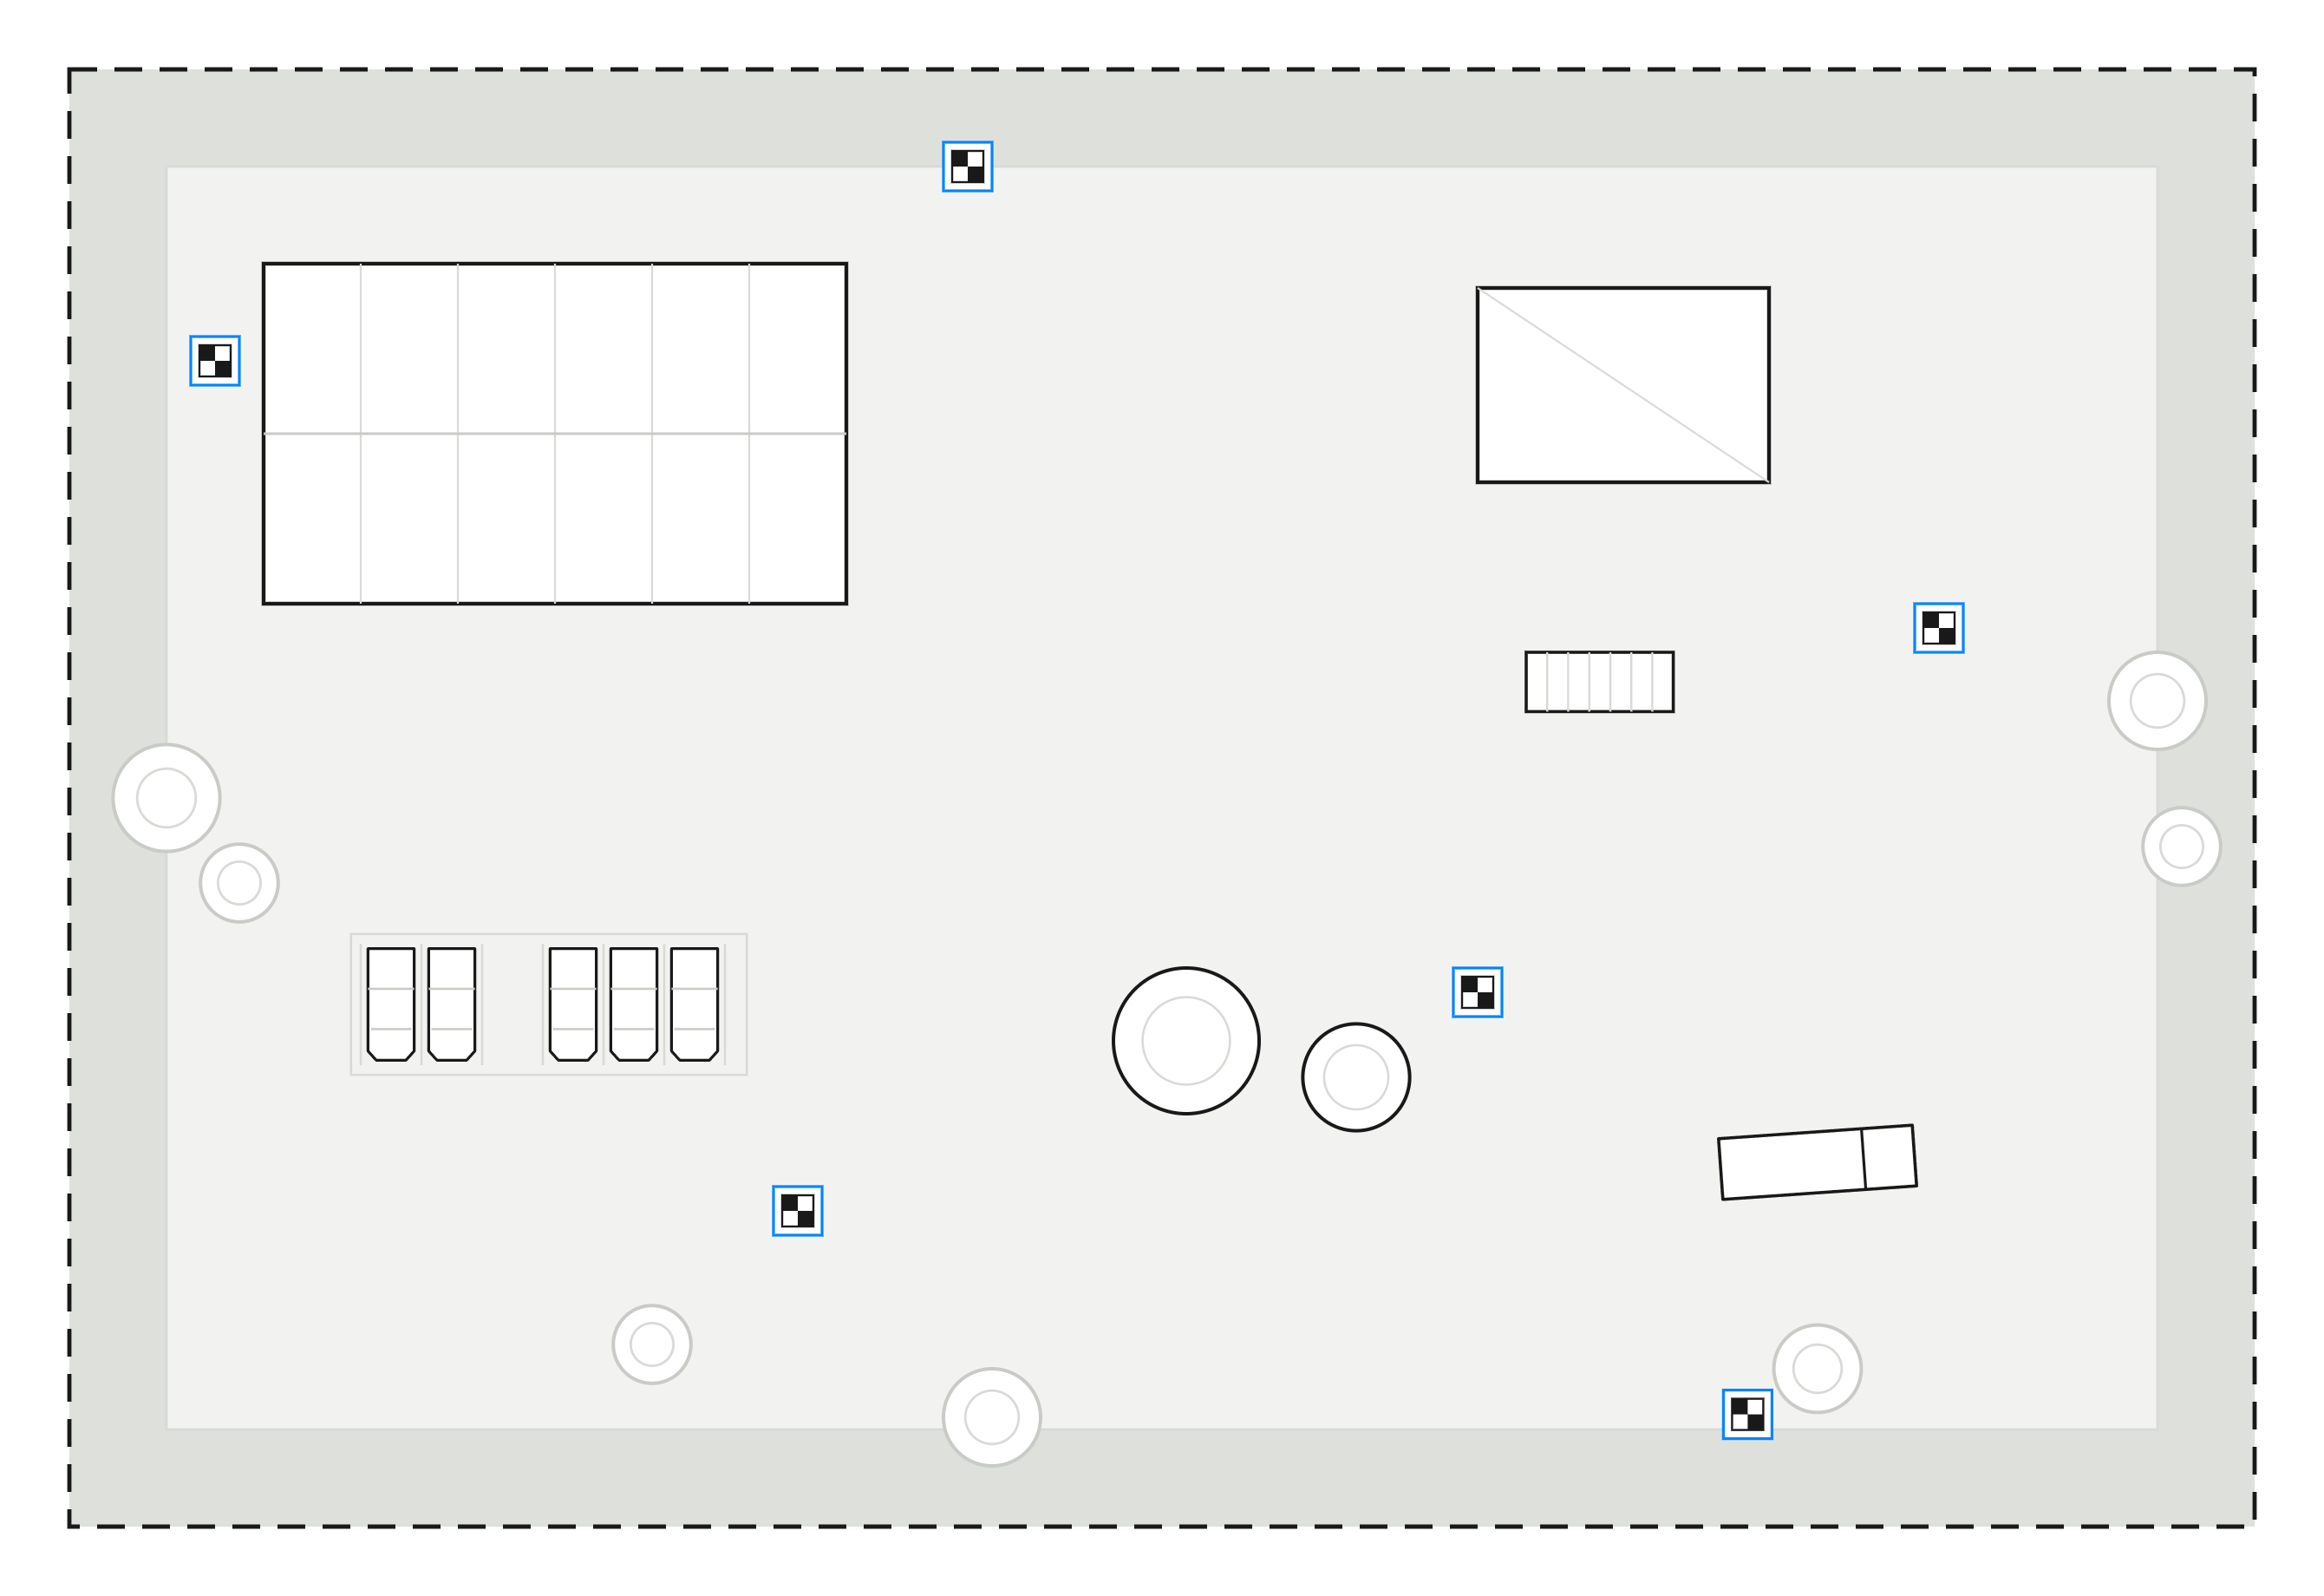
Put targets around the perimeter of the site.
Put more targets through the accessible areas of the site.
Put a minimum of 1 target in each area where the terrain height changes a large amount.
Arrange the targets irregularly across the full site.
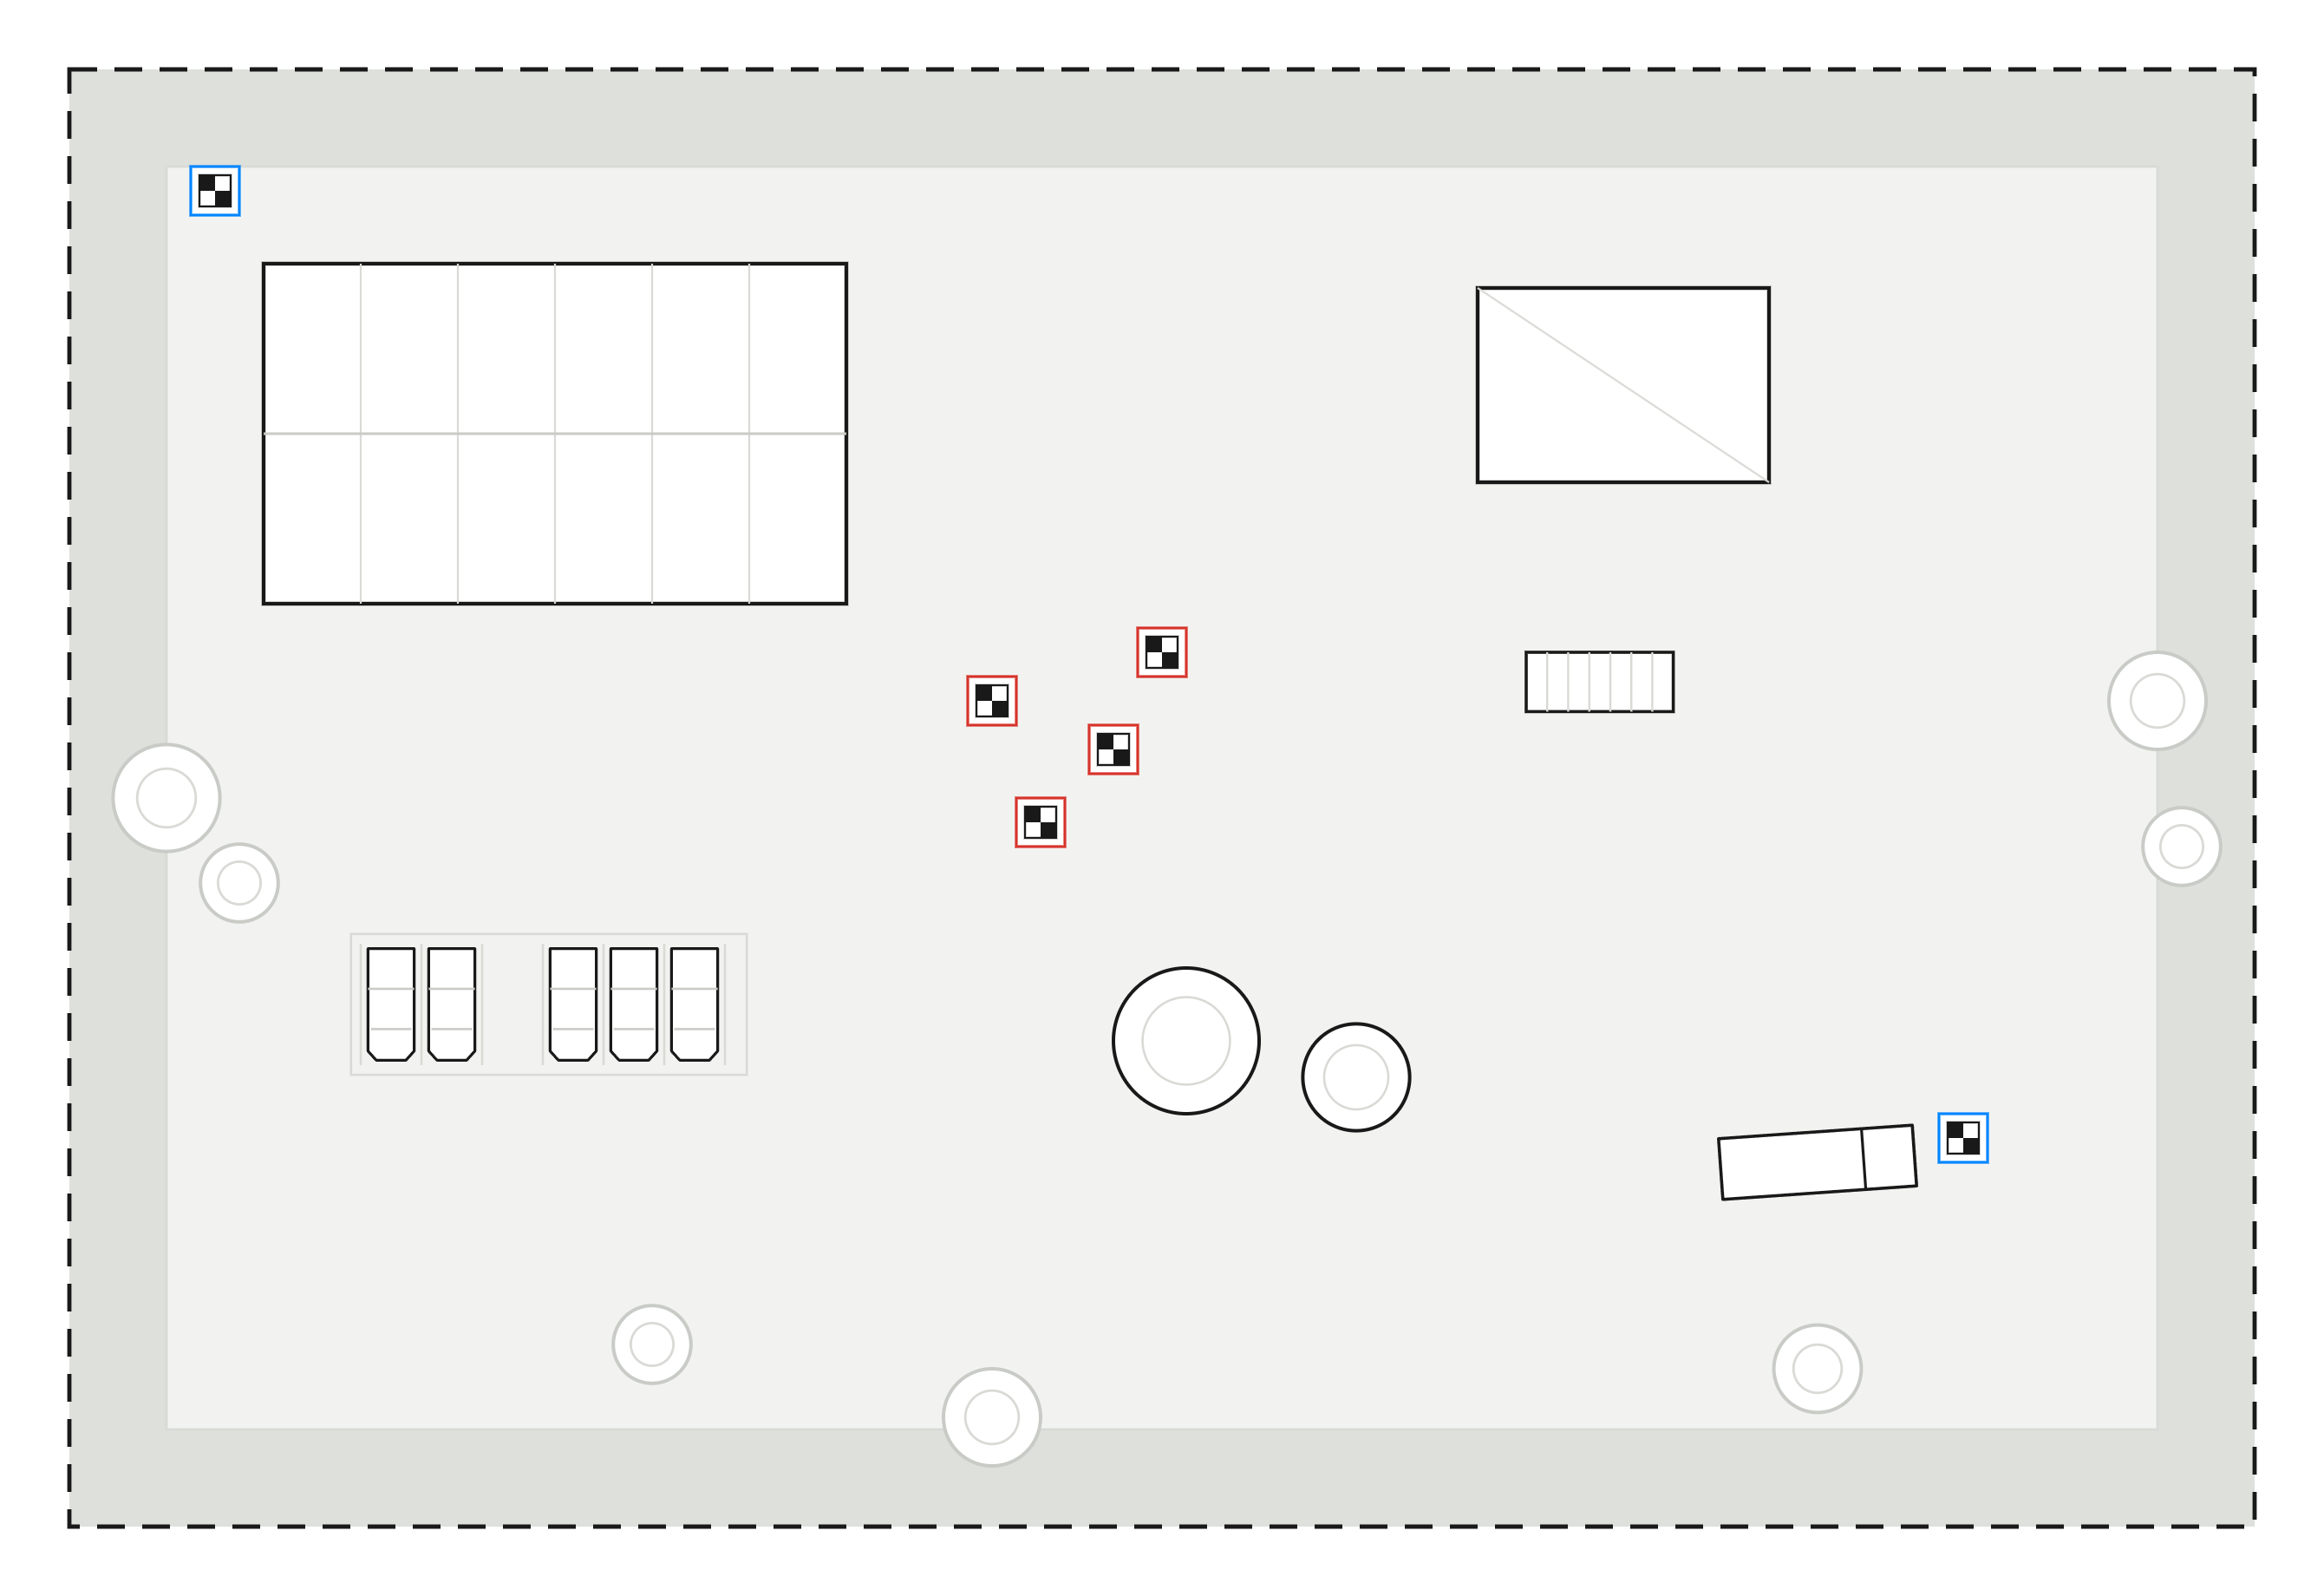
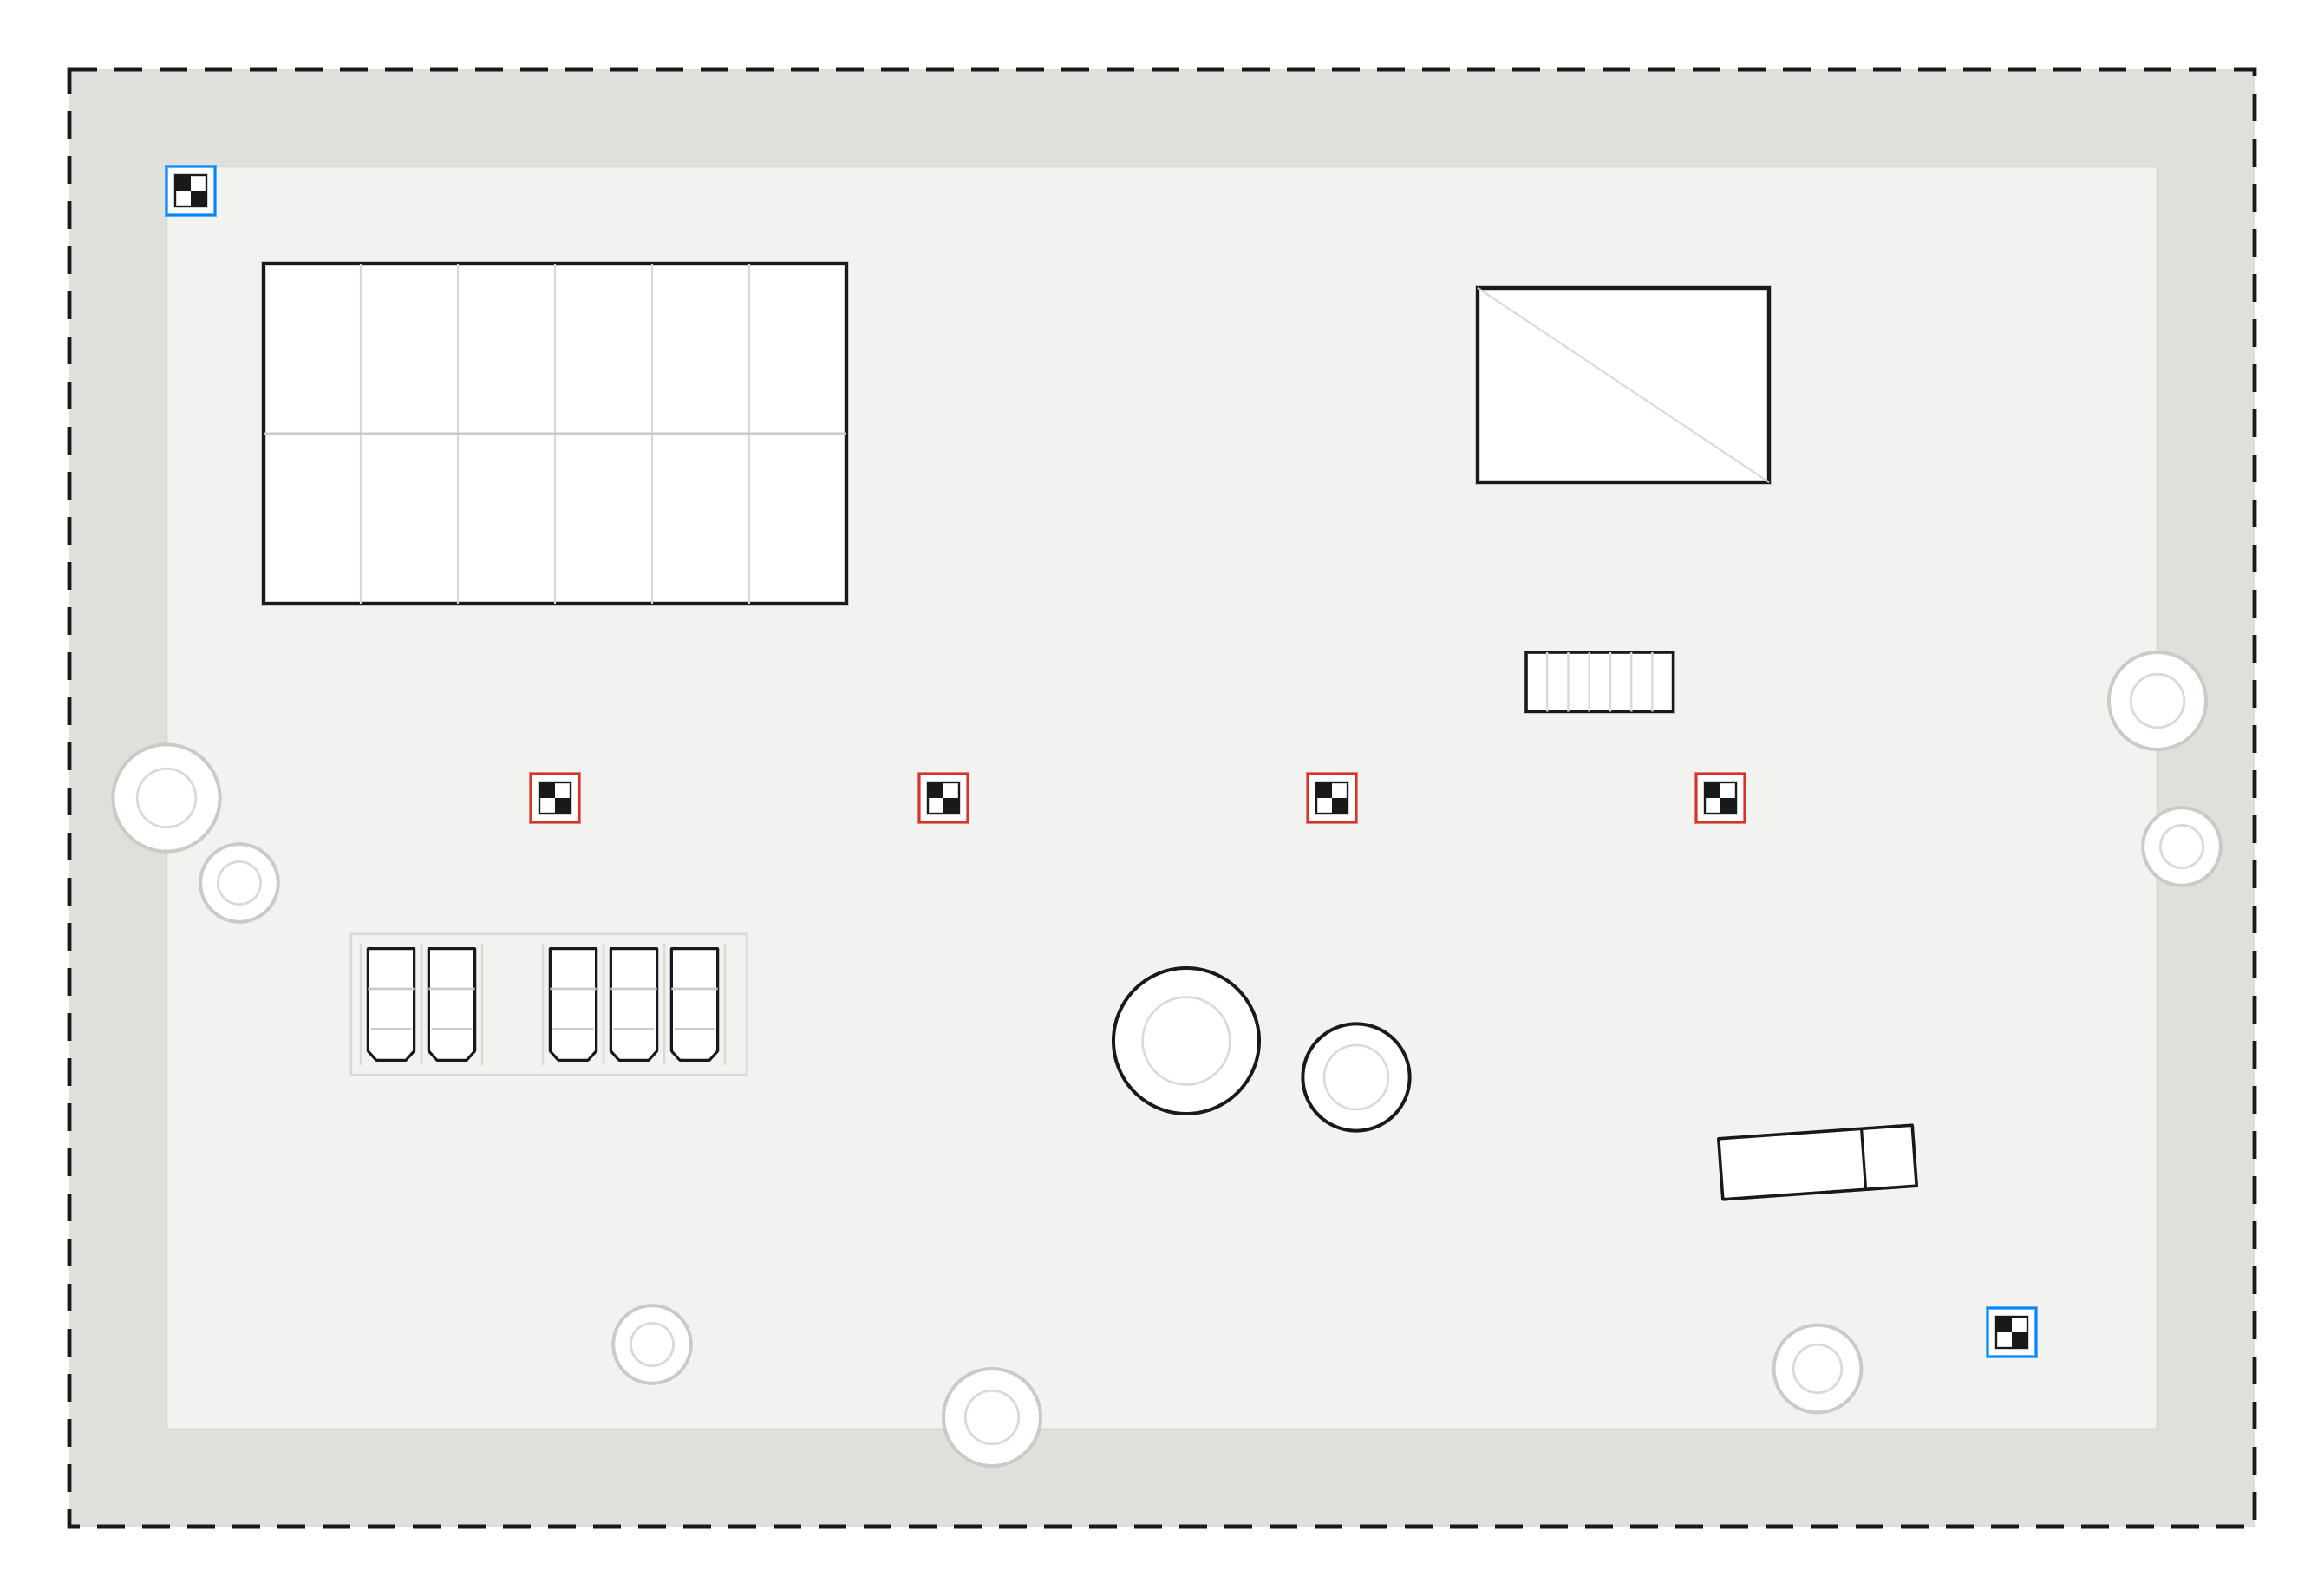
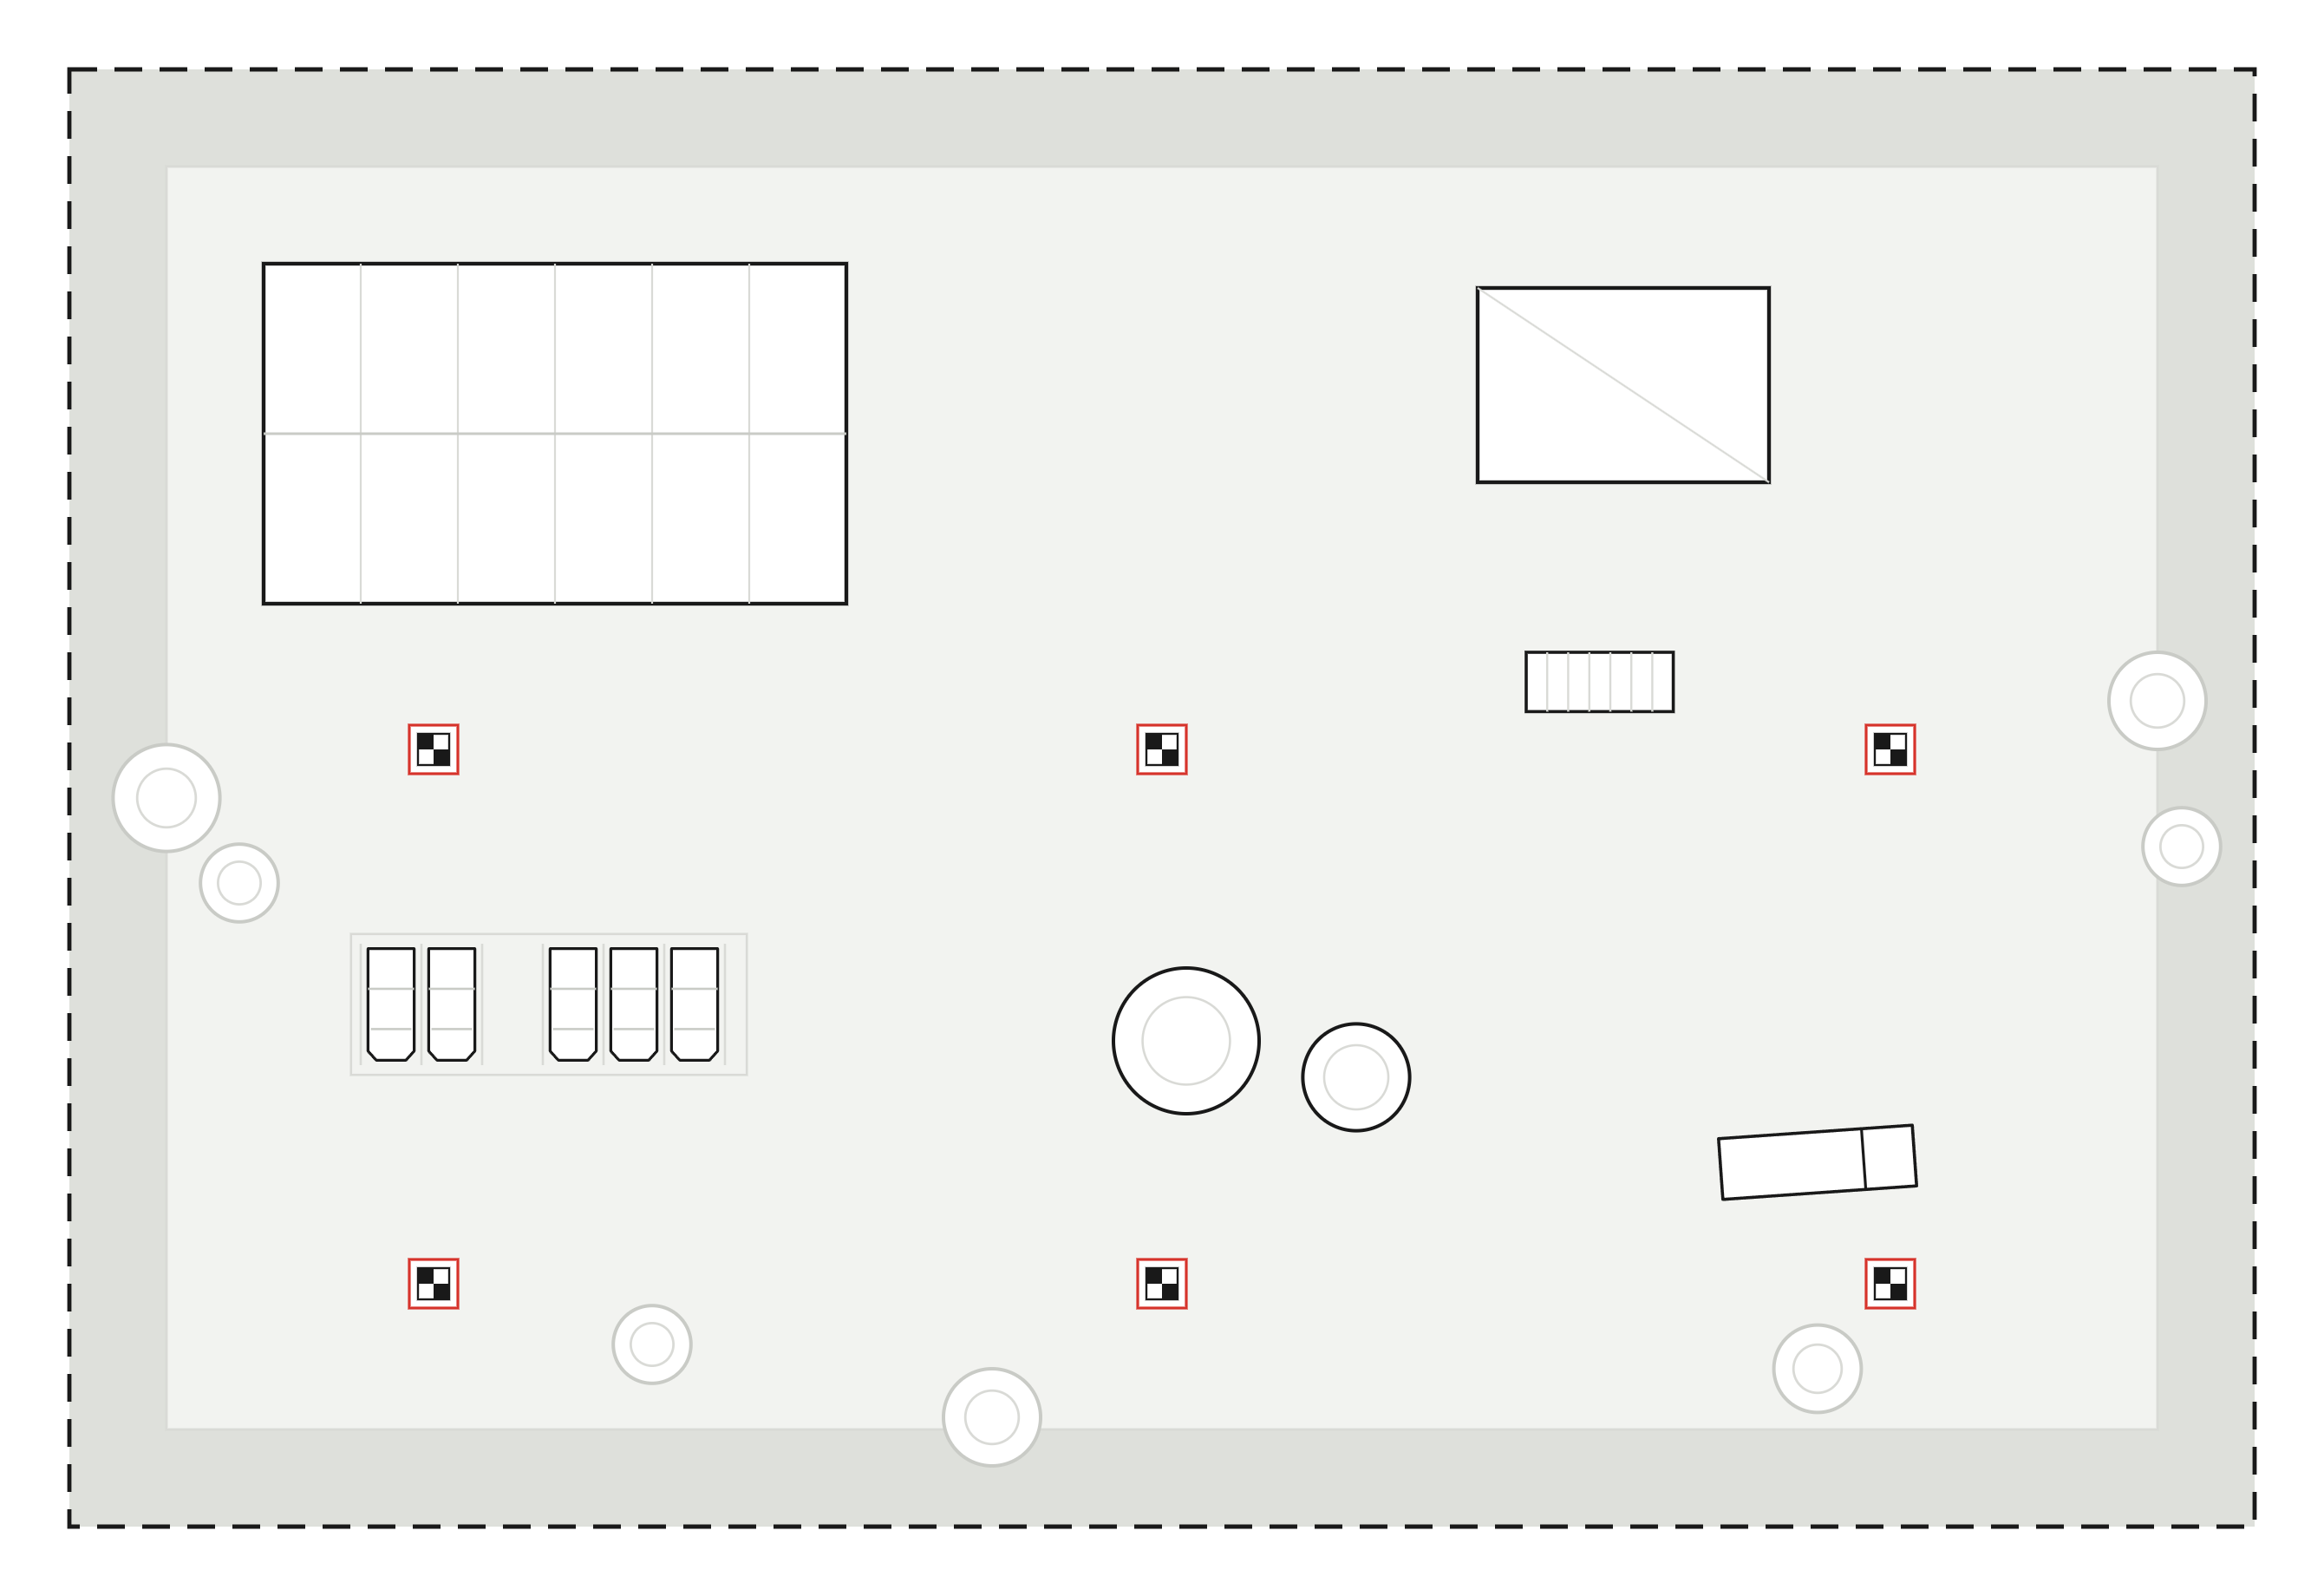
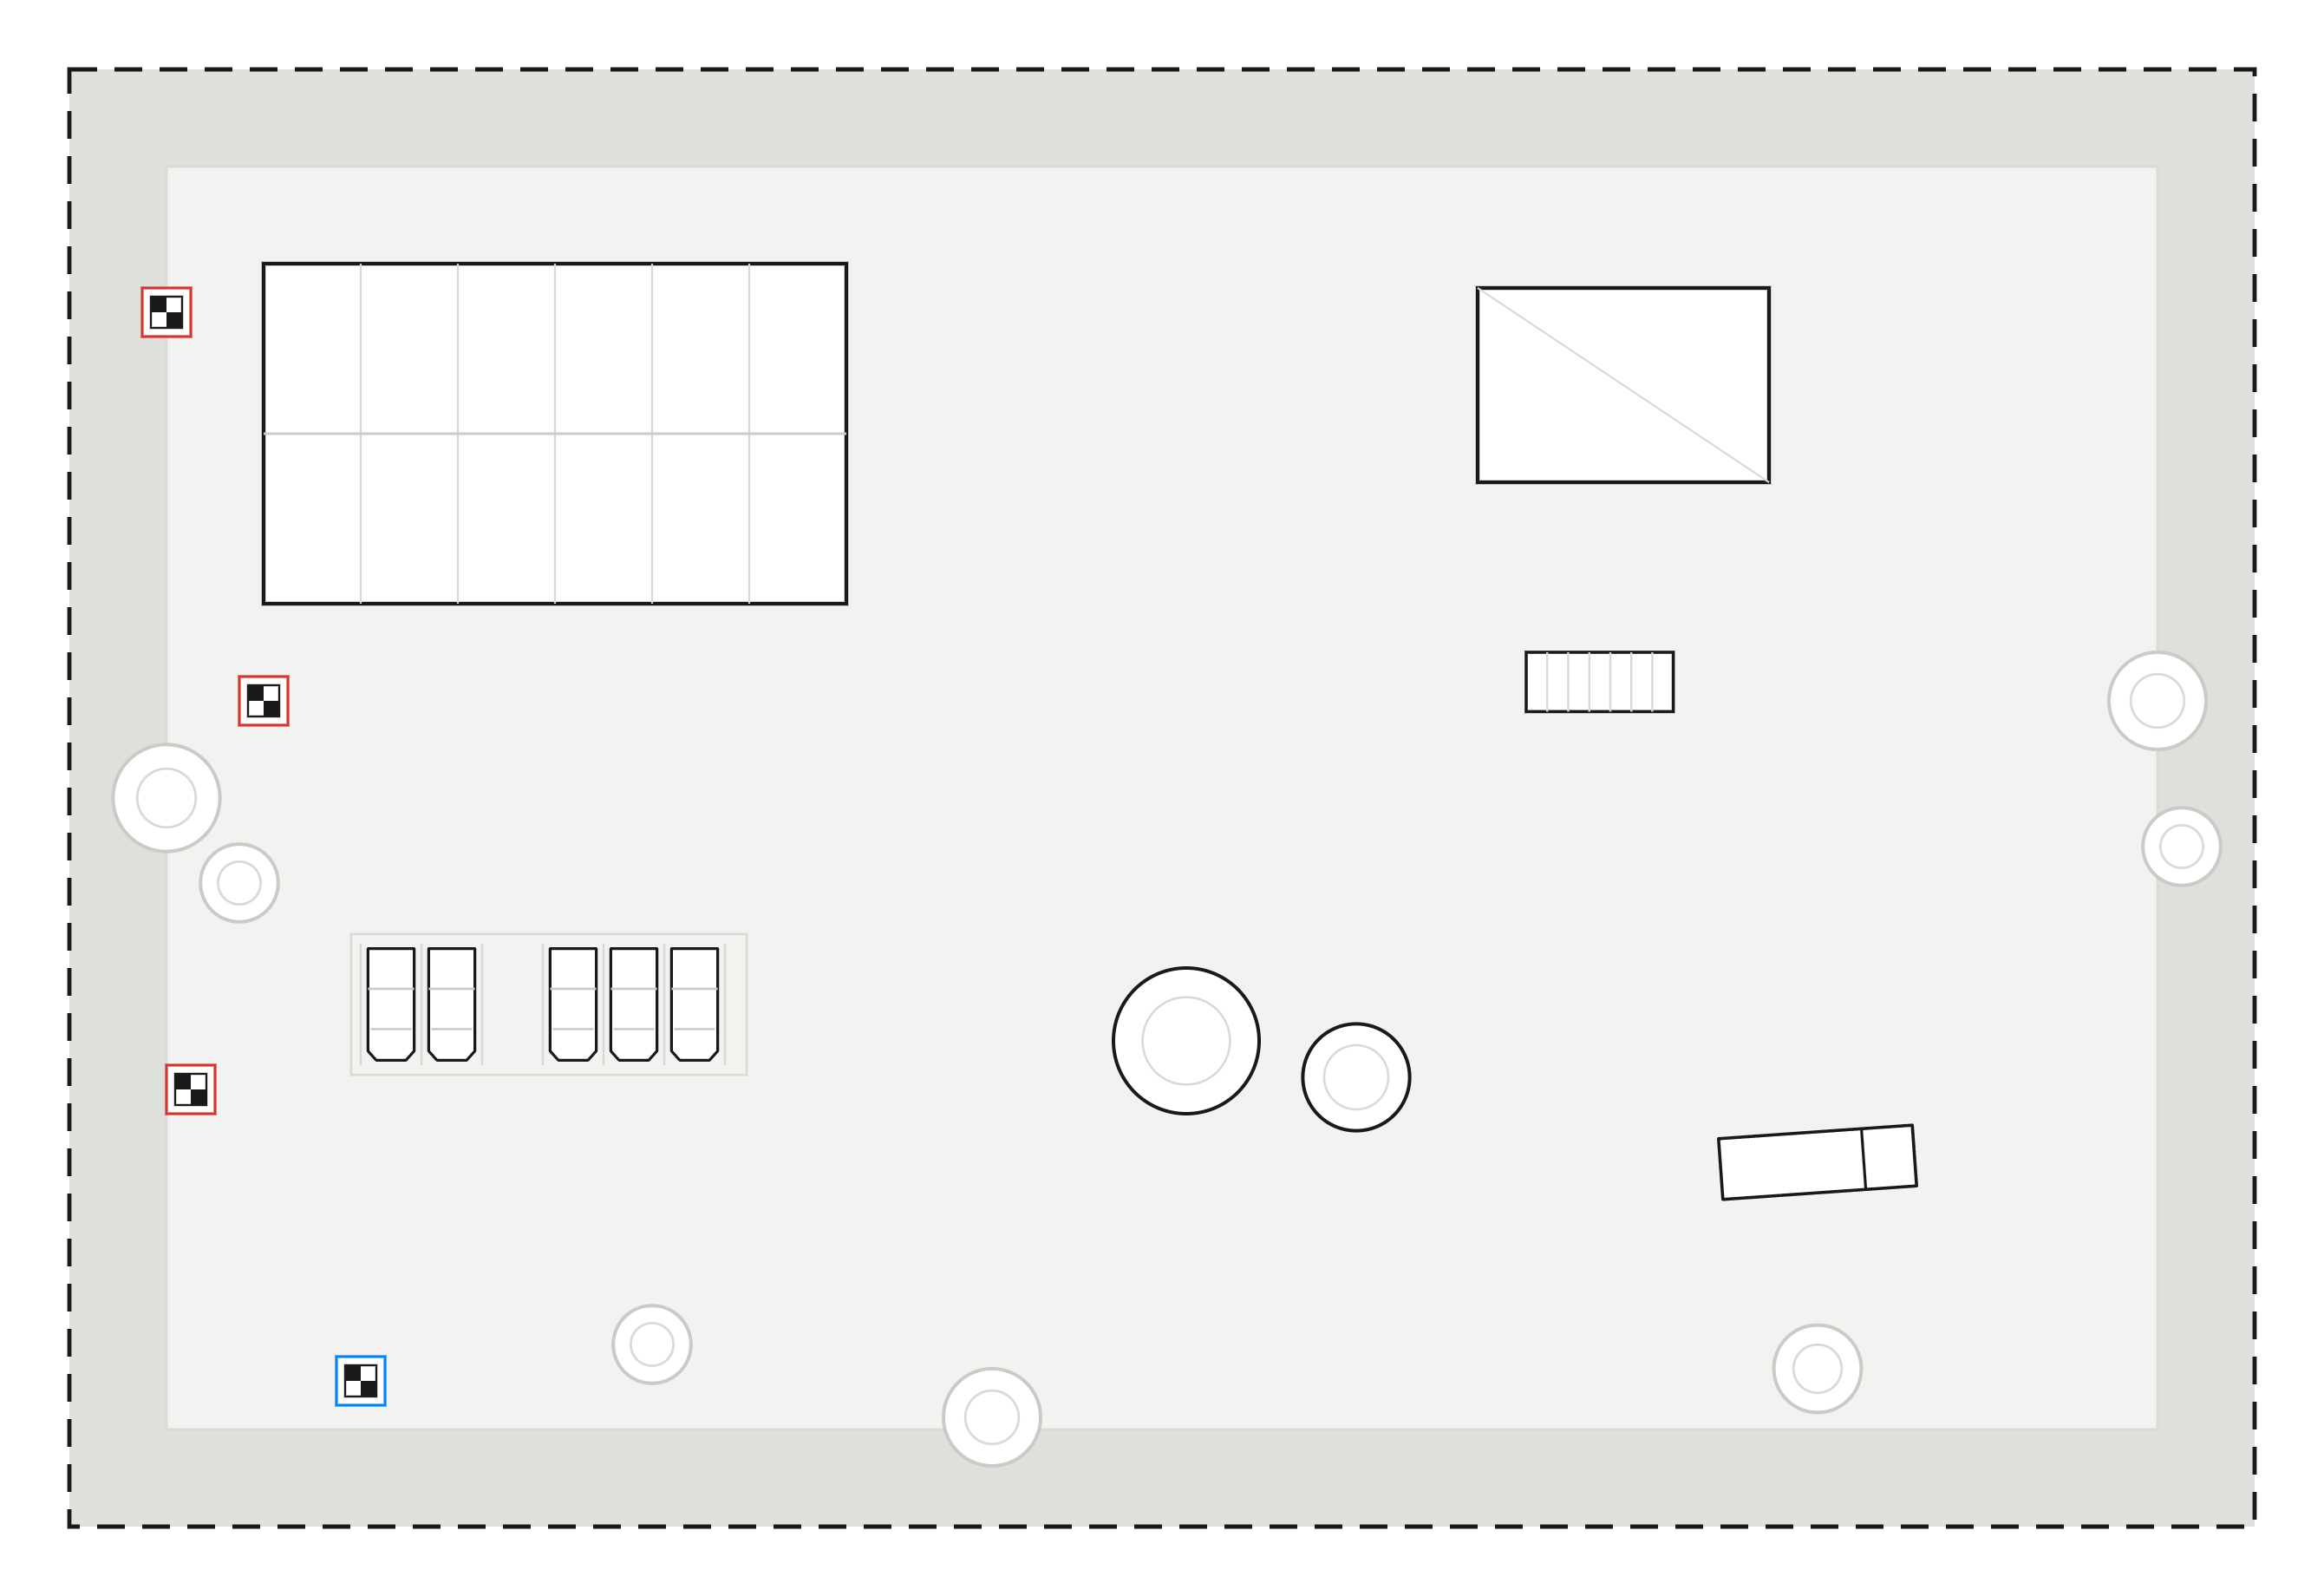
Do not use the layouts below. Each layout has enough targets, but the arrangement makes the alignment weak or unclear.
Layout and effect on the alignment | Example |
|---|---|
Grouped The targets are in one part of the site. The areas outside the group have no control. The accuracy decreases quickly across the remainder of the scan. |
|
Symmetrical Aura can match the targets in more than one way. The point cloud can then align at the wrong angle. |
|
Repeated pattern A regular pattern causes the same problem as a symmetrical layout. More than one match fits the data equally well. |
|
Too few targets There are not sufficient targets for the size of the site. The point cloud has control near the targets only. |
|
Step 3: Use a zig-zag layout on a long, narrow site
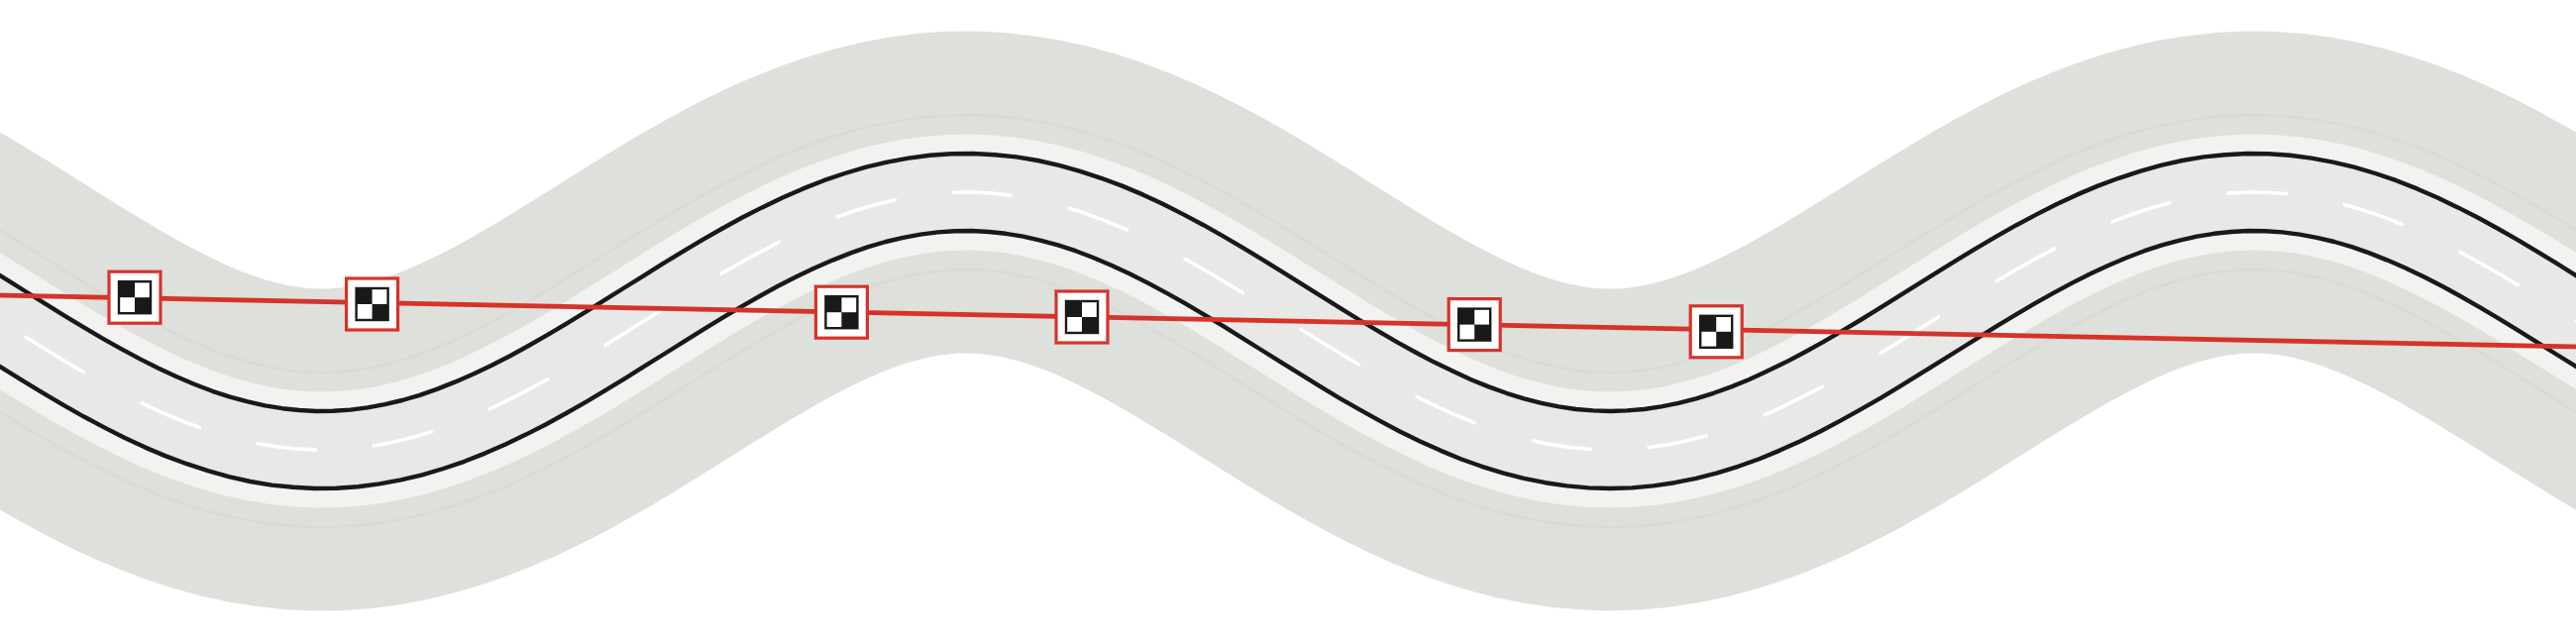
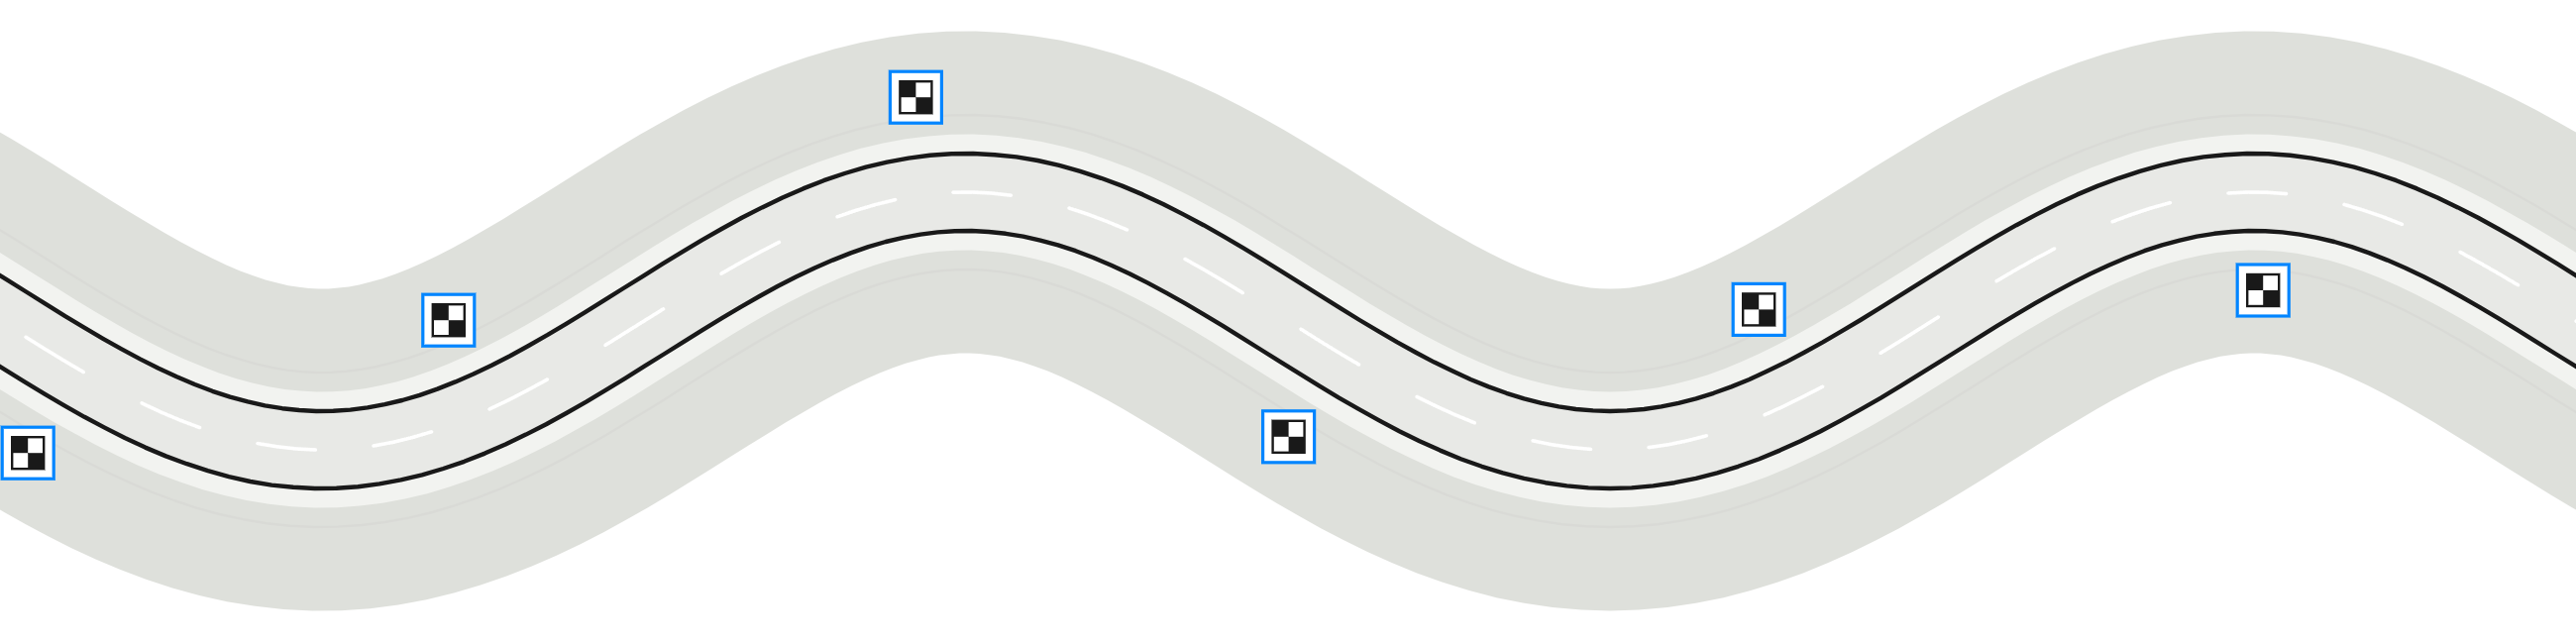
Roads, corridors and other long, narrow sites are more difficult to control. If one straight line goes through all or most of the targets, the point cloud can turn about that line. The error increases with the distance from the line.
Put the targets as near to each other as the site permits.
Put the targets on alternate sides of the road, in a zig-zag layout.
For the scan route on a road, a highway or a tunnel, see Scan a long, linear environment.
Step 4: Place each target
Put each target on a stable surface where the scan route can see it, for example the ground, a wall or a post.
Turn the reflective side to the scan route.
Make sure that the reflective side is within 30 degrees of perpendicular to the laser beam.
Attach each target with Velcro, adhesive tape or an equivalent method.
Make sure that each target cannot move.
Step 5: Survey each target
Record the coordinates in a non-scaled coordinate system, where 1 unit is 1 meter. Aura does not apply a scale factor. If the coordinate system is scaled or distorted, the point cloud is stretched or compressed.
Measure the center point of each target with the survey instrument.
Record the coordinates of each target with a unique ID for the target.
For the coordinate system and the file format that Aura uses, see Process scan data with Ground Control Points (GCPs).
Step 6: Plan the scan route
Plan one continuous route that goes past all the targets.
Keep a clear line of sight to each target.
Keep sufficient space to move around each target.
Plan the route to go past each target at 1.5 m to 5 m (5 ft to 16 ft).
Plan time to stop for several seconds at each target.
If possible, go past each target more than one time. For example, go past it at the start and at the end of a loop.
Outcome
The targets cover the full site in an irregular layout. Each target is placed and surveyed, and the scan route goes past each target. The site is ready for the scan.
Additional information
Capture a scan with Ground Control Points (GCPs) explains how to capture the targets during the scan.
Georeferencing compares GCPs with the other georeferencing methods.