
This article explains how to install or remove the GX1 Battery from the GX1.
What you will need
A GX1.
A GX1 Battery.
Procedure
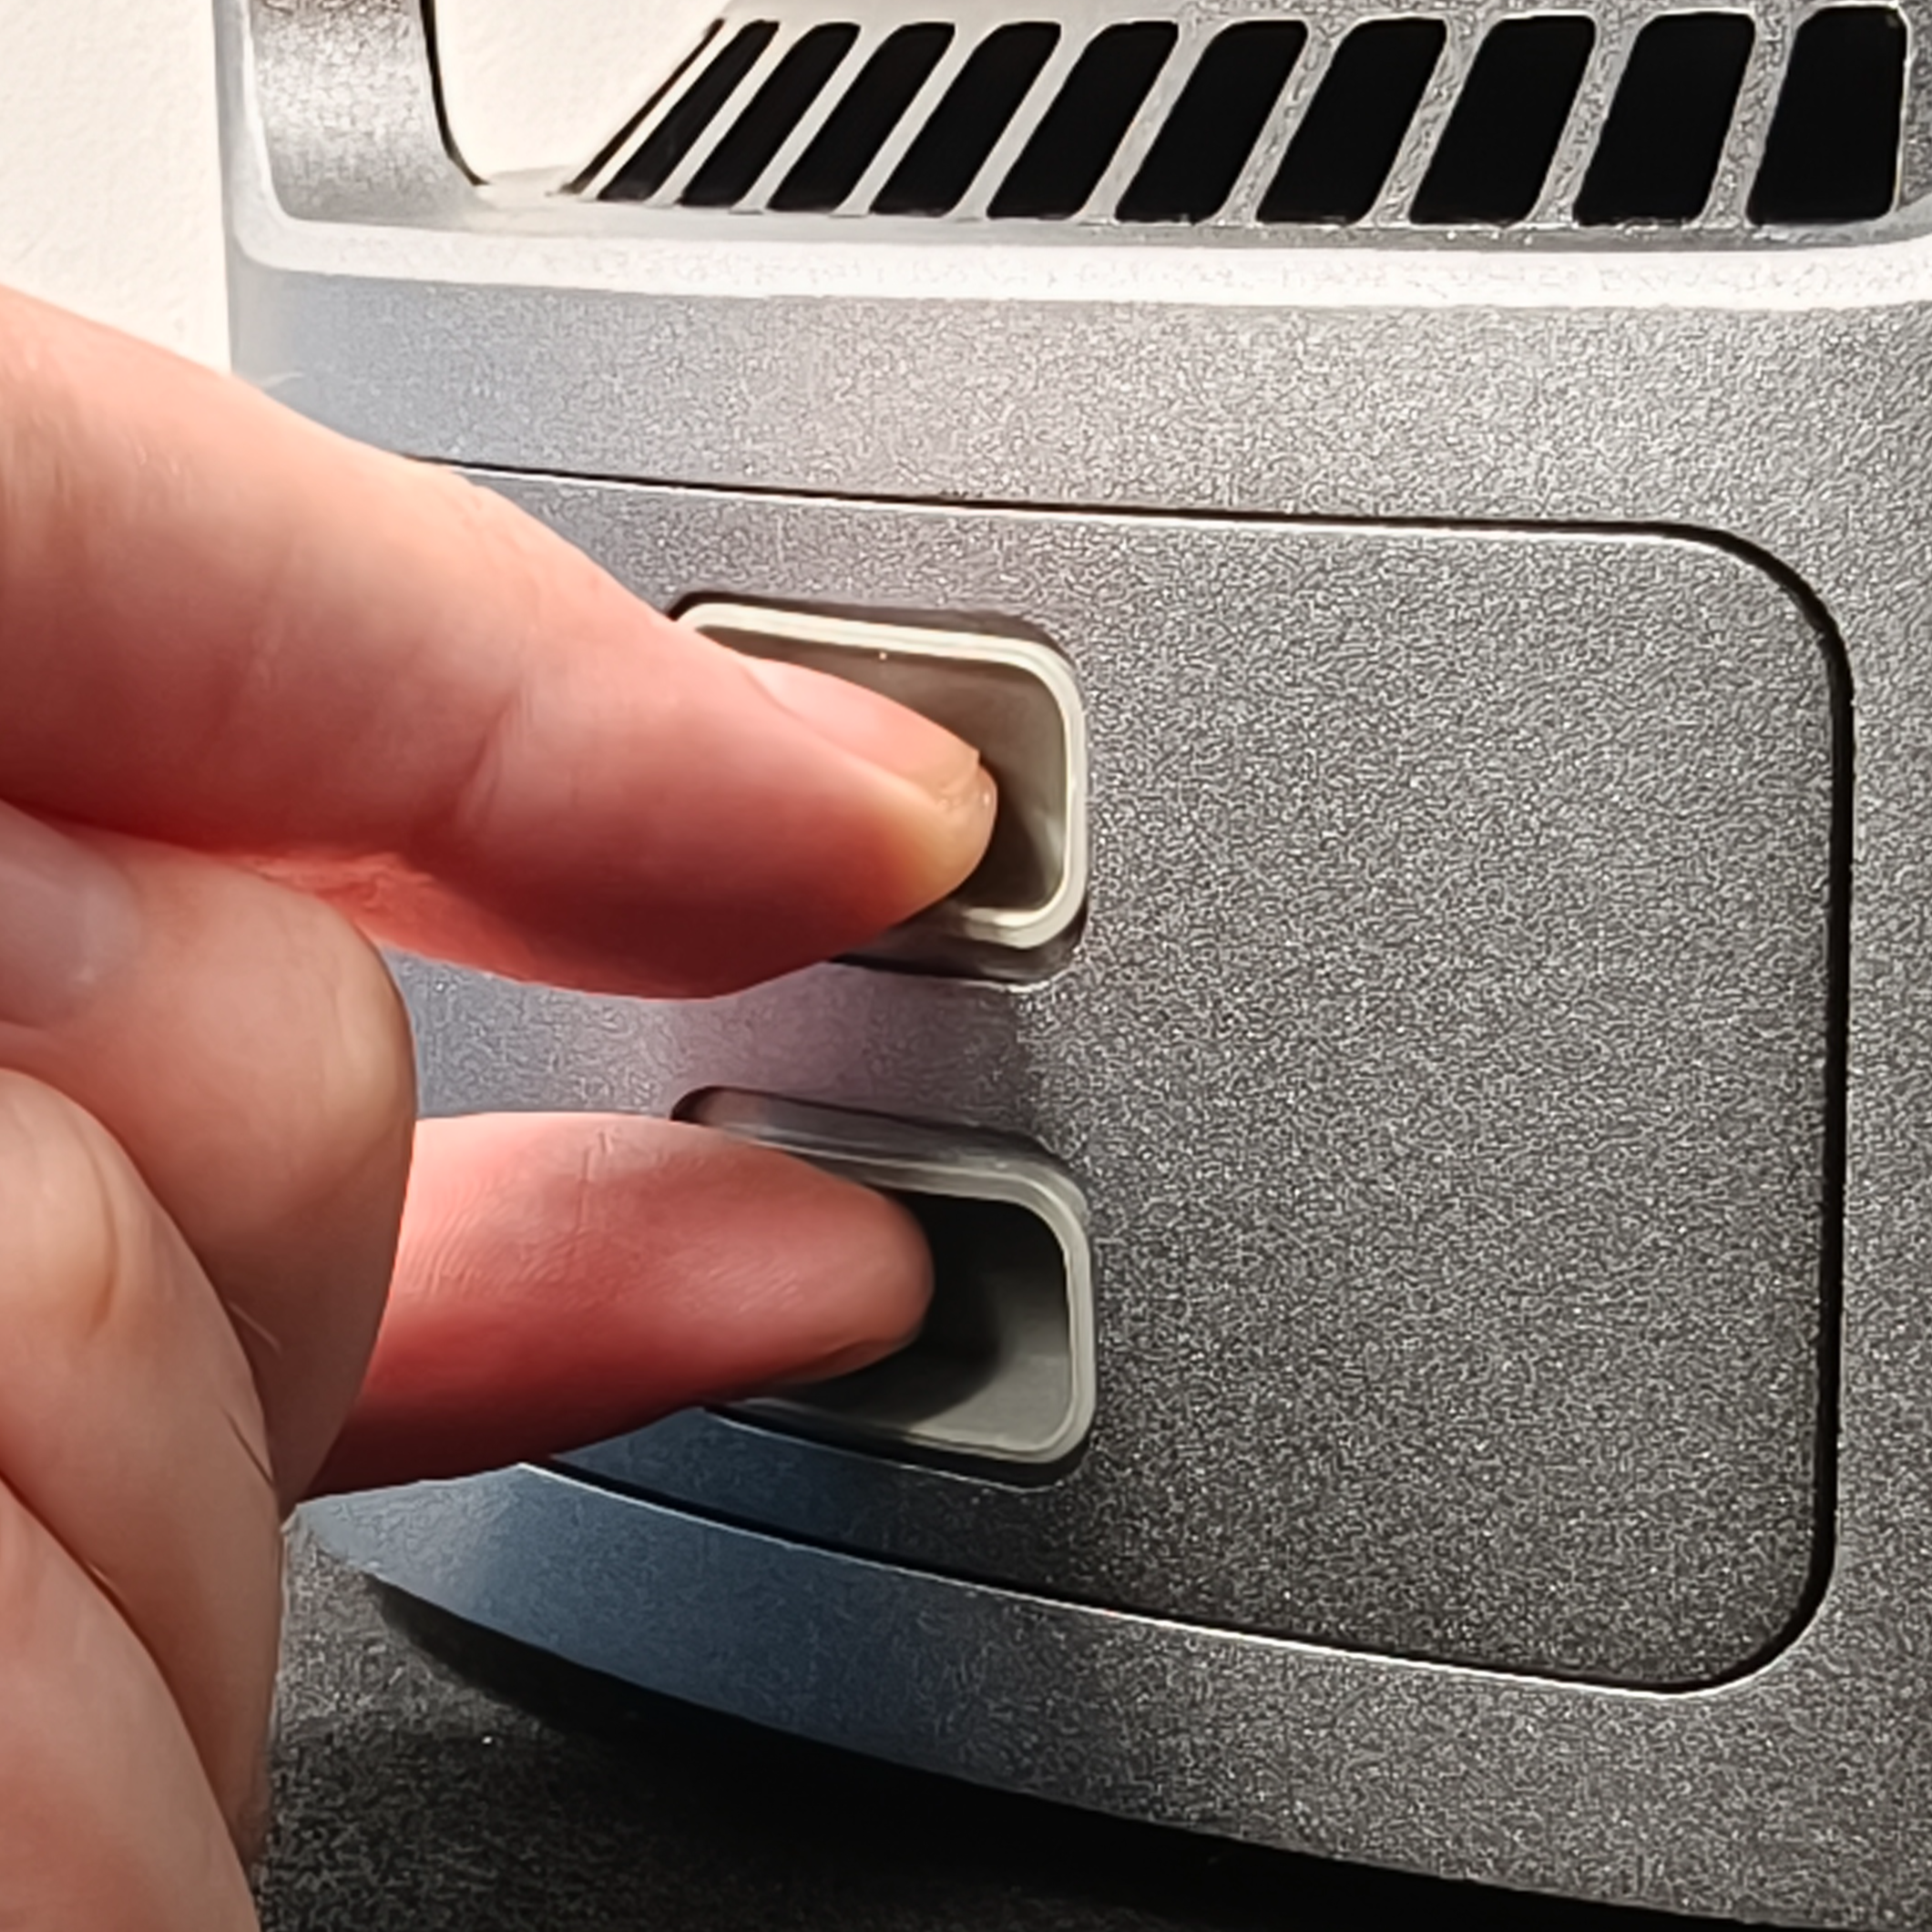
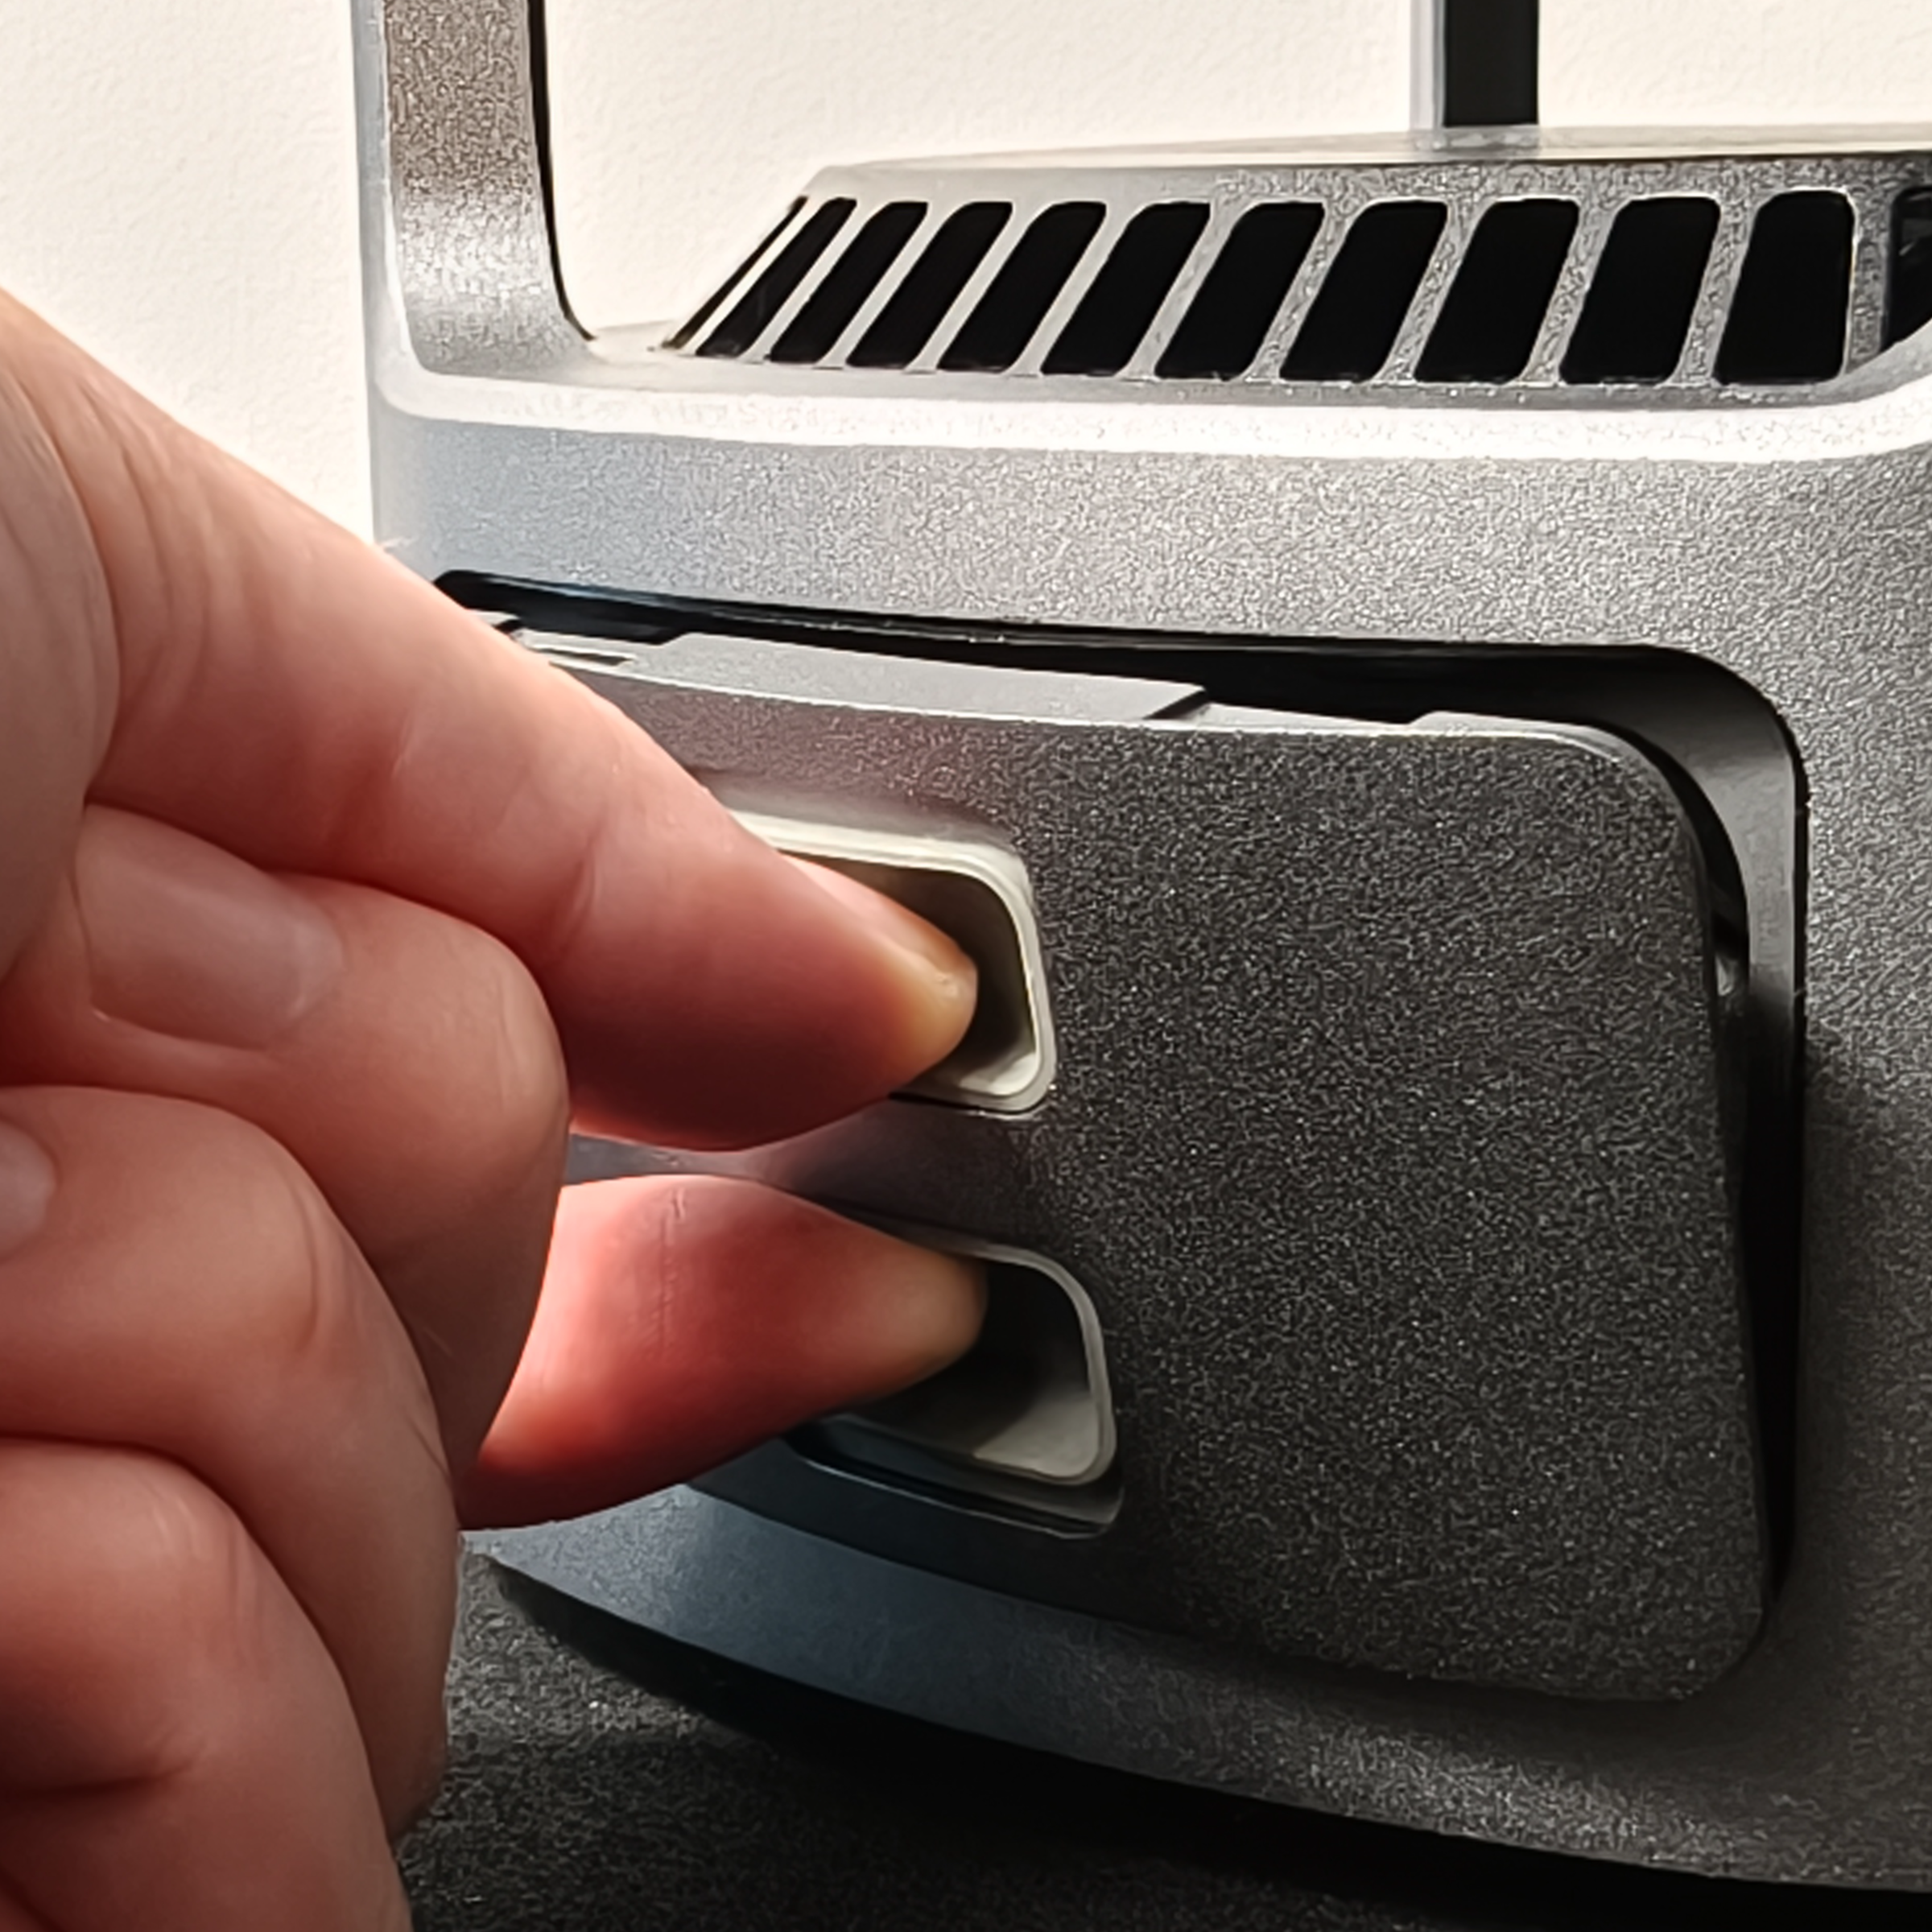
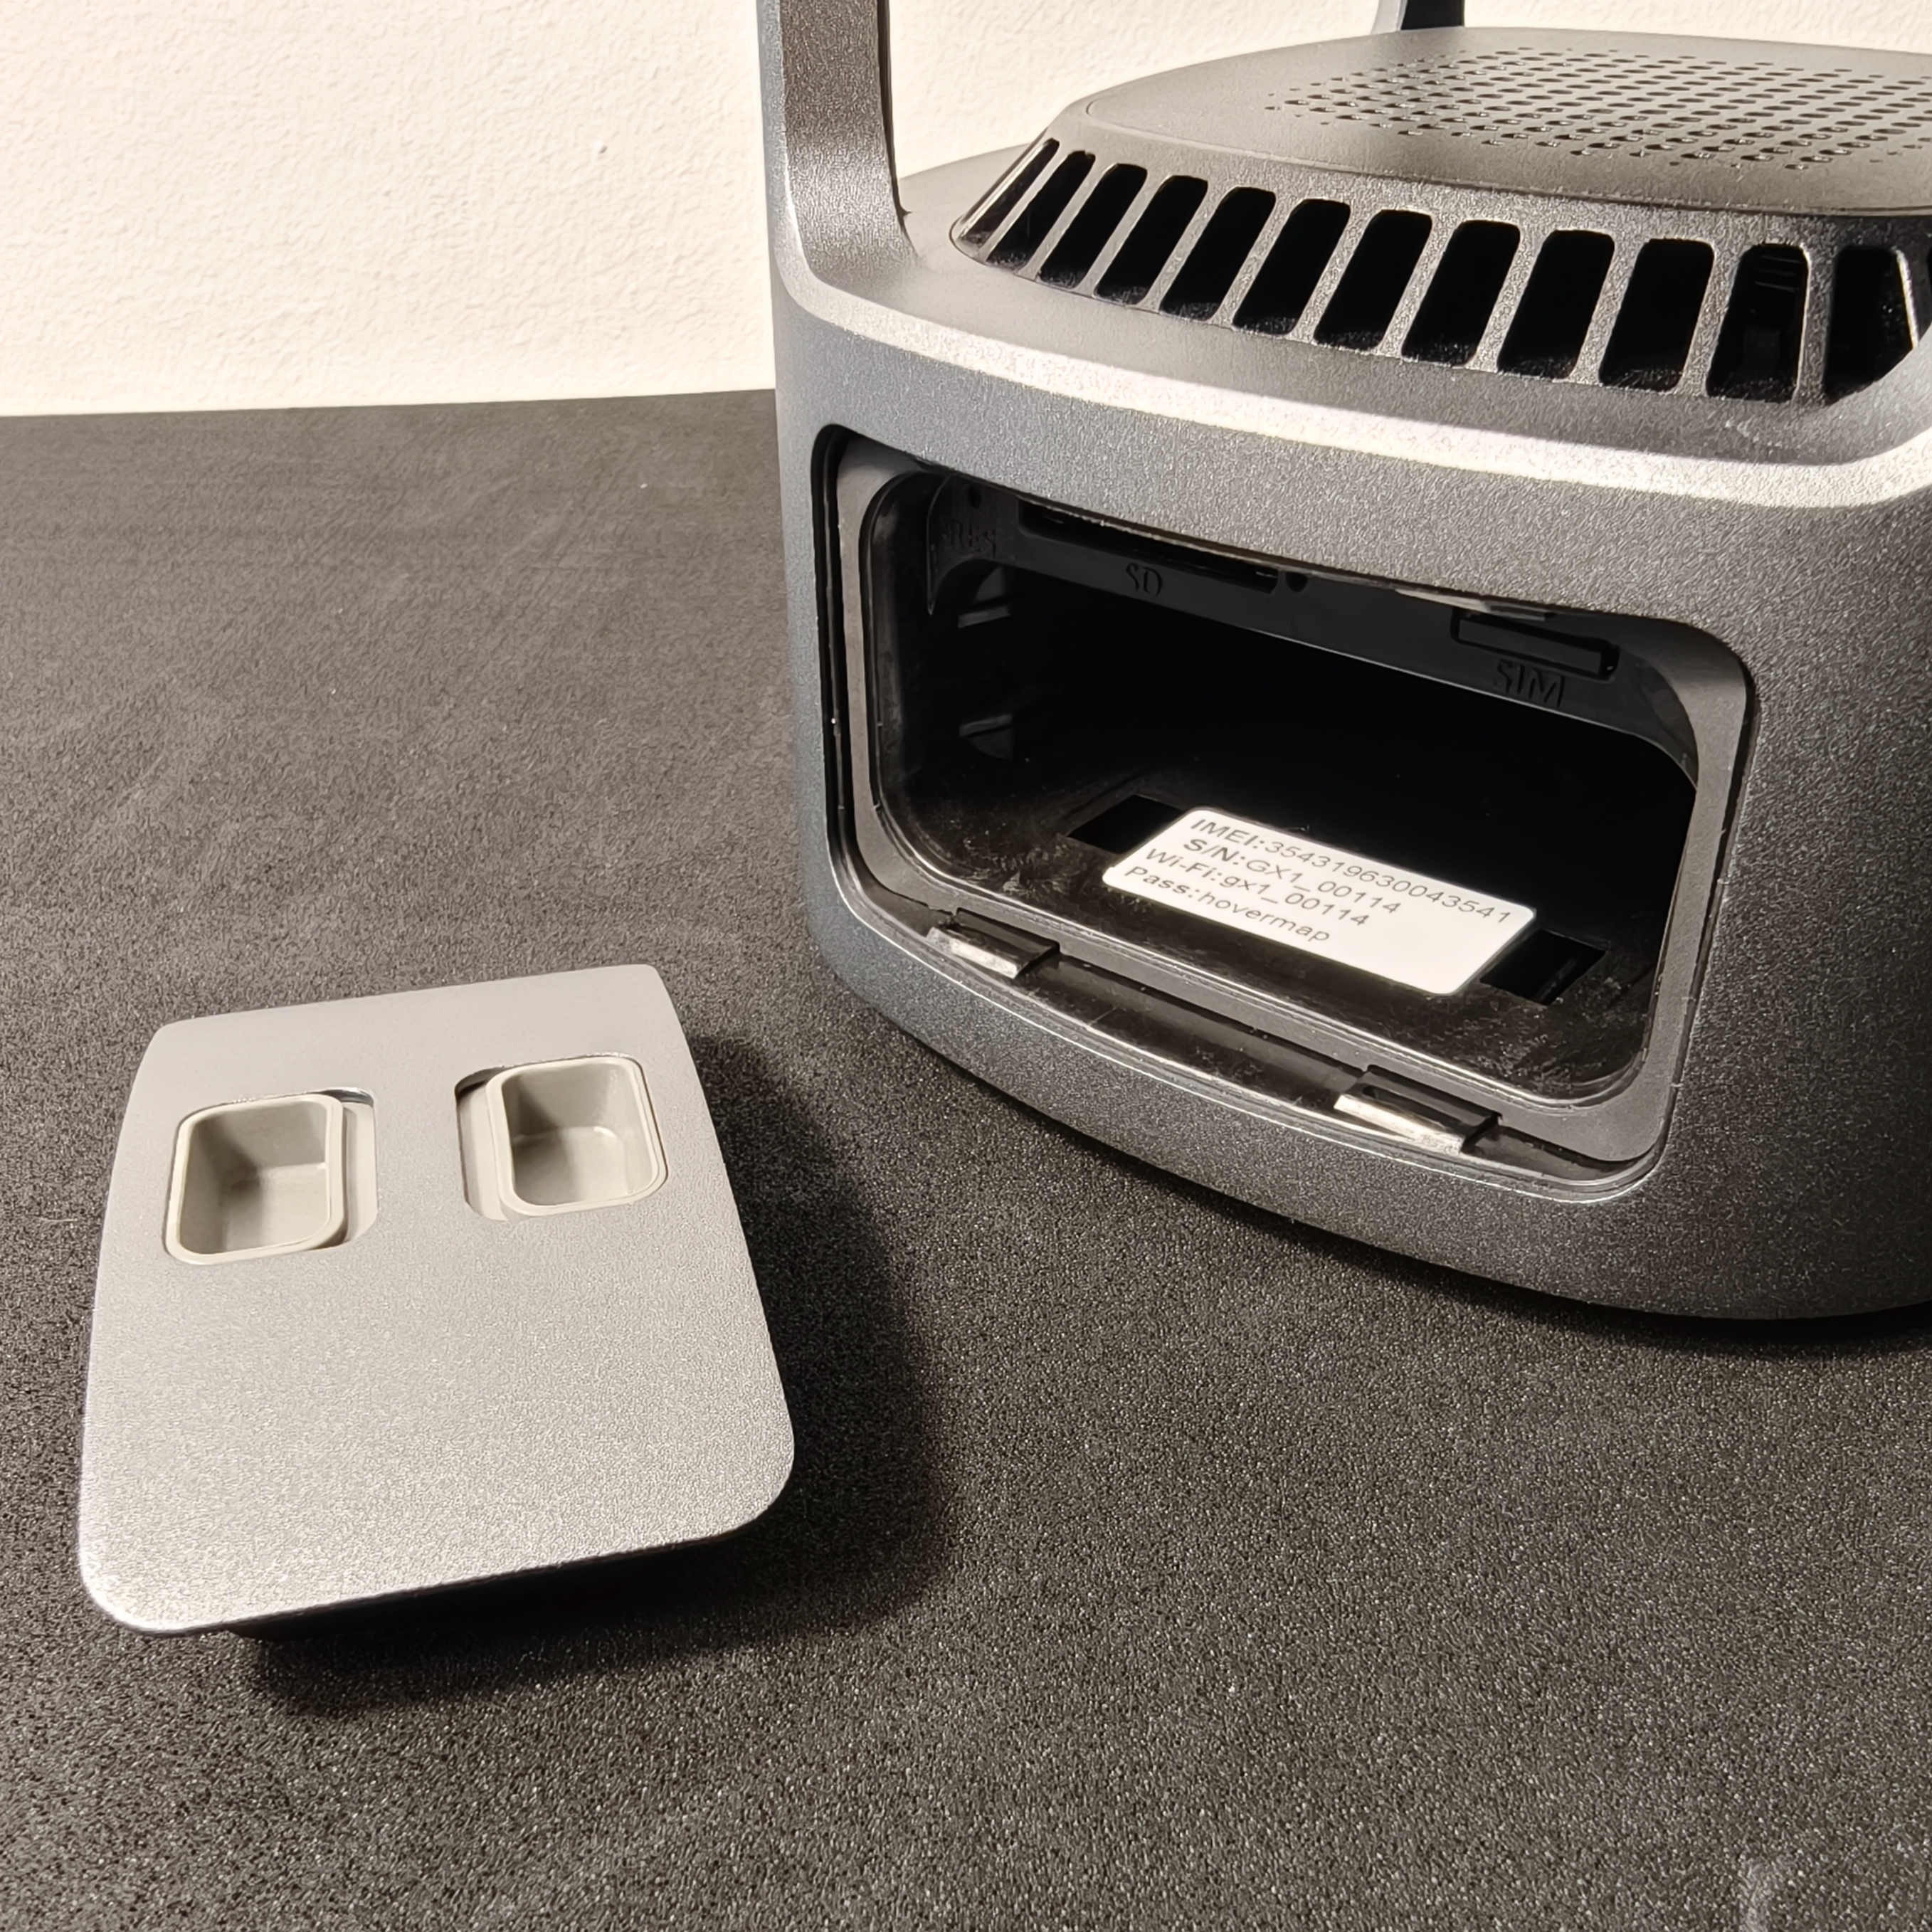
Step 1: Open the Battery Bay Door
Squeeze the Squeeze Clips on the Battery Bay Door and pull it away from the GX1.
|
|
|
Step 2: Install a battery
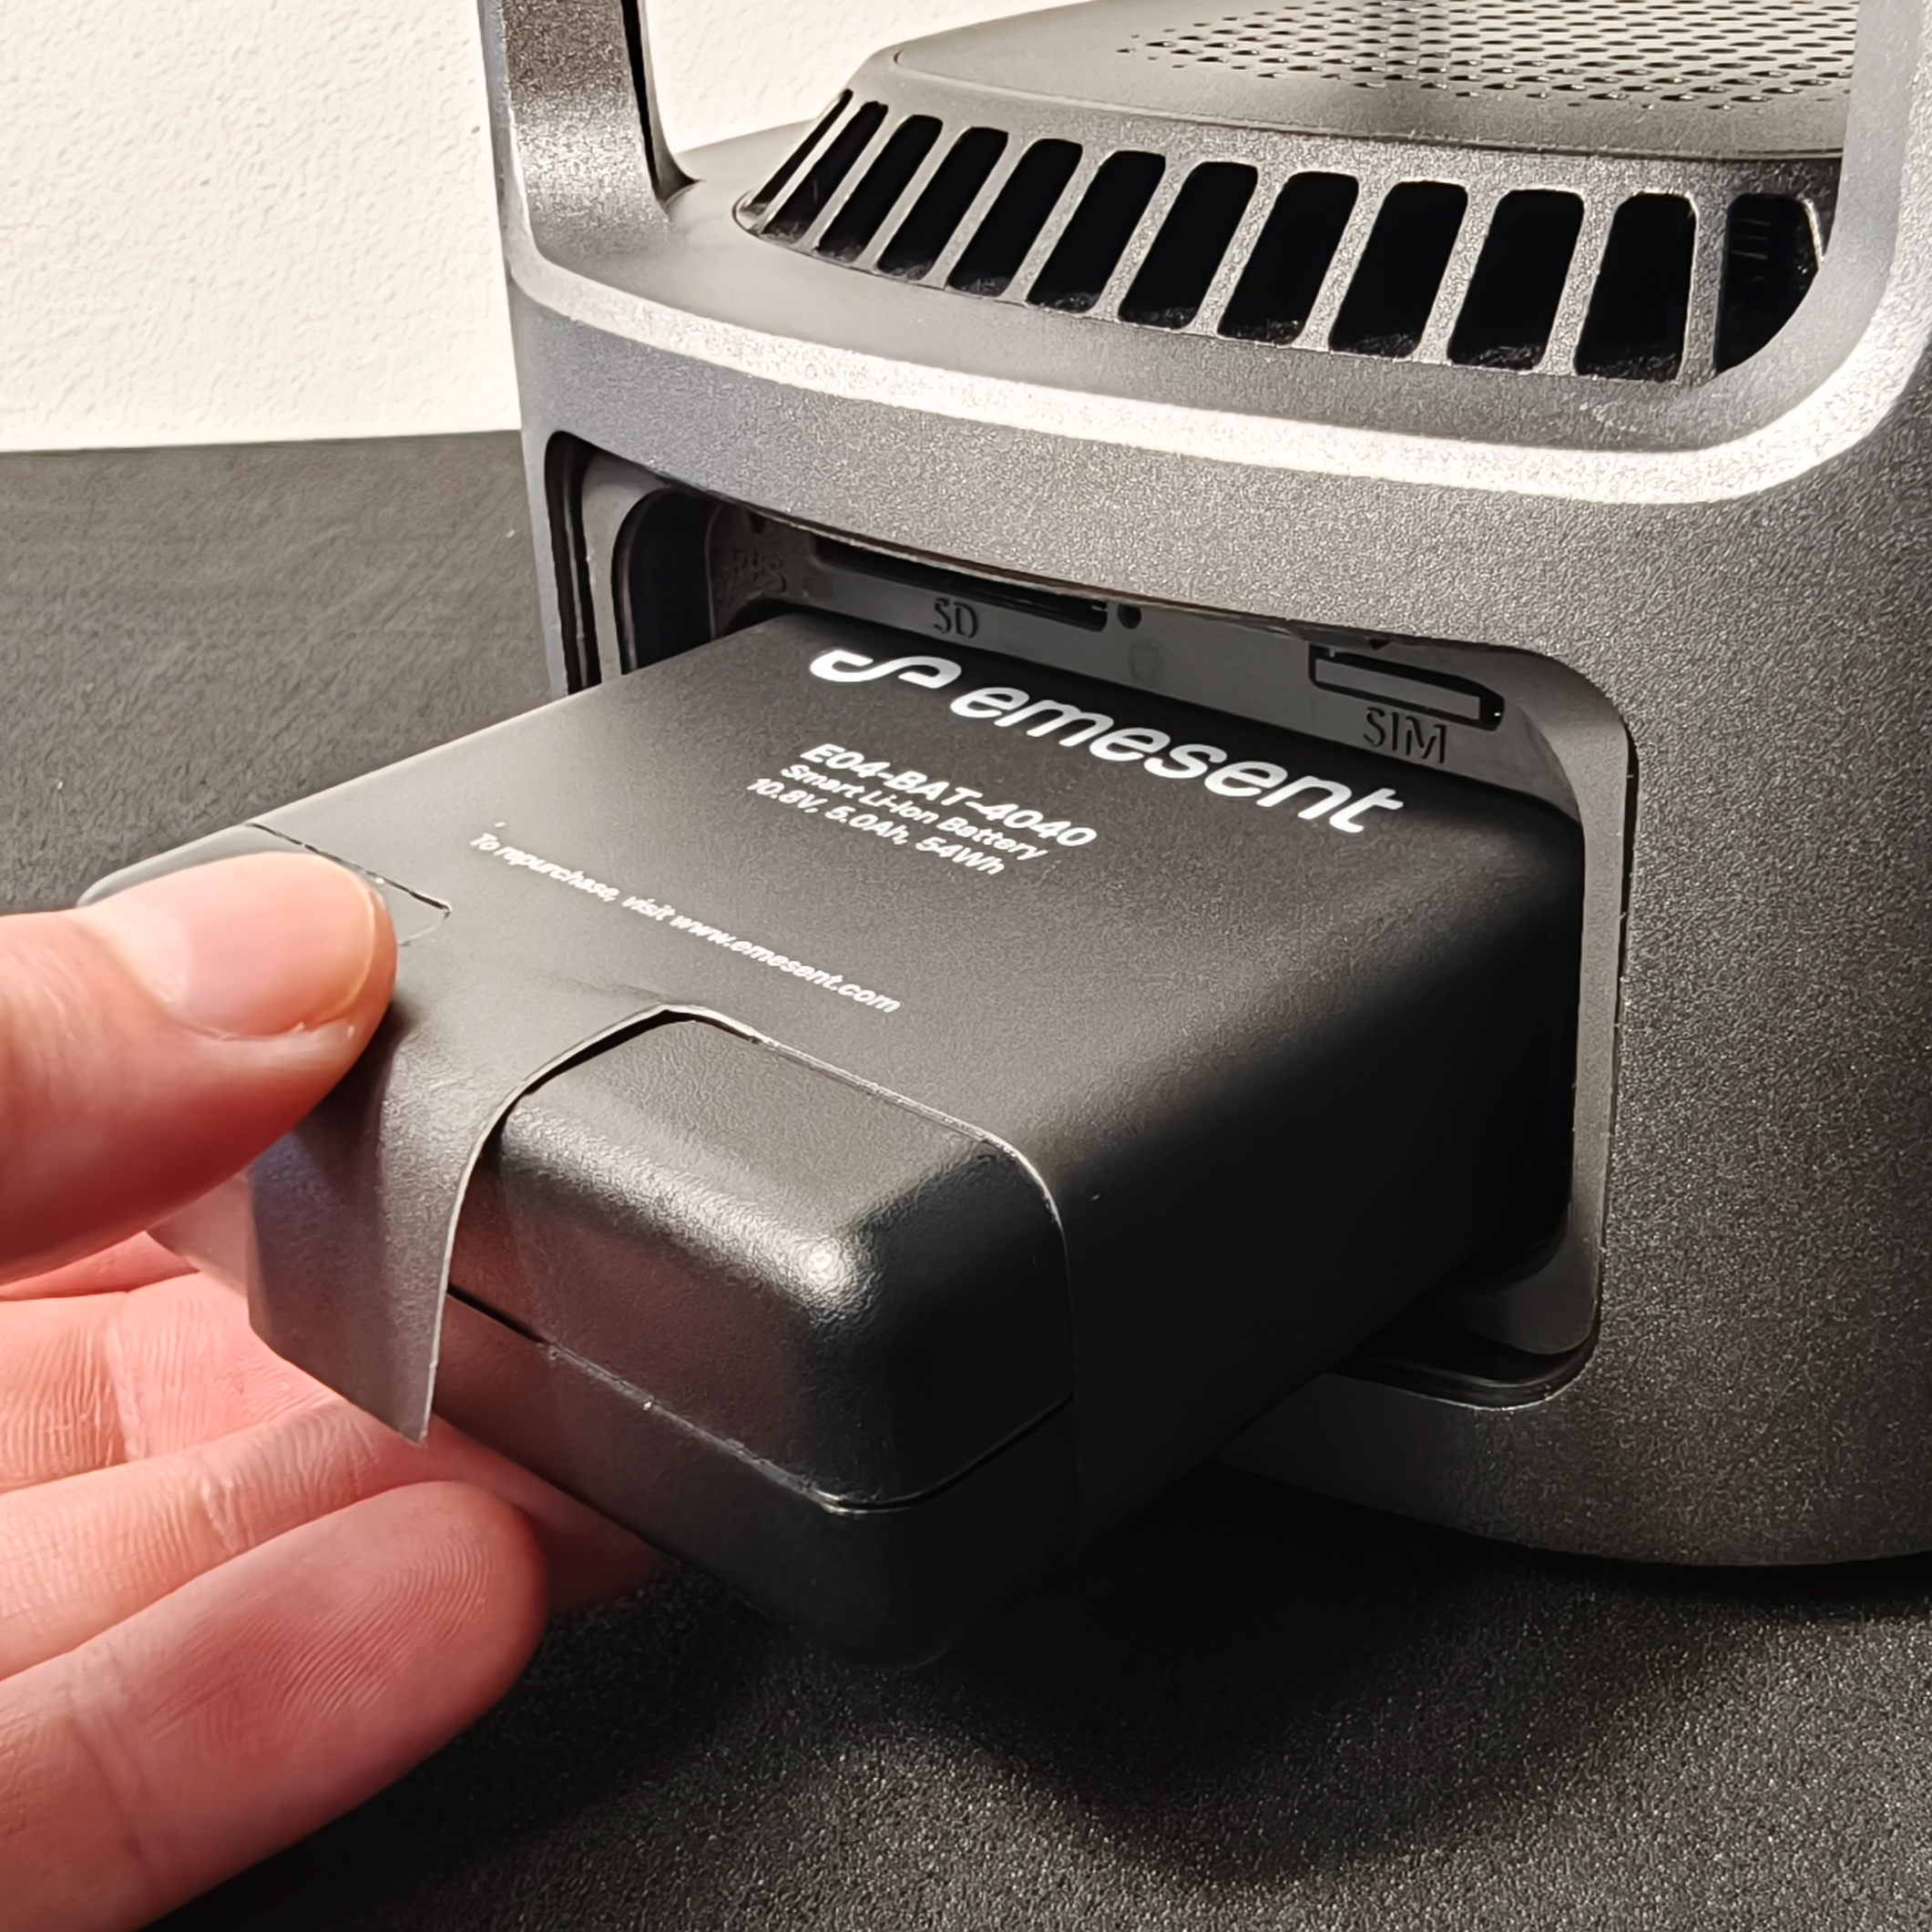
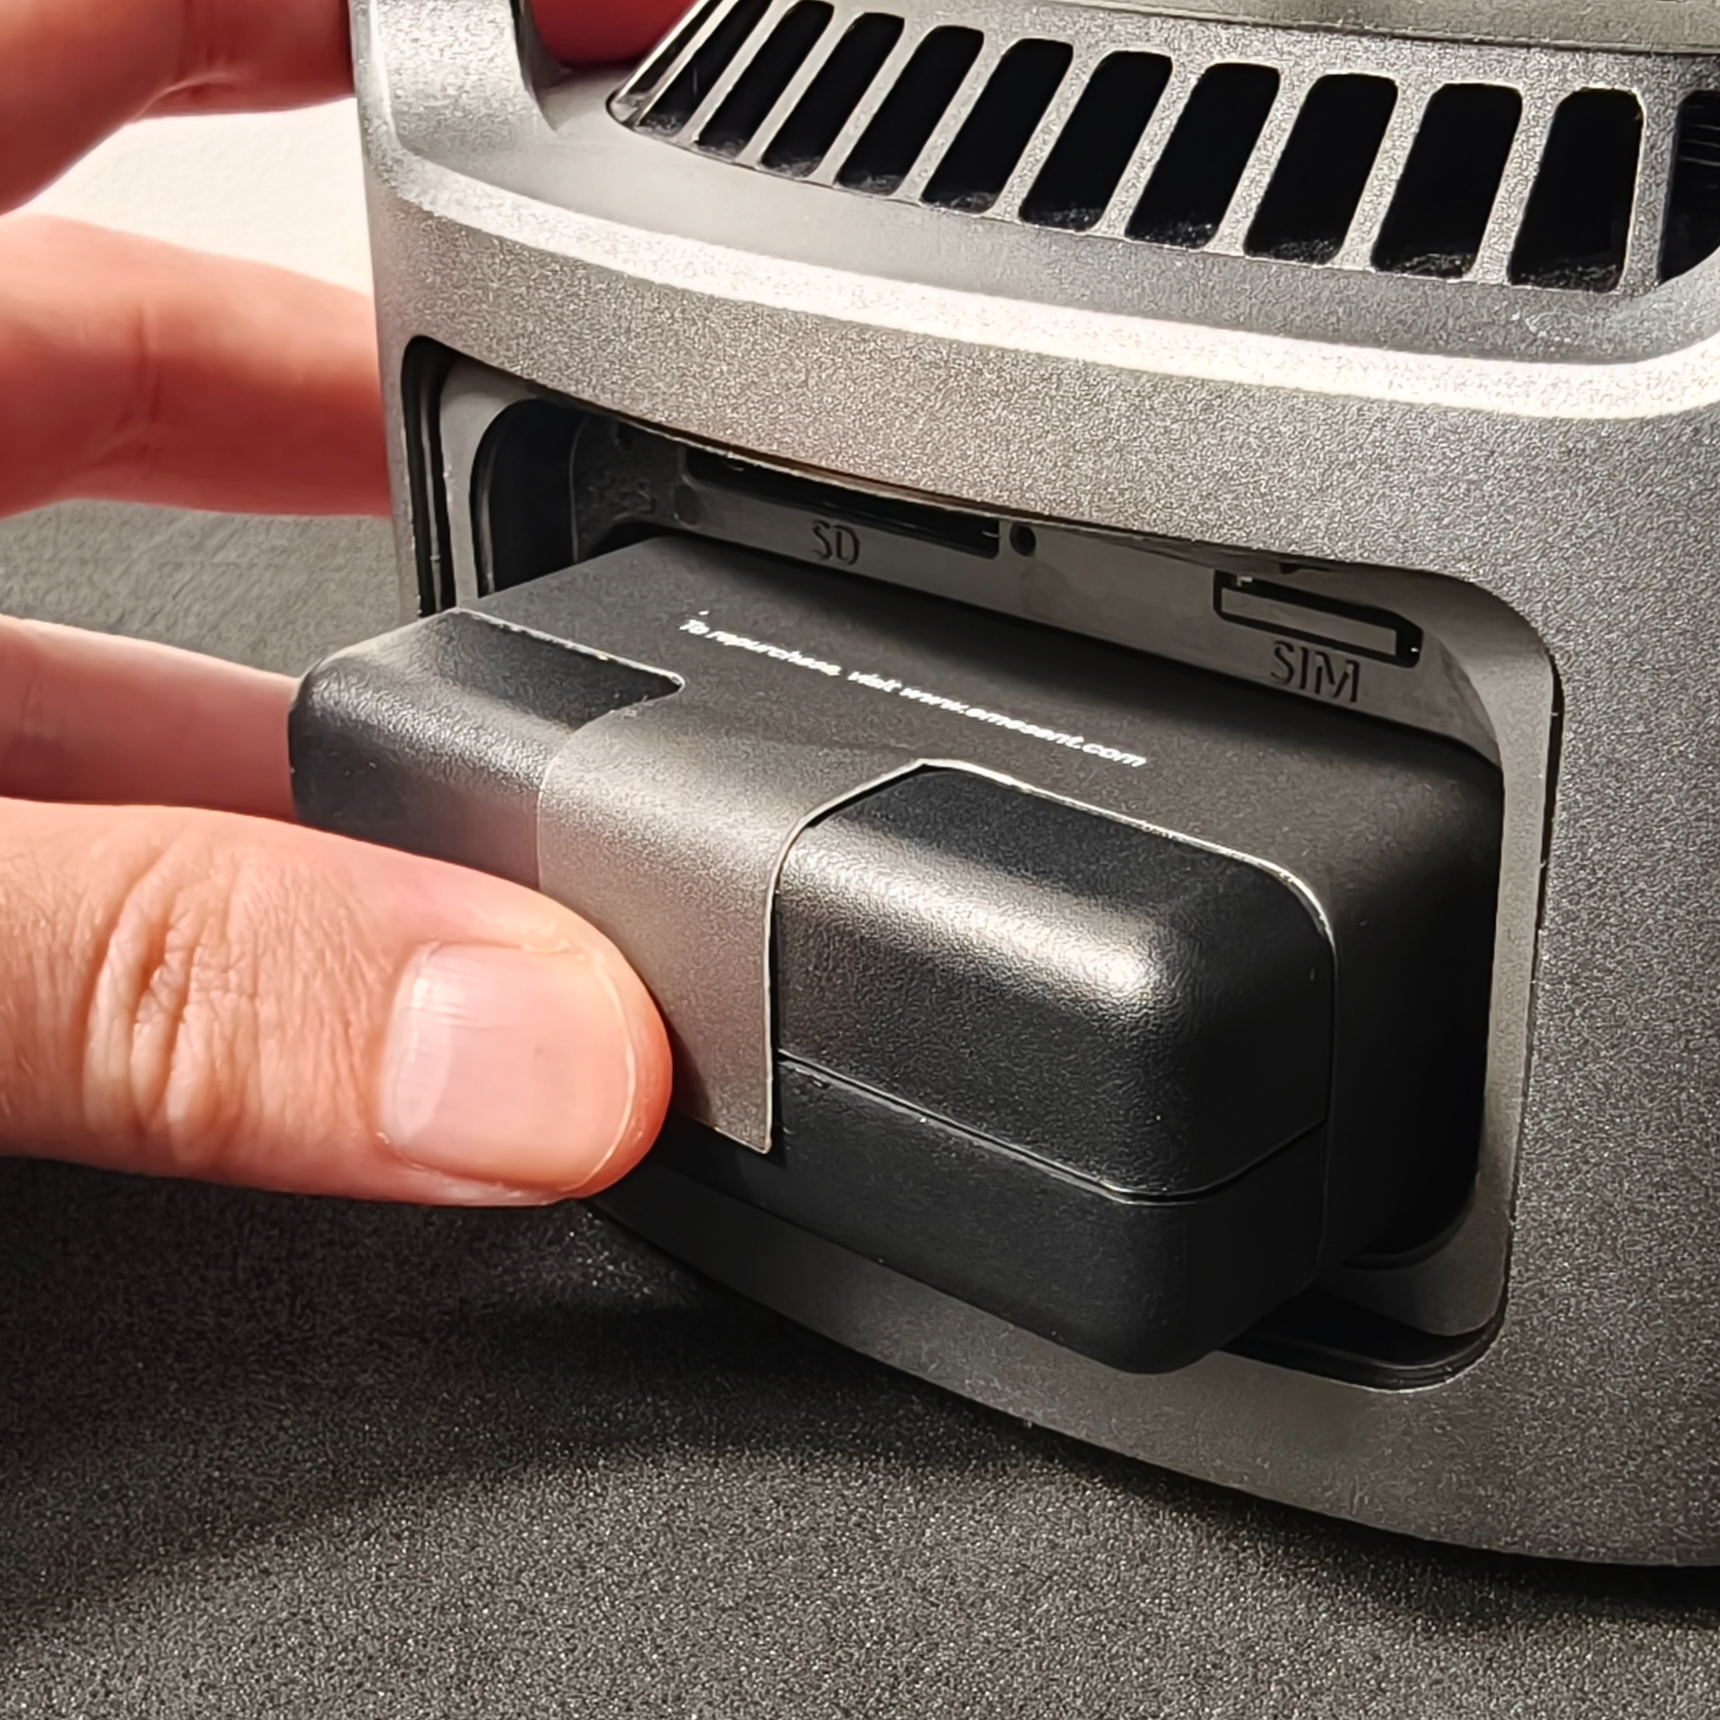
Align the GX1 Battery correctly before sliding it in. Do not force it into the bay.
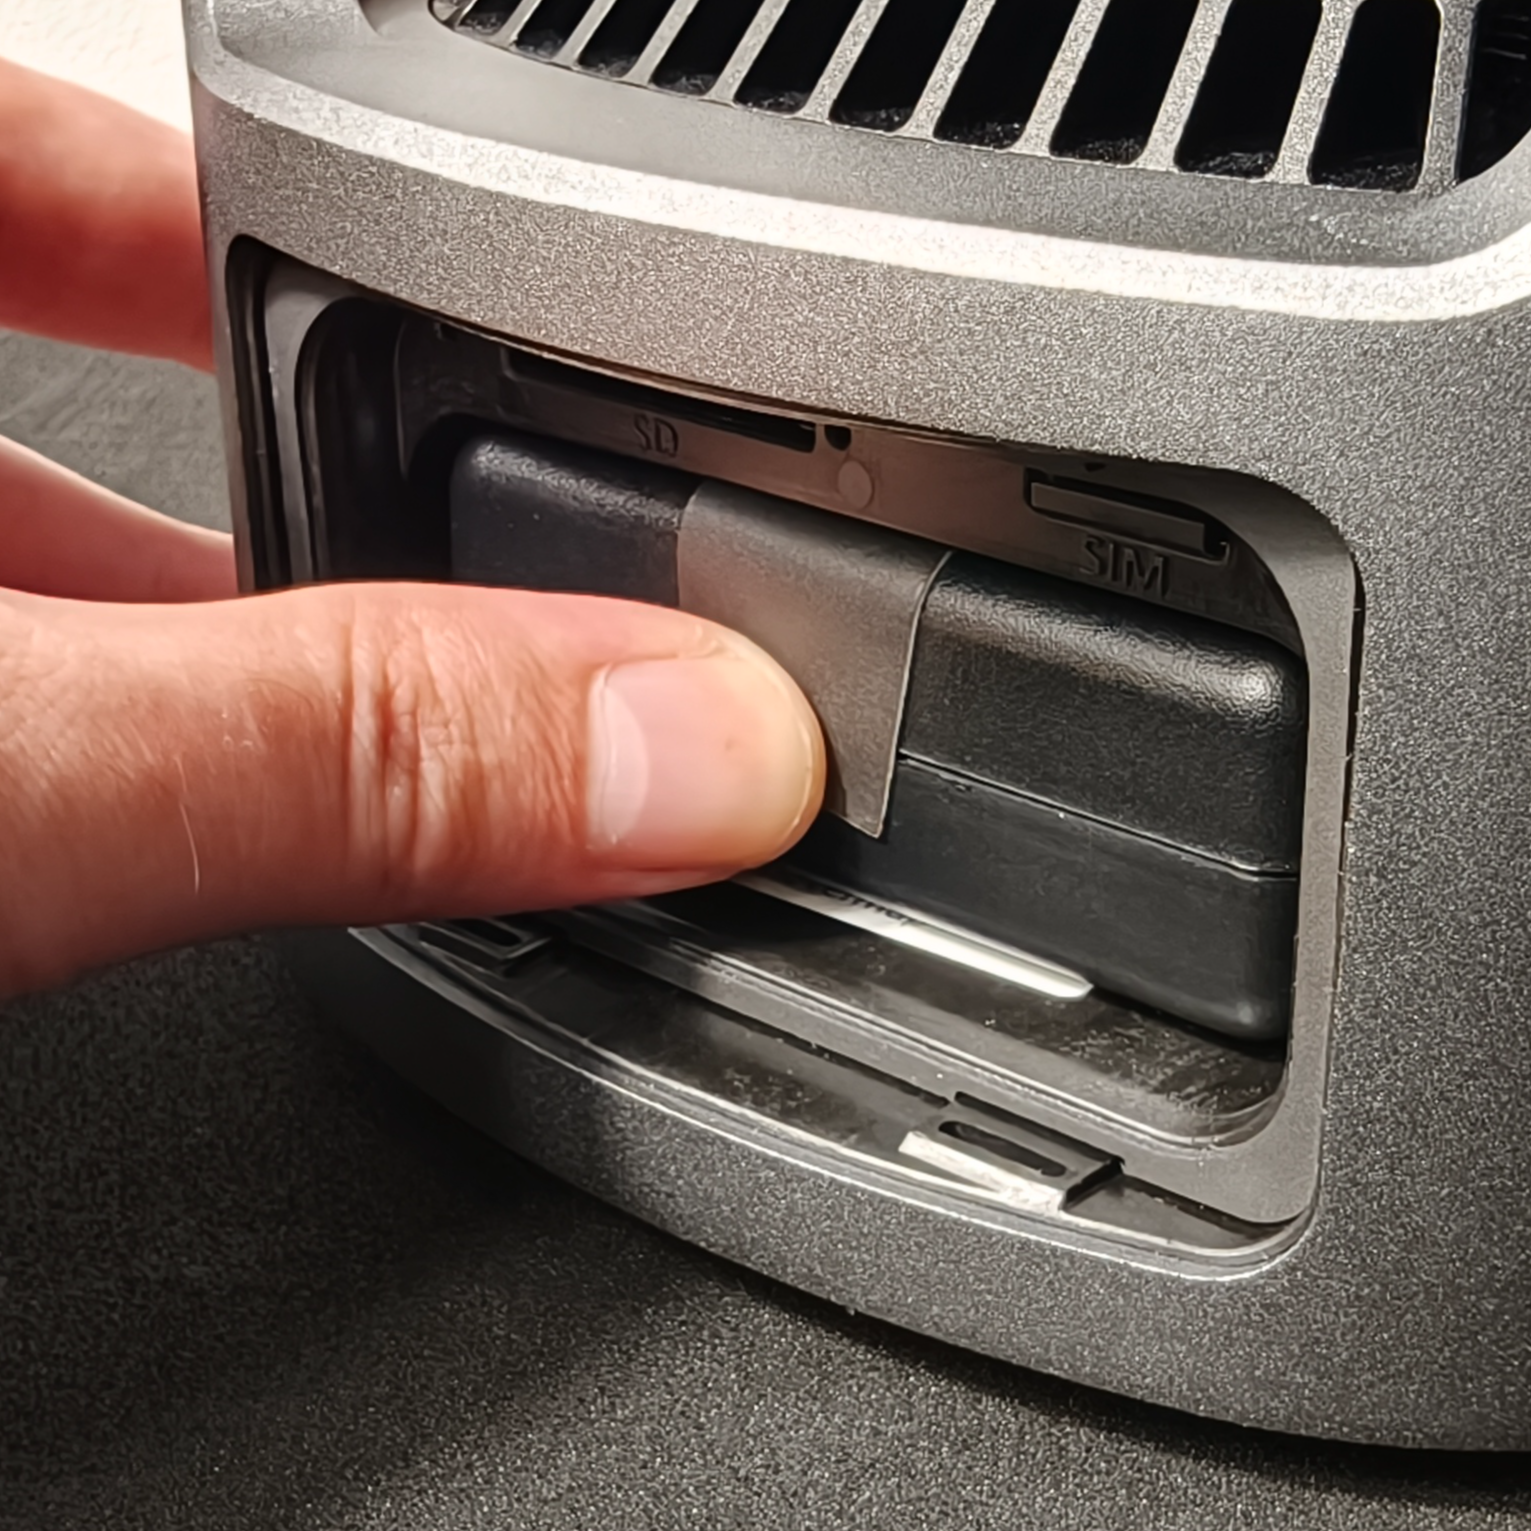
Align the GX1 Battery with the contacts facing down and the Battery Removal Tab at the top.
Slide the GX1 Battery into the bay until it is fully seated.
Press the GX1 Battery firmly to confirm it is seated.
|
|
|
Step 3: Close the Battery Bay Door
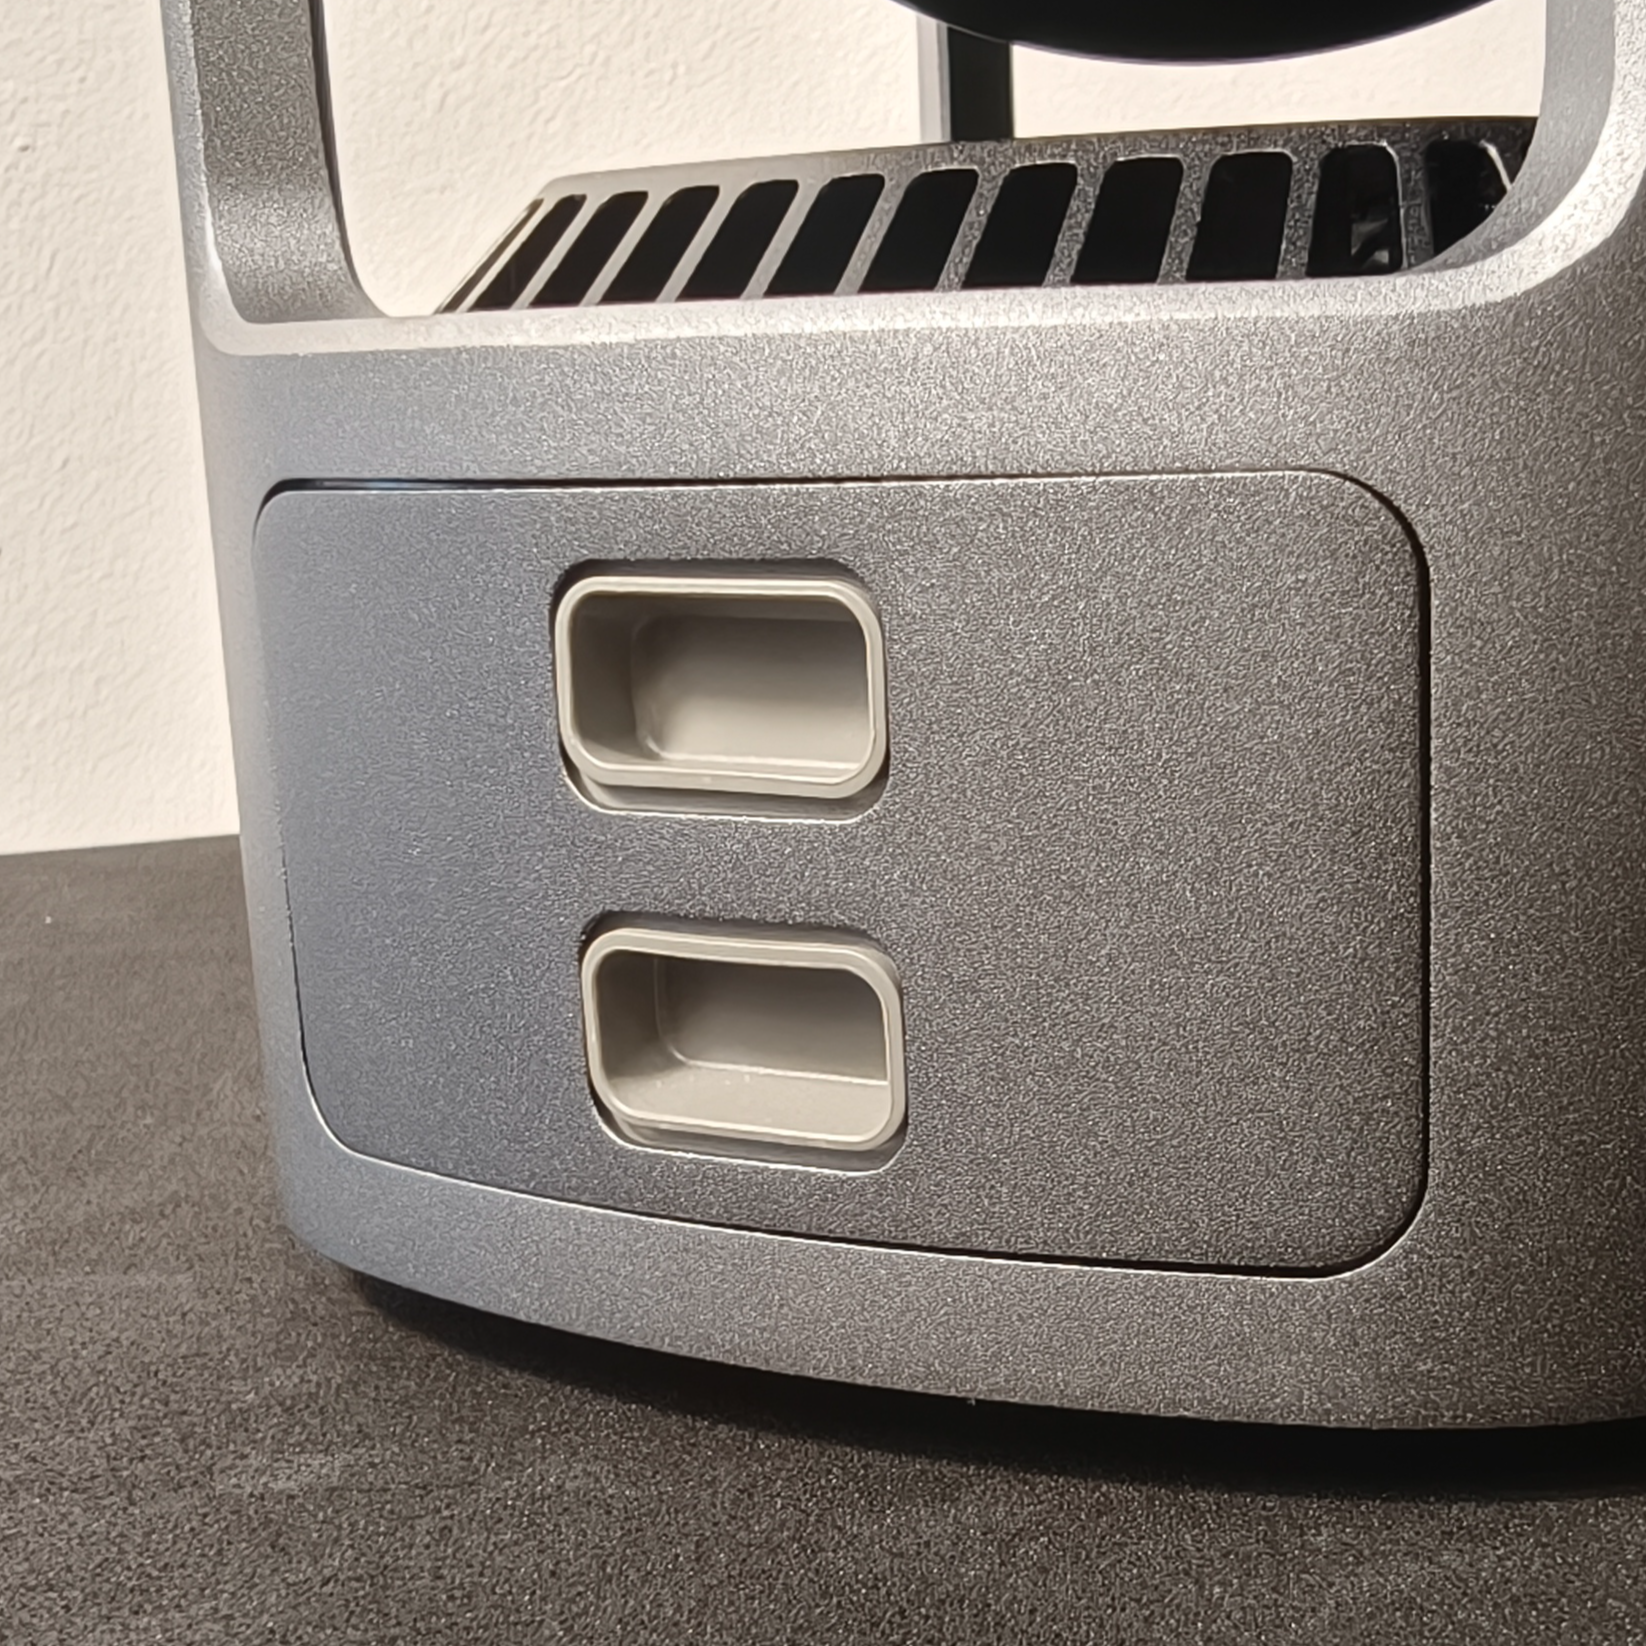
Align the Battery Bay Door with the opening.
Pinch the Squeeze Clips on the Battery Bay Door together and pull the door away from the GX1.
|
|
Step 4: Remove the battery
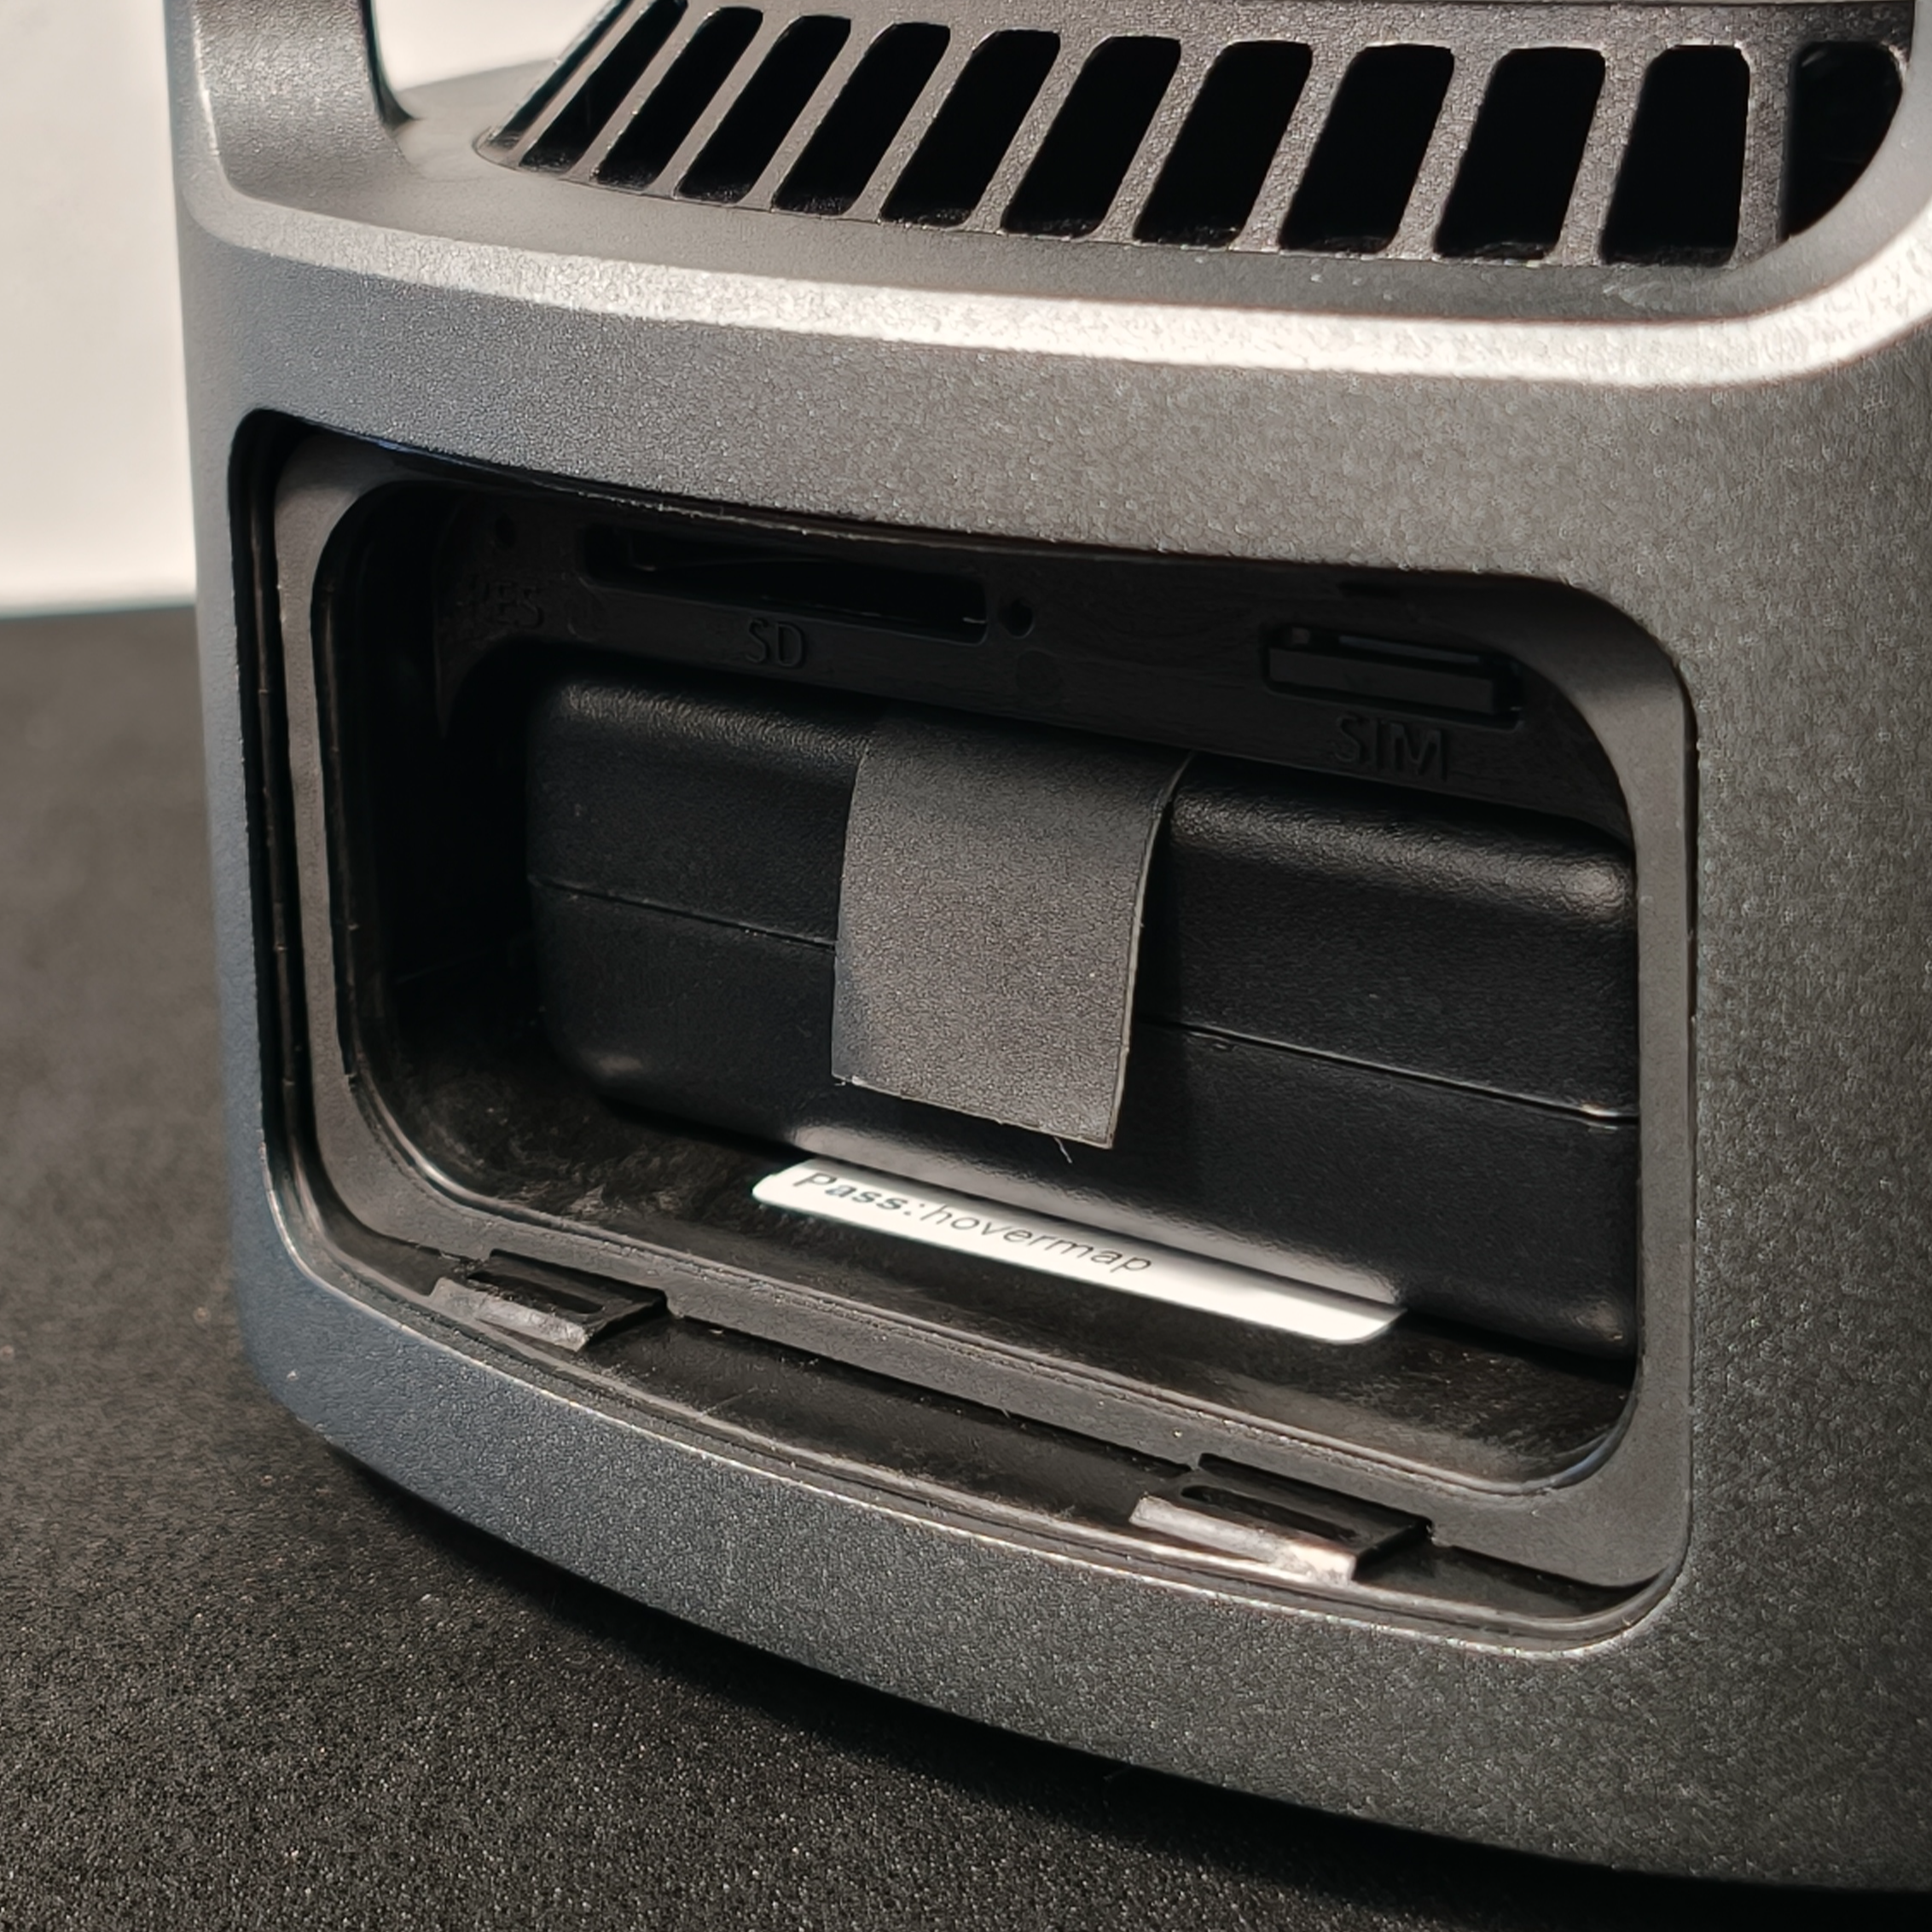
Open the Battery Bay Door.
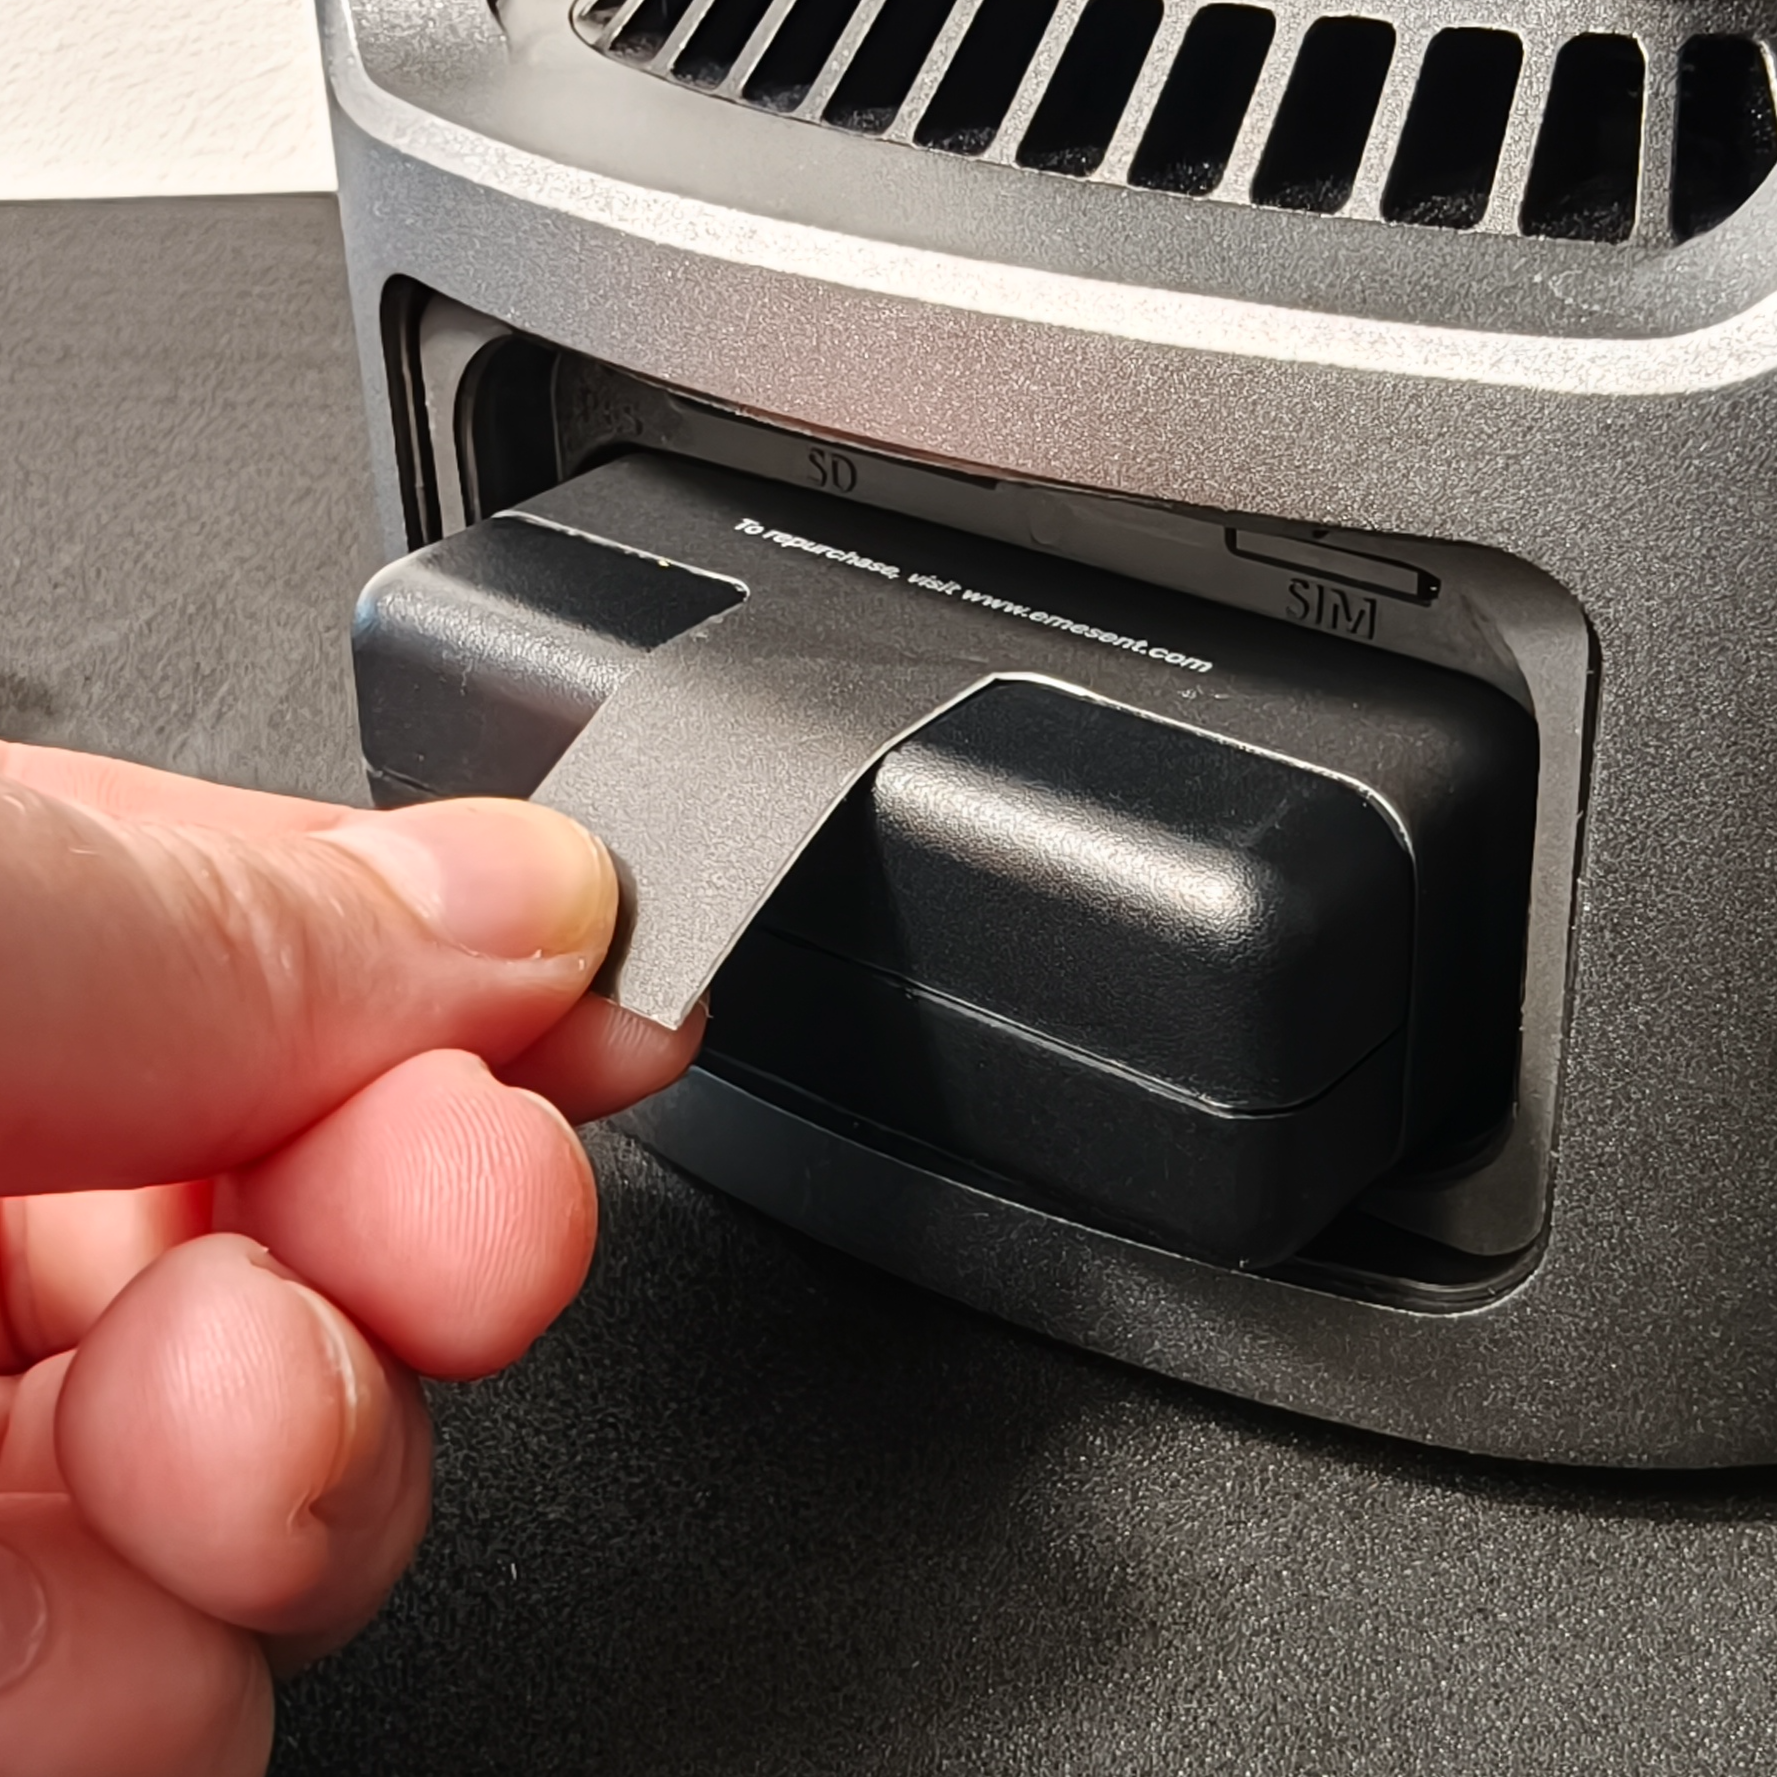
Pull the GX1 Battery out using the Battery Removal Tab.
|
|
Outcome
The GX1 Battery is now installed or removed. With a charged GX1 Battery installed and the Battery Bay Door secured, the GX1 is ready to power on for operation. With the GX1 Battery removed, the GX1 is safe to transport or store.
Additional information
For instructions on charging, see Charge the GX1 Battery.