
Select a workflow then click Processing Settings to access advanced customization settings. In addition to the General and Output tabs, an additional tab specific to the selected workflow may be available.
General
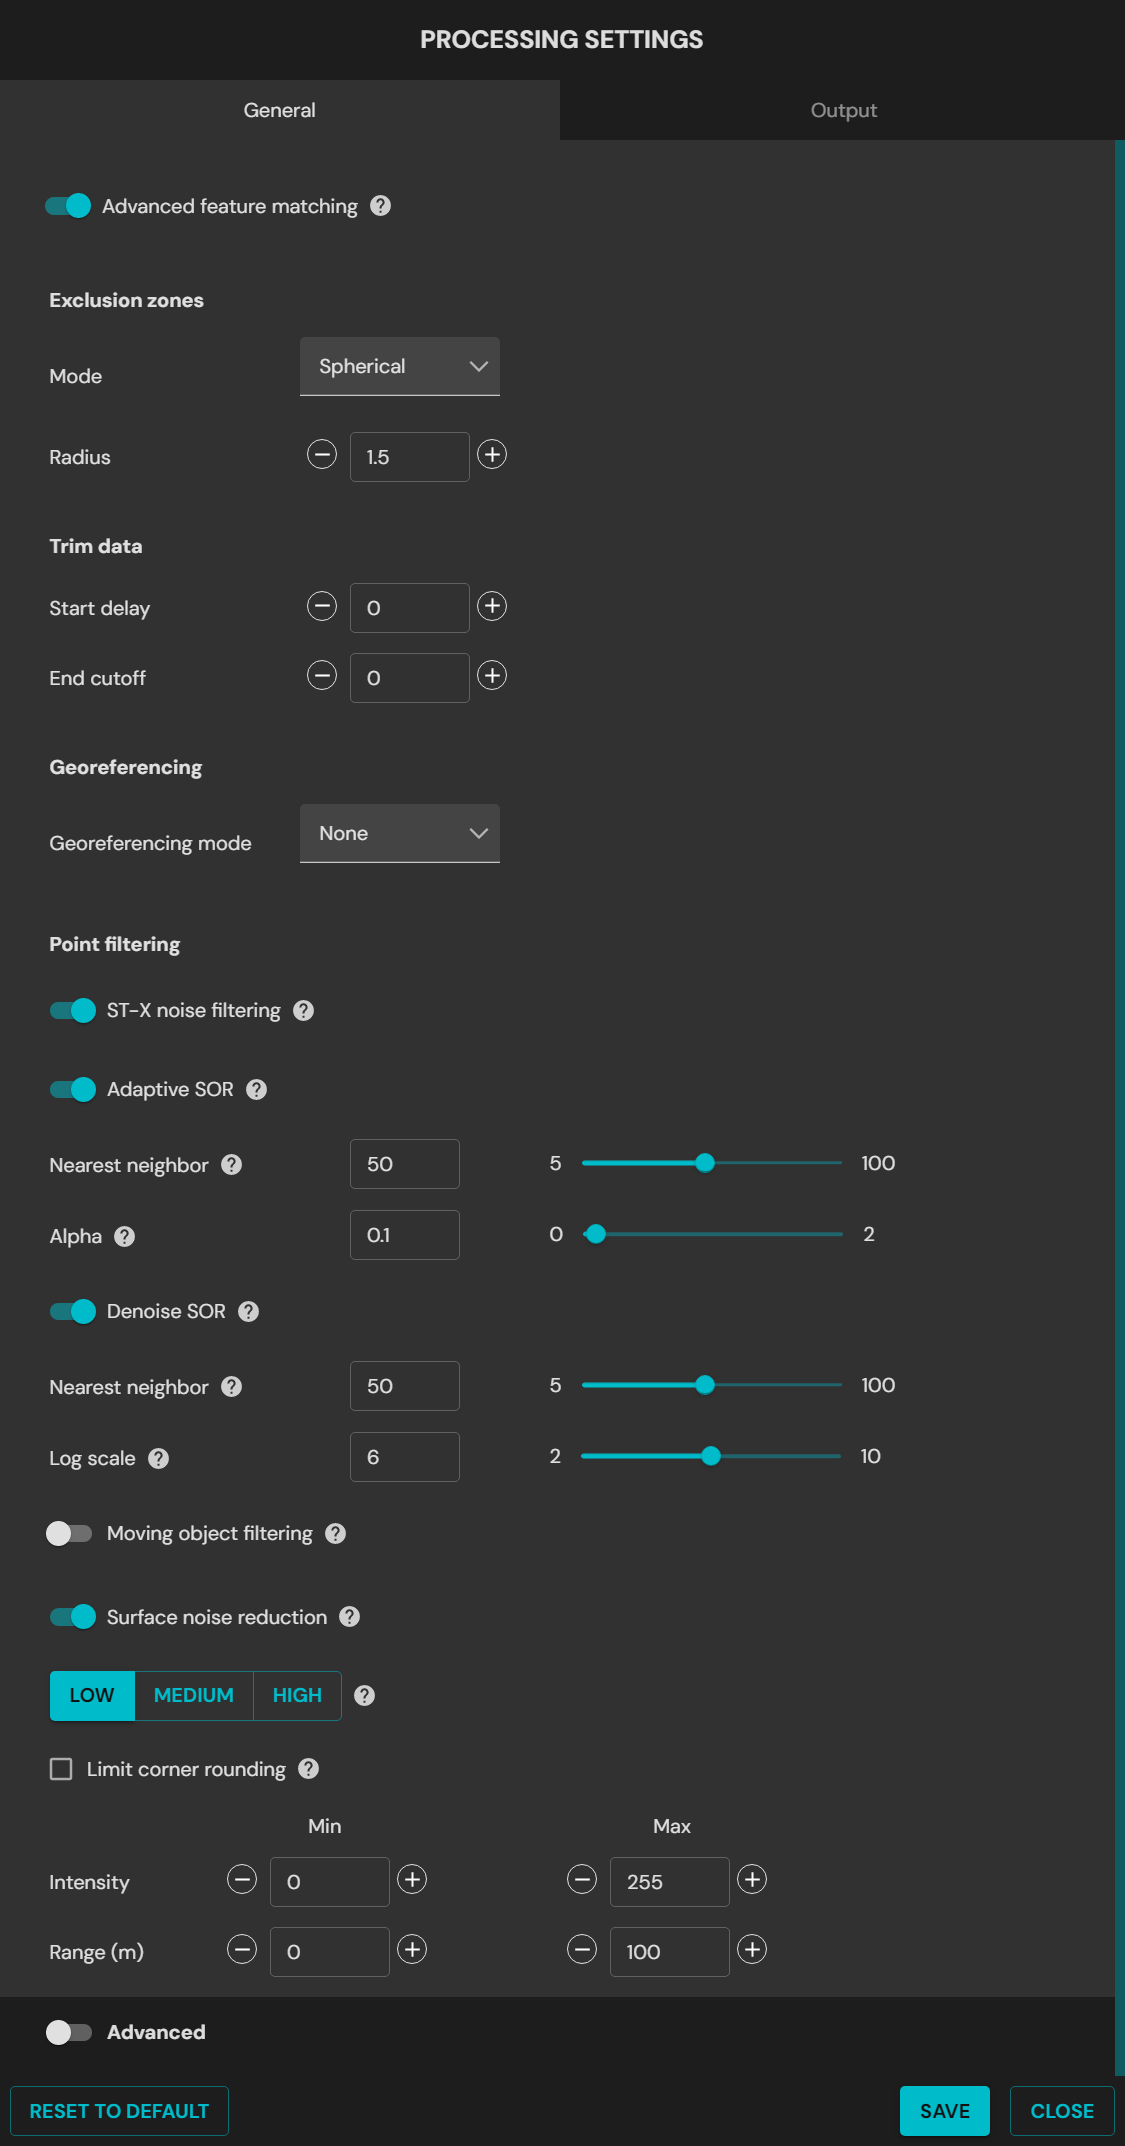
General Processing Settings
Field | Data |
|---|---|
Advanced feature matching | Enabling this stage of SLAM processing can improve results in most environments, but disabling it may provide better results in complex or repeating environments. |
Exclusion Zones | You can use this setting to exclude points close to Hovermap that may interfere with the SLAM algorithm or add noise to the point cloud (for example, those created by Hovermap itself, a drone, vehicle, or operator). We recommend that you use the default setting. Mode:
|
Trim Data | Use this setting to specify the time (in seconds) to ignore data from either end of your dataset. This can be useful, for example, if your scan gets off to a difficult start.
|
Georeferencing |
|
For optimal results, ensure that the Georeferencing mode and GNSS receiver type match the hardware used during data collection. While the resulting point cloud remains usable, the accuracy may be compromised. | |
Base coordinate reference system | Select the CRS in which the data was originally collected. This information is essential for accurate transformations and reprojections to the target CRS. |
Reprojection | Toggle on to reproject the point cloud being processed.
|
Point Filtering | You can integrate automated filtering into the processing workflow by enabling any of the following noise filters. This may eliminate the need for a separate filtering step after processing. Note that only default settings are used, there are no options to adjust the filtering parameters.
|
| |
| |
| |
| |
Reset to Default | Reset all settings to the default. |
Advanced The advanced settings contain additional processing parameters that can be adjusted to improve the output of the SLAM algorithm in certain circumstances. You should only use these settings when you are unable to achieve a quality output using the standard processing profiles. We recommend that you only use these settings after talking to Customer Support. | |
Local mapping | |
Time Window (Auto SLAM) |
|
Point Filtering |
|
Iterations |
|
Voxels |
|
Global registration | |
Point Filtering |
|
Iterations |
|
Voxels |
|
Velocity |
|
| |
Matching |
|
GCP
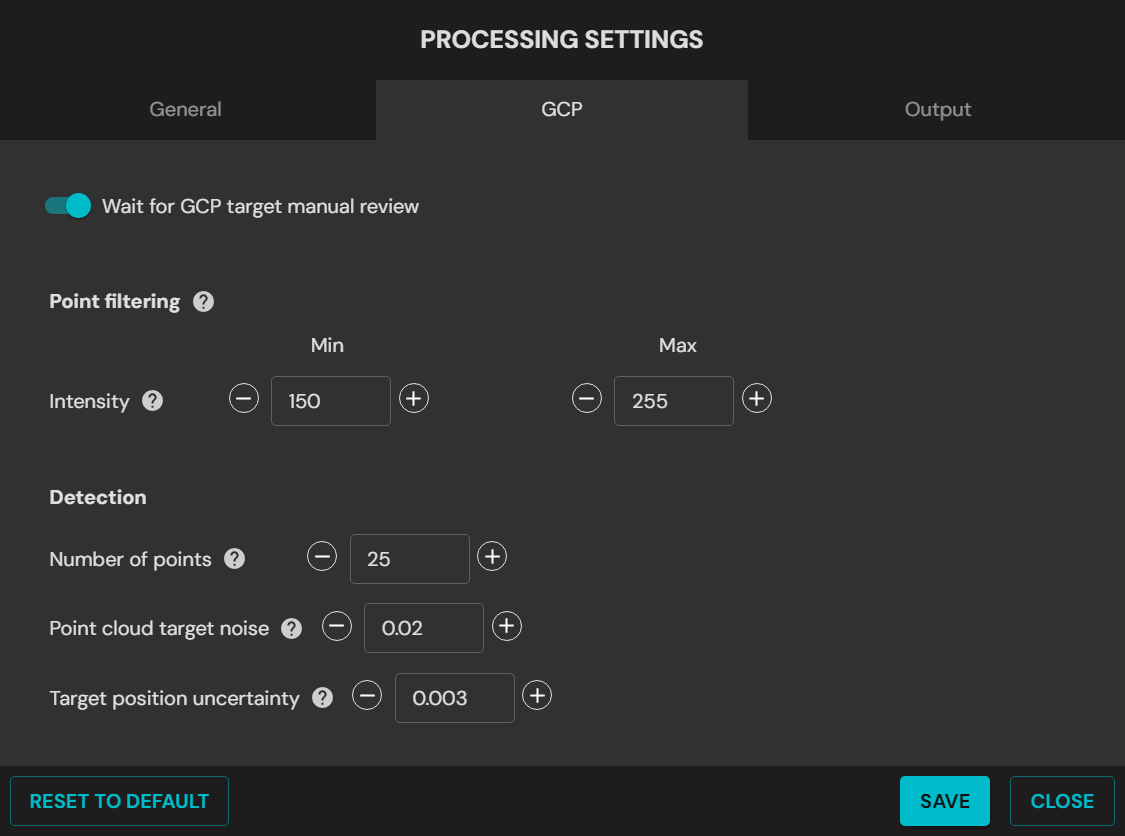
GCP Processing Settings
Field | Data |
|---|---|
Wait for GCP Target Manual Review | Select this checkbox to pause the software while the targets are confirmed. If unselected, Emesent Aura will assume that the constellation of detected targets has been successfully matched to the survey points provided. |
Point Filtering | Intensity: The filter intensities should be between 150 and 255, assuming no change to the target material. |
Detection | These parameters help to identify a target.
|
Reset to Default | Reset all settings to the default. |
Merge
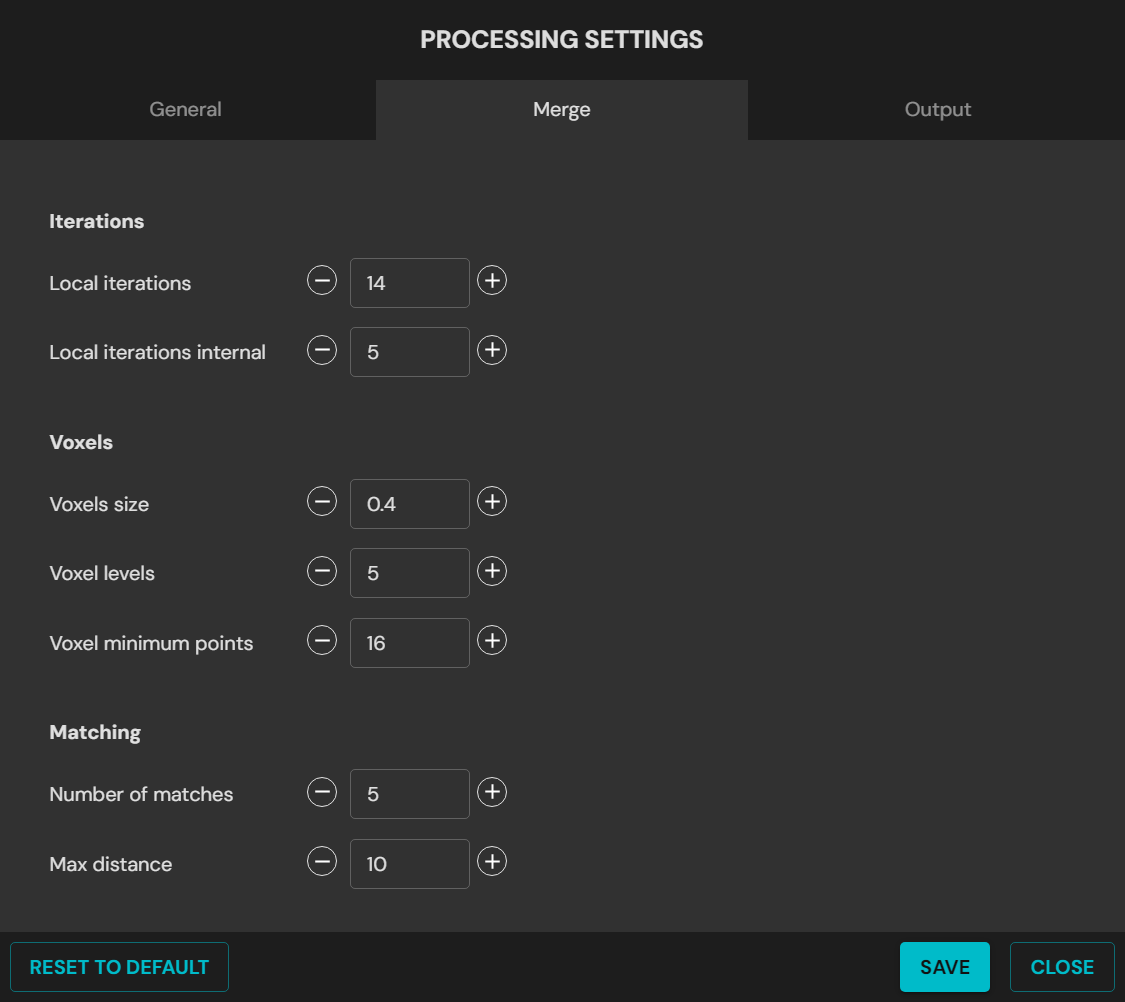
Merge Processing Settings
Field | Data |
|---|---|
Voxels |
|
Matching |
|
Georeferencing |
|
| |
Reset to Default | Reset all settings to the default. |
Colorize
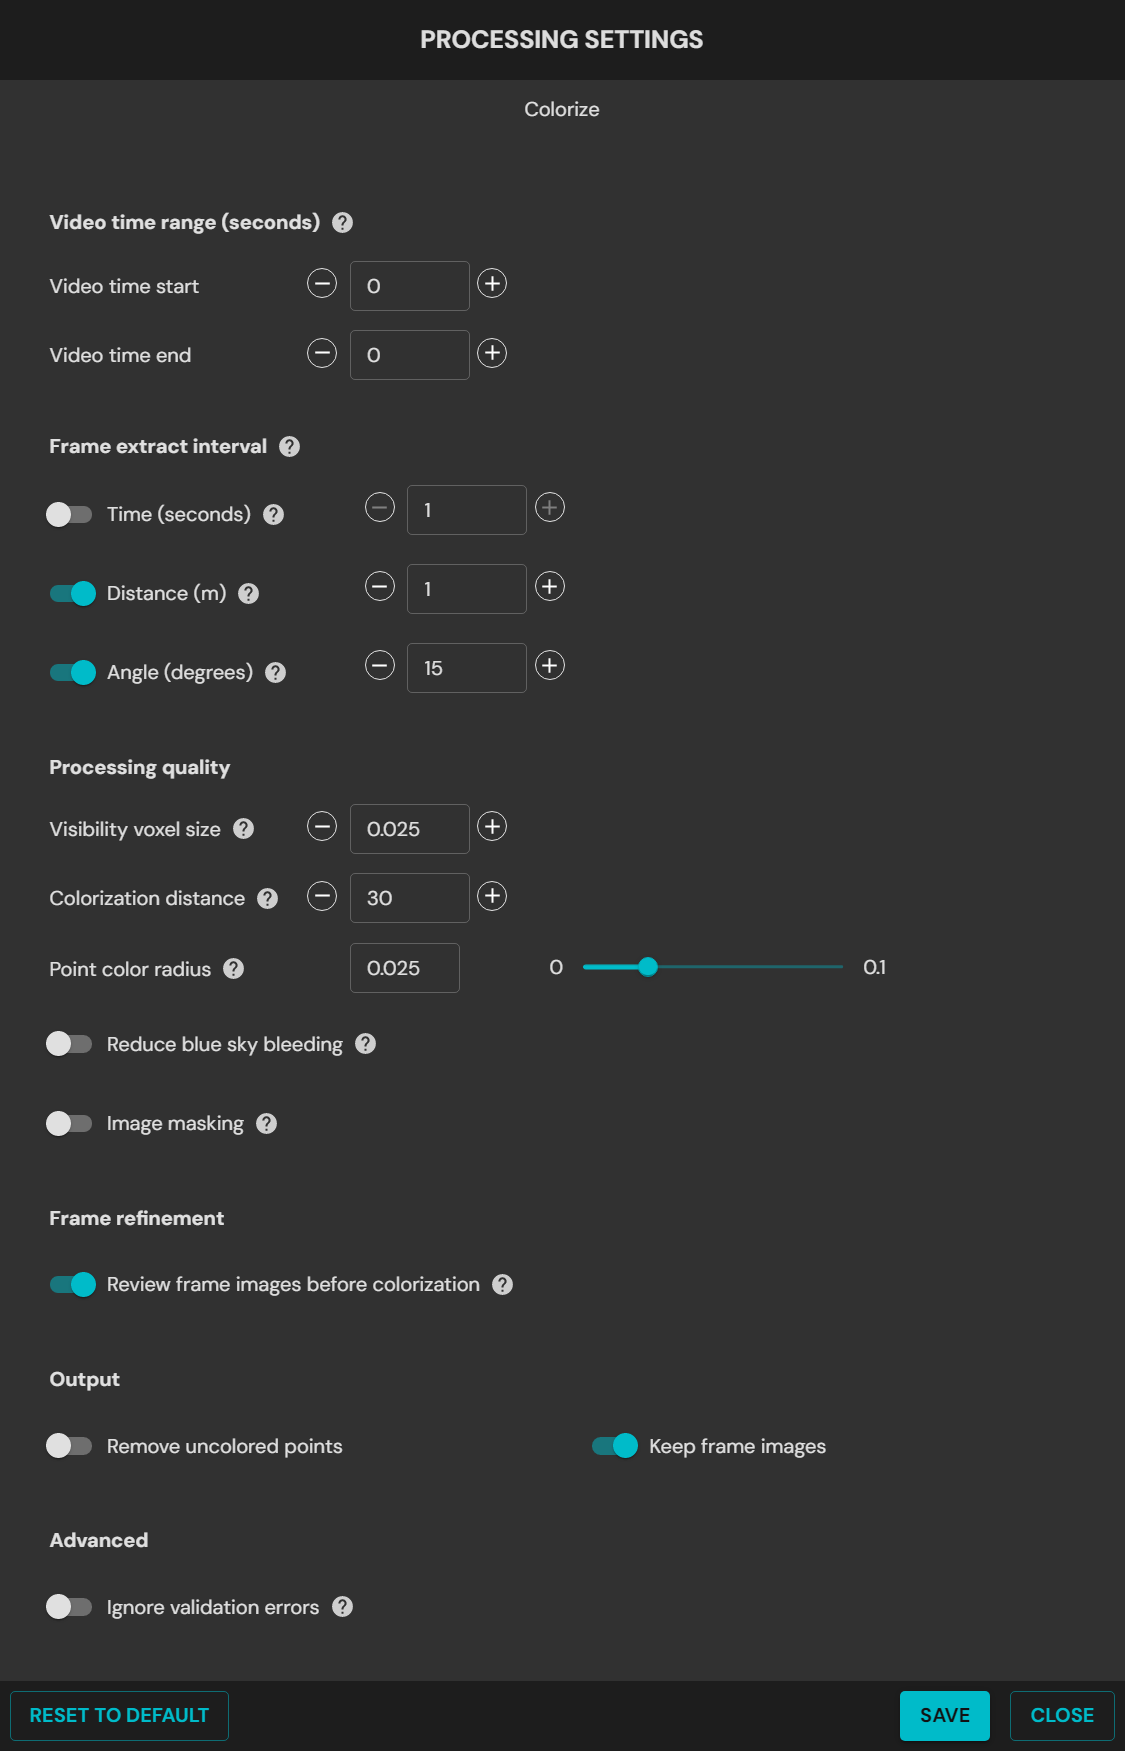
Colorize Process Settings
Field | Data |
|---|---|
Video Time Range | Sets the start and end time when frames are extracted from the video. The time represents the elapsed video time, not the number of seconds to trim from the end of the total video duration. Setting the Video end time to 0 will include everything after the start time. |
Frame extract interval | Uses the maximum time, distance, and angle to determine the number of video frames to skip between image extractions, keeping only the necessary images.
|
Processing Quality |
(in meters). A lower setting results in finer colorization quality and increased processing time. The recommended range is between 0.01 and 0.1.
points from the GoPro camera to be colorized. A higher setting results in more points being colorized and increased processing time. The recommended range is between 10 and 300. |
Reduce blue sky bleeding | Allows you to reduce and mask out the color bleed or the blending of blue or gray sky on buildings and other objects.
Alternatively, toggle on the Advanced option and configure the following:
|
When reviewing the frames between extraction and colorization, you should see the sky effectively masked in most frames. Some frames might still show minor visible patches of sky or unintended masking of building parts, but this should not impact the final colorized point cloud significantly if these issues occur only occasionally. In cases like these, it is generally better to increase the filter strength rather than decrease it, as remaining bits of visible sky are more likely to be noticeable in the final point cloud than a few mistakenly masked building parts, especially if the building is clearly visible in other frames. | |
Image Masking | This allows you to hide unwanted features from all your extracted frames. Choose from the available mask templates depending on the accessory/platform you are using. To create your own, Refer to the Creating a custom masksection for instructions. |
Output |
|
Advanced |
|
Reset to Default | Reset all settings to the default. |
Extract 360 Images
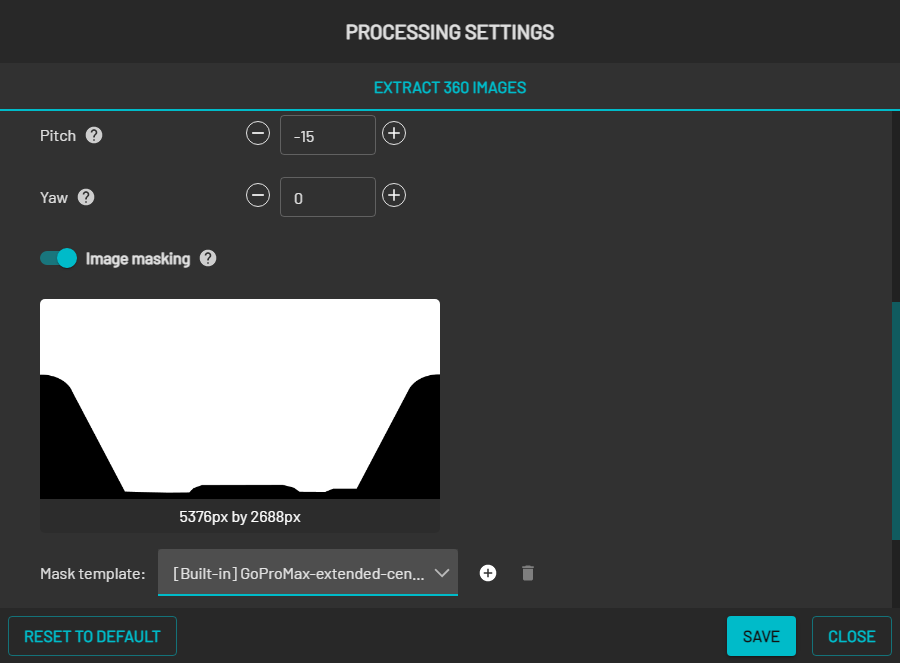
Extract 360 Images Processing Settings
Field | Data |
|---|---|
Video Time Range | Sets the start and end time when frames are extracted from the video. The time represents the actual elapsed video time, not the number of seconds to trim from the end of the total video duration. Setting the Video end time to 0 will include everything after the start time. |
Frame extract interval | Uses the maximum time, distance, and angle to determine the number of video frames to skip between image extractions, keeping only the necessary images. Time: It is recommended to turn this setting off to avoid repetitive extractions when the camera is not moving. The recommended range is between 1 to 20. Distance: Extracts images based on the distance the camera travels to avoid repetitive images when standing still. The recommended settings are 1 to 2 for small, confined spaces and 5 to 10 for moving capture in open spaces. Angle: Extracts images based on changes to the camera angle. The recommended settings are 10 to 15 degrees when using a perspective camera and 45 to 90 degrees when using a 360 camera. |
Camera orientation override | Allows you to configure the camera’s orientation settings manually.
|
Image Masking | This allows you to hide unwanted features from all your extracted frames. Choose from the available mask templates depending on the accessory/platform you are using. To create your own, Refer to the Creating a Custom Mask section for instructions. |
Output
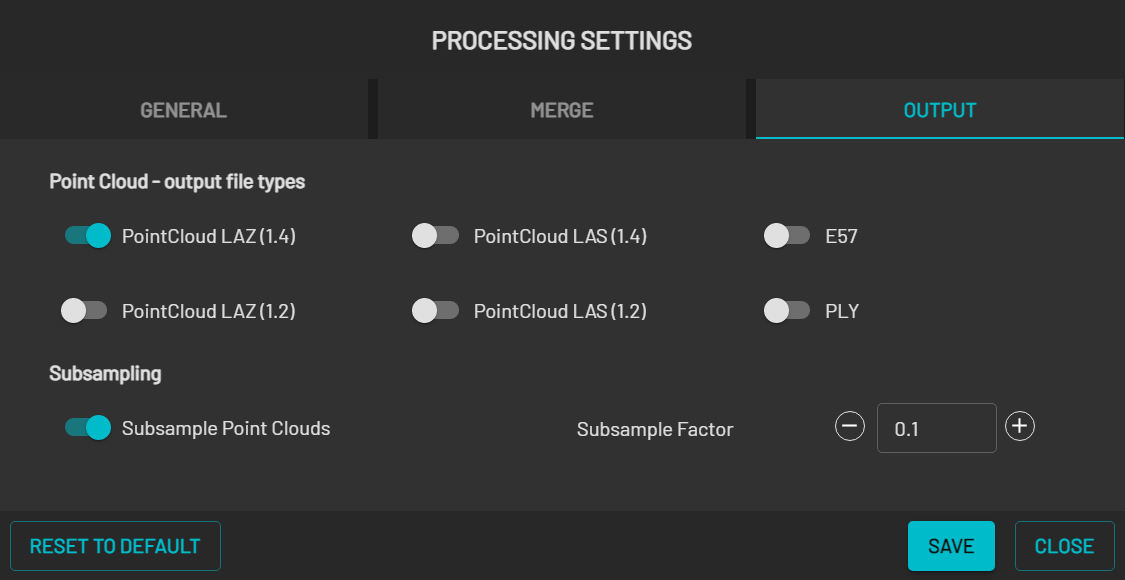
Output Processing Settings
Field | Data |
|---|---|
Point Cloud - output file types |
You can select more than one option. |
Subsampling |
|
Reset to Default | Reset all settings to the default. |