
The instructions in this article apply to the Astro and Astro Max with Hovermap ST or ST-X. Descriptions of Hovermap, Astro, and the mount are generic.
What you will need
A Freefly Astro or Astro Max with Hovermap mounted (see Set up the Freefly Astro for Hovermap).
The Freefly Pilot Pro controller, fully charged.
Emesent Commander installed on the Pilot Pro tablet (see Install Emesent Commander on the Freefly Pilot Pro controller).
The Hovermap mode sticker placed on the Pilot Pro controller next to the S2 toggle switch.
Procedure
Step 1: Power on Hovermap and the Astro
Press the power button on the Pilot Pro twice to turn on the controller and the tablet.
Power on the Astro.
Power on Hovermap.
Hovermap can be configured through the Web UI to power on automatically as soon as power is supplied.
Wait as Hovermap cycles through several stages. The status LEDs at the back of Hovermap flash red for approximately 30 seconds as the system boots. Hovermap is ready when the status LEDs show a breathing blue pattern, which can take about 60 seconds.
Step 2: Set the Pilot Pro to Hovermap mode
Set Switch 2 (S2) on the Pilot Pro controller to Hovermap/Offboard mode (highest position away from the pilot).
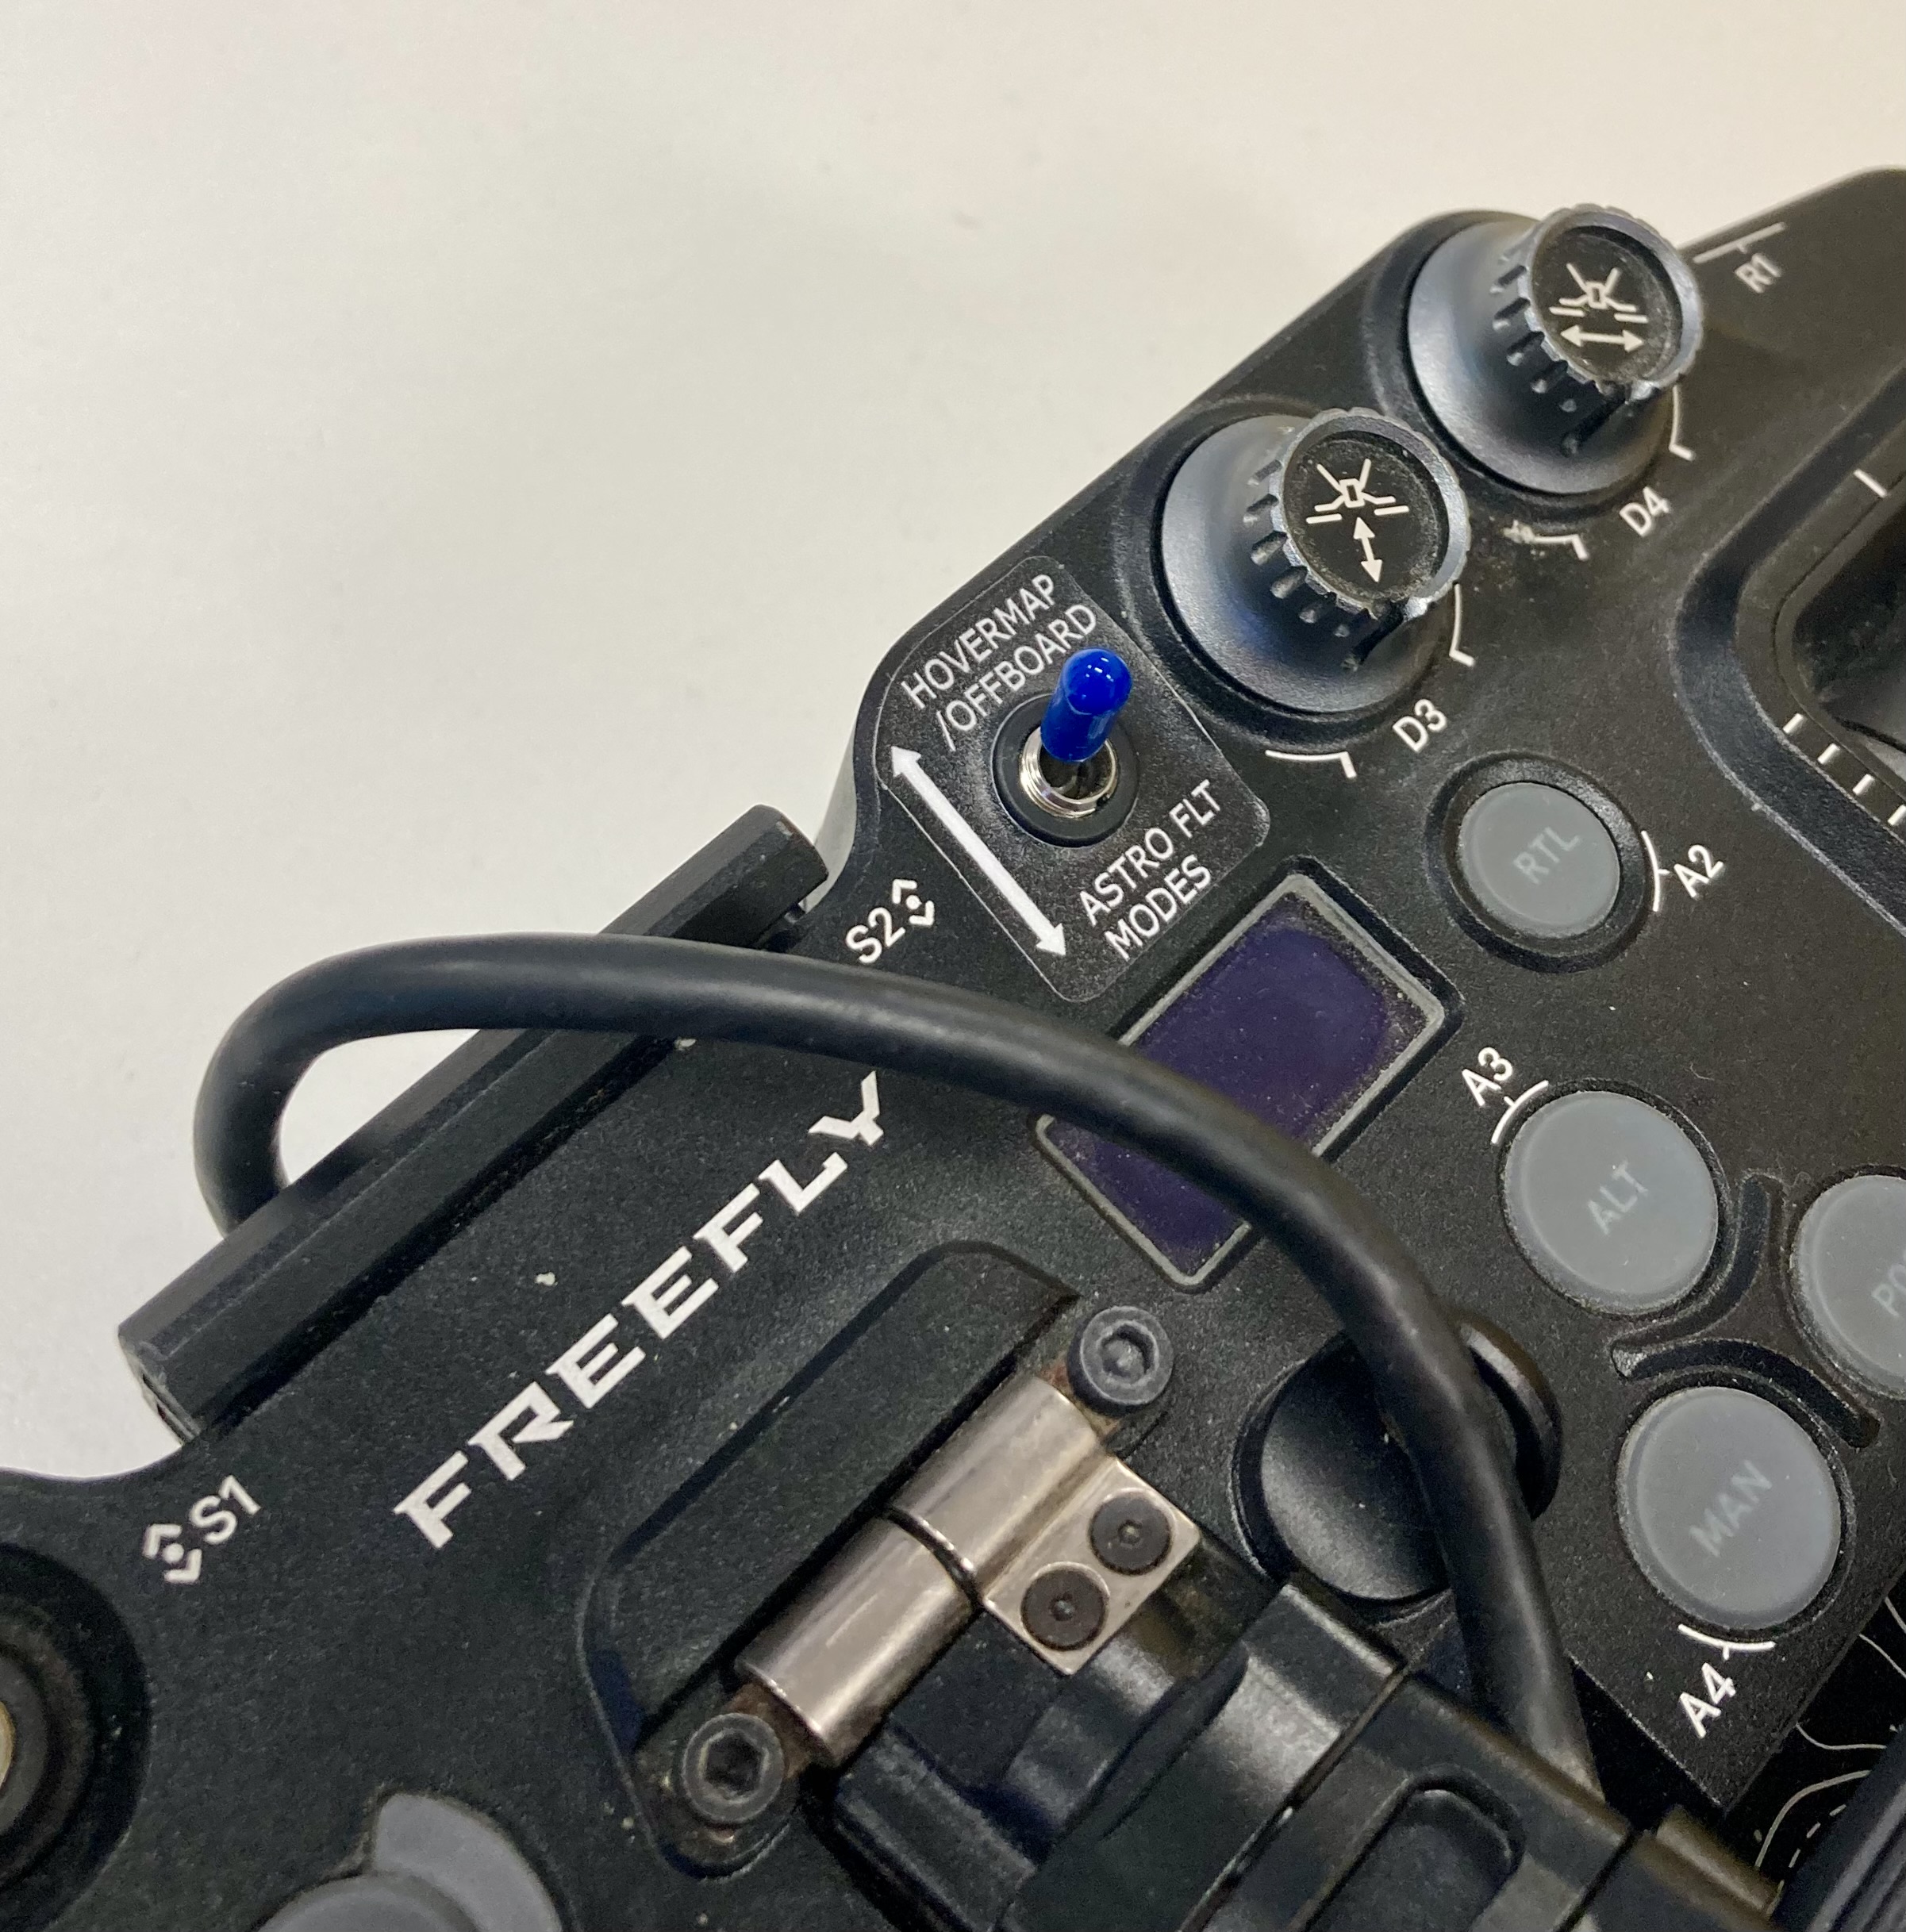
Check that the status screen shows Position or Pending.
The status changes to Offboard once the Astro is armed.
Step 3: Connect to Hovermap
Emesent Commander communicates directly with Hovermap via the Freefly Pilot Pro controller. Connection to the Hovermap Wi-Fi network is not required.
Ensure Hovermap is powered and ready.
Turn off Wi-Fi on the Pilot Pro tablet.

Communication with Hovermap is done via the controller. Wi-Fi on the Pilot Pro tablet must be disabled.
Launch Emesent Commander, then tap Connect at the top of the landing page.
On the page that displays, set Hostname/IP address to
192.168.144.101.Tap the Tick icon, then tap Close.
Once the connection is established, an audio message indicates Connected and the mission tiles are enabled.
Due to interference caused by the Pilot Pro controller to nearby Wi-Fi connections, the Observer Mode feature is only available via an Ethernet connection when using the Freefly Astro. For more information on using Observer Mode, refer to the Hovermap user manual.
Step 4: Run the initialisation scan for assisted or autonomous missions
With Hovermap powered and connected:
Select the Assisted or Autonomous Mission tile.
Progress through the mission workflow until the Scan setup page is reached.
Start a scan to allow Hovermap to initialise settings on the Astro.
This initial scan fails by design, accompanied by an audio alert of three beeps. The scan only needs to be performed once during initial setup.
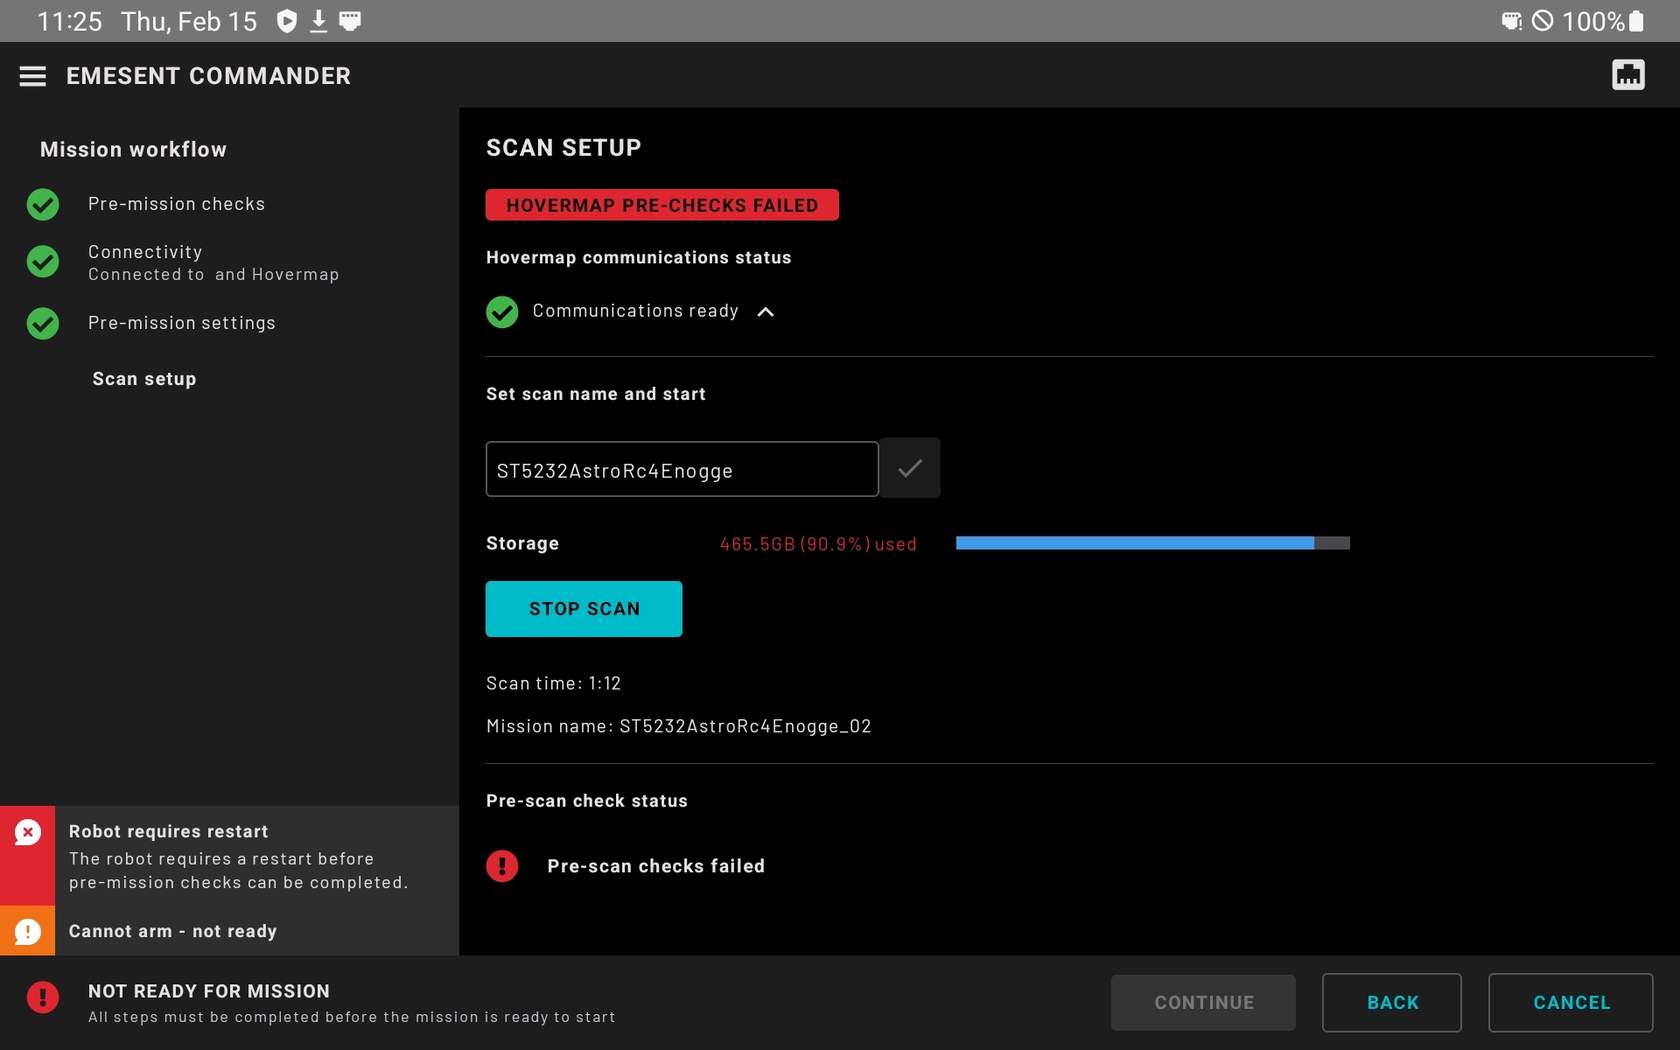
The initial scan failure indication on the Pilot Pro controller.
Step 5: (Optional) Reset the Astro to default parameters
If Hovermap is disconnected from the Astro, reset the aircraft to its default parameters before the next setup attempt.
Open Auterion Mission Control (AMC).
Activate Advanced Mode by tapping the AMC icon six times and confirming at the pop-up screen.
The icon changes to an outline when Advanced Mode is active.
Connect AMC to the Astro.
Go to Vehicle setup > Parameters > Tools, then tap Reset to vehicle's configuration defaults.
After resetting, return to Vehicle setup > Parameters > Tools, then tap Reboot Vehicle.
Calibrate sensors as required.
Outcome
Hovermap and the Freefly Astro are powered, connected via Emesent Commander, and ready for assisted or autonomous scanning missions.
Related documentation and support
Set up the Freefly Astro for Hovermap covers mounting Hovermap to the drone.
Install Emesent Commander on the Freefly Pilot Pro controller.
Recover Freefly Astro flight logs for retrieving log files after an incident.
For assistance, contact the regional Emesent partner or the Emesent Client Support team.