
Confirm Hovermap and airframe compatibility, and locate the correct interface kit.
Install the Hovermap-Astro dovetail mount on the drone.
Mount Hovermap on the drone and connect the electrical interface.
Place the Hovermap mode sticker on the Freefly Pilot Pro controller.
Compatibility
Hovermap ST and Hovermap ST-X support the Freefly Astro Max. The Freefly Astro is supported only by Hovermap ST-X.
The Astro Max has different mounts for the ST and ST-X, while the Astro uses a single ST-X mount. Each mount is colour-coded and labelled to make identification straightforward:
Hovermap ST-X mount for Astro: grey, unlabelled, two arms.
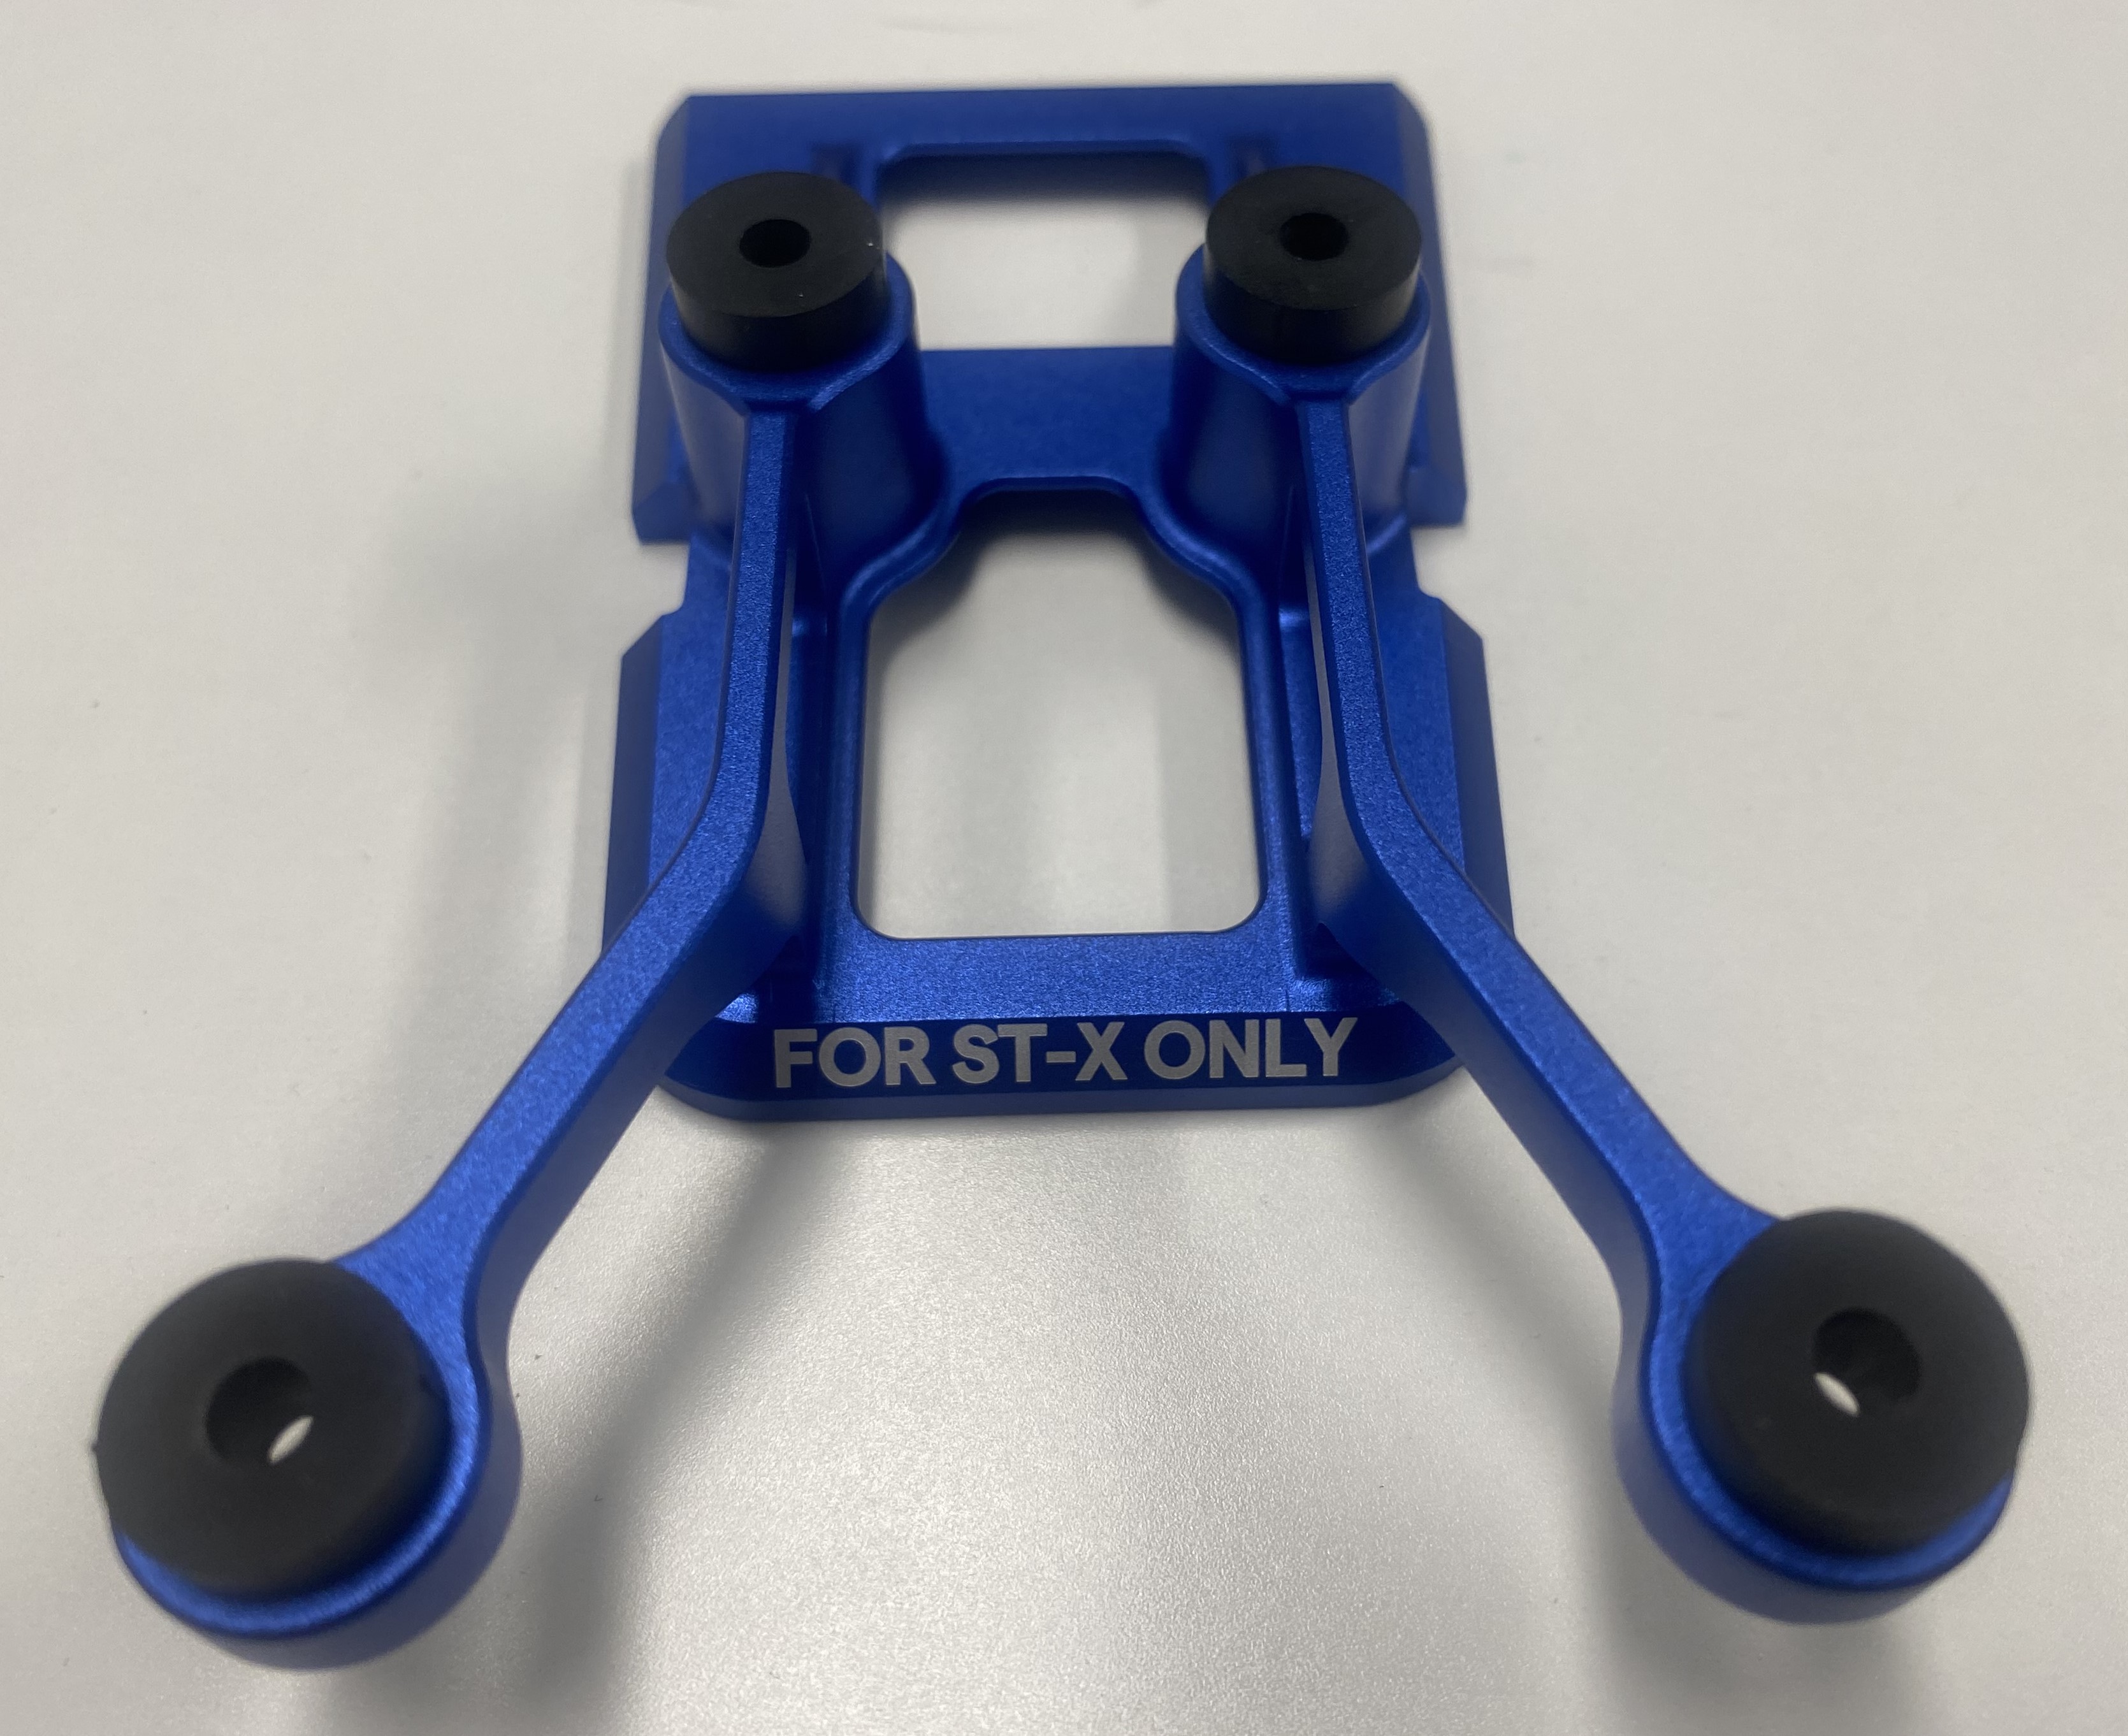
Hovermap ST-X mount for Astro Max: blue (to match the ST-X bumpers), labelled For ST-X only, two arms.
Hovermap ST mount for Astro Max: grey, labelled For ST only.
The setup steps are the same for the Astro and Astro Max with Hovermap ST or ST-X. Only the dovetail mount differs.
What you will need
Astro interface kit (for the Hovermap ST-X)
Contents |
|---|
Hovermap-Astro dovetail mount for ST-X |
Hovermap-Pilot Pro mode sticker |
Electrical interface |
USB-C dust cover |
2 x Electrical interface attachment screws (M3 x 6, 2.5 mm hex drive) |
4 x Dovetail mount attachment screws (flanged, 2.5 mm hex drive) |
Astro Max interface kit (for the Hovermap ST-X or ST)
Contents |
|---|
Hovermap-Astro Max dovetail mount for ST-X (blue) or ST (grey) |
Hovermap-Pilot Pro mode sticker |
Electrical interface |
USB-C dust cover |
2 x Electrical interface attachment screws (M3 x 6, 2.5 mm hex drive) |
4 x Dovetail mount attachment screws (flanged, 2.5 mm hex drive) |
Required tool (provided)
2.5 mm hex driver.
Procedure
Step 1: Install the Hovermap-Astro dovetail mount
The dovetail mount install is the same for the Astro and Astro Max with Hovermap ST or ST-X.
Remove the Hovermap dovetail mount from the box and install the provided mounting screws. Grommets are already in place. If the grommets have come loose, use a cylindrical object such as the base of a pen to push them back into the mount.

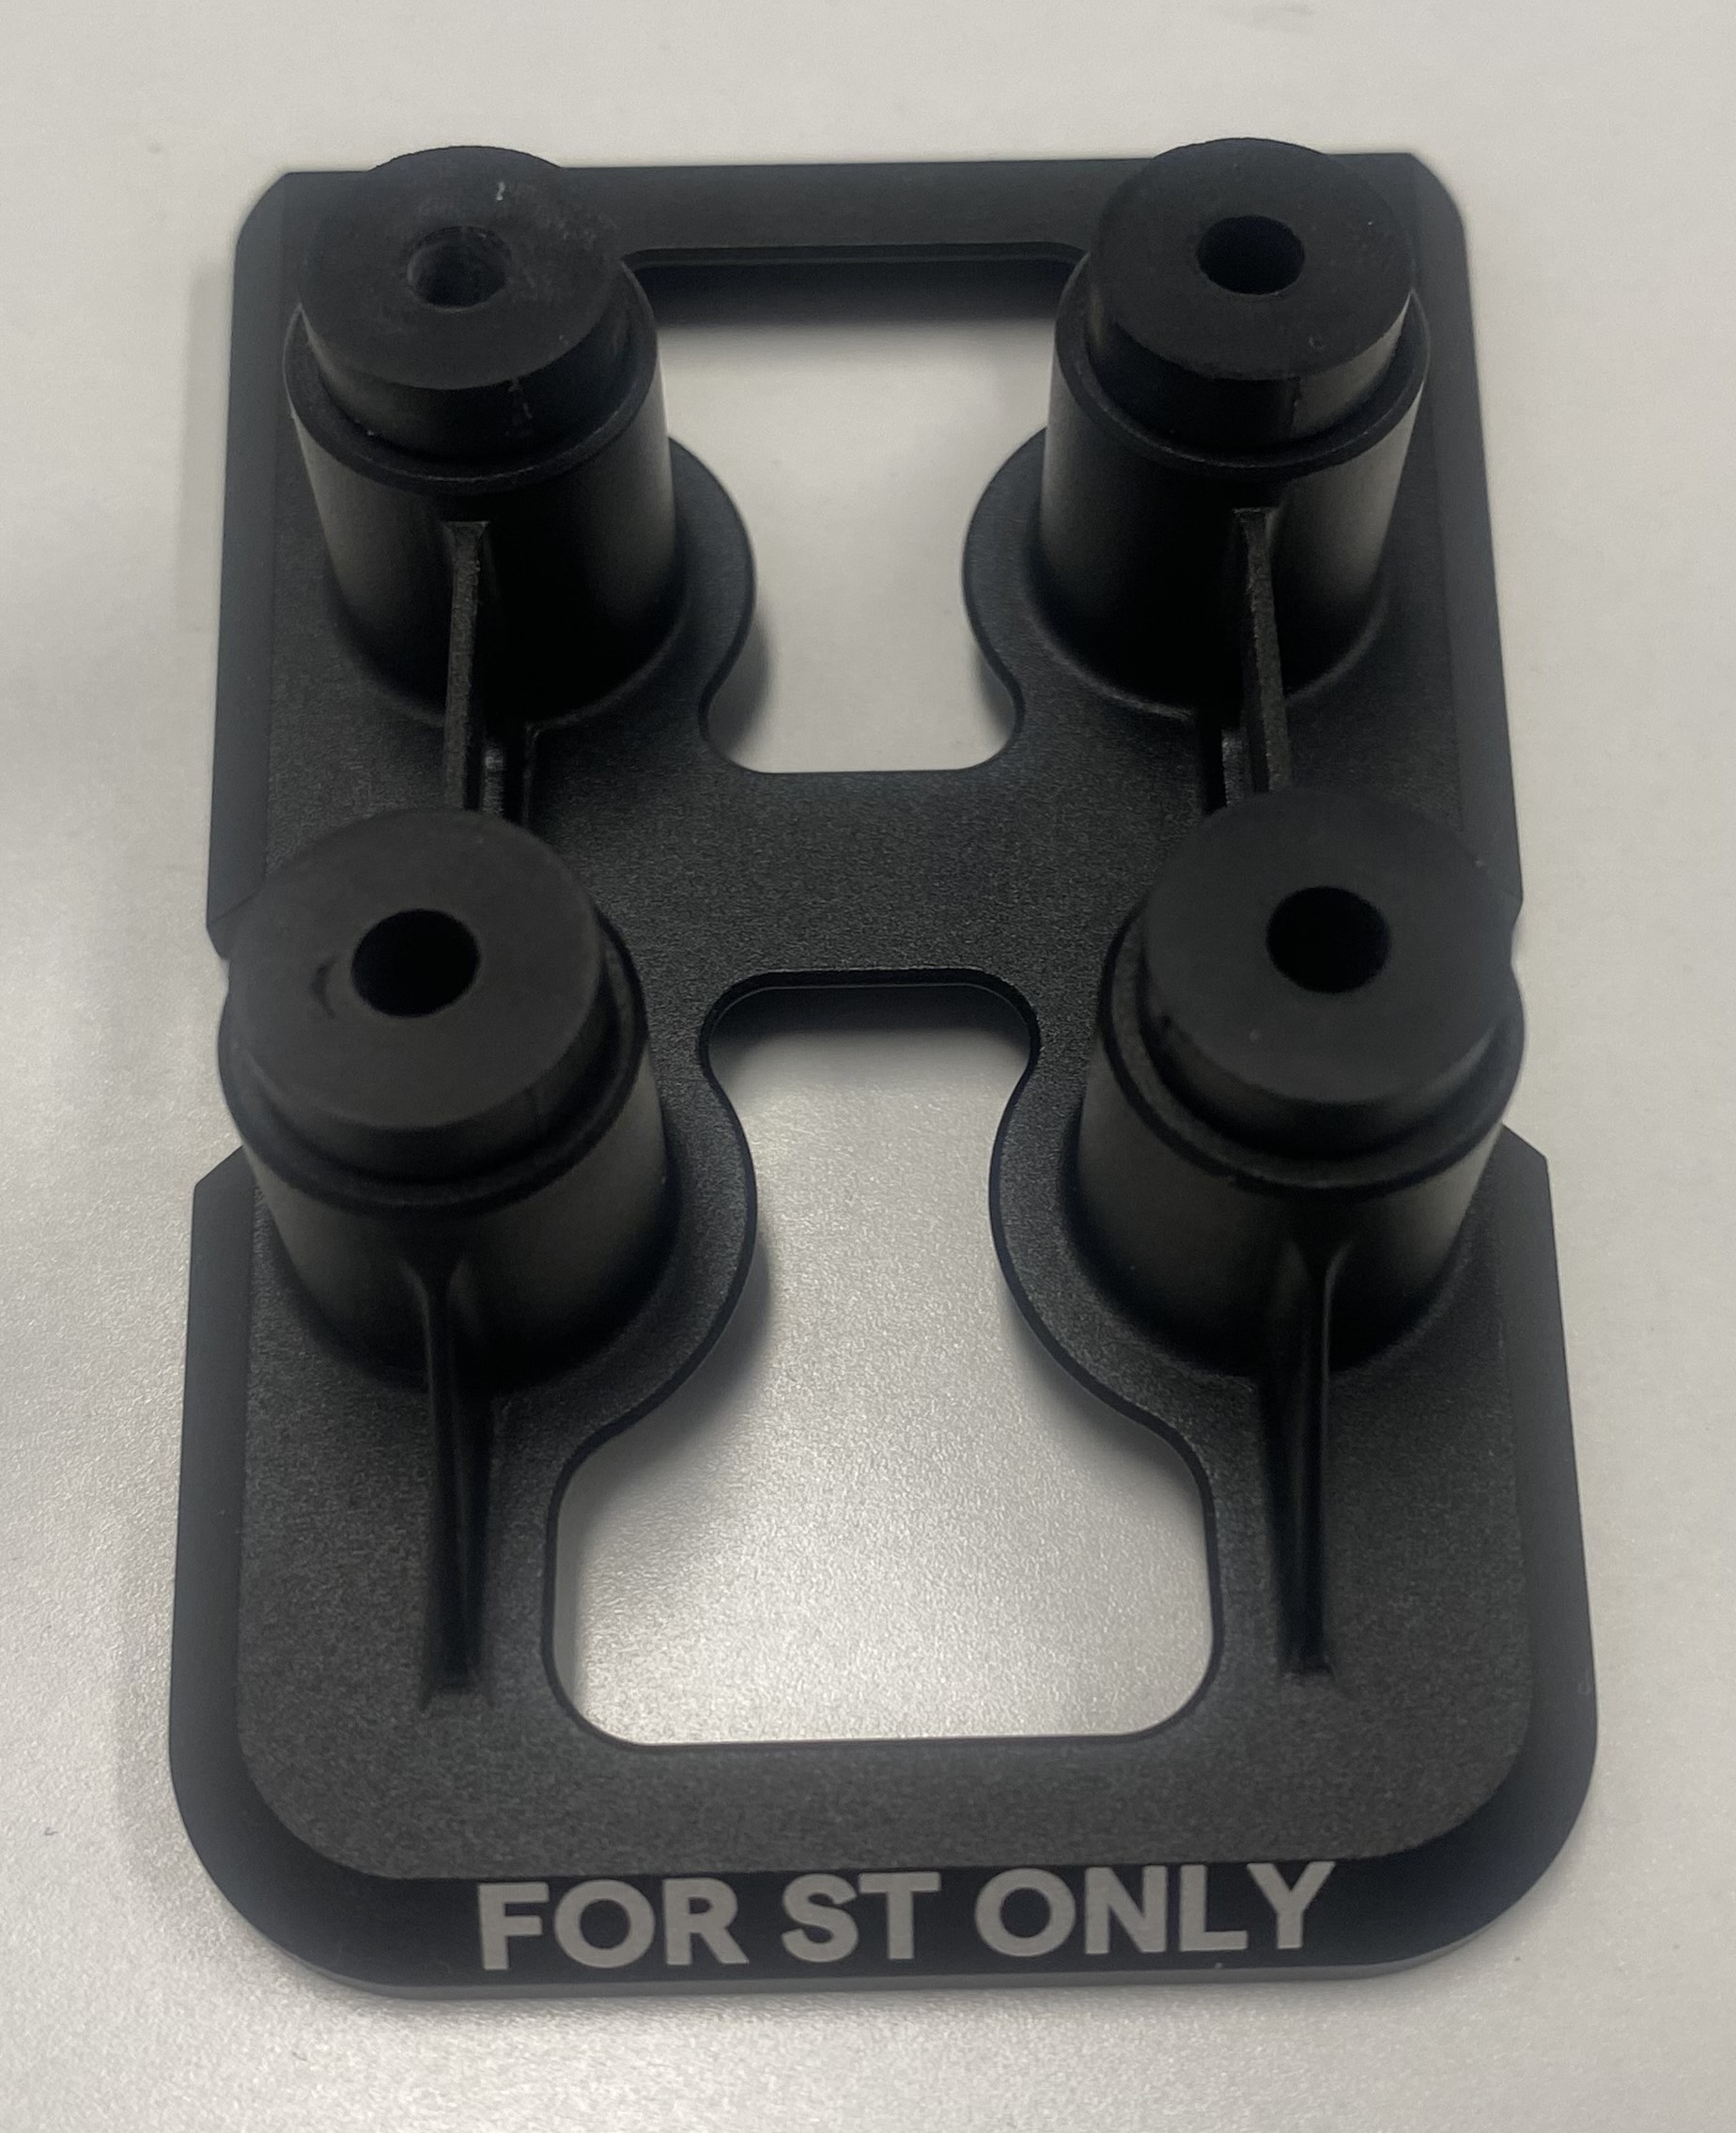
Dovetail mounts (L-R): ST-X for Astro, ST for Astro Max, ST-X for Astro Max.
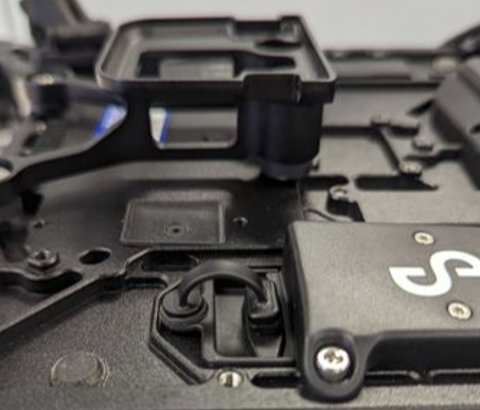
Remove the Freefly Astro from its box and flip the aircraft. Remove the existing plastic shield from the I/O panel on the underside of the aircraft.
Place the Hovermap dovetail mount over the mounting holes.
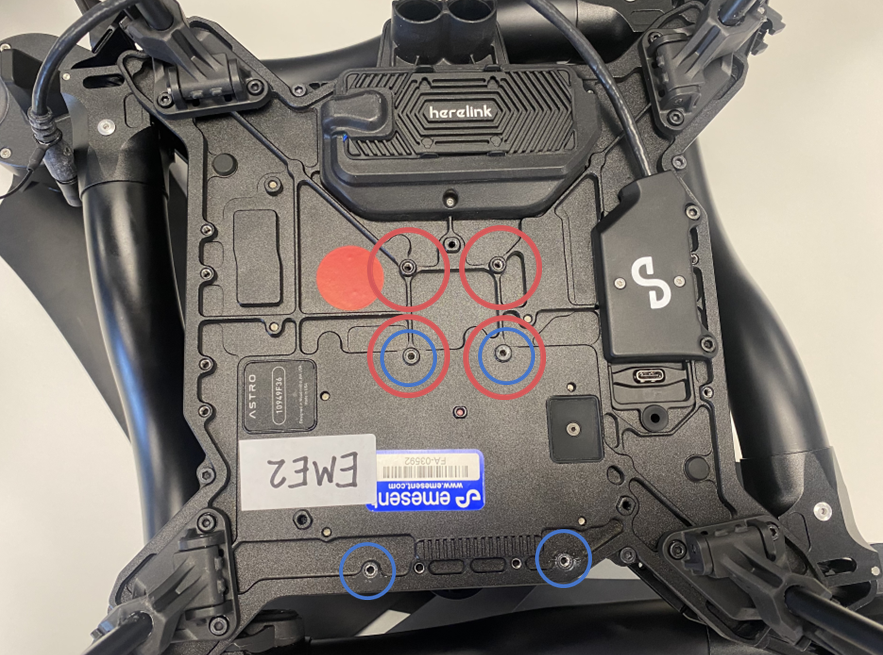
Blue circles show the Hovermap ST-X mounting hole locations. Red circles show the Hovermap ST mounting hole locations.
Align the four attachment screws with the mounting holes and screw them in using the provided 2.5 mm hex driver.
The Hovermap ST-X mount on the Freefly Astro.
.jpg)
Securely fasten screws until they stop rotating. If available, use a thread-locking fluid such as Loctite 222.
Connect the Hovermap cable to the connector labelled Payload on the Astro, ensuring it locks into place. A clicking sound indicates the cable is successfully attached to the aircraft.
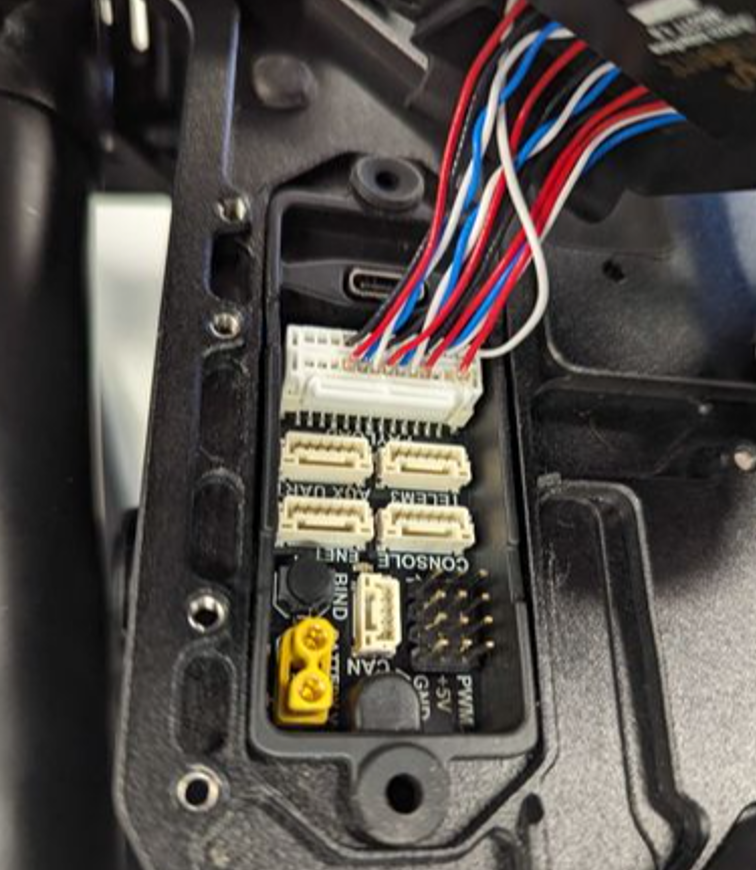
Payload connector on the Astro I/O panel.
Gently tuck the cables towards the rear of the Astro (directed towards the yellow connector in the payload bay), then position the plastic cover over the Astro I/O panel, leaving the USB-C port accessible.

Take care not to crush the cables between the Astro and the lip of the plastic cover.
Place the shield back over the Astro I/O panel, ensuring that it sits flush with the aircraft. Use the provided 2.5 mm hex driver to secure the screws and fasten the plastic cover in place.
.png)
I/O shield secured over the Astro I/O panel.
Insert the round end of the dust cover into the rubber grommet next to the USB-C port, then connect the opposite end of the cover to the USB-C port.
Confirm the I/O shield is properly secured and the USB-C dust cover is in place. The aircraft is now ready to be turned upright.
.png)
I/O shield properly secured with USB-C dust cover in place.
Step 2: Install Hovermap on the Astro
Gently slide Hovermap onto the Hovermap dovetail mount, positioning it from the front of the Astro and ensuring it locks into place. A clicking sound indicates the bracket has locked into the dovetail mount.
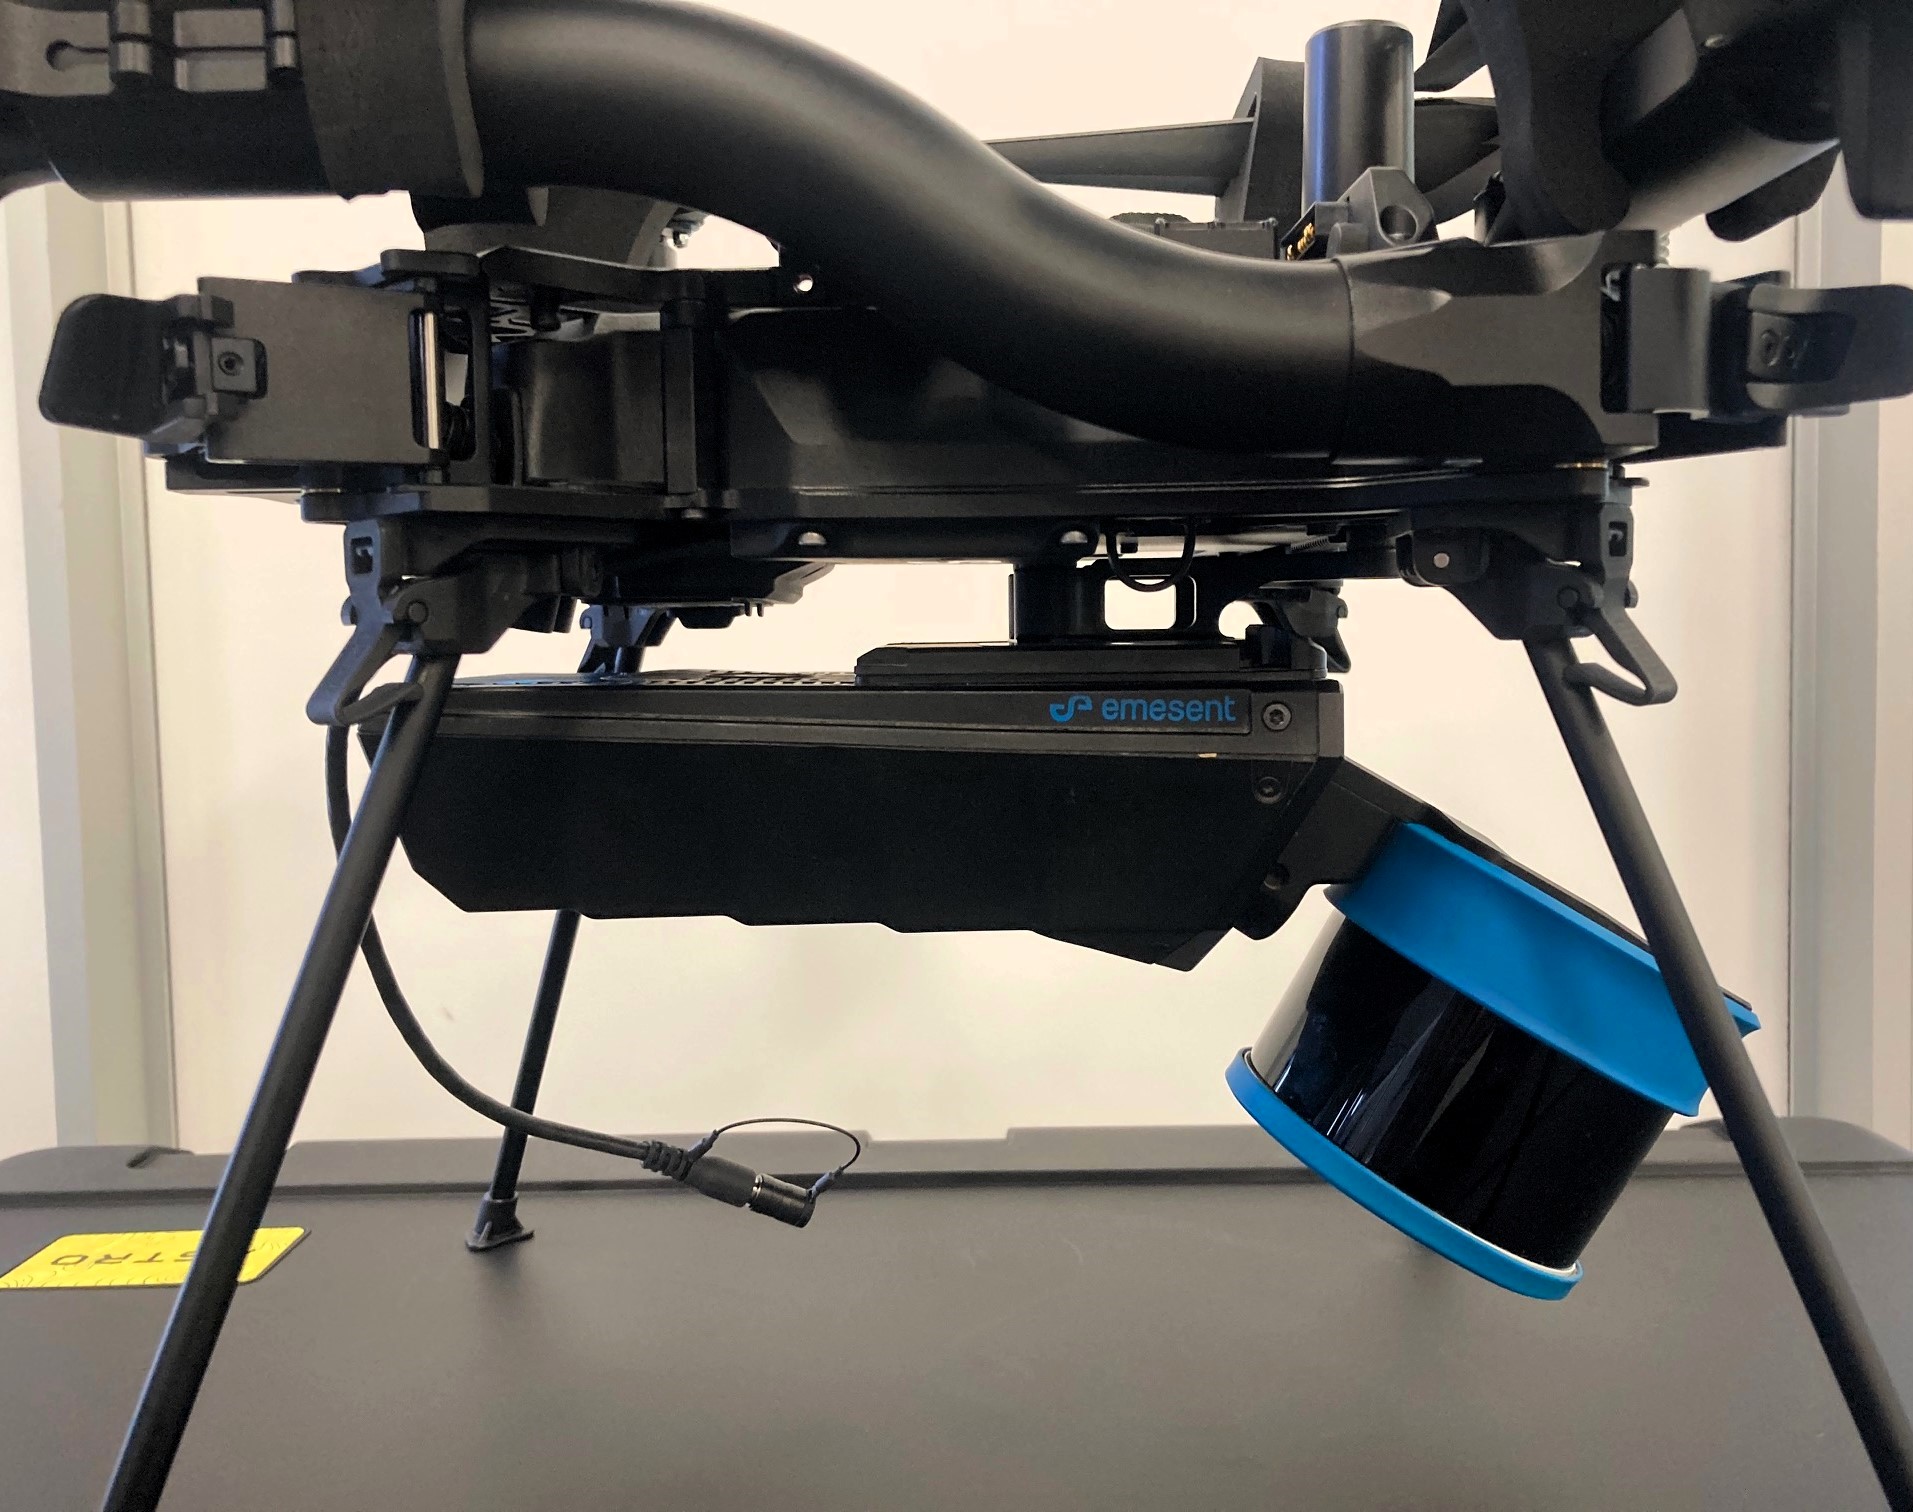
Hovermap mounted on the Freefly Astro.
Align the white dot on the electrical interface with the white dot on the port on Hovermap. Press firmly to connect the electrical interface, making sure it locks into place. A clicking sound indicates the cable is successfully attached to Hovermap.
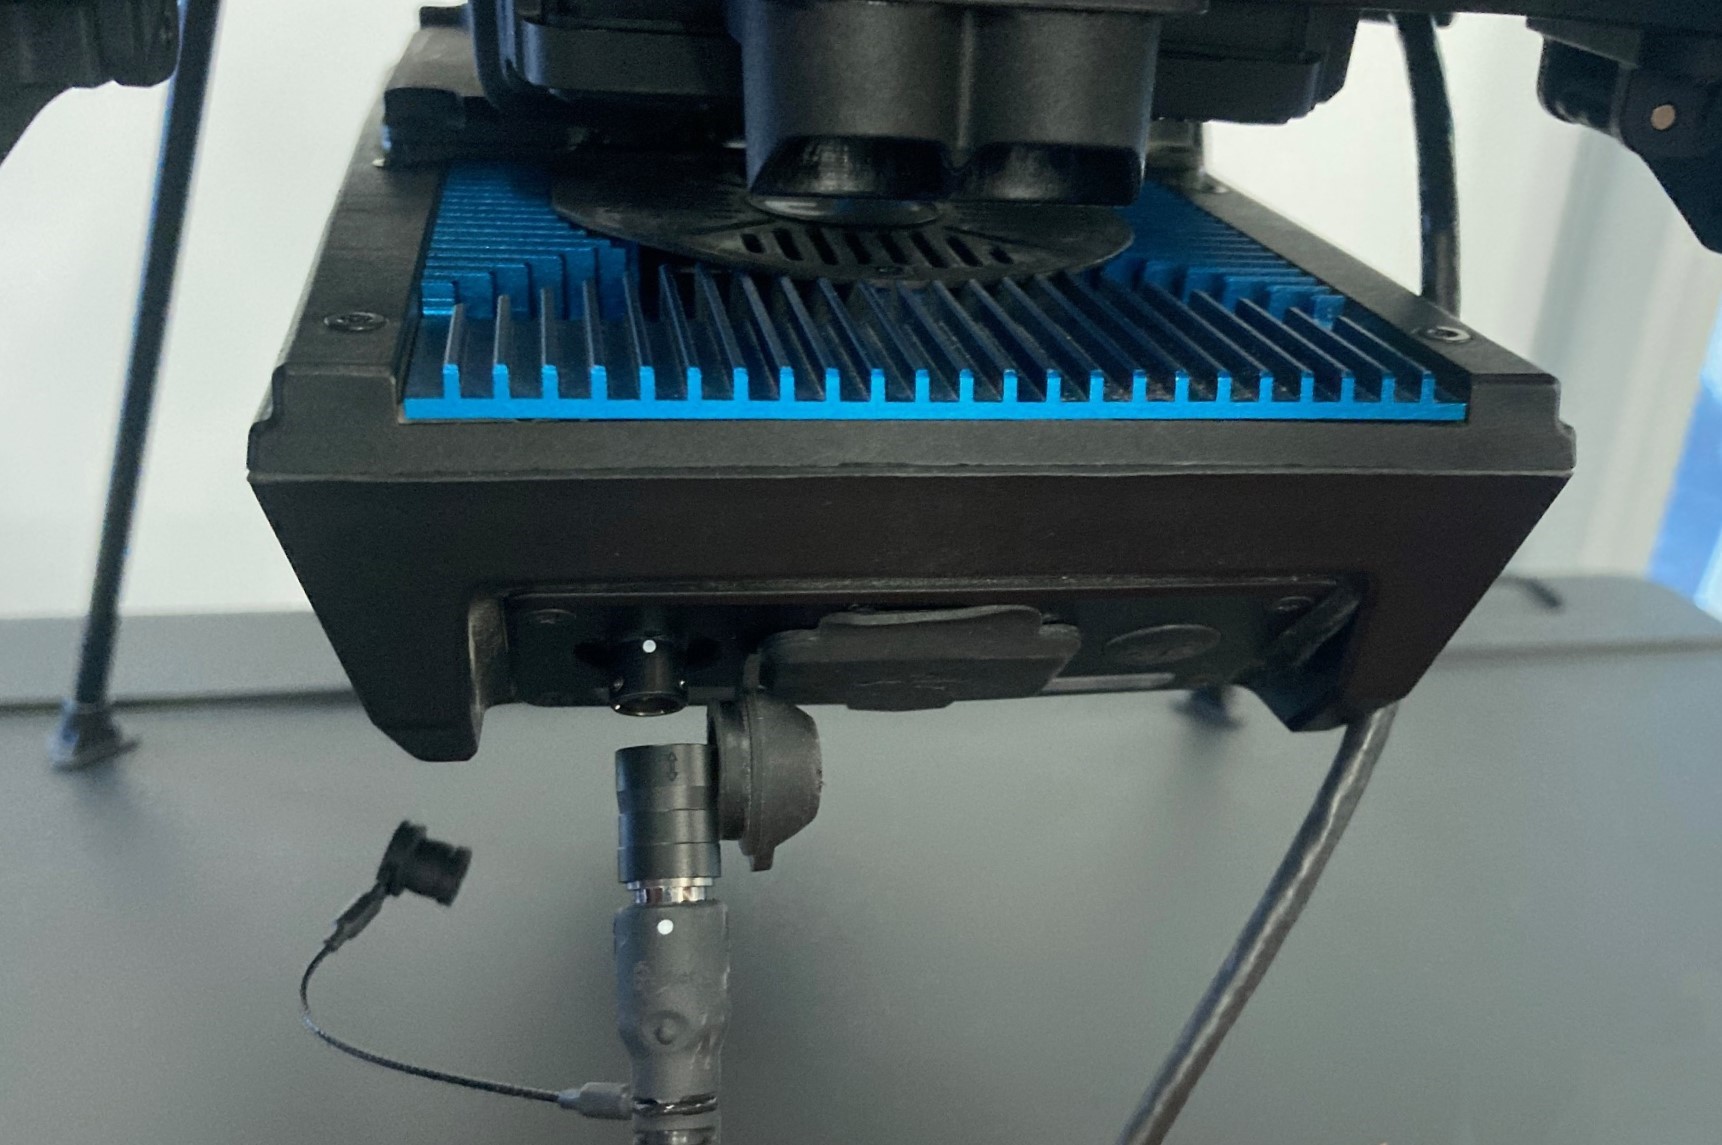
Test the cable connection by gently tugging on the cable to ensure it is positively retained on Hovermap.
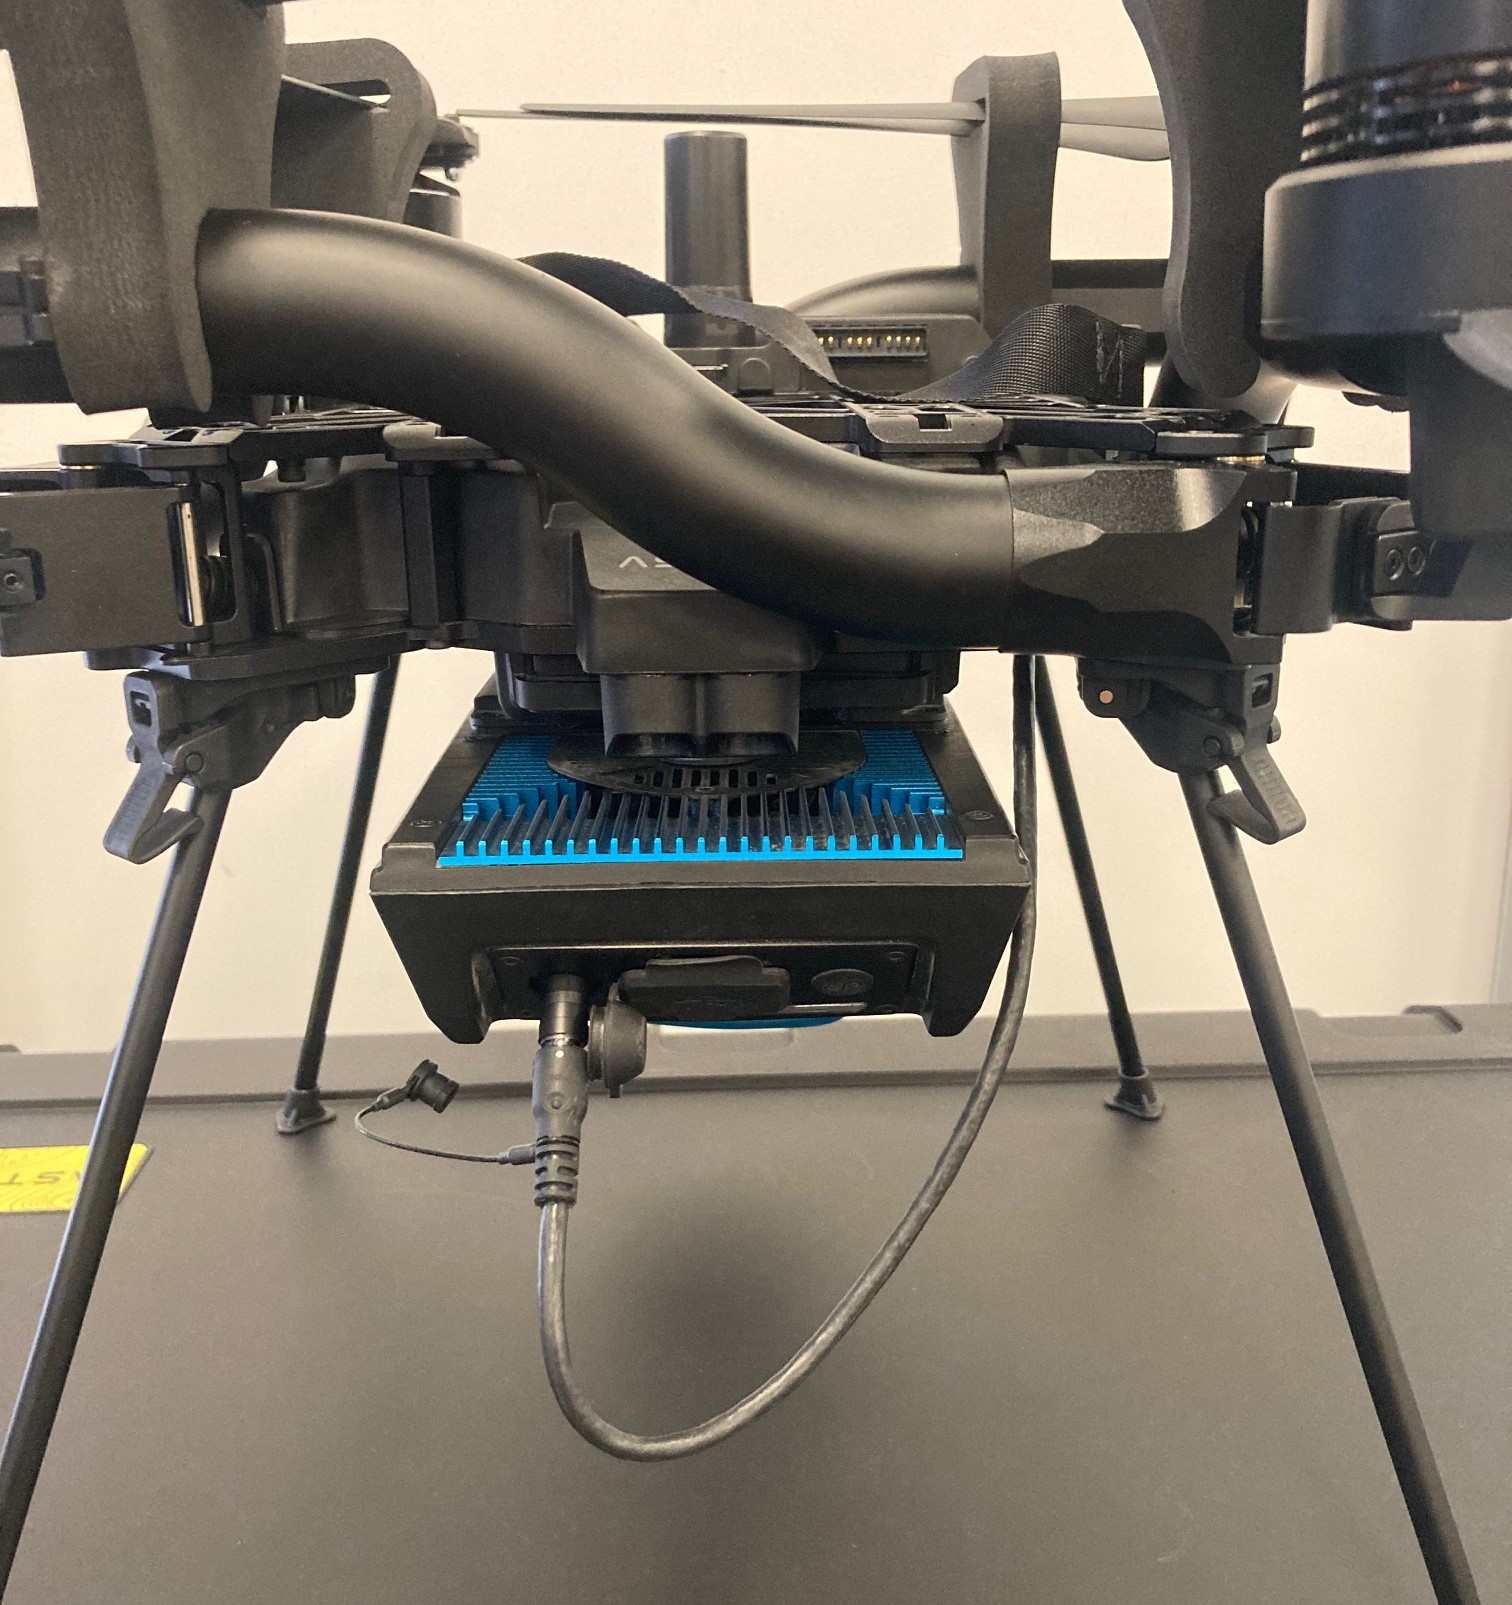
If the cable fails to remain connected during this test, contact the Emesent Client Support team.
Step 3: Place the Hovermap mode sticker on the Pilot Pro controller
The Hovermap mode sticker labels the switch positions for Hovermap modes on the Freefly Pilot Pro controller. The sticker is included in the Hovermap-Astro interface kit.
Locate the S2 toggle switch in the upper-right area of the Freefly Pilot Pro controller.
.png)
Peel the sticker from its backing sheet and place it as shown below.
.png)
Outcome
Hovermap is mounted to the Freefly Astro or Astro Max, the electrical interface is connected and tested, and the Pilot Pro controller is labelled with the Hovermap mode sticker. The drone is ready for Hovermap configuration and basic operations.
Next steps
Install Emesent Commander on the Freefly Pilot Pro controller covers installing the Commander app on the controller.
Set up Hovermap and Freefly Astro for basic operations covers configuring Astro parameters and the first scan.
Related documentation and support
Recover Freefly Astro flight logs for troubleshooting after an incident.
For assistance, contact the regional Emesent partner or the Emesent Client Support team.