
This article explains how to collect the calibration data for a Hovermap and GoPro pair, and send it to Emesent. Emesent uses this data to make a calibration file. During colorization, Aura uses the file to align the GoPro video with the Hovermap point cloud.
Do a calibration when a GoPro is installed on a Hovermap for the first time. Also do one when the camera mount moves, or when the calibration degrades over time. The calibration is done remotely. It is not necessary to return the Hovermap to Emesent.
The procedure has 3 stages. Steps 1 to 3 prepare the camera, the target and the site. Steps 4 to 7 capture the scans. Steps 8 and 9 submit the data.
What you will need
A Hovermap with the GoPro bracket
A GoPro Max or GoPro HERO 9, 10 or 11
The color calibration target (to buy a target, contact an Emesent Sales representative)
A rigid, flat board for the target (for example, a sheet of metal or a paint canvas)
A soft cloth
A support that holds the target a minimum of 20 cm above the ground
An open, evenly lit area with a 10 m radius around the target
Procedure
Step 1: Prepare the camera
Caution
Lock the GoPro orientation to up (sub-steps 5 to 8). If the orientation is not locked, the calibration fails.
Attach the GoPro to the Hovermap with the bracket. To see how, watch How to attach the 360 camera mount to Hovermap.
Update the GoPro firmware.
Attach a label to the GoPro. Write the Hovermap serial number on the label.
Clean the GoPro lens with the soft cloth.
Hold the GoPro upright, with the record button facing up.
Swipe down on the GoPro screen to open the dashboard.
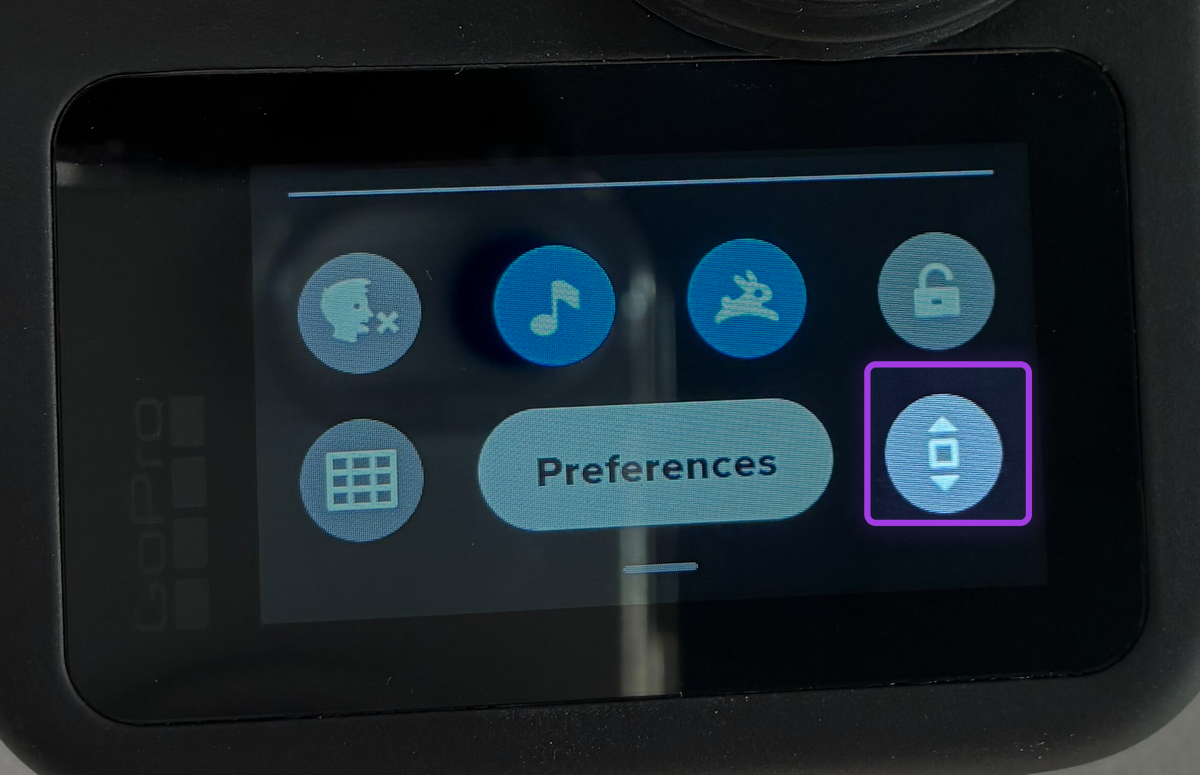
Make sure that the Orientation Lock icon is gray and shows 2 triangles. In this state, the GoPro resets the orientation to up (from left, right or down).
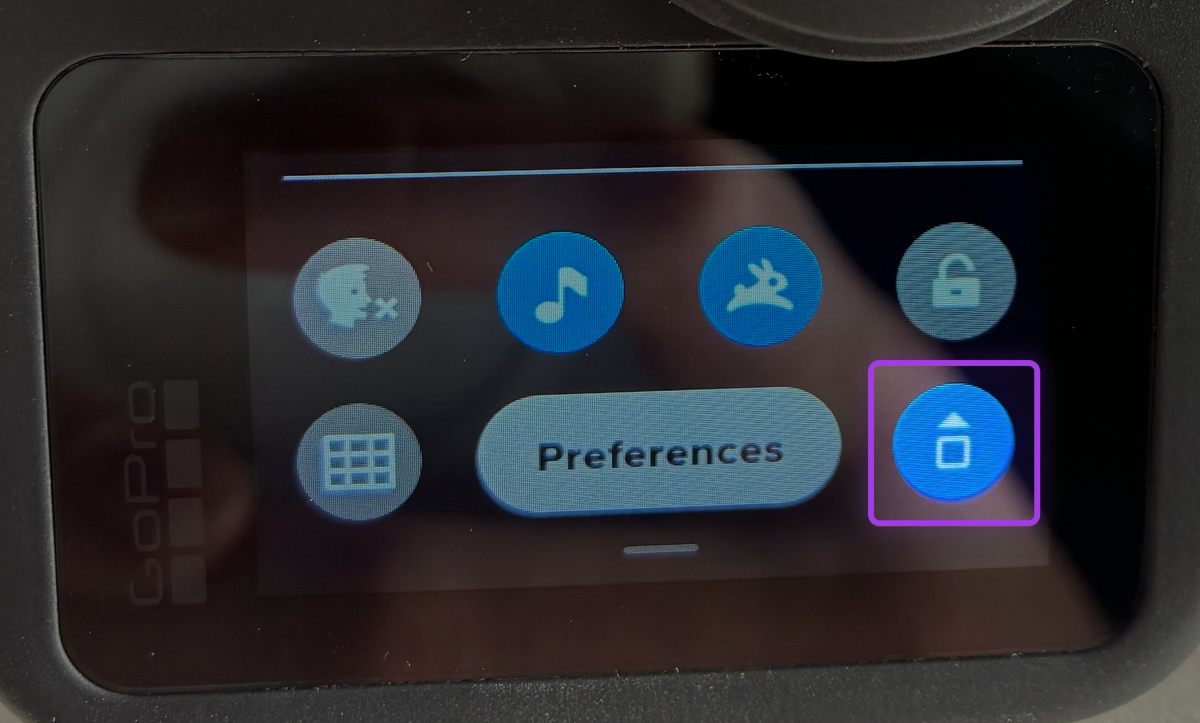
Keep the GoPro upright. Tap the Orientation Lock icon. The icon changes to blue and shows 1 triangle on top. The orientation locks to up.
The Orientation Lock icon is gray, with 2 triangles. The orientation is not locked. |
The Orientation Lock icon is blue, with 1 triangle on top. The orientation is locked to up. |
Press the Mode button until Video shows.
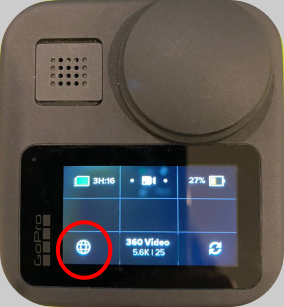
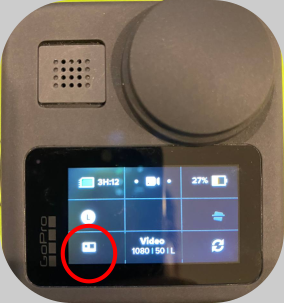
GoPro Max only: if the camera is in 360 Video mode (sphere icon), tap the sphere icon to change to Hero mode.
360 Video mode icon |
Hero mode icon |
Tap Video.
GoPro Max: set the values in the table. GoPro HERO 9, 10 or 11: use the settings in Settings for GoPro Hero 9/10/11.
Setting | Value |
|---|---|
Mode | Hero |
RES | FPS | 1080 | 50 |
Lens | Linear |
Max HyperSmooth | Off |
Clips | Off |
Protune: Bit rate | High |
Protune: Shutter | Auto |
Protune: EV comp | 0 |
Protune: White balance | Auto |
Protune: ISO min | 100 |
Protune: ISO max | 1600 |
Protune: Sharpness | High |
Protune: Color | GoPro |
Protune: Raw audio | Off |
Protune: Mics | Stereo |
On-screen shortcuts (all 4 positions) | Off |
Info
The calibration file is for one Hovermap, one GoPro (by serial number) and one mount position. Keep the labeled GoPro with the same Hovermap, and do not move or remove the GoPro bracket after the calibration. If a different GoPro is used, Aura processing stops with a camera serial mismatch error. Refer to Resolving calibration mismatch errors during Aura colorization.
Step 2: Prepare the target
Put the rolled target on the board. Align one edge of the target with one edge of the board.
Peel back approximately 10 cm of the backing film at the 2 corners of that edge.
Stick the 2 corners to the board. Pull the target tight along the edge.
Peel the film between the corners. Press the edge down with the cloth.
Unroll the target in 10 cm sections. Peel the film and press each section flat with the cloth.
Remove the protective film from the front of the target.
Make sure that the target has no bubbles, folds or bulges. The target must be flat to within 1 mm.
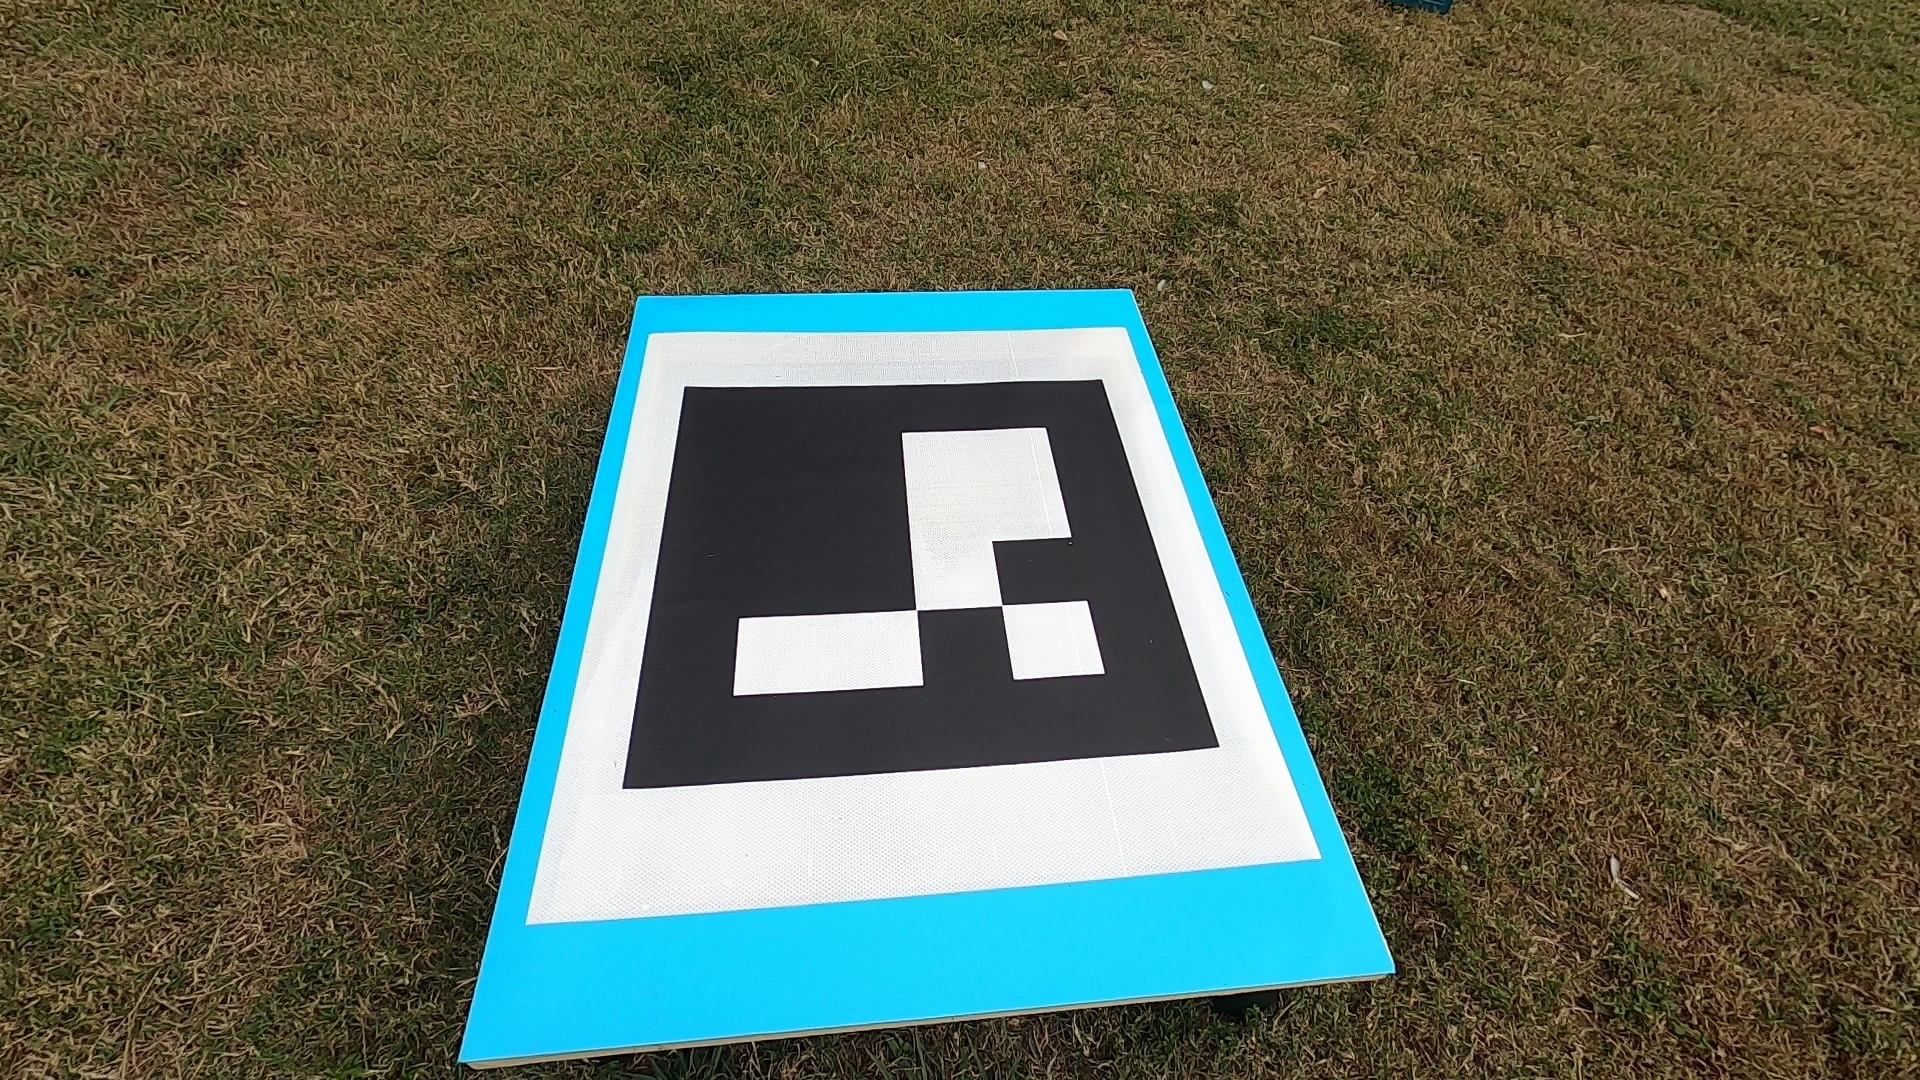
Correctly prepared calibration target
Info
To see how to stick the target to the board, watch How to set up the calibration target.
Step 3: Set up the site
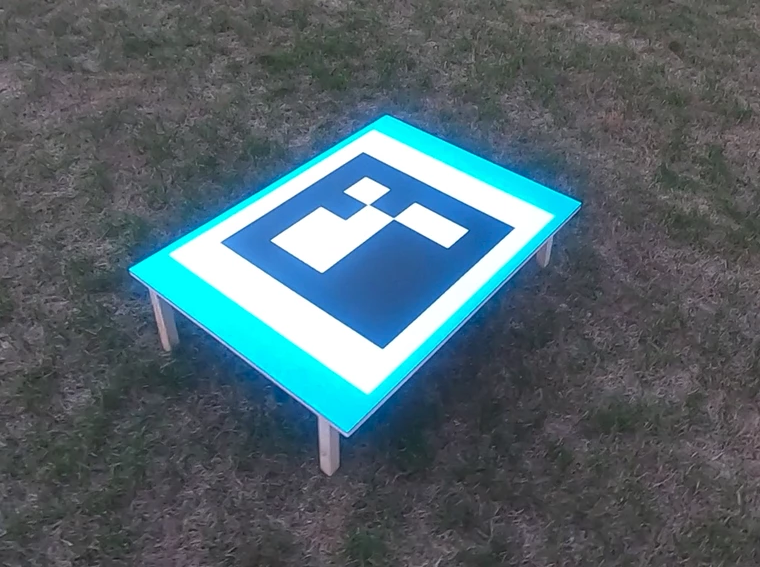
Put the target on the support, a minimum of 20 cm above the ground.
Make sure that there is a clear area with a 10 m radius around the target.
Make sure that the light on the target is even, with no sun glare, reflections or shadows. If possible, use a covered area.
Make sure that no people or objects move through the area during the scan.
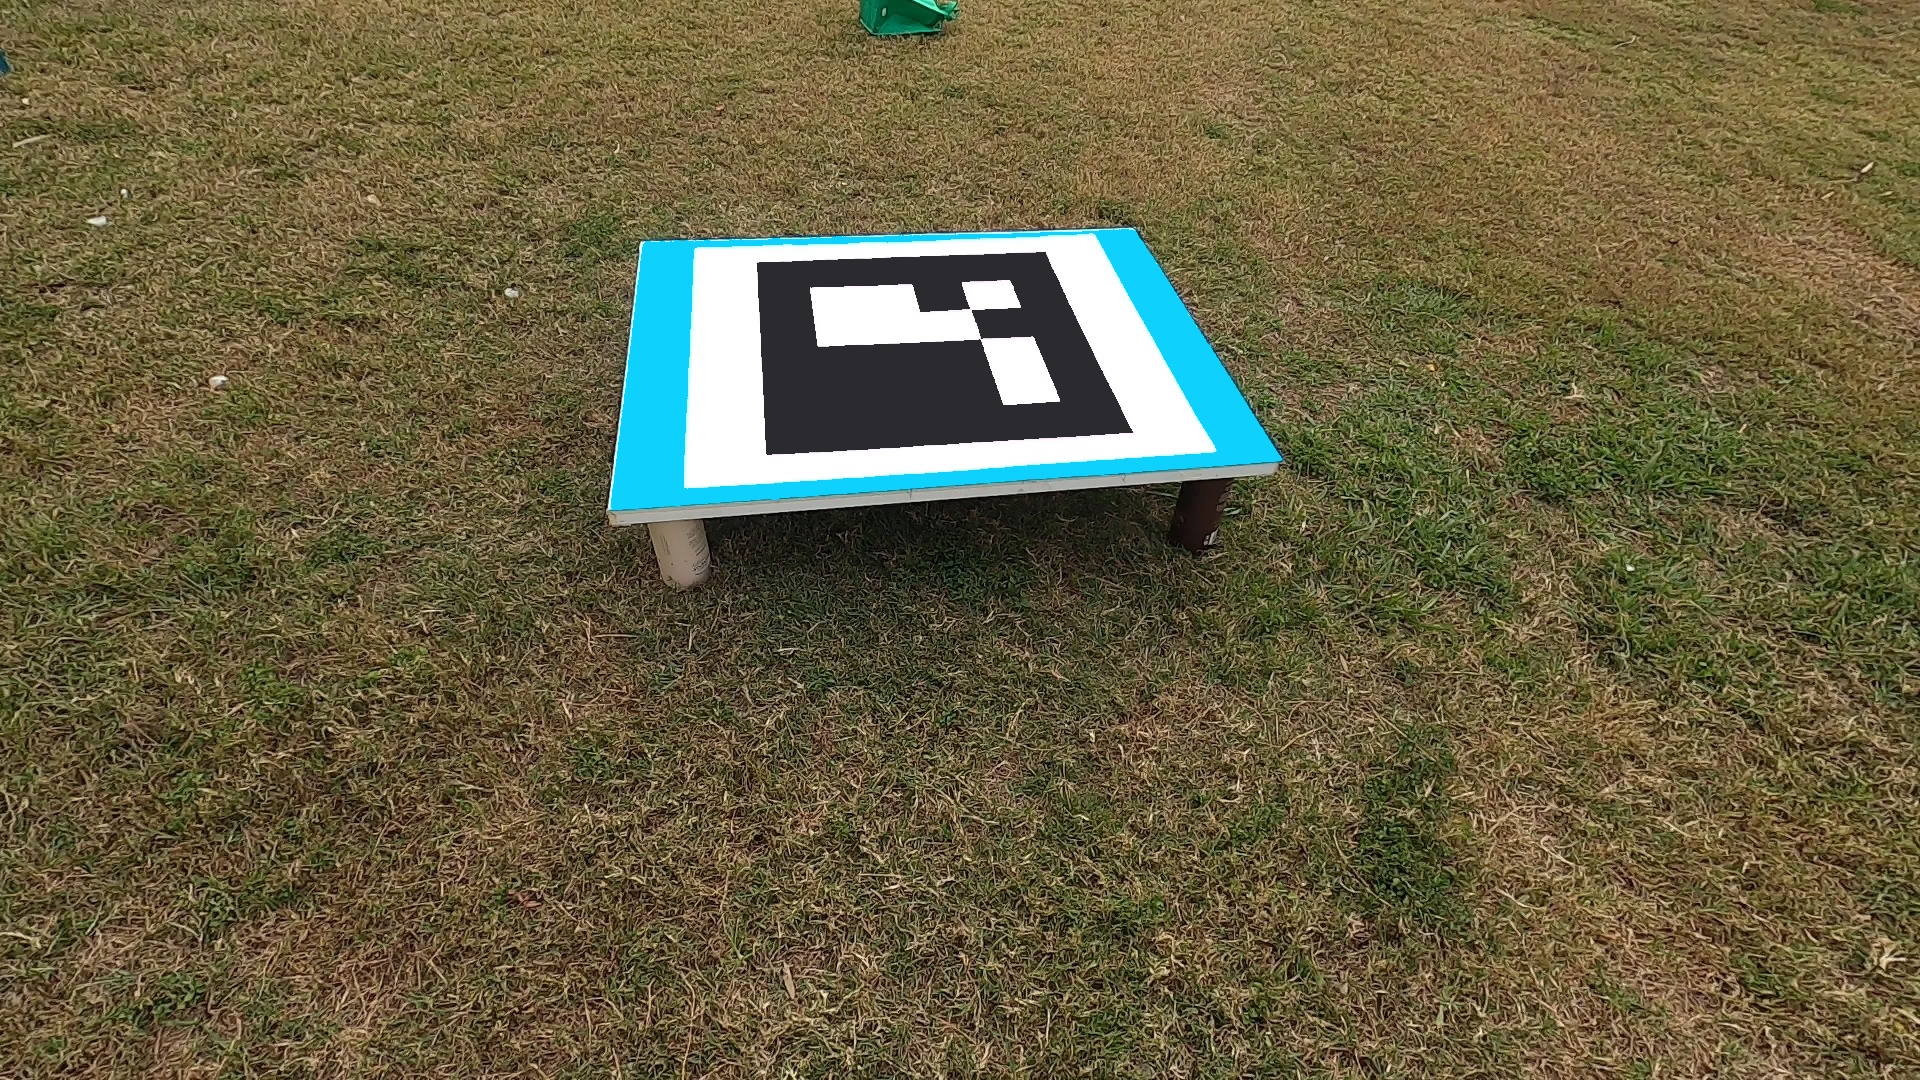
Calibration target on a raised support
Step 4: Start the scan
Caution
Obey these conditions for each calibration scan. If one condition is not met, the calibration fails and the scan must be done again.
Start the GoPro and the Hovermap at the same time.
Keep the target out of the GoPro view during the start and end sways.
Keep the target in the center of the GoPro screen during the laps.
Make the largest lap a minimum of 6 m radius.
Record more than 3 minutes of video.
Stand approximately 3 m from the target. Face away from the target.
Start the GoPro video and the Hovermap scan at the same time.
Start Scan in Emesent Commander |
Record in the GoPro Quik app |
Keep the Hovermap still for 10 seconds after the LiDAR starts to turn.
Hold the Hovermap level in front of you. Sway the Hovermap quickly from side to side: 60° left, 60° right, 60° left, then back to the center. Do not turn the Hovermap on its own axis.
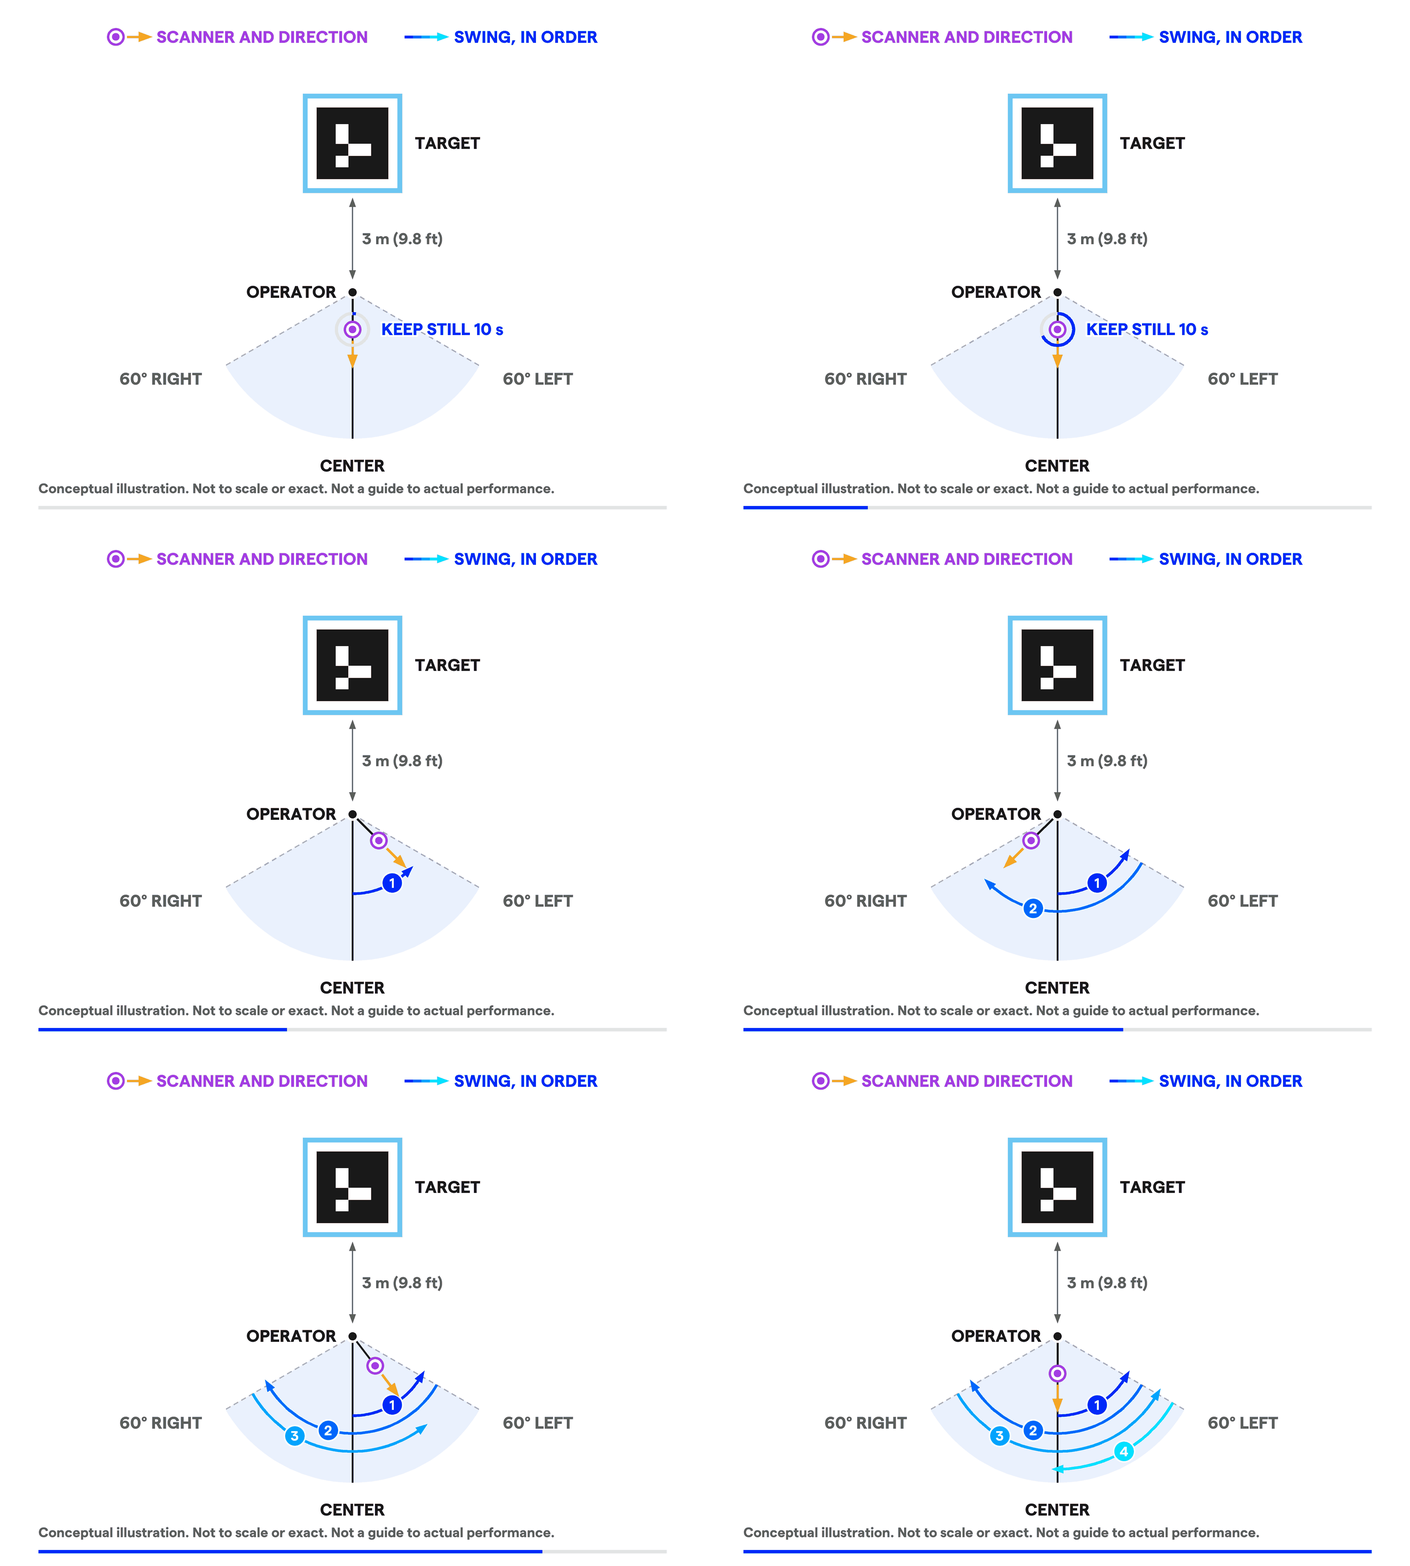
Start and end sways
Step 5: Walk the laps
Turn to face the target. Move to 1.5 m from the target.
Hold the Hovermap at head height in the normal position. Tilt the handle down so that the GoPro points at the target.
Walk slowly around the target. Do not make sharp turns or sudden movements. The first lap takes approximately 60 seconds.
After each lap, move farther from the target and walk another lap. Do 5 laps in total. Suggested radii are 1.5 m, 2.5 m, 5 m, 7.5 m and 10 m.
As the distance increases, lift the Hovermap higher. Keep the target in the center of the GoPro screen.
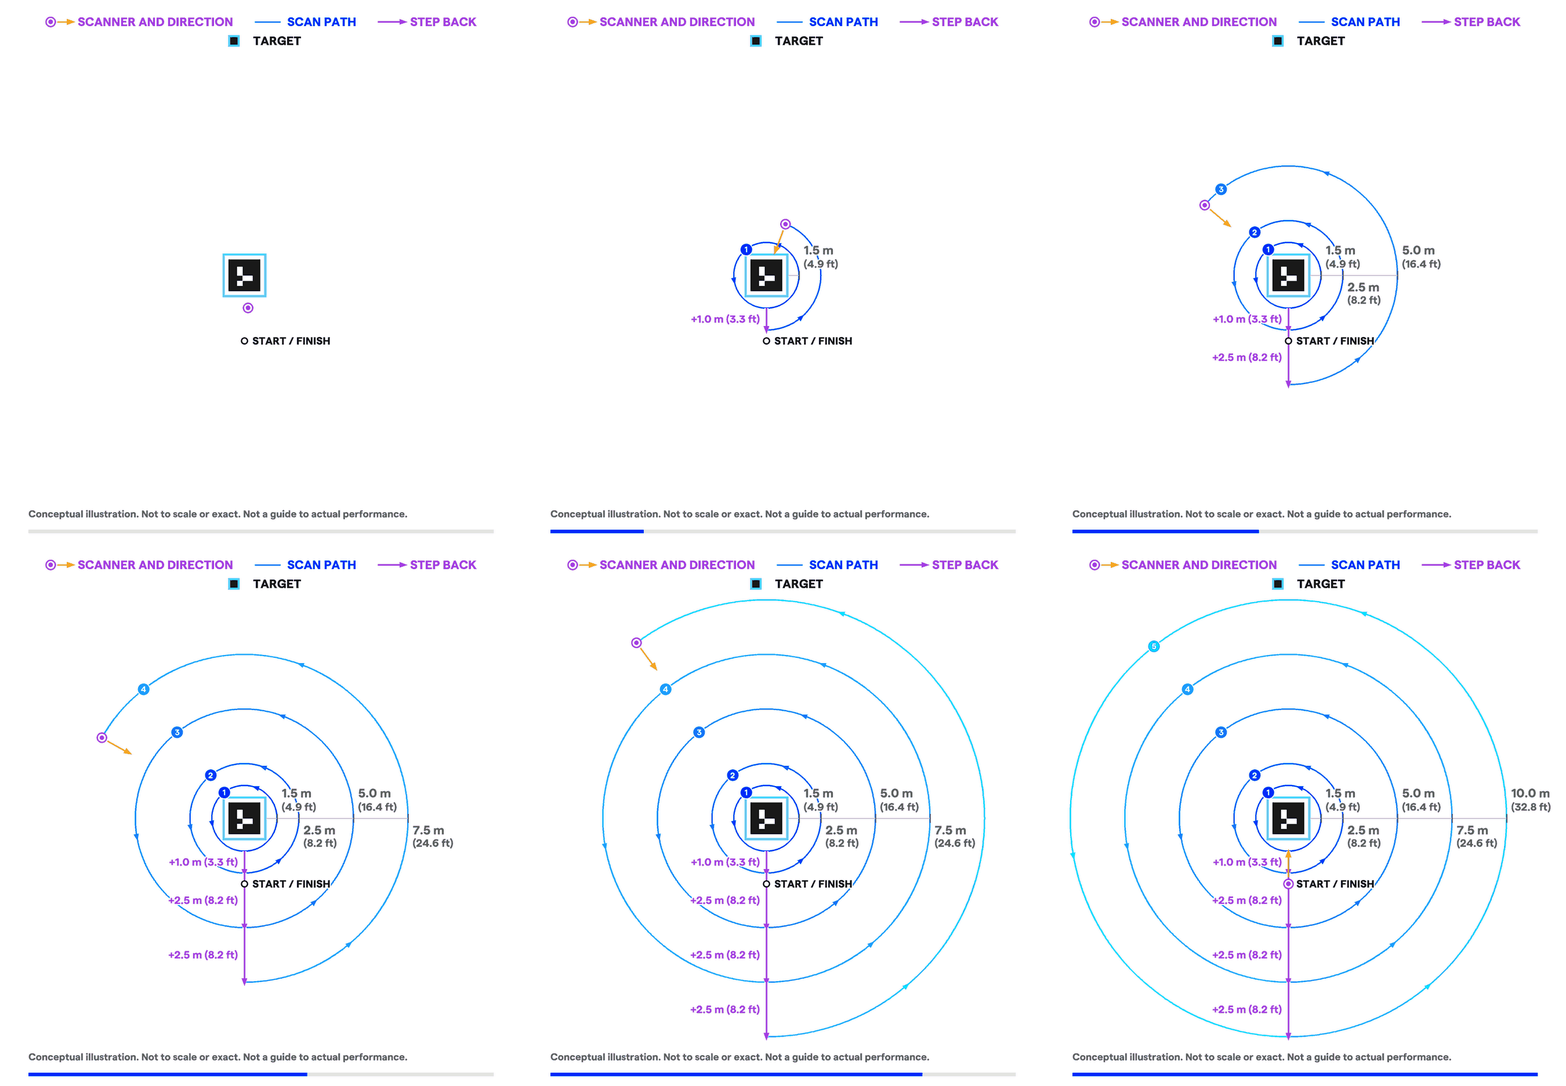
Lap path around the calibration target
Step 6: End the scan
Return to the start point.
Face away from the target.
Do the sways from Step 4 again.
Stop the GoPro video and the Hovermap scan immediately.
Stop Scan in Emesent Commander |
Stop Record in the GoPro Quik app |

Step 7: Capture the extra scans
Do a second calibration scan. Repeat Step 4 to Step 6.
Do a sanity check scan of 2 to 3 minutes. Scan an area near the target that has different colors and features.
GoPro Max only: set the GoPro back to 360 Video mode for colorization capture. Refer to Settings for GoPro Hero Max. A GoPro HERO 9, 10 or 11 keeps its settings.
Step 8: Prepare the data
Make a folder for each scan.
Put the Hovermap scan folder and the matching GoPro MP4 file in each folder.
Zip the folders.
Step 9: Submit the request
Open the Color Calibration Request Form.
Complete the Email, Description, Hovermap Serial Number and GoPro Model fields.
In Uploaded Dataset, select Calibration Scan, GoPro Footage and Sanity Check Scan.
If the zip file is on a file-sharing service, paste the link into Customer Shared Data. If not, leave the field empty.
Click Submit. A confirmation email arrives.
If Customer Support sends a share link, upload the zip file to the link. Reply to the email to confirm the upload.
Outcome
Customer Support receives the calibration data and sends the calibration file within 2 to 4 business days. To upload the file to the Hovermap, refer to Uploading Calibration Files to Hovermap.
Common mistakes
Orientation not locked. The calibration fails. Refer to Step 1.
Wrong GoPro for the calibration file. Aura stops with a camera serial mismatch error. Refer to Step 1.
Dirty lens. The images are blurry. Refer to Step 1.
Dirty lens
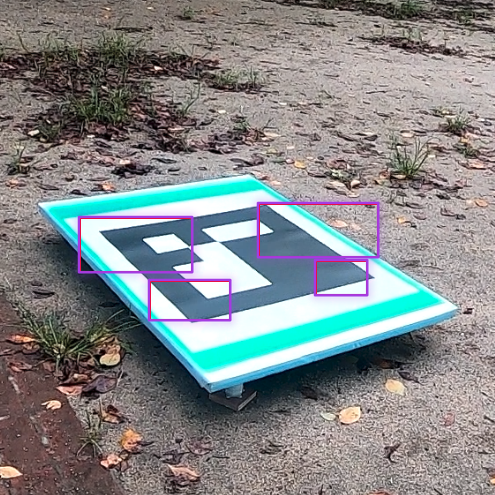
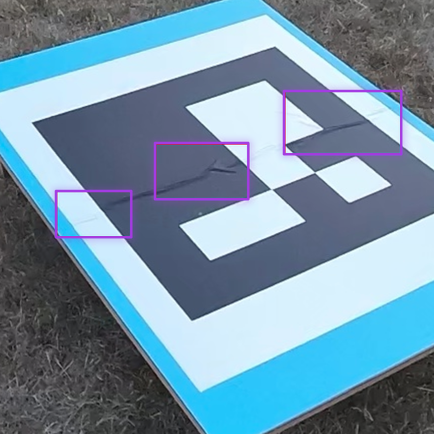
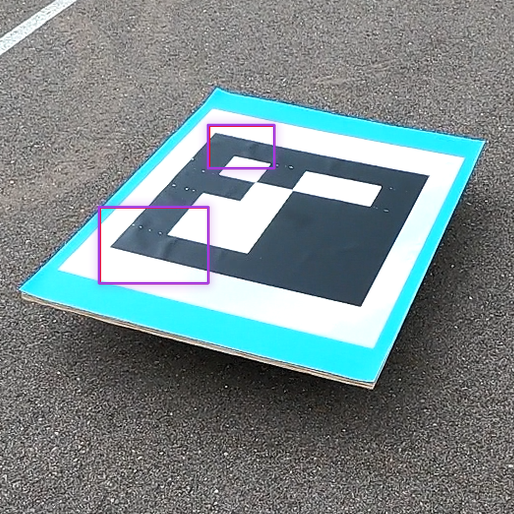
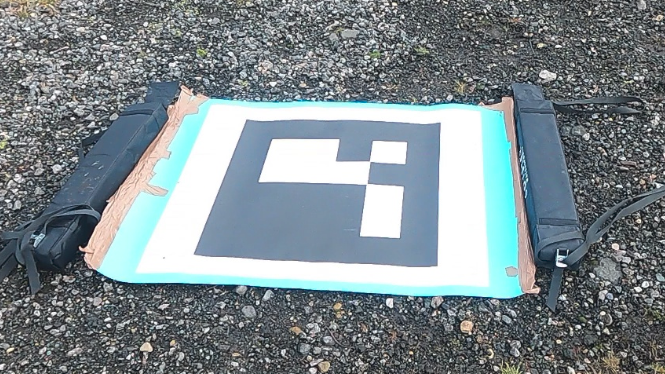
Target not flat. The calibration is poor. Refer to Step 2.
Target not flat |
Target not flat |
Target not flat |
Board not flat |
Protective film not removed. Reflections show on the target. Refer to Step 2.
Protective film not removed |
Reflections from the protective film |
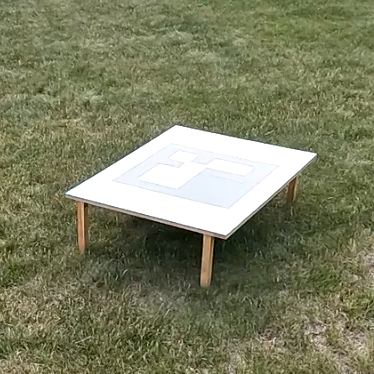
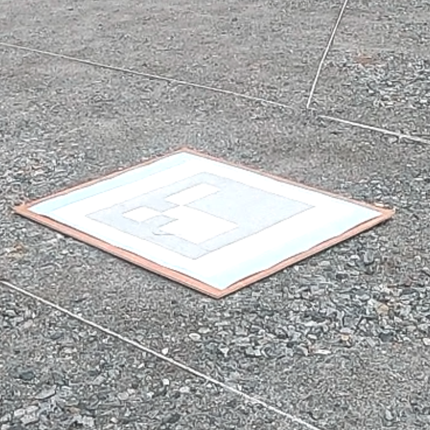
Target on the ground in an area with few features. SLAM errors occur. Refer to Step 3.
Sun glare, reflections or uneven light. The images are not clear. Refer to Step 3.
Uneven lighting with glare |
Even lighting |
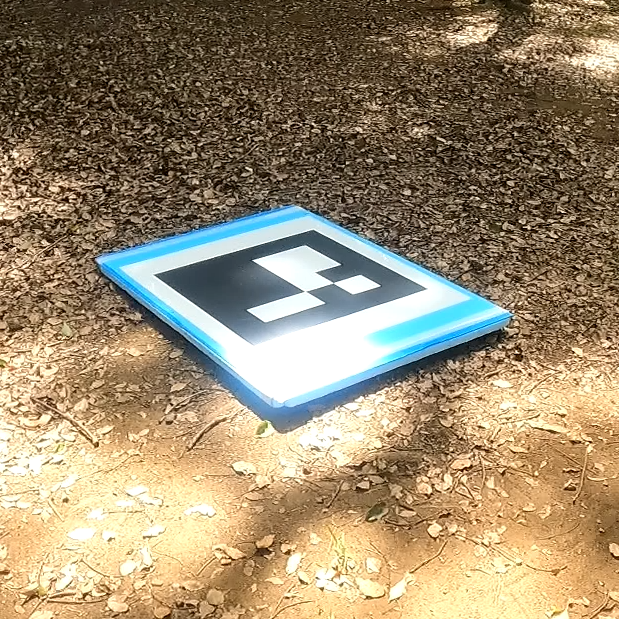
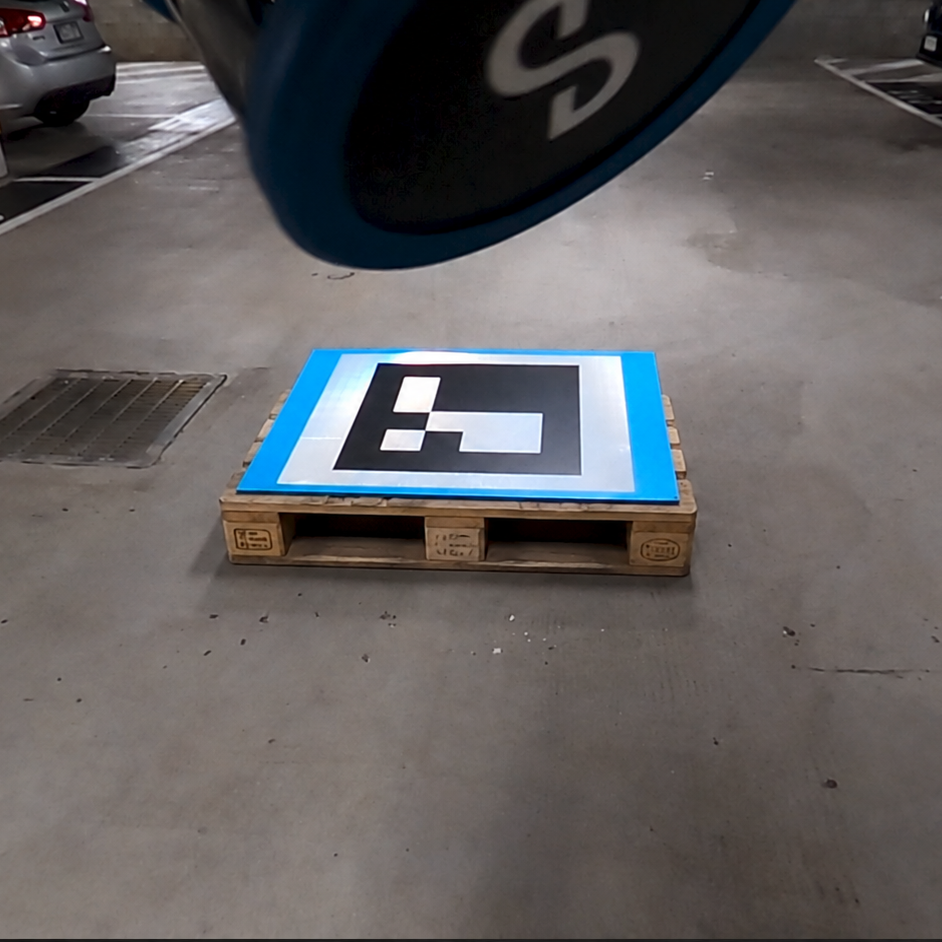
No sways, or target visible during the sways. Time synchronization fails. Refer to Step 4 and Step 6.
Additional information
To set up the GoPro for colorization, refer to Colorization Initial Setup Guide.
To capture a colorized scan, refer to Capturing a Scan with colorization.
GoPro settings for colorization capture: Settings for GoPro Hero Max and Settings for GoPro Hero 9/10/11.