
This section describes using Emlid reciever as a base station to send NTRIP corrections to the DJI M300/M350 drone.
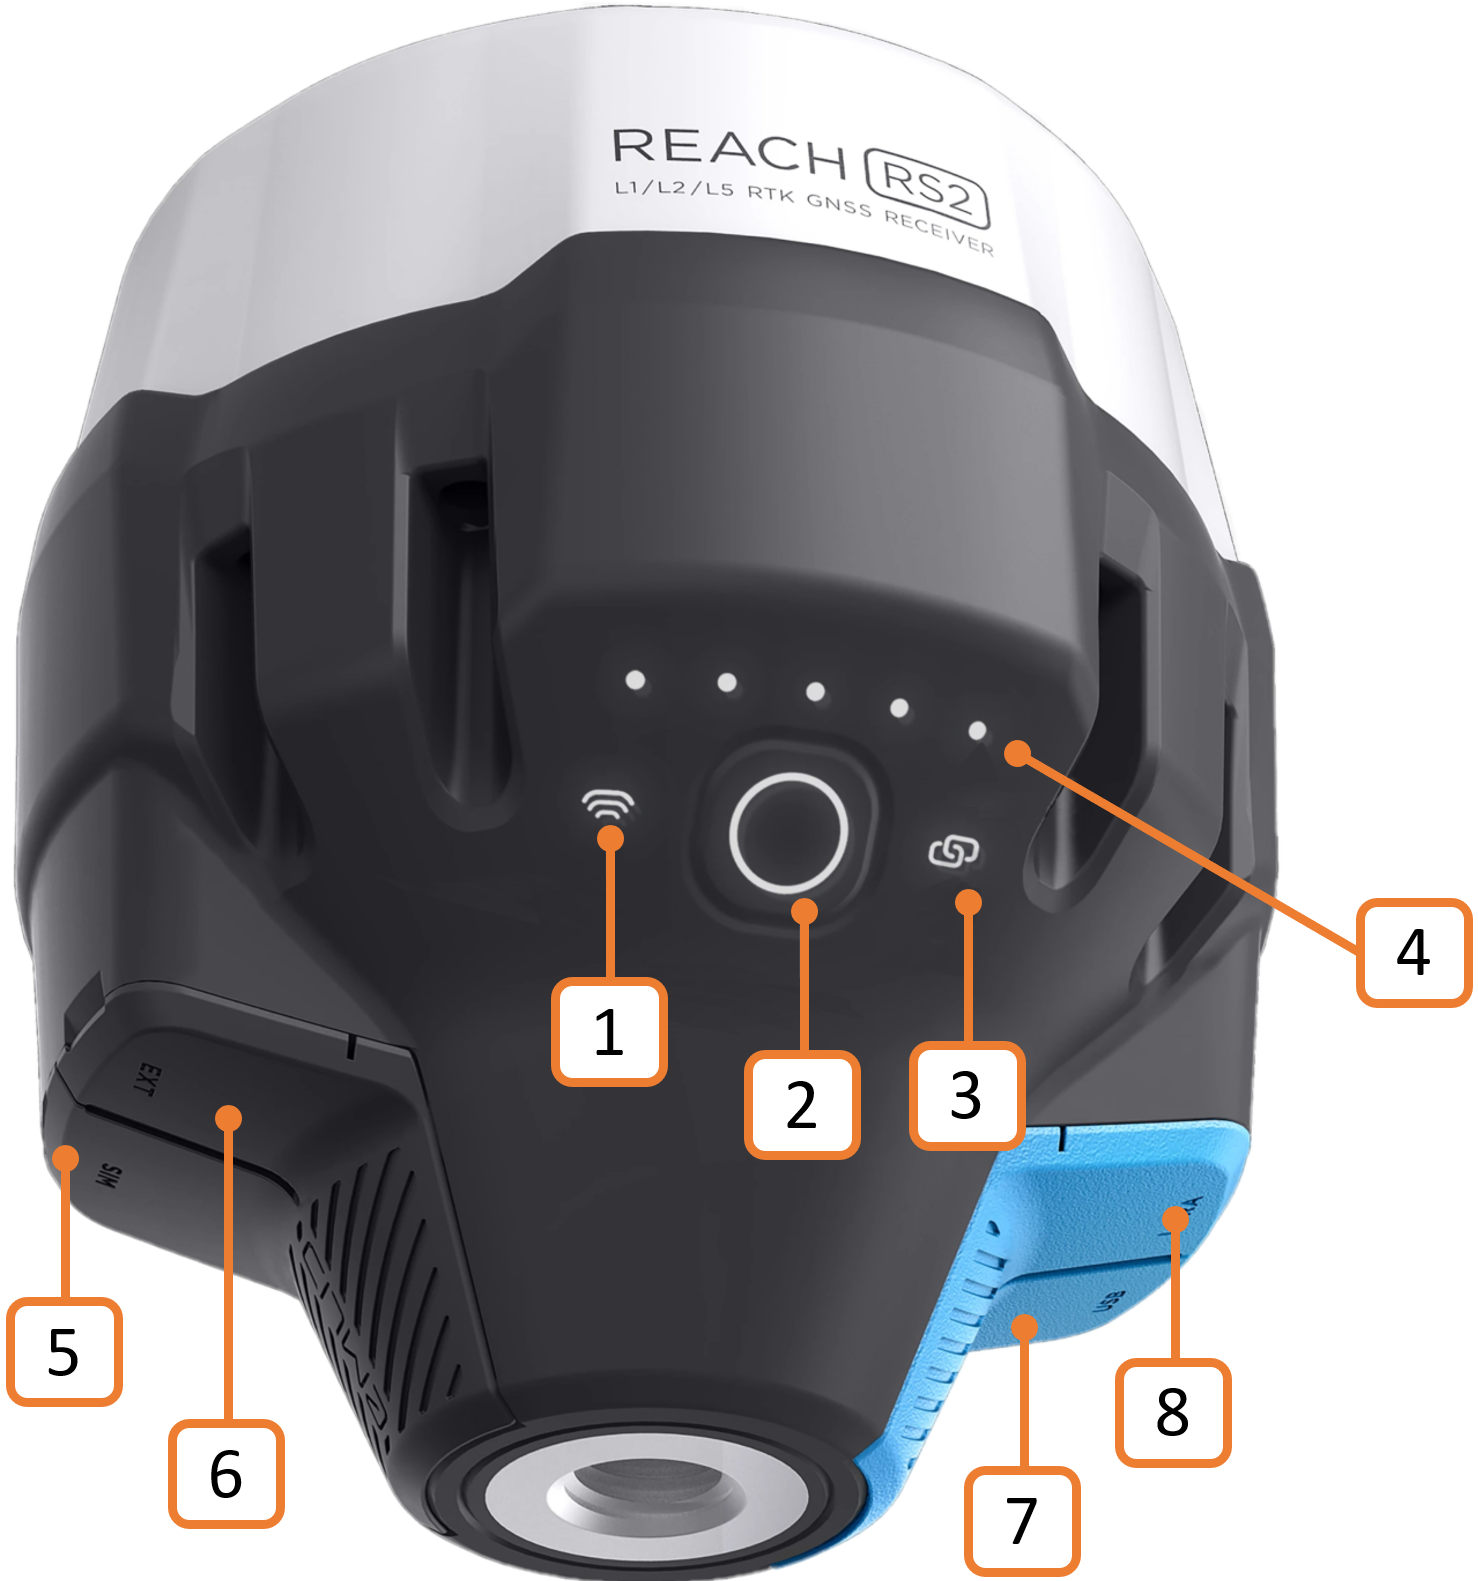
Figure 1 Emlid Reach RS2 base station
Refer to Base Station Activation and Setup if using the Emlid Reach RS2/RS2+ for the first time.
Access the Emlid Flow app
Download the Emlid Flow app on your iOS or Android mobile device.
Set up the Emlid reciever as a base station
Attach the base station to the pole and mount it on the tripod. Make sure that the tripod is properly leveled and that you are in an open area with a clear view of the sky. This will ensure good signal reception and a fair number of available satellites.
Press and hold the Power button (see Figure 1) on the base station for 2 seconds to turn it on. When Reach is turned on, the LED lights up with a solid white light. When the point collection has started, the light flashes rapidly. During startup, the Emlid Reach RS2/RS2+ enters a network scan state and searches for known networks to connect to. If it doesn't find a known network, it switches to broadcast mode.
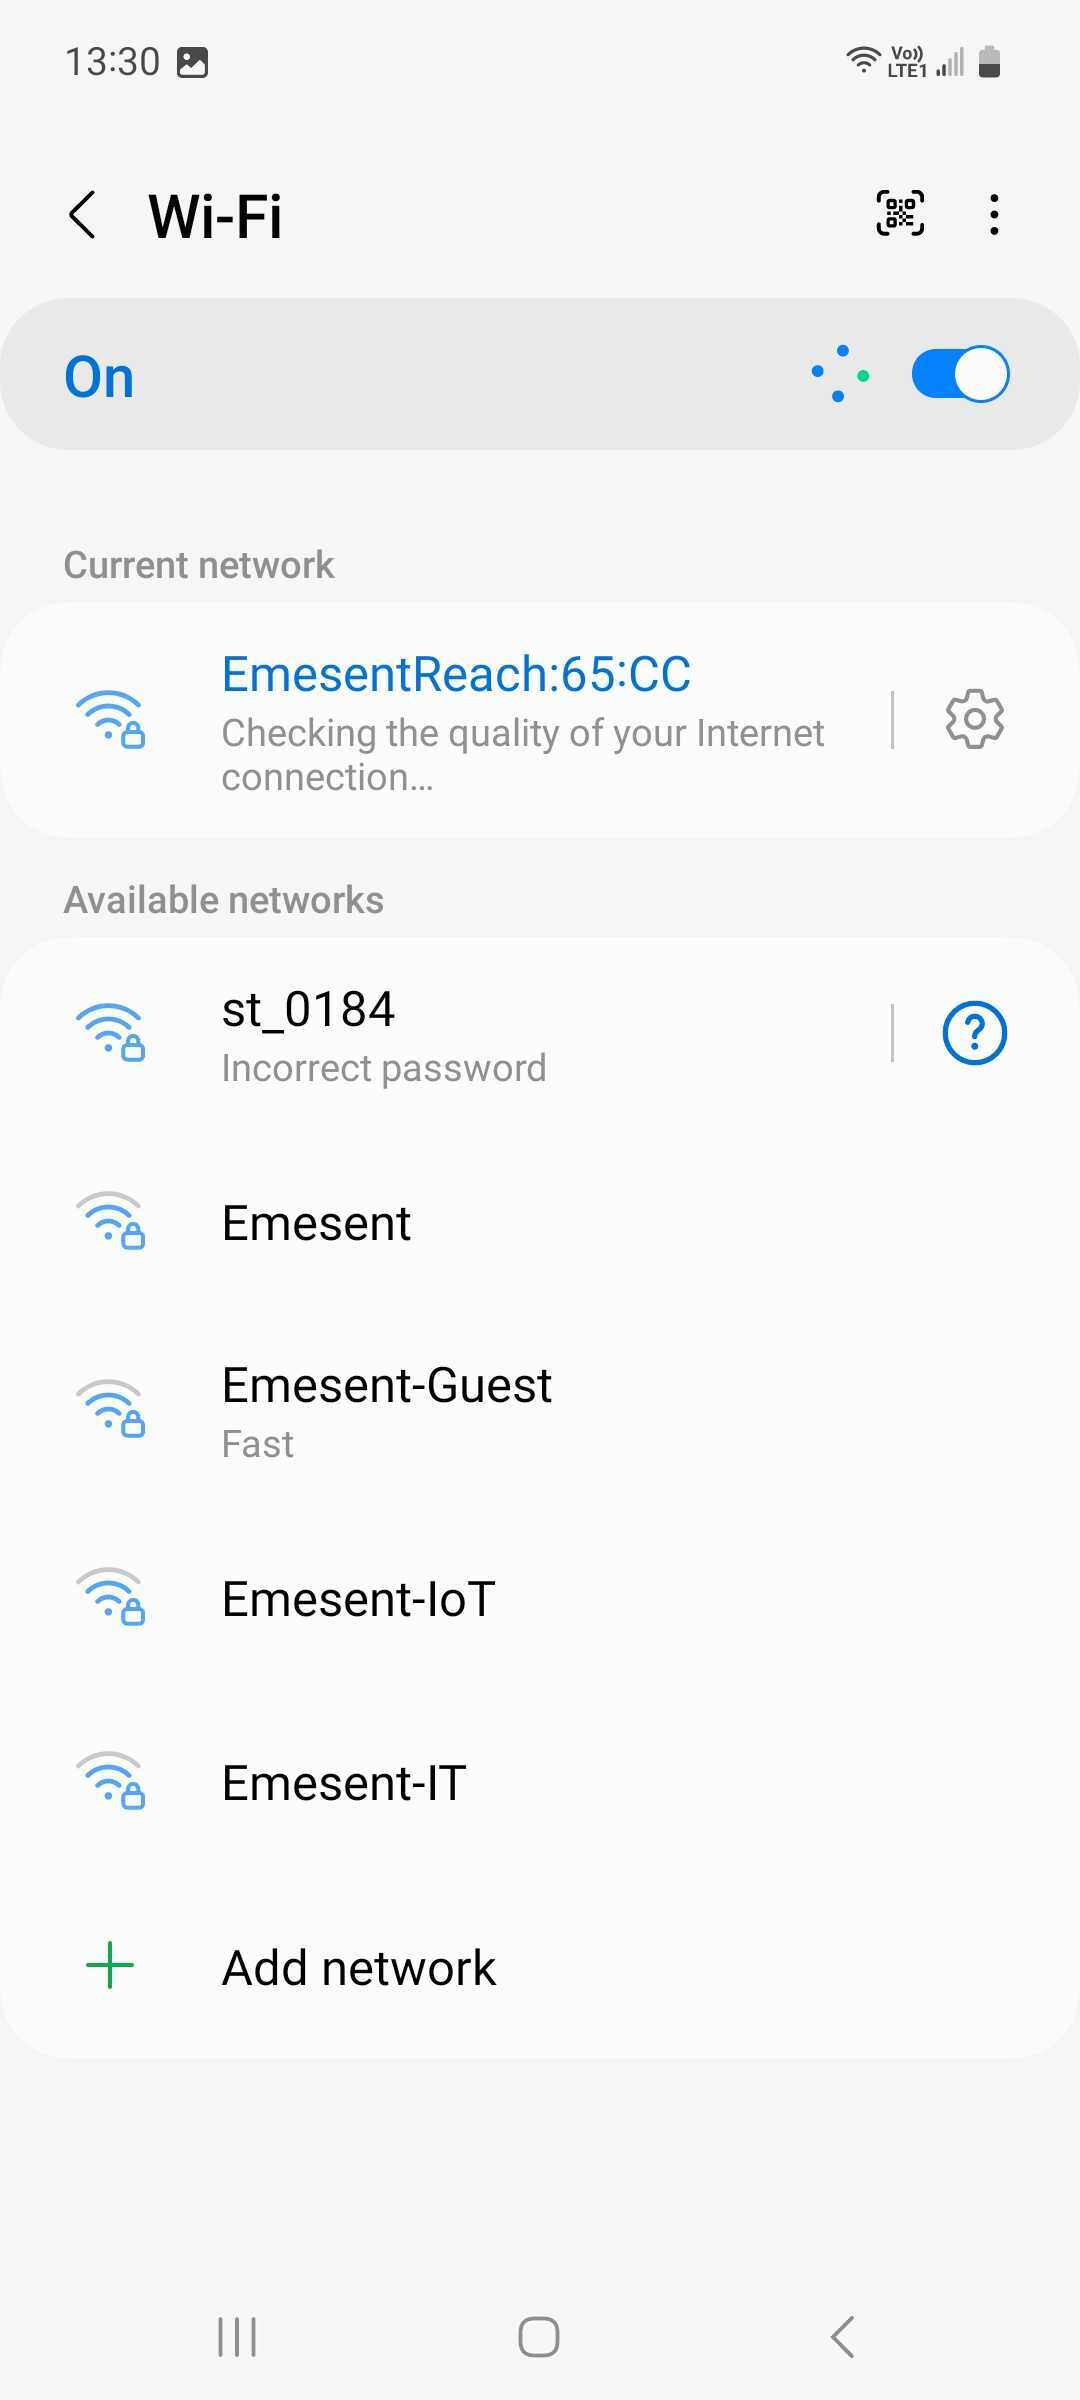
The lights above the Power button indicate the battery charge level. If the loading animation is over, proceed to connect your mobile device to the Emesent Reach RS2/RS2+ receiver via Wi-Fi. The default password is emlidreach.
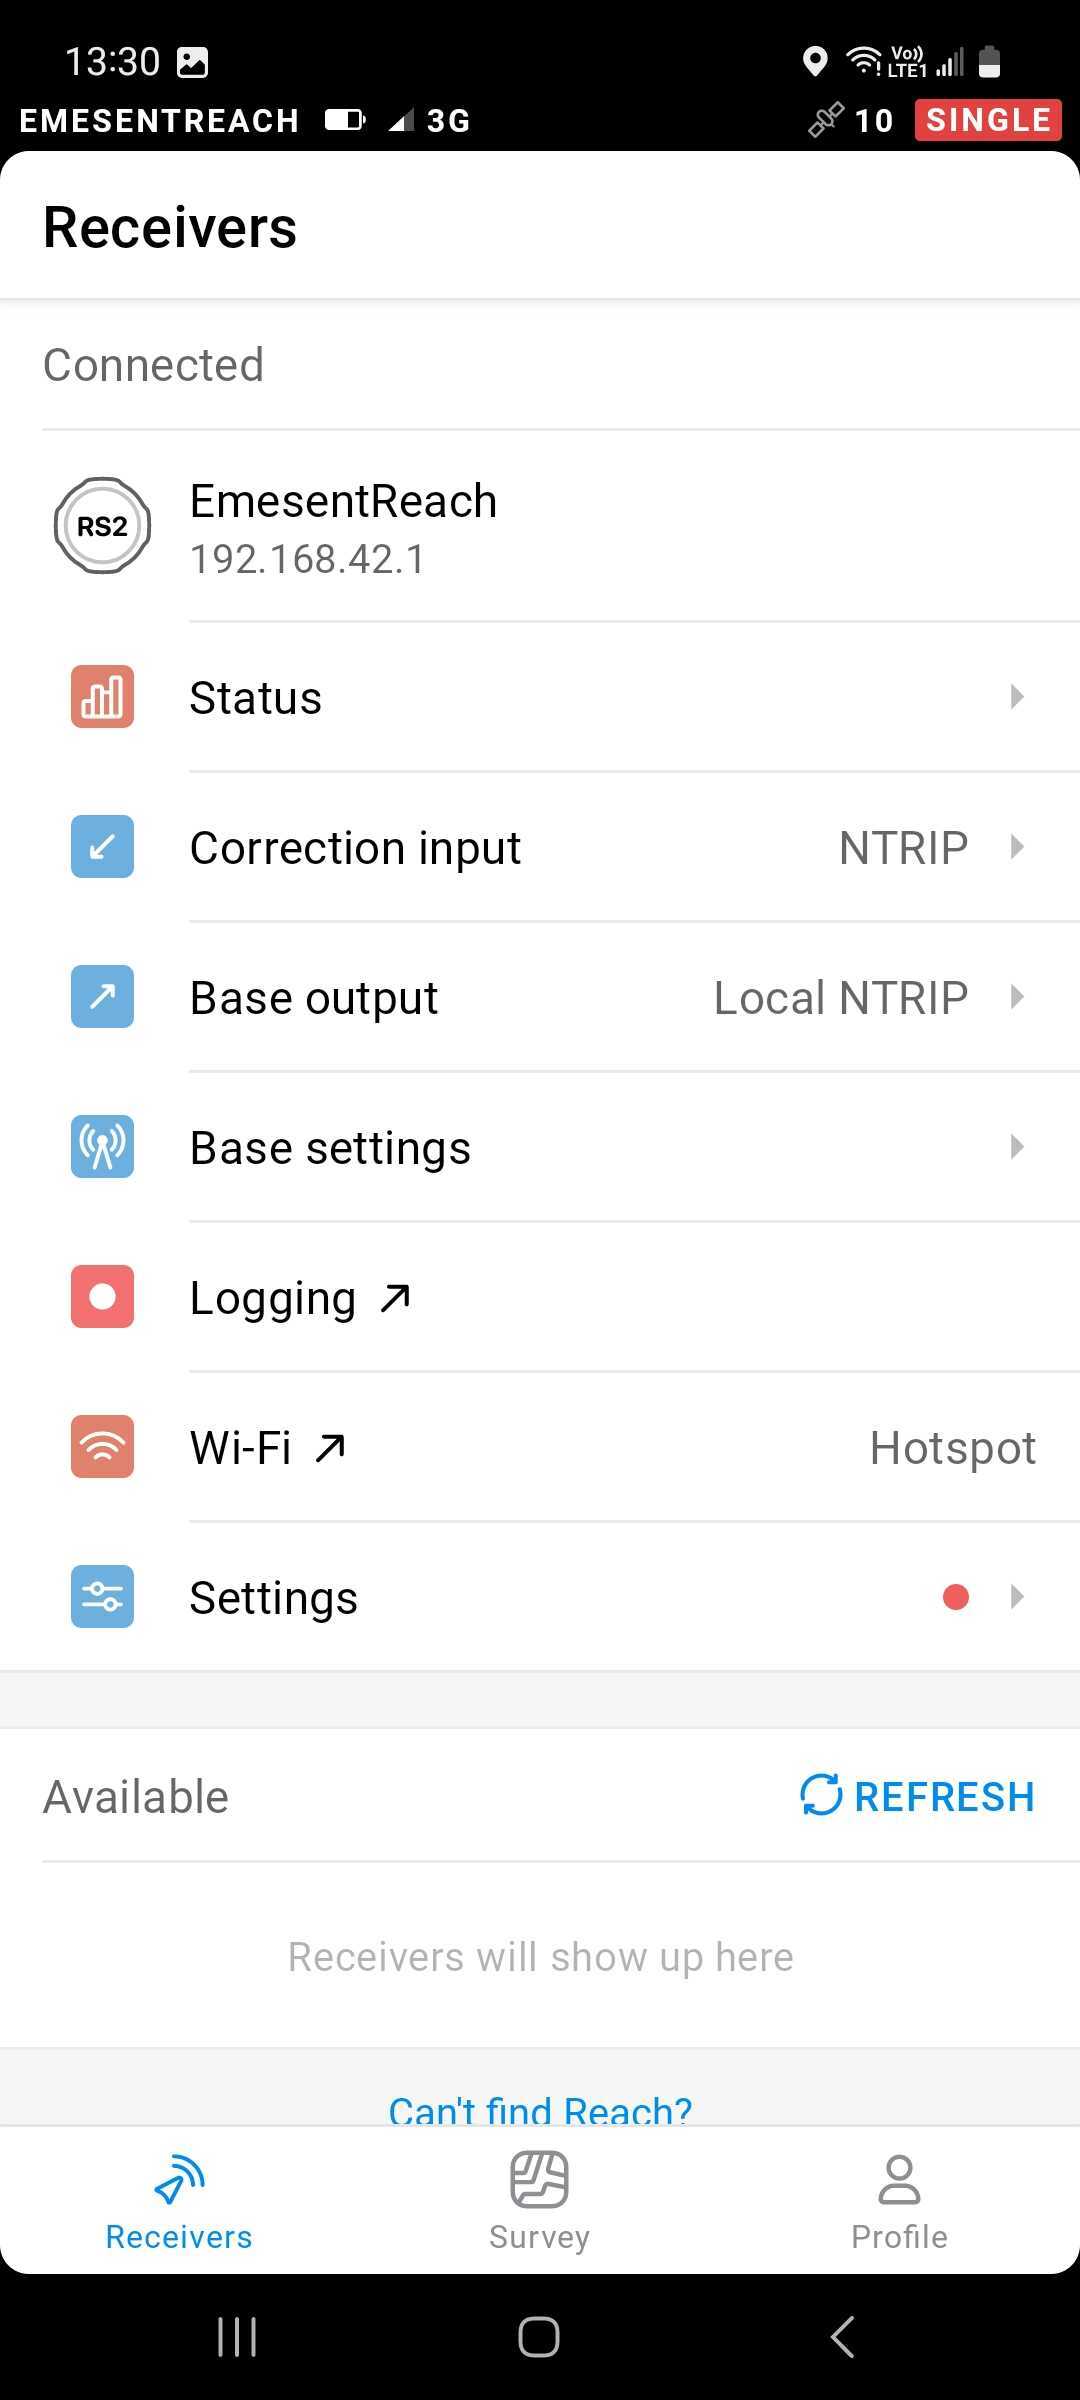
Launch the Emlid Flow application on your mobile device.
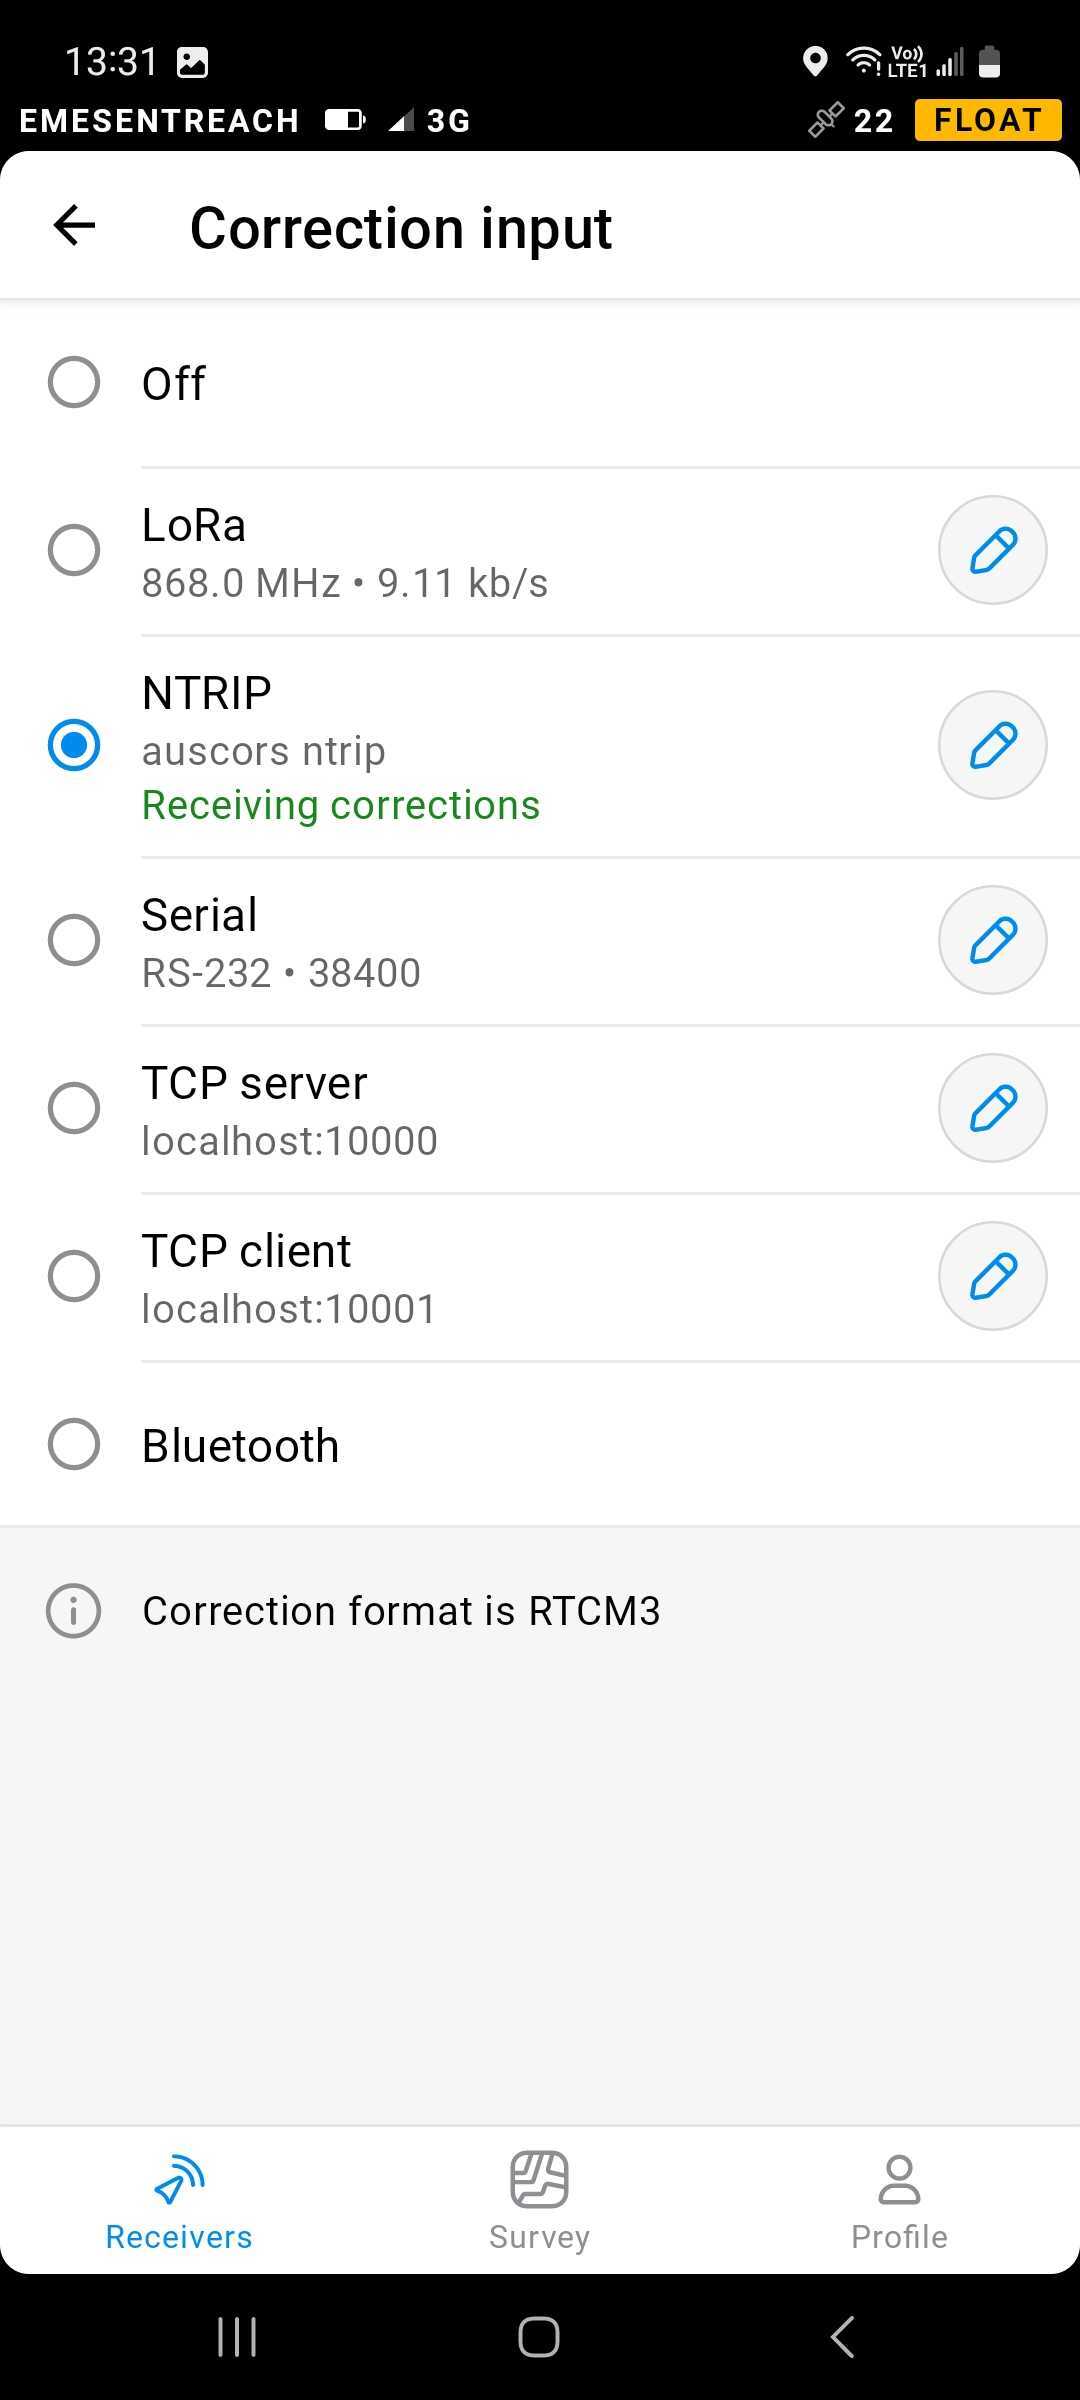
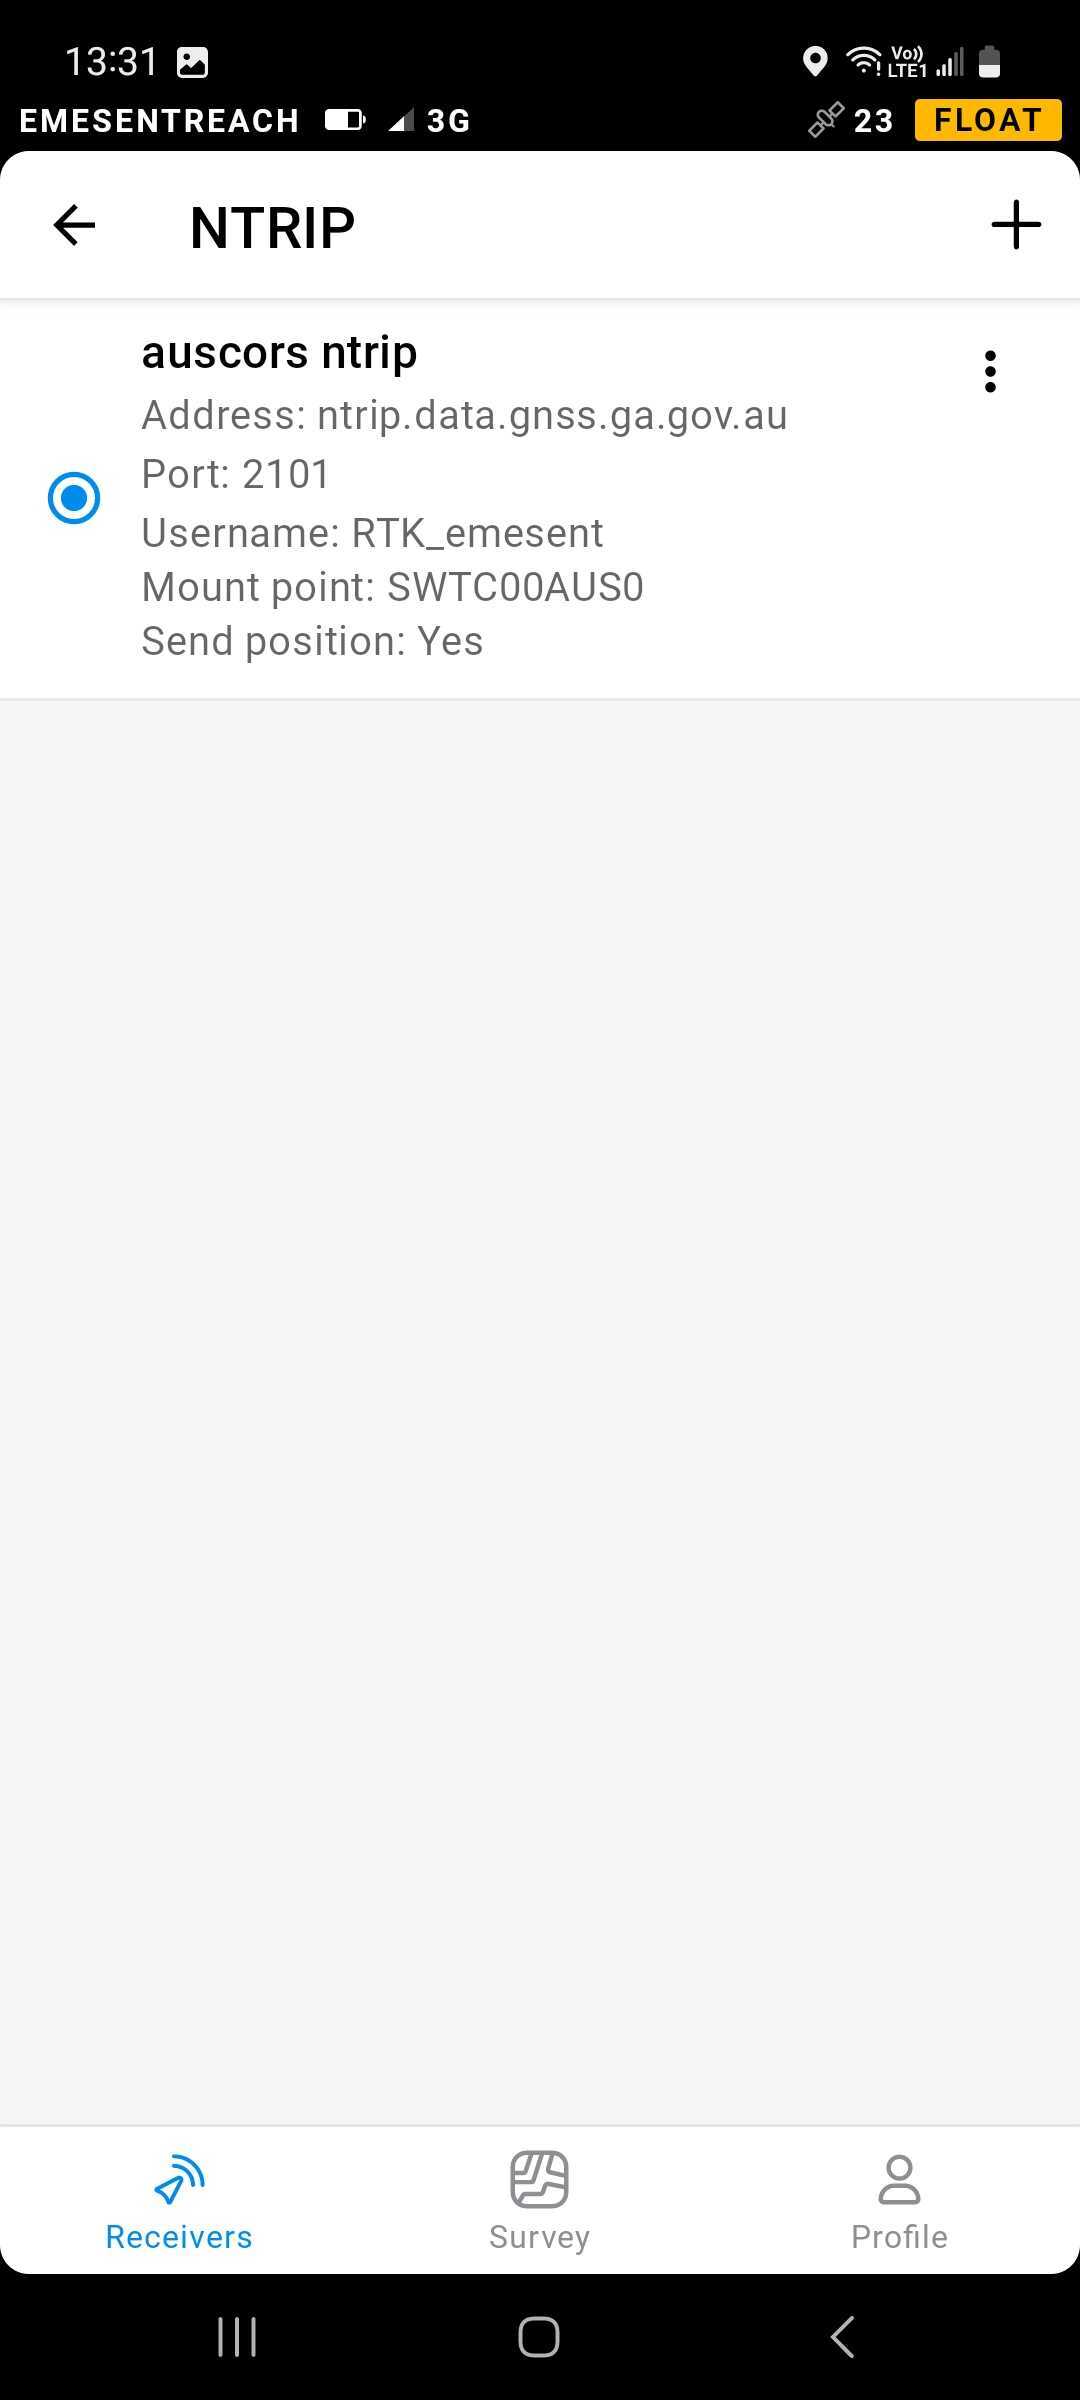
Tap Correction Input then select NTRIP from the list.
The system remembers the last connected network. Make sure that the network is shown as Receiving corrections.
Clicking the Pencil icon opens a screen where you can edit existing network connection settings. You can also click the Plus icon on the top right of that screen to add a network. Check with your network provider to determine the correct settings to use. Additionally, you can refer to the Geoscience Australia website and use the map provided to find the most appropriate mount point location. See GNSS Network Map. You should see the following display after you have entered the required network settings.
Go back to the main page and check if you have successfully connected to the network and if the Emlid Reach RS2/RS2+ is reporting back properly. If it takes a while to connect (more than 5 mins), it may be worth double-checking if the Emlid Reach RS2/RS2+ has access to mobile data.
Place the base station over a known coordinate
The absolute position of the rover is accurate only to the same level as the position of the base station. Therefore, place the receiver above the benchmark as precisely as possible.
Find the nearest survey monument to the area where you are going to conduct a survey. It may be a trig point, a survey marker, or just some reference point on site.
Check that it is located in an open area with a clear sky view to ensure good satellite reception.
Accurately place the tripod over the benchmark, checking that the tripod is approximately above the point.
Fix the tripod's position by deepening its legs into the ground.
Check the position again and make the necessary adjustments.
Level the tribrach.
Double-check that the tripod is exactly above the benchmark.
Mount your Reach on the tripod.
Open the Emlid Flow app and connect to the Base Station.
Go to the Base mode tab.
In the Base coordinates section, select Manual and enter the benchmark coordinates in WGS84 format.
Fill in the height in the corresponding field of the ReachView app.
Go to the Status tab on the base station to ensure Emlid Flow shows plenty of green satellites and the receiver has at least a Single solution.
Position averaging with FIX solution
If a known coordinate is not available, use the "positioning averaging method" to improve the accuracy of determining the base station's position. This method involves collecting multiple position measurements over a period of time and then averaging these measurements to obtain a more precise estimate of the base station's coordinates.
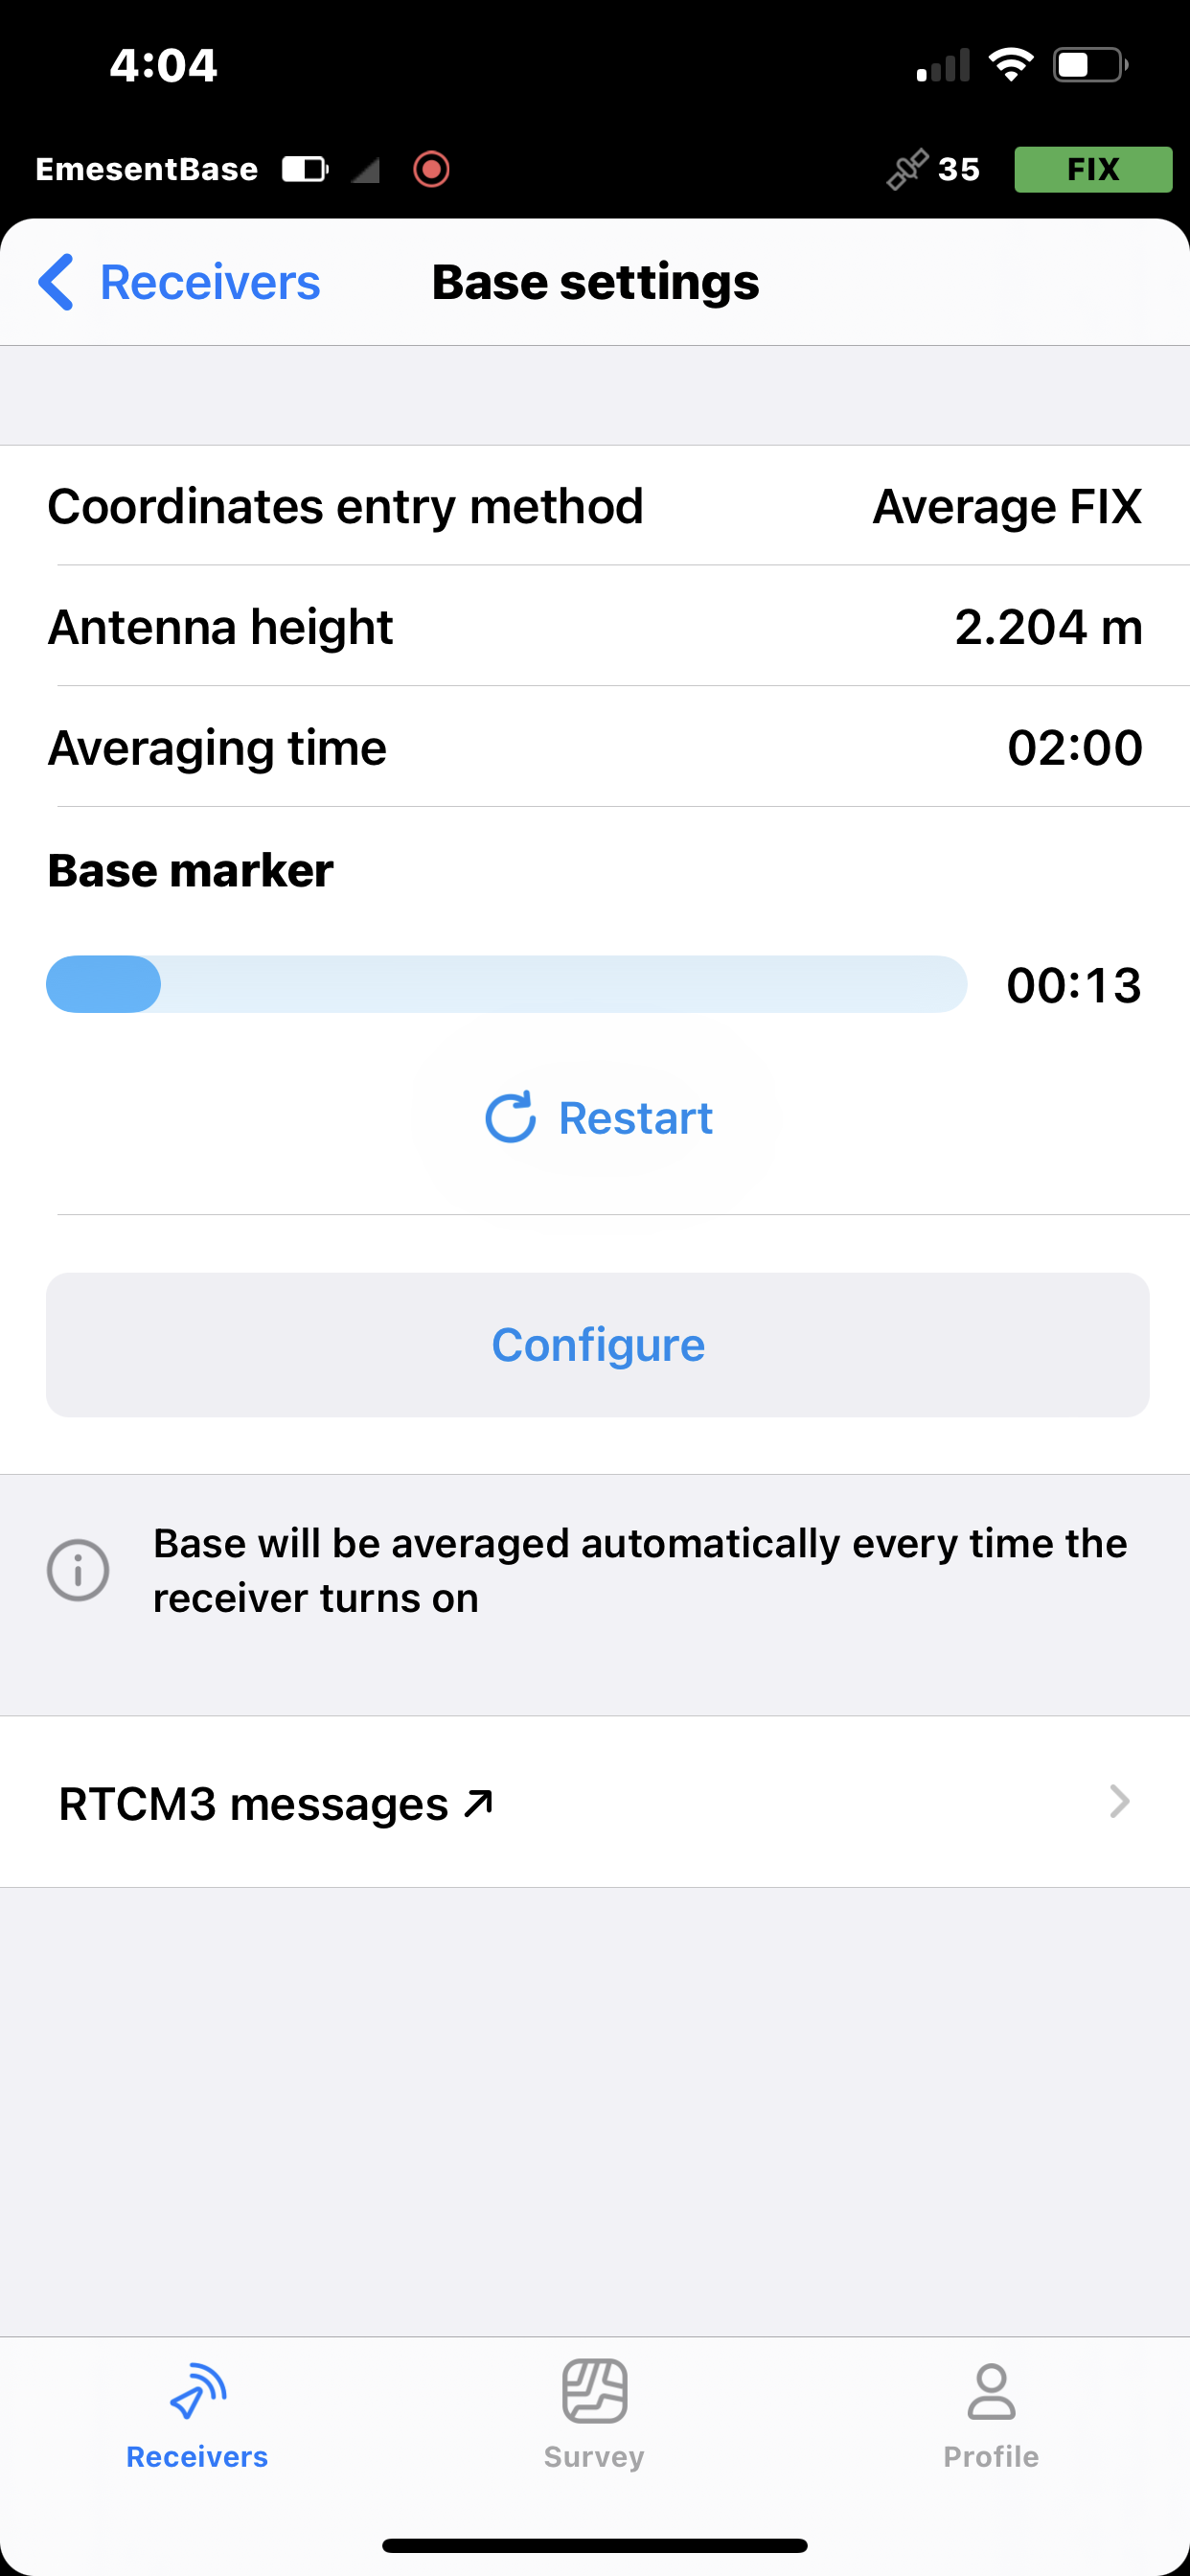
In the Emlid Flow app, tap Base settings.
Make sure the Coordinates entry method is set to Average FIX. If not, tap Configure.
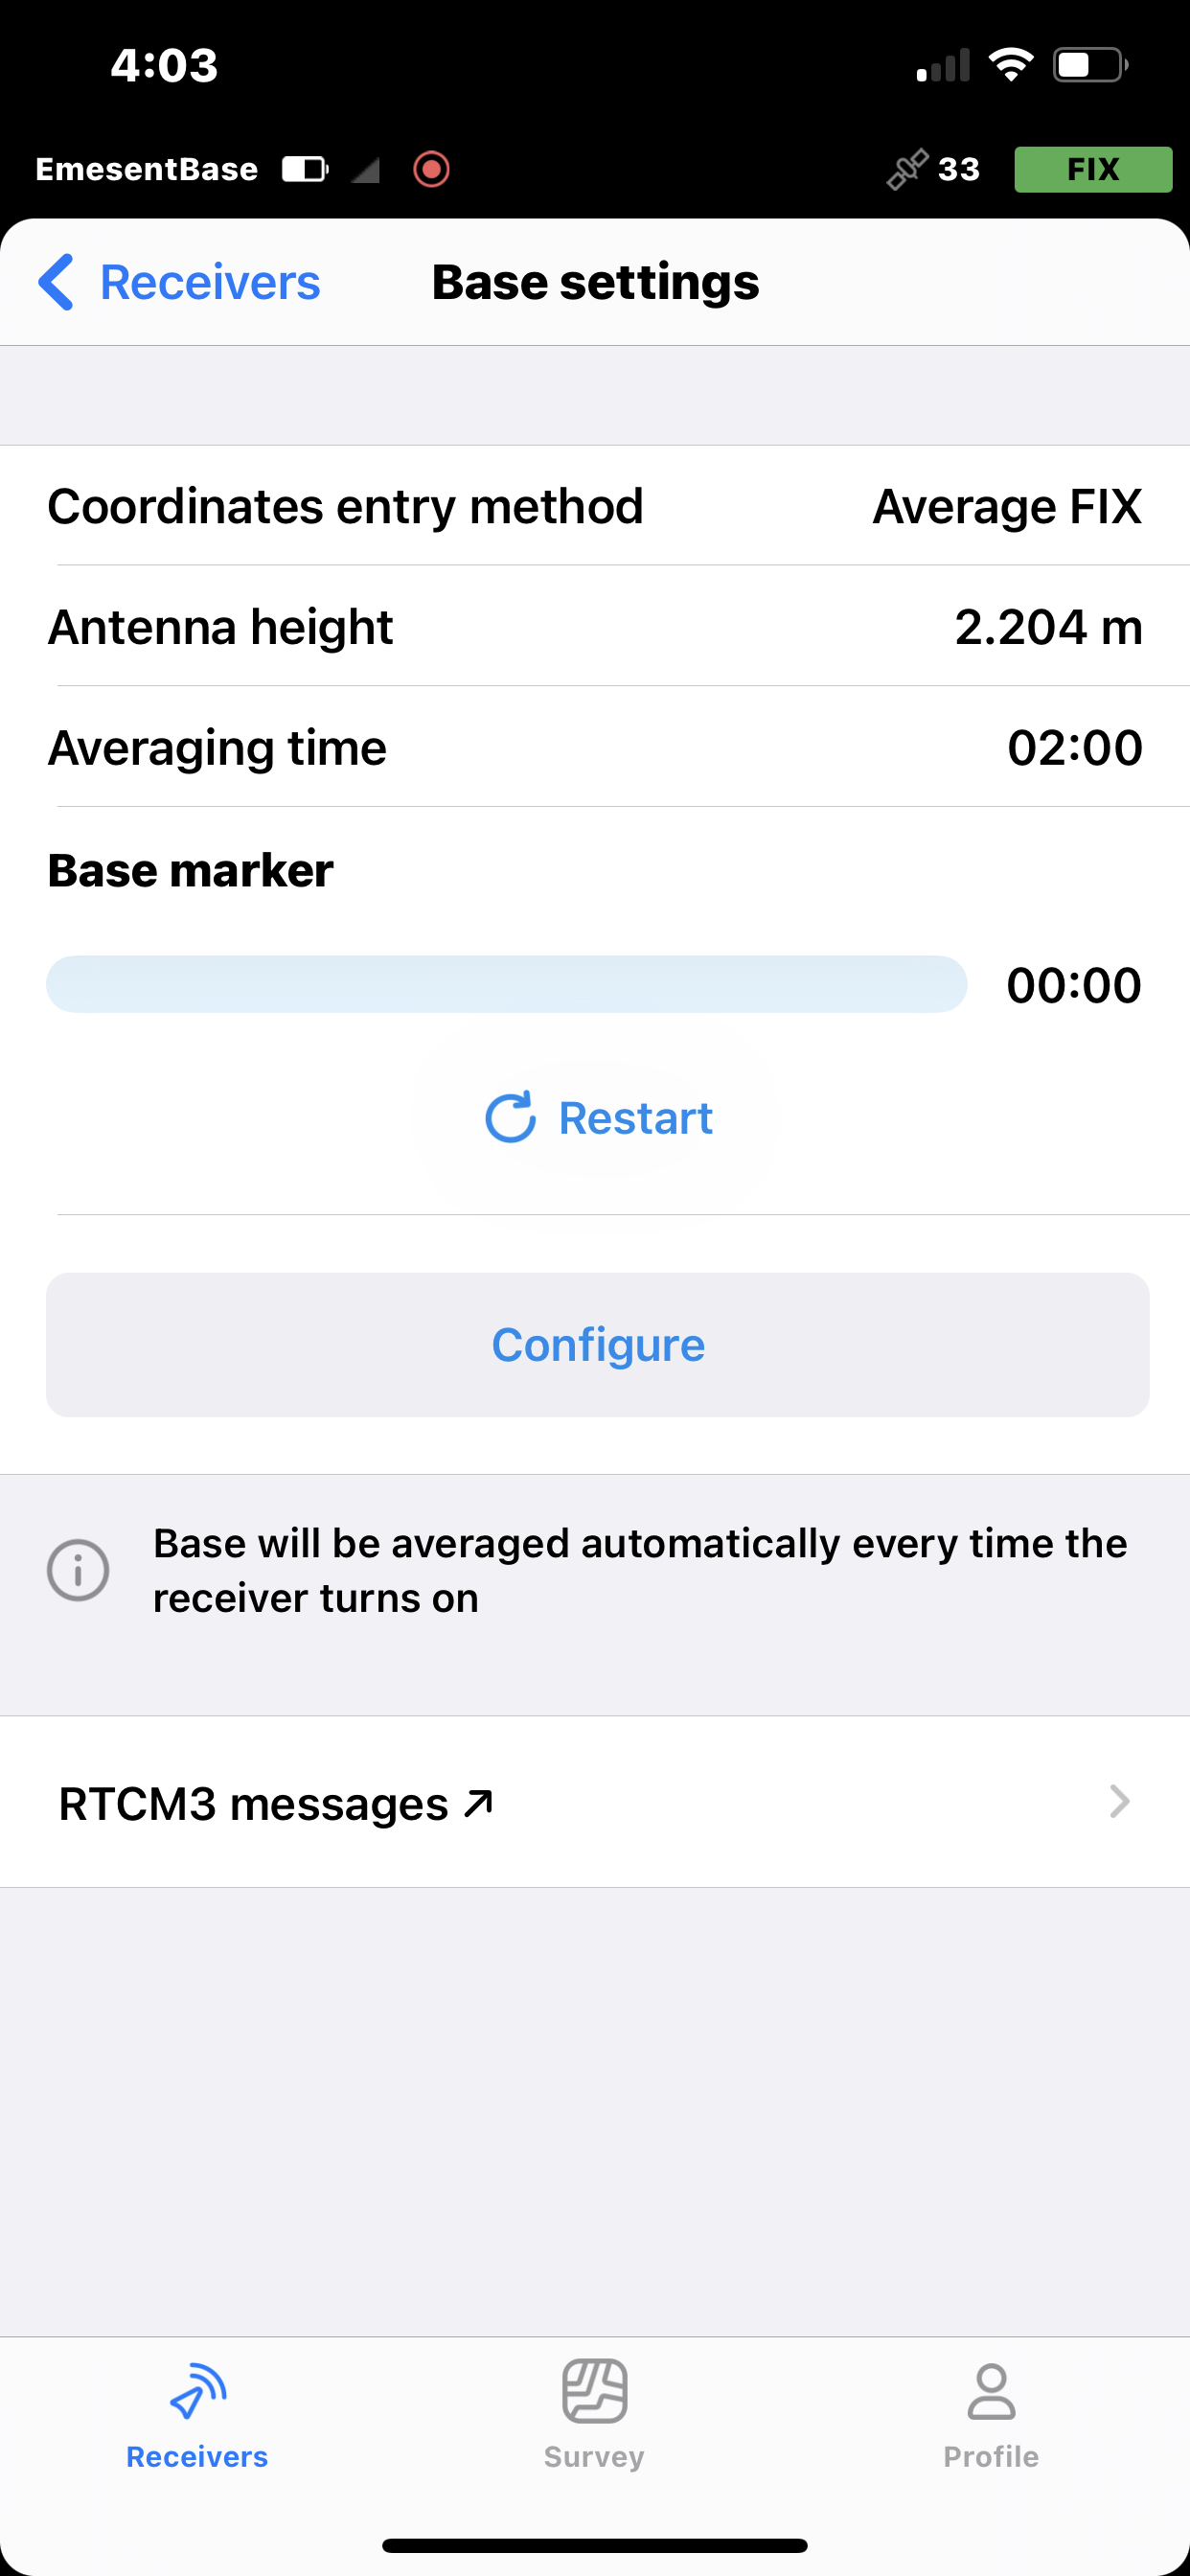
In the screen that displays, select Average FIX.
Set the Antenna height then specify the Averaging time.
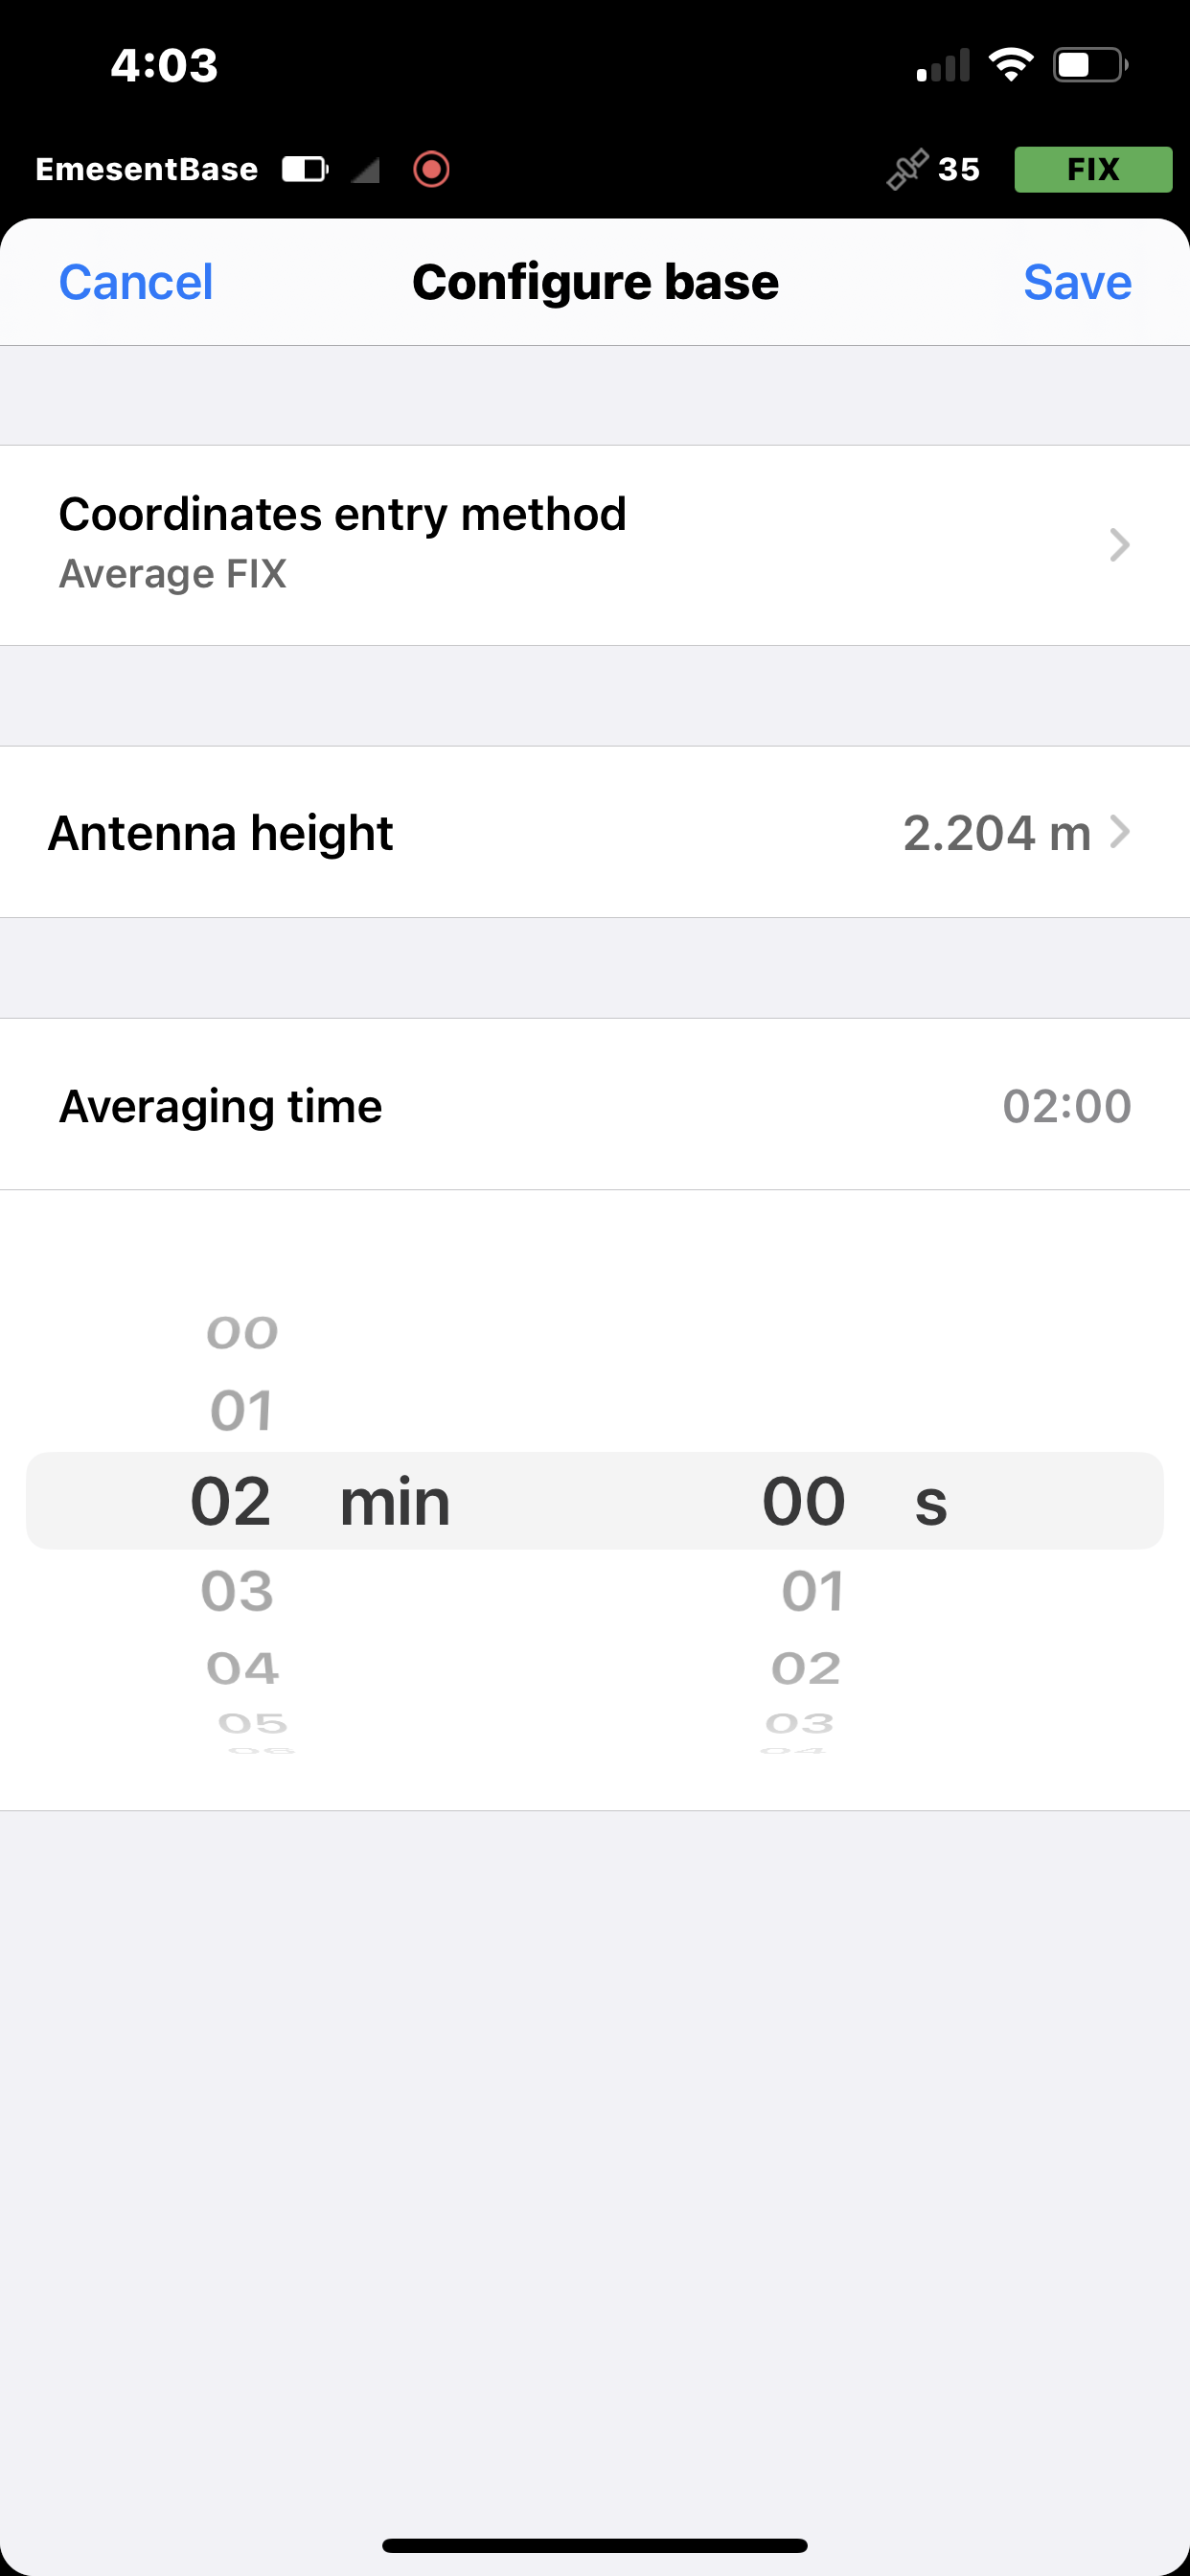
The Antenna height is measured from the ground to the base of the Emlid Reach RS2/RS2+. For example, if you are using a 2-meter pole and quick-tripod setup, your measured height will be 2 meters. The actual phase center of the antenna is 0.134 m higher but the receiver will include that automatically. The Averaging time depends on the specific requirements of the application. Short averaging periods may be suitable for applications that require rapid updates, while longer averaging periods may be preferable for applications that prioritize maximum accuracy.
Tap Save to go back to the Base settings page, the averaging process is started.
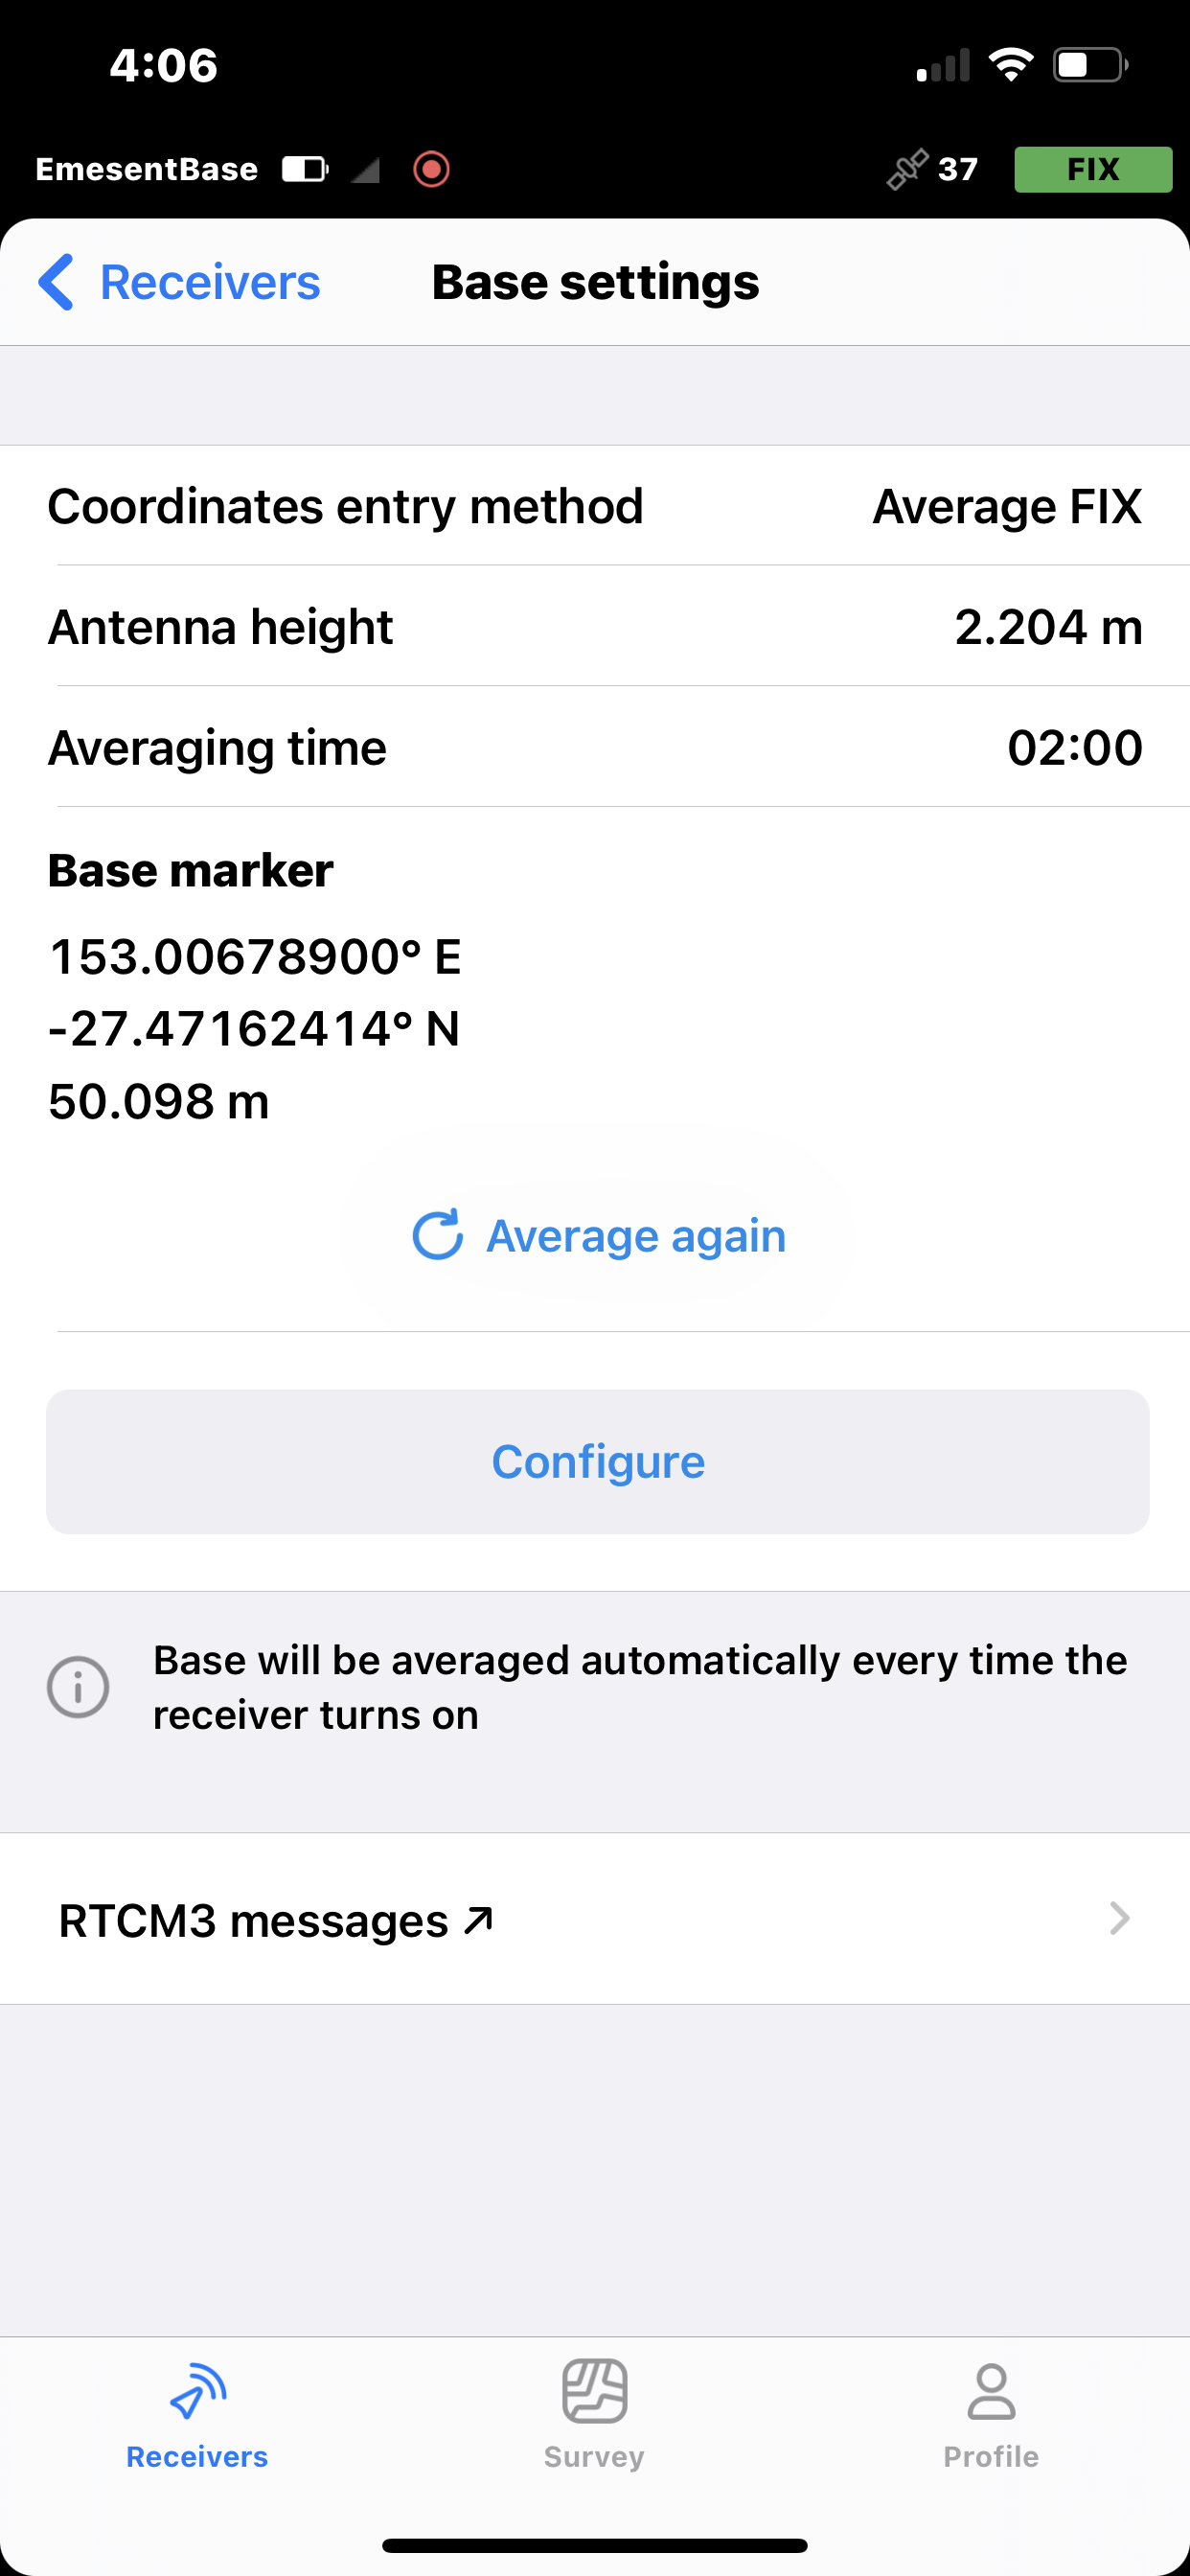
Once the averaging is completed, the updated base coordinates are displayed.
Connect the M300/M350 controller to the Emlid Reach RS2/RS2+ base station
Once the base station is properly set up, the Emlid Reach RS2/RS2+ can serve as a base station for the M300/M350. Follow these steps to enable the M300/M350 to consume RTK corrections from the Emlid Reach RS2/RS2+.
On your mobile device, connect to the Emesent Reach RS2/RS2+ receiver via Wi-Fi. The default password is emlidreach.
.jpg)
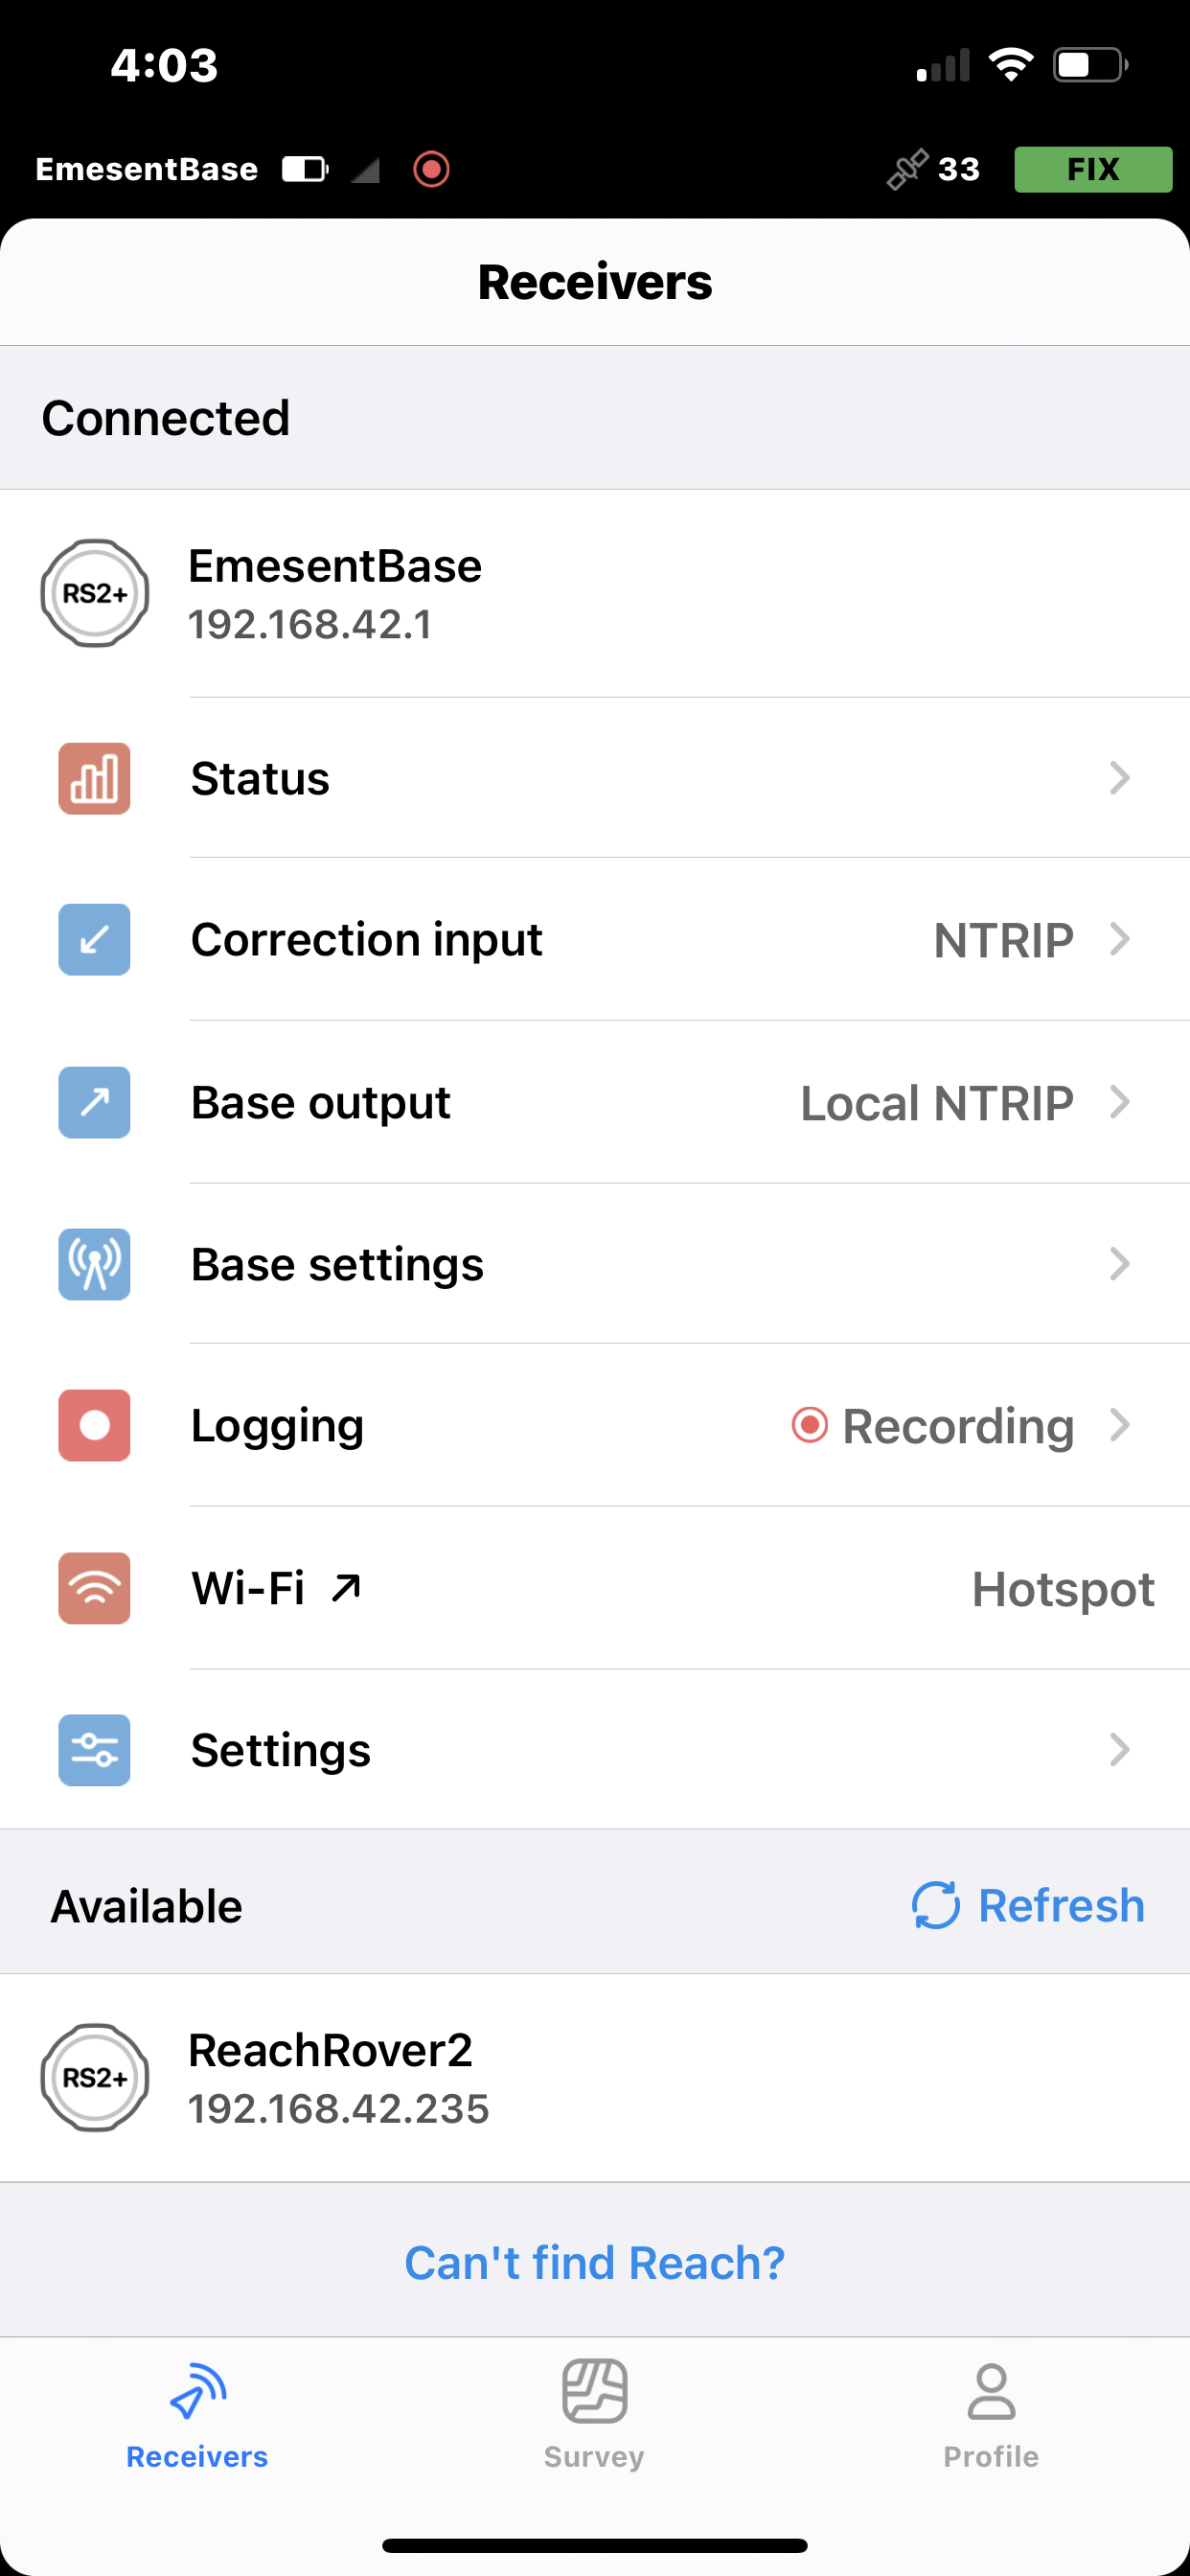
Launch the Emlid Flow application.
Tap Base output then select Local NTRIP from the list.
.jpg)
Click the Information icon on the right-hand side.
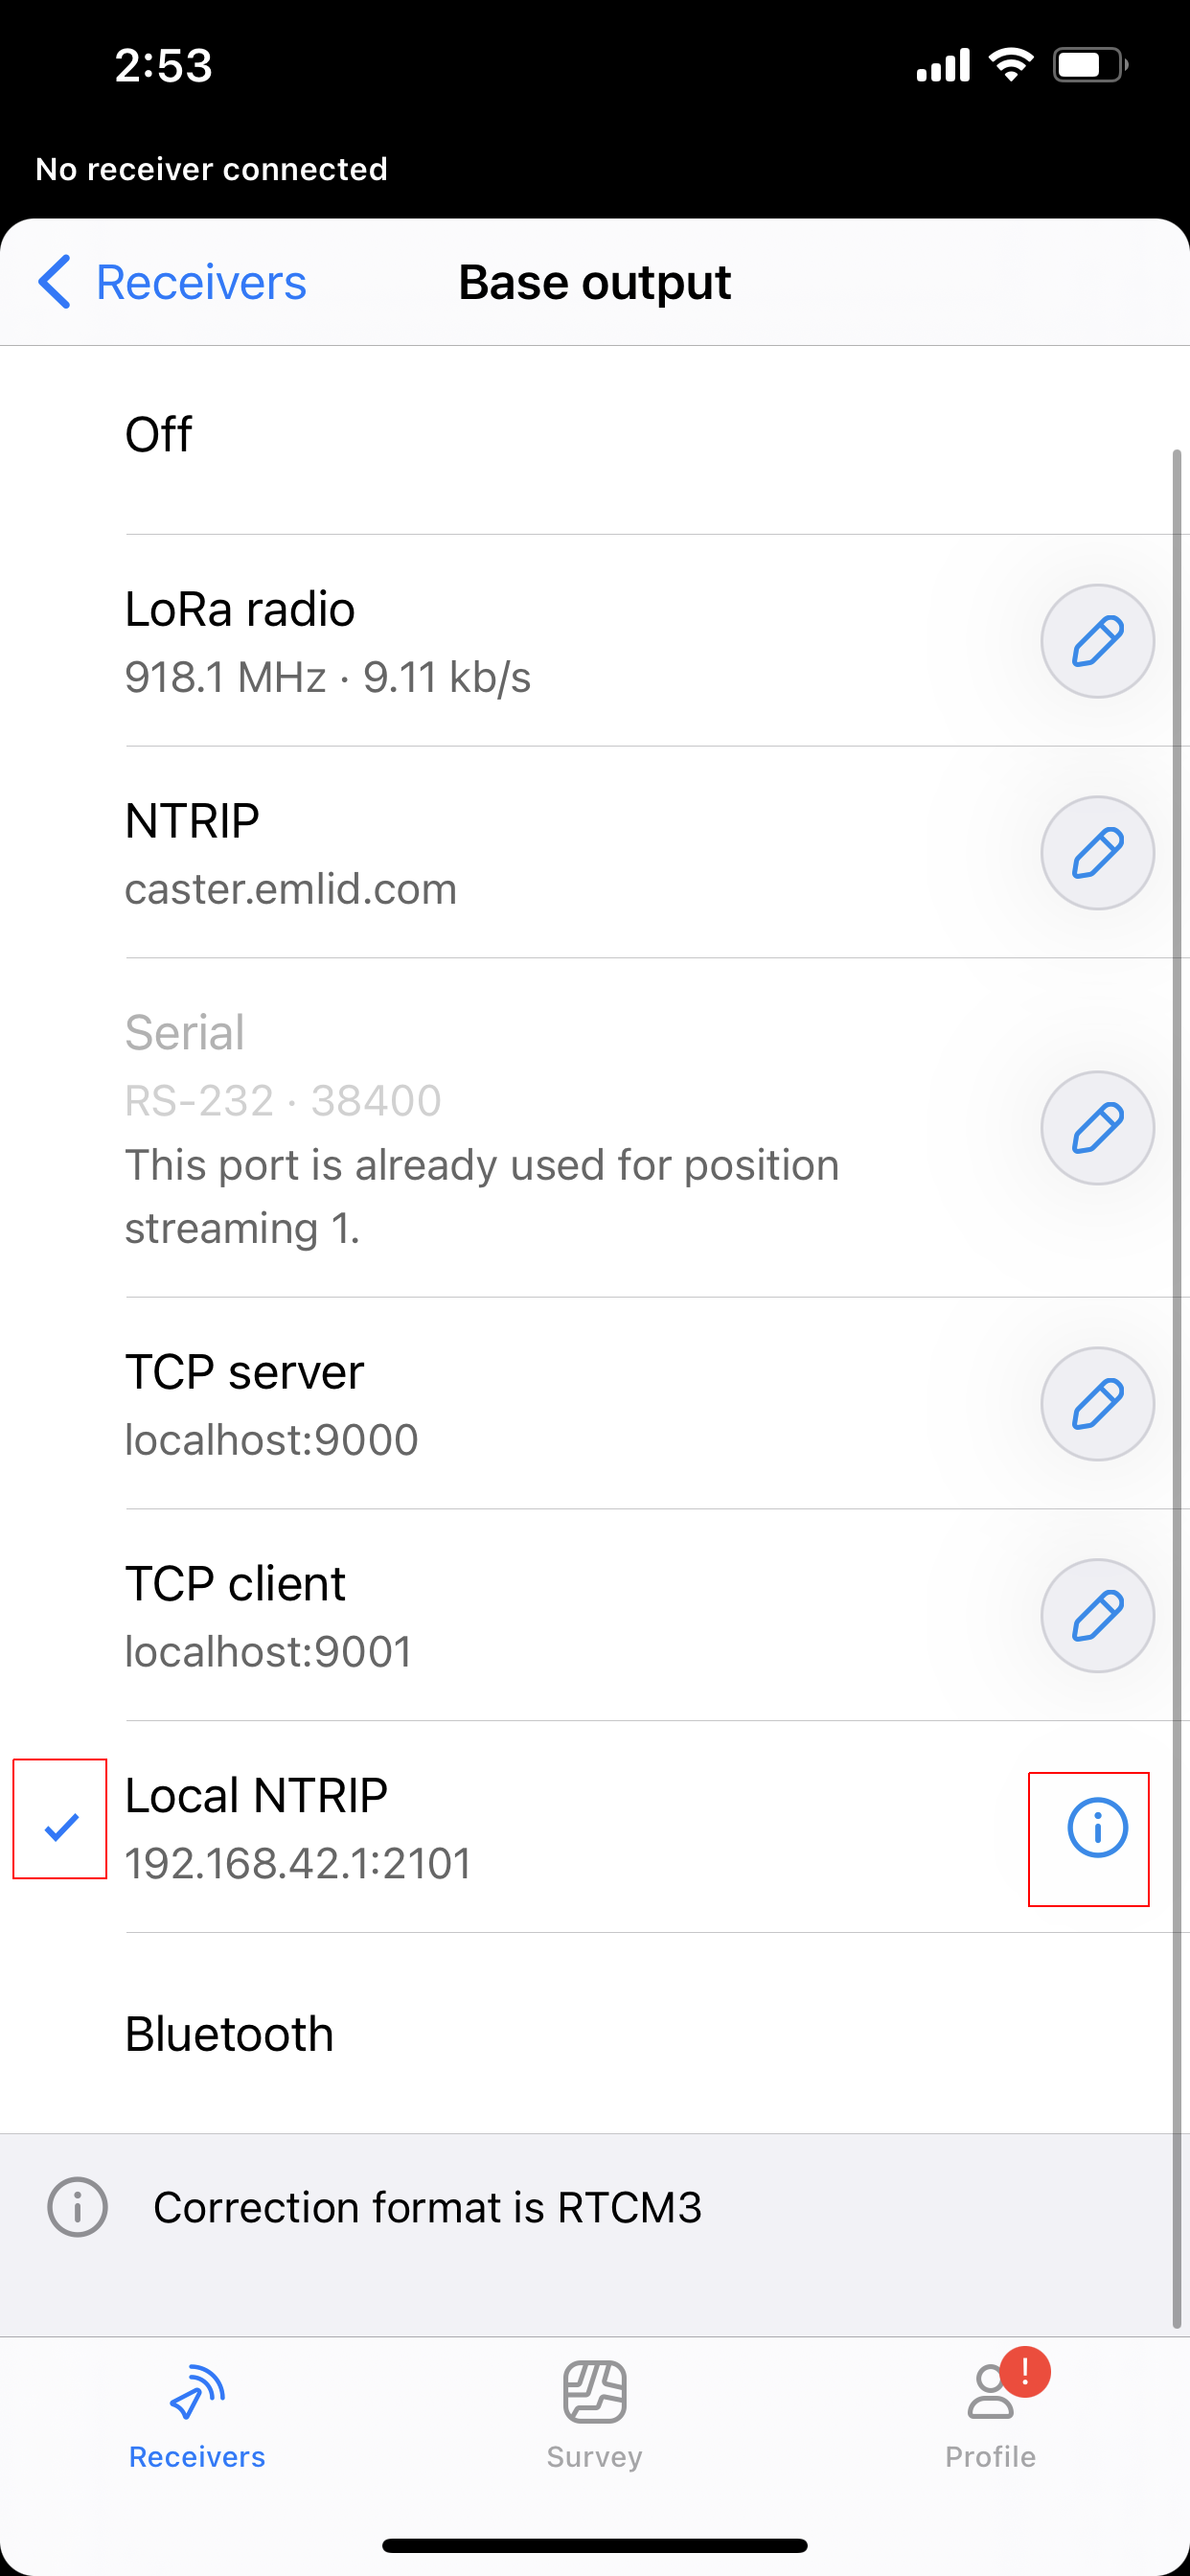
Make a note of the information provided. These will be used to configure NTRIP on your rover or remote controller.
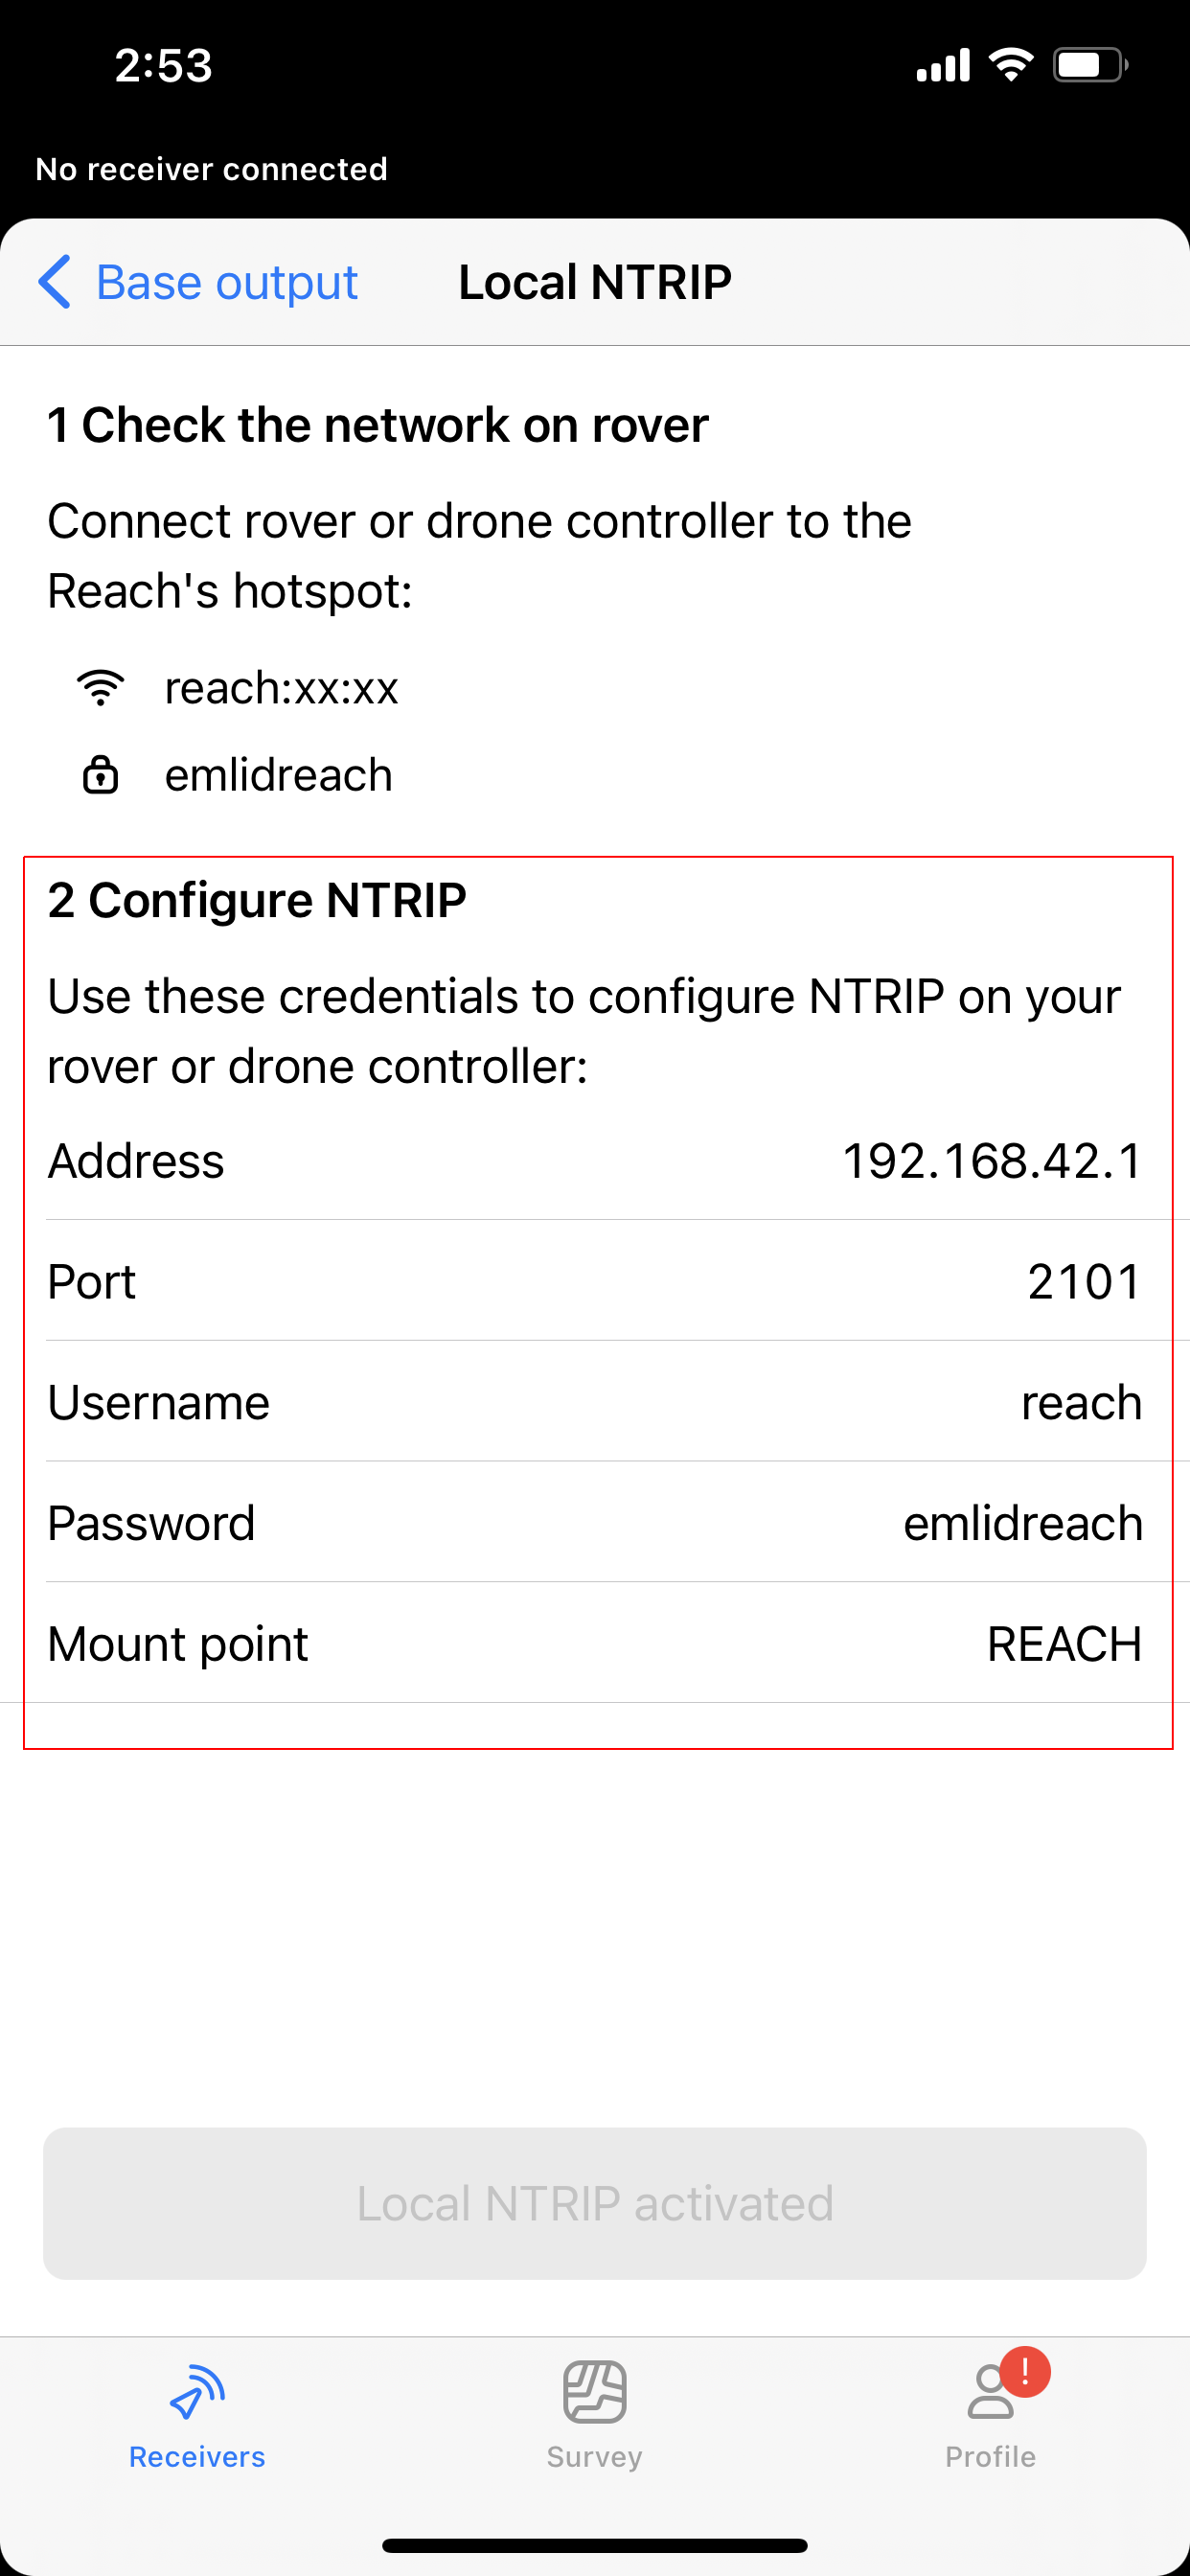
Setting | Value |
Address | 192.168.42.1 |
Port | 2101 |
Username | reach |
Password | emlidreach |
Mount point | REACH |
On the M300/M350 controller, open the DJI Pilot Pro 2 app.
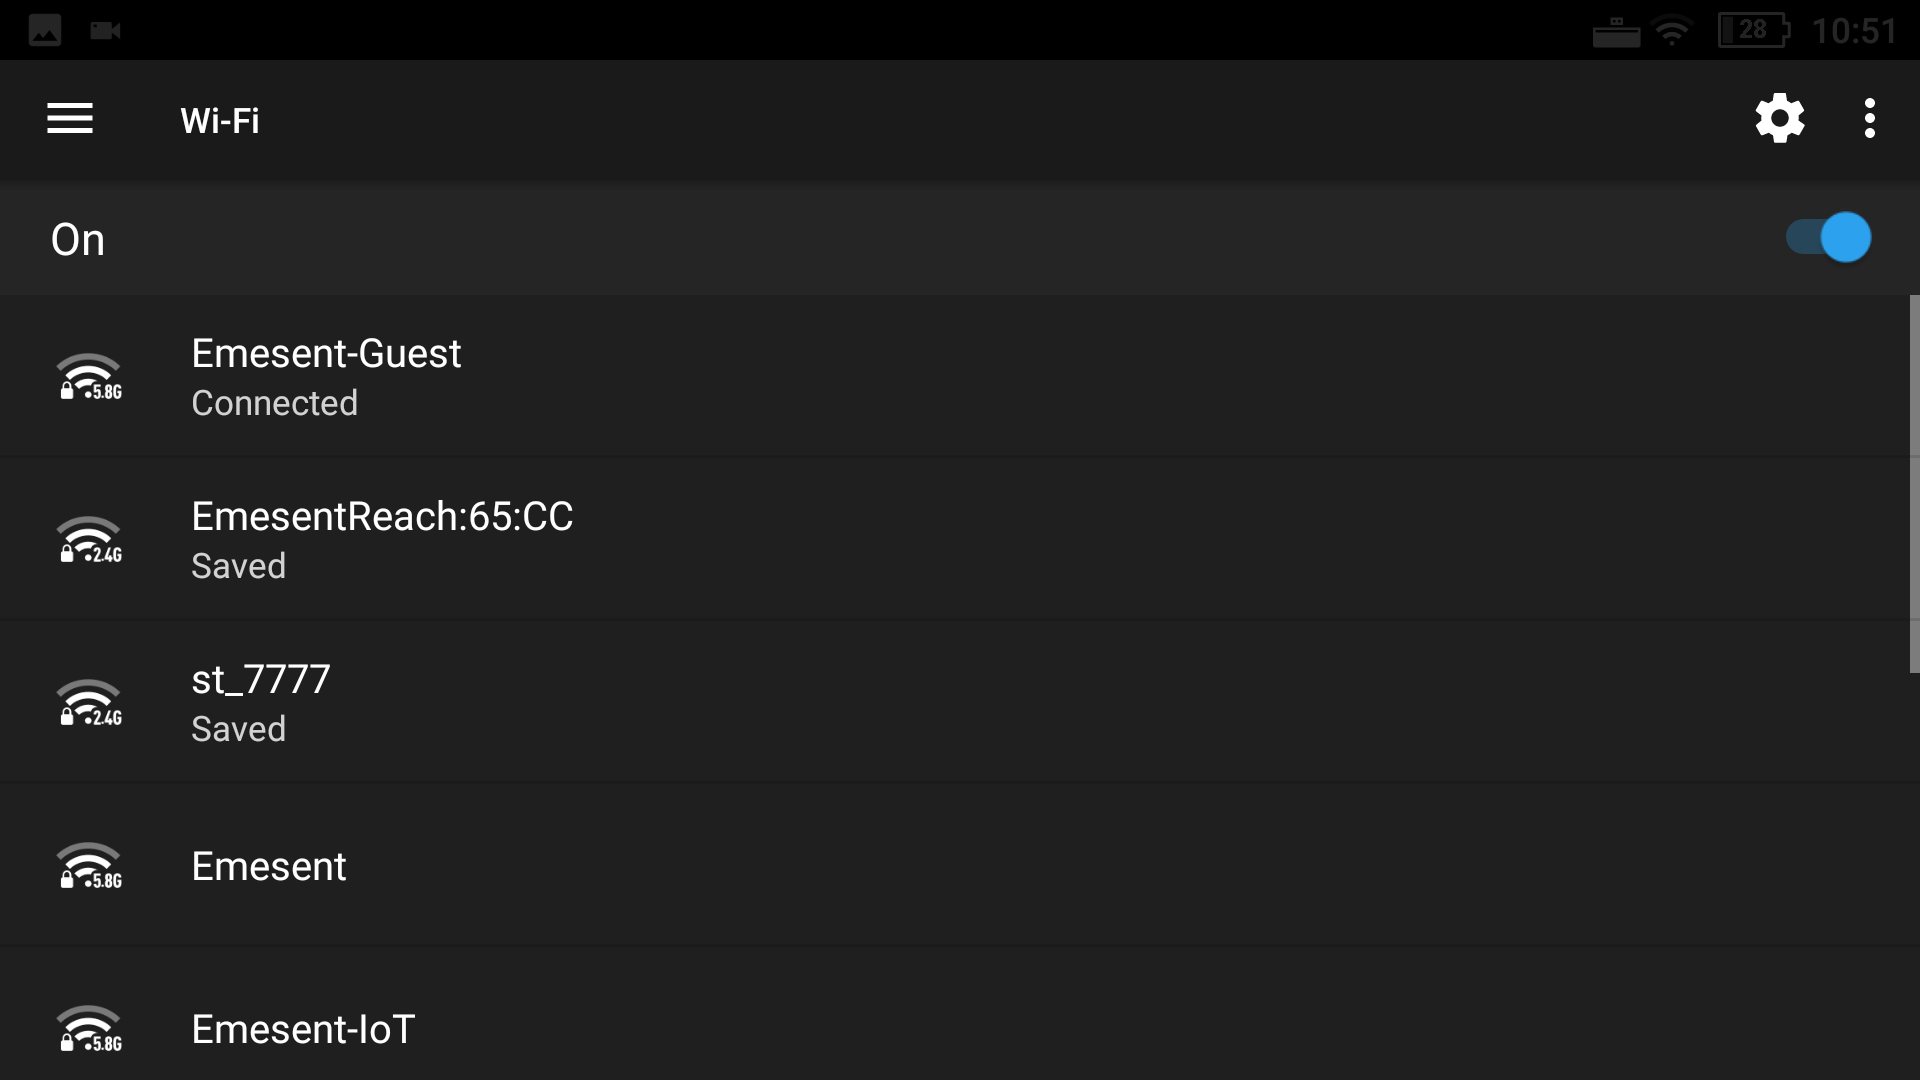
Tap the Settings button on the top right then connect the Wi-Fi network of the Emlid Reach RS2/RS2+ base station.
In the app's main display, tap the More Settings button (…) on the upper right.
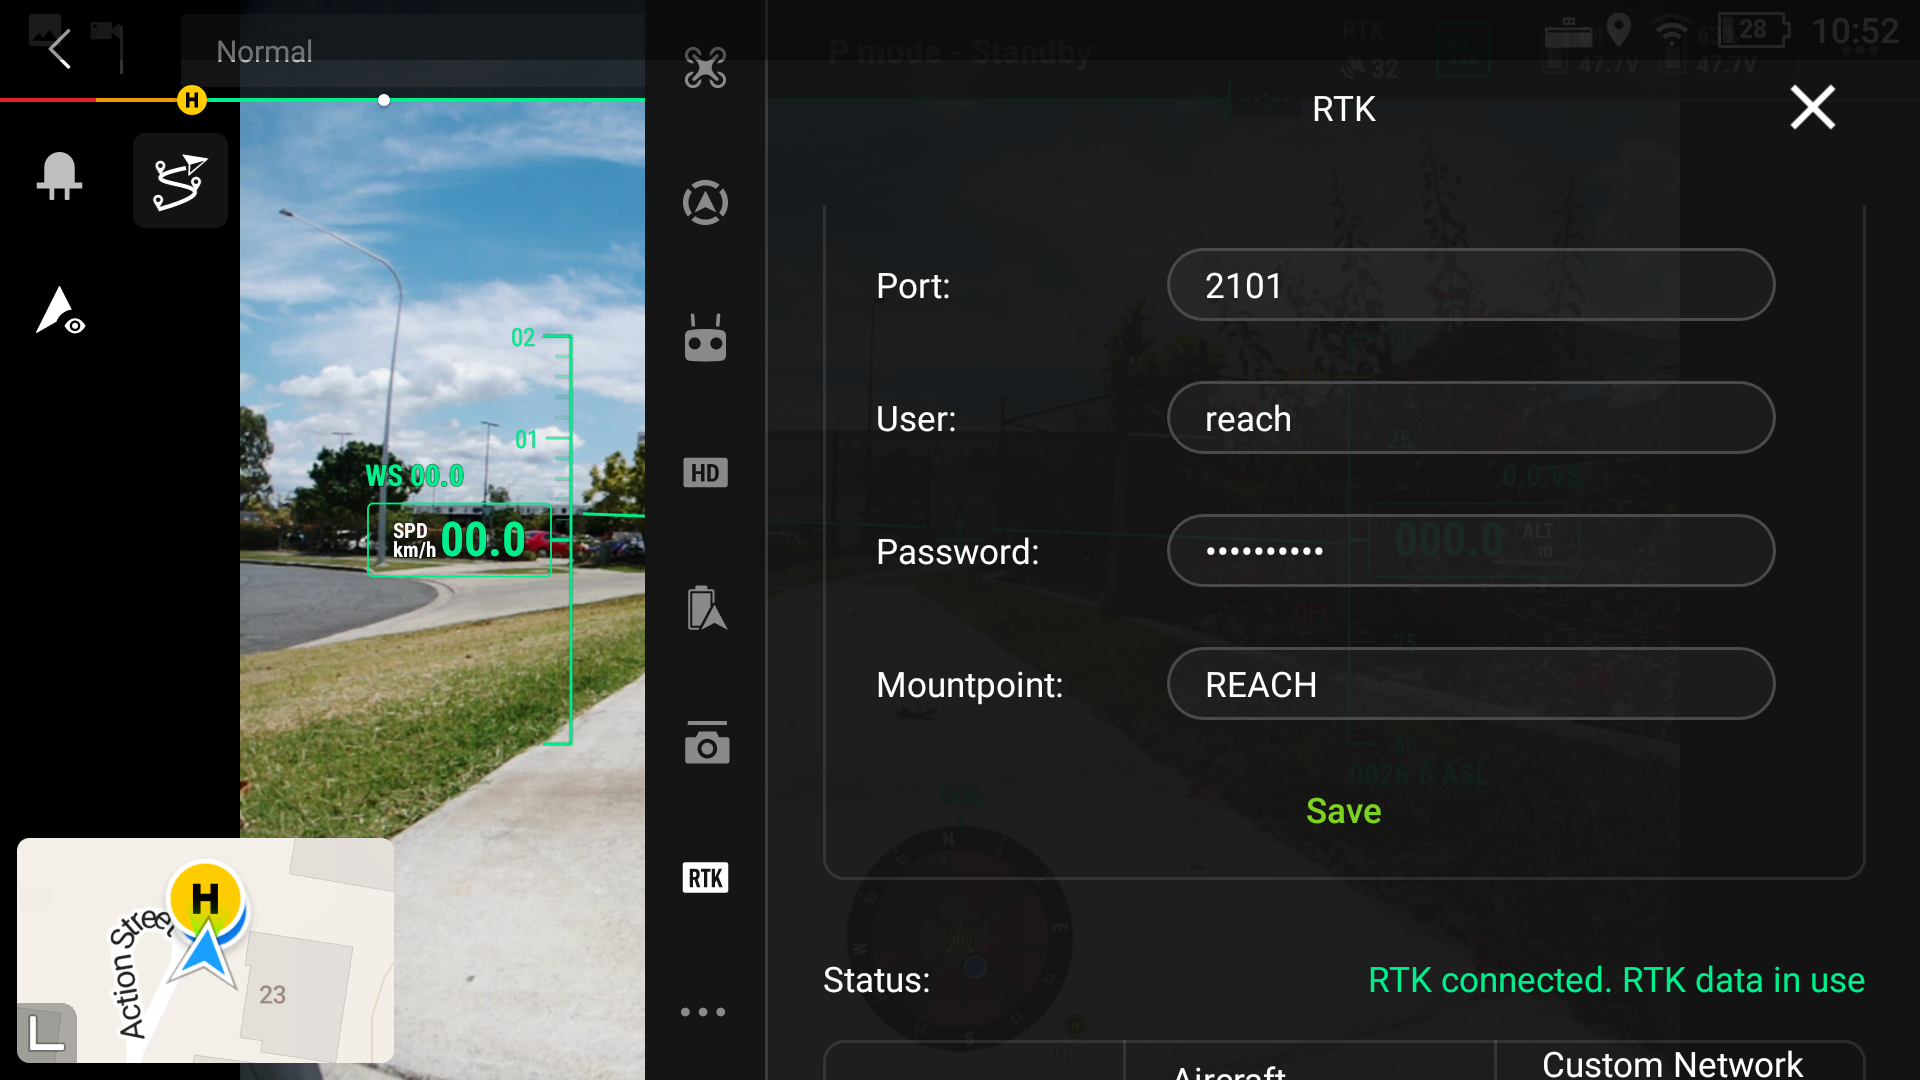
Tap RTK from the menu on the left to display the RTK Settings page.
Ensure the RTK Positioning and Maintain Positioning Accuracy Mode are toggled on.
In the field next to Select RTK Service Type, tap the down arrow then select Custom network RTK.
Enter the base station details gathered in Step 5 then tap Save. Wait for the Set successfully message to appear. In addition, the Status will show as RTK connected. RTK data in use.
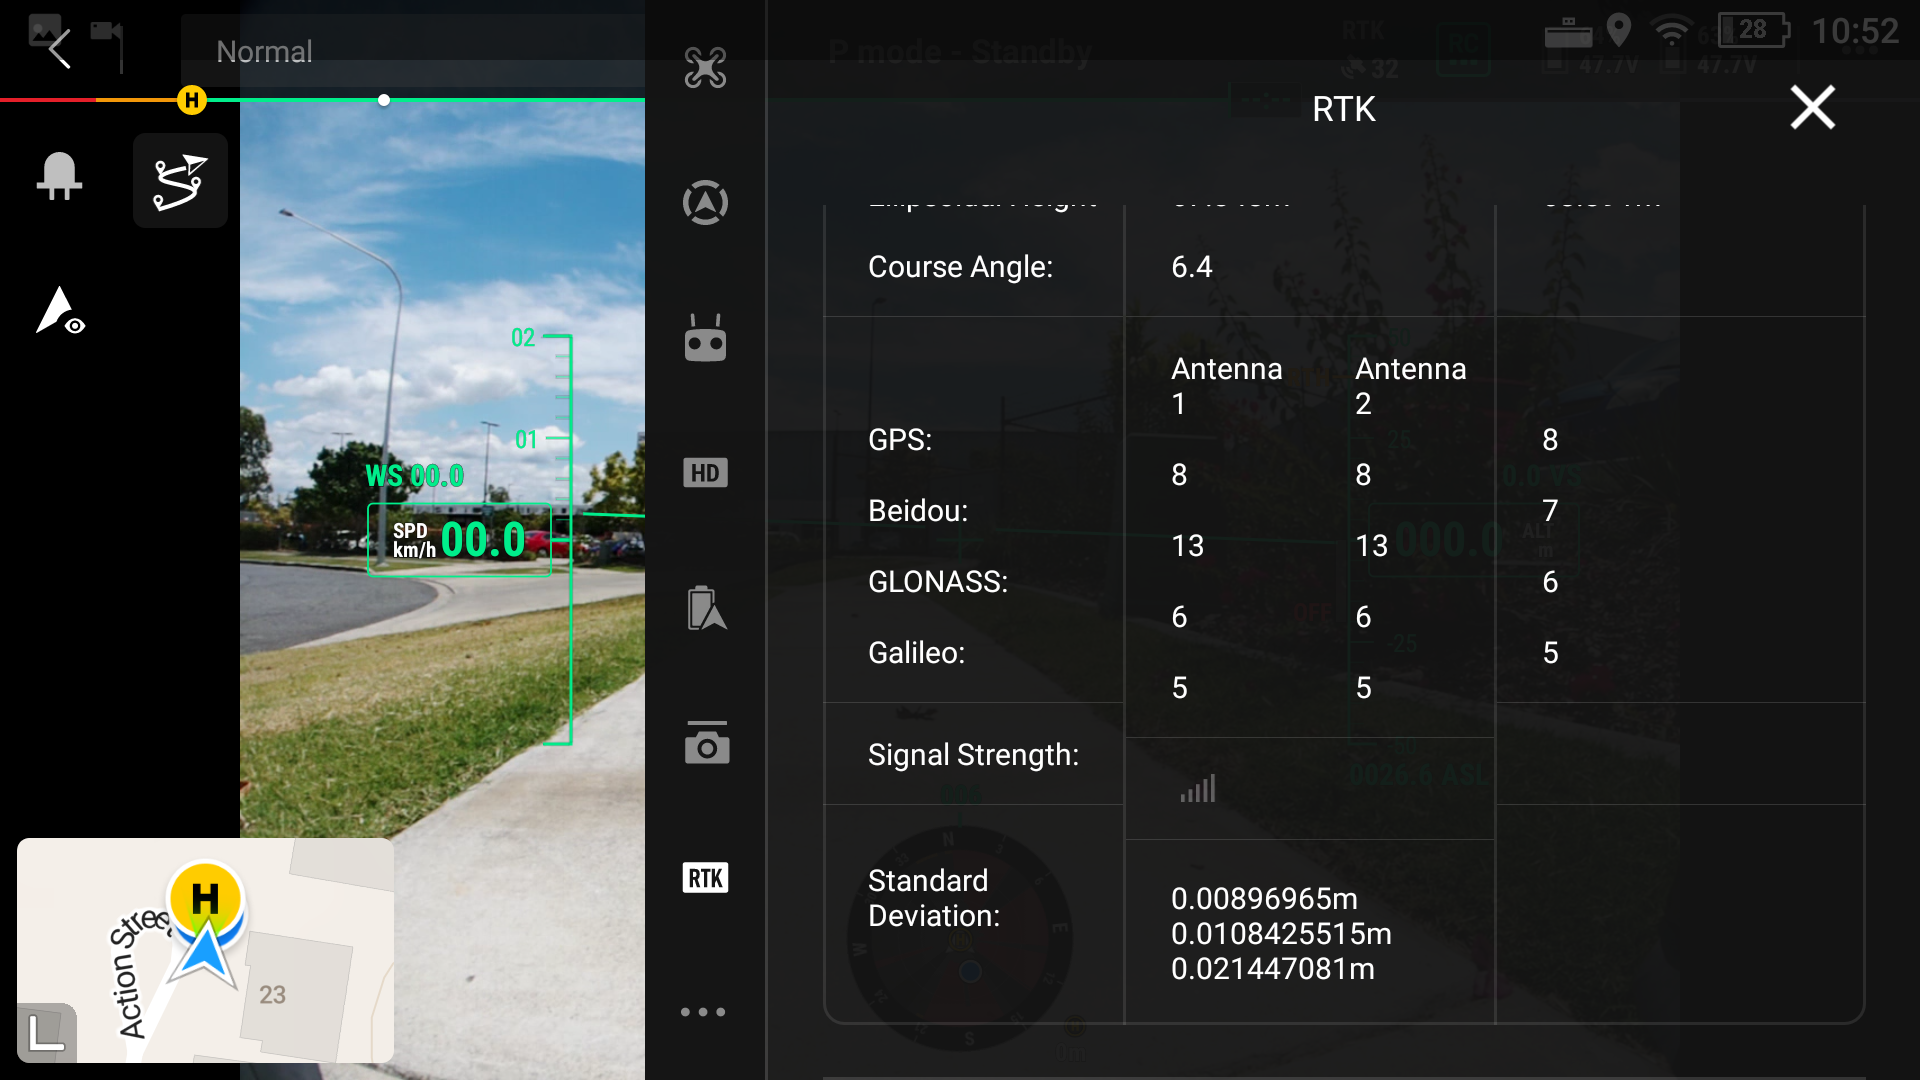
Once you have configured the Emlid Reach RS2/RS2+ and established communications with the M300/M350 RTK Controller, refer to the Status screen on the controller to check your configuration for accuracy. It should display RTK connected. RTK data in use. Also, the RTK Status LED (see Figure 1) on the base station lights up with a solid white light.
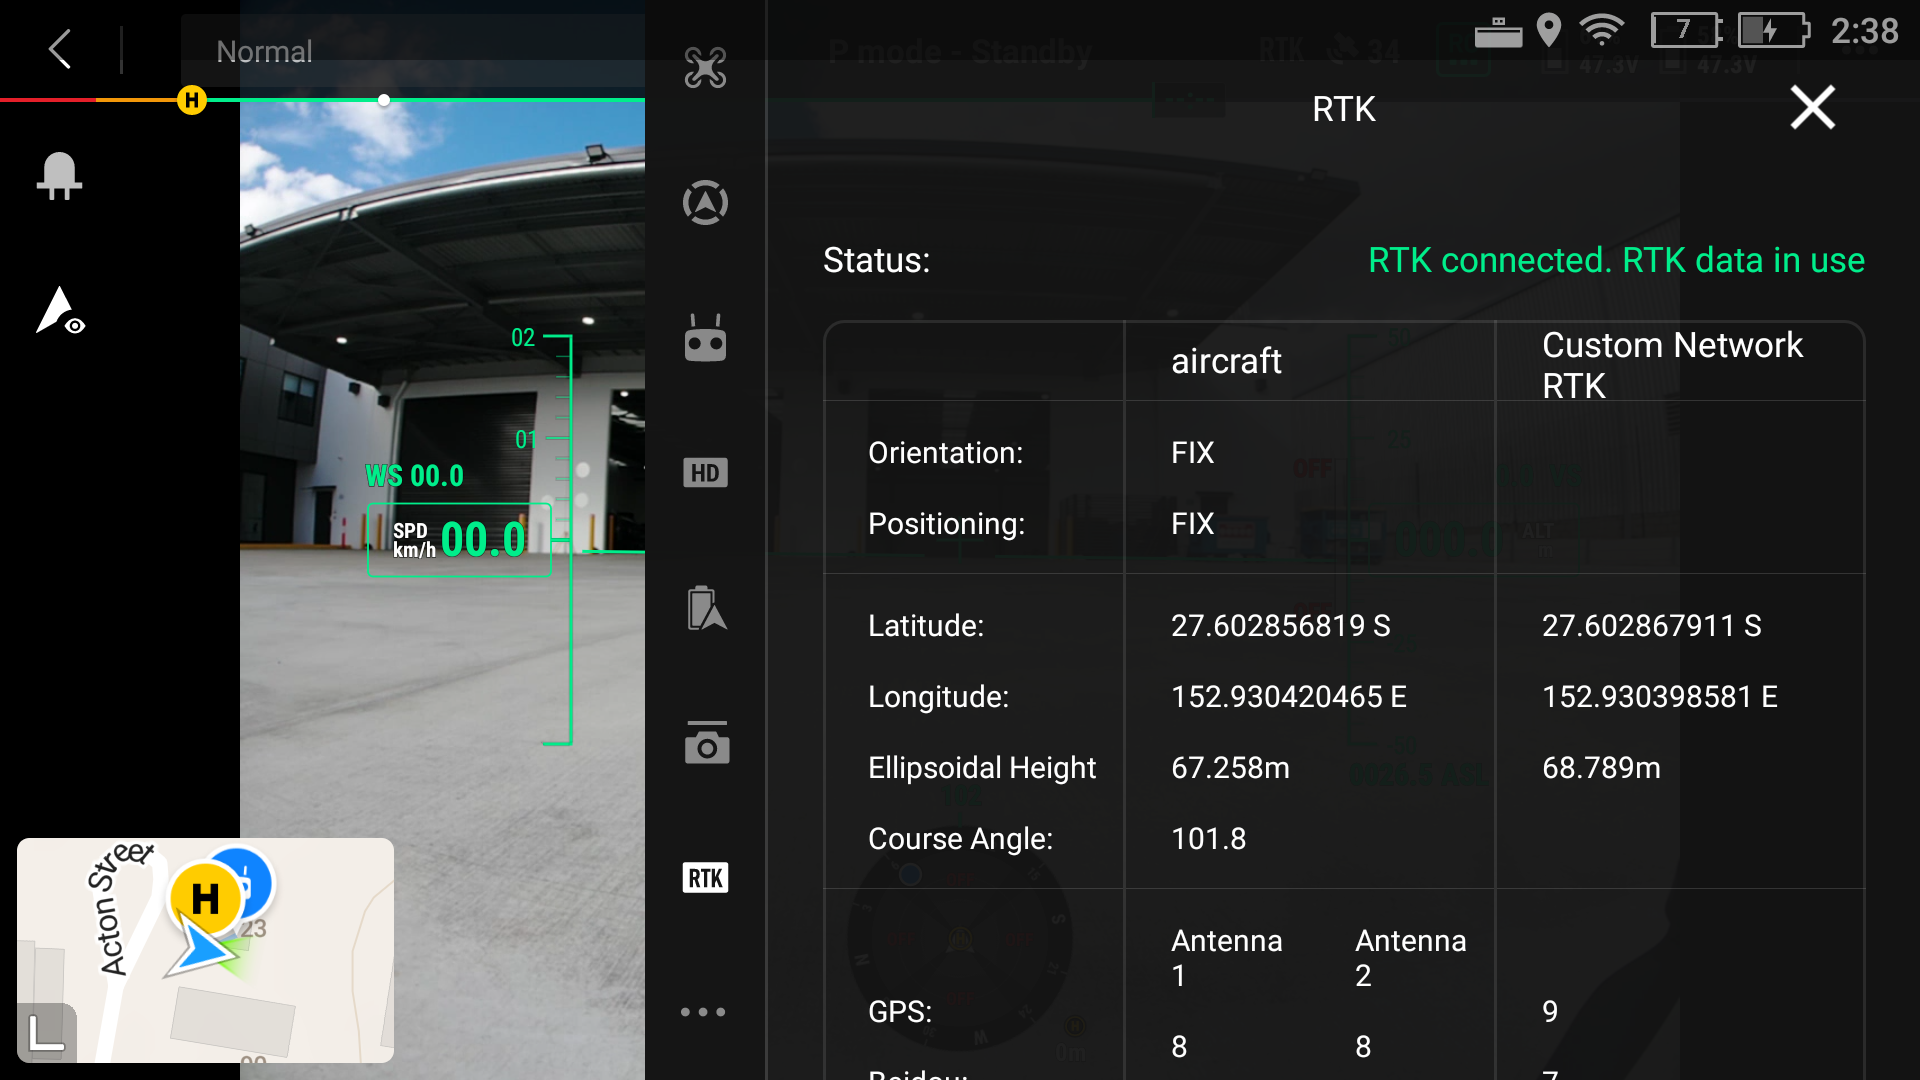
In addition, the aircraft Positioning and Orientation should appear as FIX and the Standard Deviation should be similar to what is reported by Emlid.
You are now to perform a scan mission. It is a good practice to check the app from time to time during the mission. Tap Correction input and make sure the NTRIP network you are connected to shows as Receiving corrections.