
This article covers how to address processing failures caused by a mismatch between the camera used during capture and the calibration file provided in the scan data.
Error message
Processing Failed:
Camera serial number of video and calibration files for Hovermap do not match. Check that the correct datasets have been selected and the data was captured with a calibrated Hovermap and camera.

Why this occurs
This error occurs when Aura detects that the camera serial number embedded in the video file does not match the serial number in the associated calibration file (col_st_XXXX.yaml).
Accurate colorization requires that the Hovermap, camera, and mount are calibrated together as a matched set. The calibration process generates a file (for example, col_st_XXXX.yaml) that captures the precise spatial relationship between these components, including the camera's position and orientation relative to the Hovermap, as well as lens and alignment parameters. Aura uses this file during processing to correctly project video frames onto the 3D point cloud.
Because calibration is unique to each Hovermap-camera-mount combination, using different hardware or an incorrect calibration file can lead to poor color quality or misaligned results. Always use the original calibrated hardware and ensure the correct calibration file is present when processing scans.
Cause: the incorrect GoPro was used during capture
When multiple Hovermaps or cameras are present on-site, equipment may be inadvertently mismatched. For clients operating several colorized Hovermap units, a common cause of this error is that the scan was captured using a camera that was not calibrated with the corresponding Hovermap.
Resolution
To resolve this issue, confirm whether the camera and Hovermap were correctly paired by comparing the serial number stored in the scan's calibration file with the serial number on the physical camera. If they match, the pairing is correct. If they do not match, the wrong camera was likely used during capture.
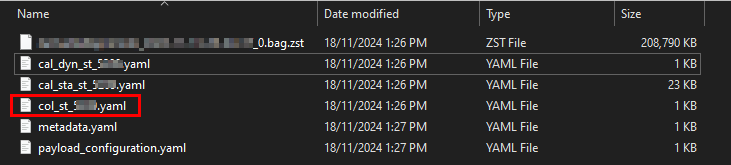
Step 1: Locate the calibrated GoPro serial number in the scan data
Open the scan folder associated with the failed processing attempt.
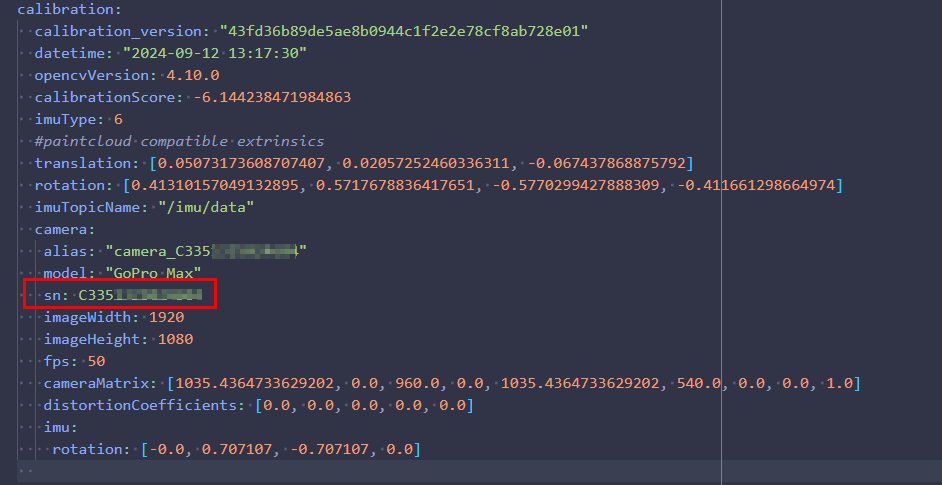
Locate the file named col_st_XXXX.yaml.
Open this file in a text editor. (Notepad is sufficient, but a code editor such as VS Code offers better readability.)
Search for the entry sn:.
Record the camera serial number listed next to sn:.
Step 2: Locate the physical GoPro's serial number
The only supported camera for colorization is currently a GoPro.
Open the GoPro's battery compartment and locate the serial number sticker.
Alternatively, find the serial number in one of these locations:
The on-screen menu under Preferences > About > Camera Info.
The original packaging or camera case.
The GoPro Quik app, if the camera is paired.
Step 3: Compare and validate the serial number pairing
Compare the serial number from Step 1 (the col_st_XXXX.yaml file) with the physical camera's serial number from Step 2.
If the numbers match, the Hovermap and camera are correctly paired.
If they do not match, locate the camera that matches the calibration.
All cameras shipped by Emesent are labelled with the associated Hovermap serial number. If this label is missing or worn, replace it to avoid future pairing issues.
Can the data still be processed?
If the data was captured using a Hovermap and camera that were not calibrated together, there are two available workarounds. Neither method guarantees a successful result, and colorization quality may be reduced.
Option 1: Obtain a new calibration file
A post-scan calibration can be performed that matches the hardware used during the original capture. This allows the scan to be processed even if the original calibration was missing, incorrect, or mismatched. A new calibration file is generated and can be manually copied into previously offloaded scans to potentially enable successful colorization.
The colorization calibration procedure involves returning the Hovermap and camera to Emesent or an authorized Emesent partner for processing. Service fees may apply.
For assistance, contact the regional Emesent partner or the Emesent Client Support team.
Option 2: Bypass the serial number check
The serial number validation can be bypassed by replacing the col_st_XXXX.yaml file in the scan folder with a calibration file from a scan where the camera was correctly calibrated.
This method is only recommended if recapture is not possible. Calibration is specific to each Hovermap-camera combination, and bypassing the serial number check may result in reduced color quality.
Step 1: Locate the calibration file for the camera
Find a scan captured with the Hovermap the camera is calibrated to.
Open the scan folder for that dataset.
Locate the file named col_st_XXXX.yaml.
Copy this calibration file for use in the failed scan.
Step 2: Replace and reprocess
Open the scan folder for the dataset that failed to process.
Replace the existing col_st_XXXX.yaml file with the copied calibration file.
Reprocess the scan in Aura using the updated file.
Related documentation and support
For assistance, contact the Emesent Client Support team.