Commander’s Measurement Tools allow you to measure point-to-point distances within a live point cloud or review mission point cloud. You can place two points for a simple measurement or add multiple points to create a path measure. Points can be moved, adjusted, or removed as needed, giving you flexible in-field control over how you verify dimensions.
Step 1: Open the Tools Menu
-
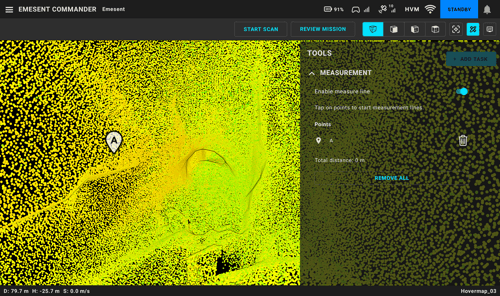
From the Commander Main View, select the Tools icon in the top right corner of the toolbar.

Step 2: Enable Measure Line
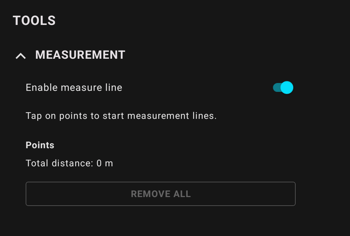
- In the Measurement section, toggle Enable Measure Line to activate the tool.
-
-
The Measure Line interface appears on the right side of the screen.
-
To increase screen space for easier navigation, you can minimize the Tools menu by selecting the Tools icon again.
Step 3: Place Your Points
-
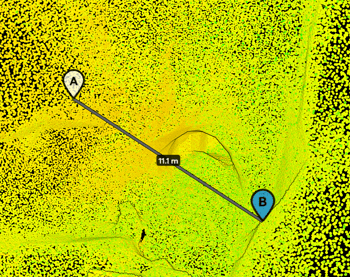
Select a point in the live point cloud to place your first measure point.
-
Select a second point to place your second marker.
-
A line connects the two points, and a distance label appears at the midpoint.
-

|

|
Step 4: (Optional) Extend the Measurement
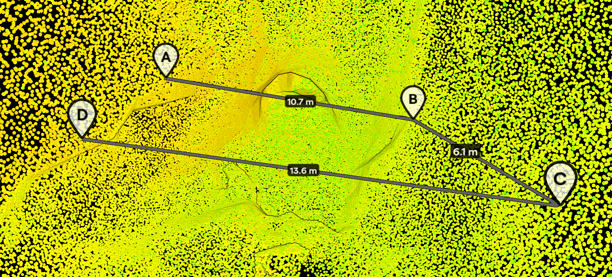
To measure a longer path, continue selecting points to add them sequentially.
- Each new point is numbered, and segment distances appear automatically between points.
- The Points list in the Tools menu updates as you go, displaying all points and the total distance at the bottom.
Step 5: (Optional) Adjust a Point
If a point is placed incorrectly:
- Select the point to highlight it in blue.
- Select a new location in the point cloud to move it.

|
|
Step 6: (Optional) Remove Points
To delete an individual point:
-
If closed, reopen the Tools menu by pressing the Tools button.
-
Select the bin icon beside the point you want to remove.
To clear all points and start fresh, scroll to the bottom and select Remove All.