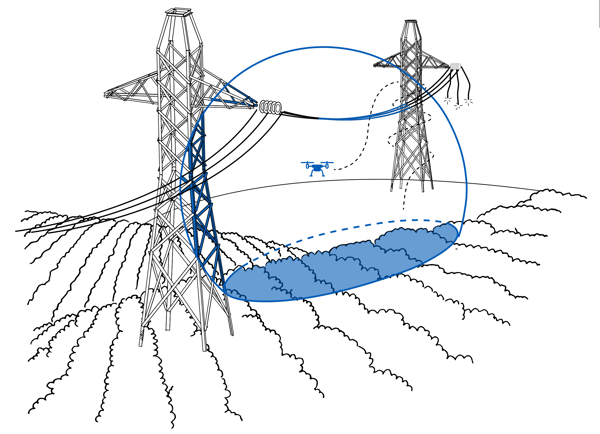
Scanning power lines
Note
Please bear in mind that every situation is unique. These practices are a guideline only, and may need to be adjusted for your specific environment.
Power lines can be very tricky to scan, as they are relatively high, small, linear, and long. None of these factors are ideal for Hovermap, but following this process will enable you to create consistent scans of power lines, towers, and the surrounding vegetation.

We recommend that you follow this process for the best results.
Step 1: Analyze your environment
Make sure that you analyze the terrain before starting your scan. This is particularly important when scanning power lines, as the power lines themselves are not a suitable feature and Hovermap needs to retain visibility of features on the ground.
Consider the following when planning your mission:
- We recommend a flight height of no more than 40 m. Follow the terrain as much as you are able so that you are consistently at this height.
- If you encounter power lines that span a valley that is deeper than 100 m, you will not be able to use Hovermap, as the absolute range of Hovermap is 100 m.
- Heavily vegetated areas may pose a problem, especially on windy days. Hovermap relies on the environment being relatively static. If a tree or branch is moving, it could lead to inaccuracies in your scan data.
- If you plan on capturing a long stretch, break down your scan into around 500 m increments, with about 100 m overlap.
Step 2: Pre-mission checks
Set your navigation methods as follows:
- Good GPS signal: If you are likely to have a good GPS signal for your entire mission, set GPS as your primary navigation method and SLAM as your secondary method.
- Partial GPS signal: Set SLAM as your primary navigation method and GPS as your secondary method.
Go to Understanding Hovermap for more information on choosing the best navigation method.
Step 3: Perform your mission
- Take off next to the first tower in Pilot Assist mode. Make sure that you are facing the tower as you take off, as it will be an important feature in your scan.
- Enable VESH and then test it by trying to land the drone. VESH should prevent you from landing.
- While scanning, check the live point cloud to ensure that your data is being collected correctly. Do this in the Hovermap App or the Waypoint UI (go to The Hovermap App for more information). You can also do this by connecting to the Hovermap’s Wi-Fi, opening a web browser (on any laptop or Android device), and then navigating to hover.map:8082.
- Scan the tower by spiraling upward around it. Make sure that you continue to face the tower at all times while you are doing this.
- Fly the drone down to below the height of the power lines. Make sure that you keep to a flight height of 40 m as much as possible. Remember, Hovermap needs to retain visibility of the ground.
- In Pilot Assist mode, fly in a zig-zag pattern underneath the power lines. The zig-zag pattern helps to capture more of Hovermap’s surroundings, allowing for a more accurate scan.
- When you reach the other end, spiral upward around the tower, as you did previously.
- Bring Hovermap back down to below the height of the power lines.
- Return to the original tower, flying back in a zig-zag pattern and keeping to e height of 40 m.
- Perform one final lap around the original tower. This final lap only needs to be a single circle around the tower (facing the tower at all times). This helps Hovermap understand where it is. You don’t need to actually capture the tower again.
- Land the drone.
Step 4: Process your data
- Process your scan data using the Emesent Aura Software. When processing, select the Standard profile for the first job.
- If your results are not as desired, you can then change the processing parameters. For a linear scan such as power lines, we recommend that you make the following changes to the Local Mapping processing parameters:
-
-
Sliding size in seconds: 15
-
Sliding shift in seconds: 0.6
-
Note
These parameters work more often than not. However, it is still dependent on your specific environment, so they may not yield the desired results. If you don’t get the result you are looking for, play around with the rest of the settings. But be aware that this will increase your processing times significantly.
