If the built-in profiles don’t cater to your needs, Emesent Aura also allows you to create and save custom profiles.
Built-in Profiles
Note
Be aware that using any profile other than Standard may significantly increase processing time.
The following built-in profiles are available.
|
|
Processing profiles
|
-
Standard: We recommend that you use this profile for most processing operations. Sometimes this profile won’t give you an outcome that you are happy with. If your point cloud output includes ghosting, copies of objects, or overlapping objects, or if the trajectory file significantly diverges from known information about the actual trajectory (for example, where a dataset from a closed loop scan is processed and the trajectory file shows the start and end points are a significant distance apart), we recommend that you try one of the other three built-in profiles.
-
Low features: Use this profile for environments with relatively few geometric features. It includes adjustments to window size and iterations. This profile can improve point clouds from some environments, but it can also result in worse point clouds from others.
-
More iterations: This profile is designed for environments that are more challenging for the SLAM algorithm to handle. It increases the number of iterations.
-
Forest: This profile is designed for environments that are largely or exclusively natural terrain and vegetation. It includes adjustments to the way that global registration is performed.
-
ST-X: This profile contains the recommended intensity and range filtering settings as the ST-X LiDAR has a greater range and is more sensitive than older hardware.
|
GCP profiles
|
-
Standard: The default profile for a GCP workflow. This profile will cater to most common georeferencing jobs.
-
ST-X: This profile contains the recommended settings for detecting targets when georeferencing the point cloud.
|
Merge profiles
|
-
Standard: The default profile for a merge process. This profile will cater for most common merge jobs.
-
Outdoor indoor: This profile can give better results when merging datasets that have overlaps between outdoor and indoor environments.
-
Complex building: This profile can give better results when merging datasets from complex building structures, such as buildings with multiple levels or with multiple similar rooms.
-
Terrain: This profile can produce better results when merging datasets from outdoor environments with large open areas.
|
Colorization profiles
|
-
Standard: This default profile provides a set of configuration parameters that should suit most colorization requirements. It achieves a good balance of output quality vs processing time for most datasets.
-
Quick: This profile delivers a faster output at the cost of quality. This option is useful when reviewing results in the field. Only one video frame every 5 seconds is used to colorize the points, which may result in gaps or poor colorization.
-
Quality: This profile increases the quality of the colorized point cloud at the cost of increased processing time. It uses 10 frames every second (instead of two, which is standard), and decreases the visibility voxel scale from 250 mm to 100 mm.
-
Driving: This profile is useful when colorizing scans that were done at higher speeds (for example, driving scans). It uses 10 frames per second (instead of two, which is standard) to ensure sufficient coverage at high speed.
|
Custom Profiles
When you make changes to a built-in processing profile in Emesent Aura, a temporary custom profile is created. You can choose to save this custom profile to save time in setting up processing jobs for common or known environments. Once saved, it becomes available for selection in the Profiles dropdown list.
To create a new processing profile:
-
Go to the Process tab then click Process Scan.
-
Select the workflow that you want to create a new profile for then click the Add Profile icon.
-
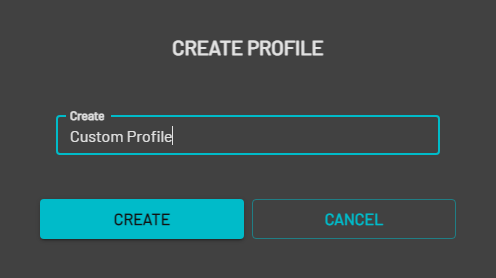
In the Create Profile dialog box, enter a name for the new profile then click Create.
-
Click Processing Settings then customize the settings for the new profile.
-
Click Save. Your new profile should now be available in the dropdown list.
To save a custom profile:
- Go to the Process tab then click Process Scan.
- Select a workflow then select from one of the available built-in profiles.
- Click Processing Settings then edit the settings of the built-in profile.
- Click Save to go back to the main panel. The selected profile changes to the newly created “Custom” profile.
- Click Save Profile.
-
In the Create Profile dialog box, enter a name for the new profile then click Create. Your new profile should now be available in the dropdown list.
-