
This article explains how to replace the Inner Pole on the GX1 Backpack Harness.
What you will need
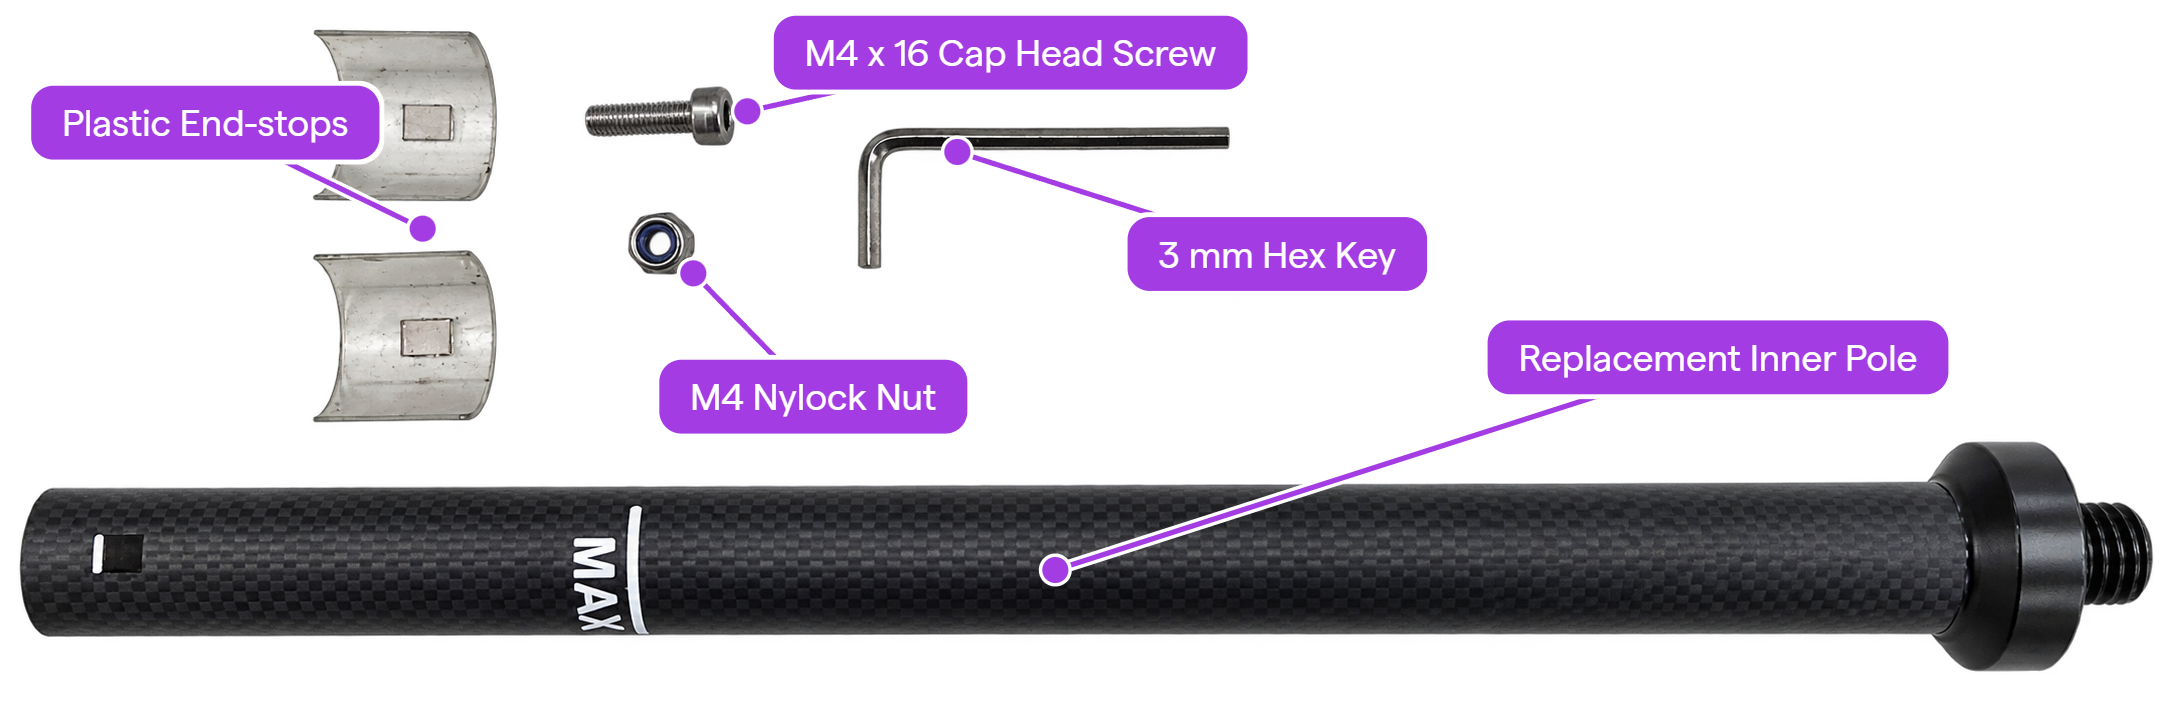
The replacement kit contains these items.
Item | Description |
|---|---|
Replacement Inner Pole | The new inner tube for the Telescoping Pole, with the Survey Thread at its top end. |
2 End-Stops | Plastic stops that limit the travel of the Inner Pole in the Outer Pole. |
M4 x 16 Cap Head Screw | Clamps the two halves of the Pole Clamp onto the Outer Pole. |
M4 Nyloc Nut | Lock nut for the M4 x 16 screw, on the underside of the Pole Clamp. |
3 mm Hex Key | Tool for the Pole Clamp screw and the Cam Lock Lever pivot nut. |
These are also necessary, and are not in the kit.
A GX1 Backpack Harness
A large flat surface, such as a table
Procedure
Step 1: Prepare the harness
The GX1 Case must not be mounted on the harness.
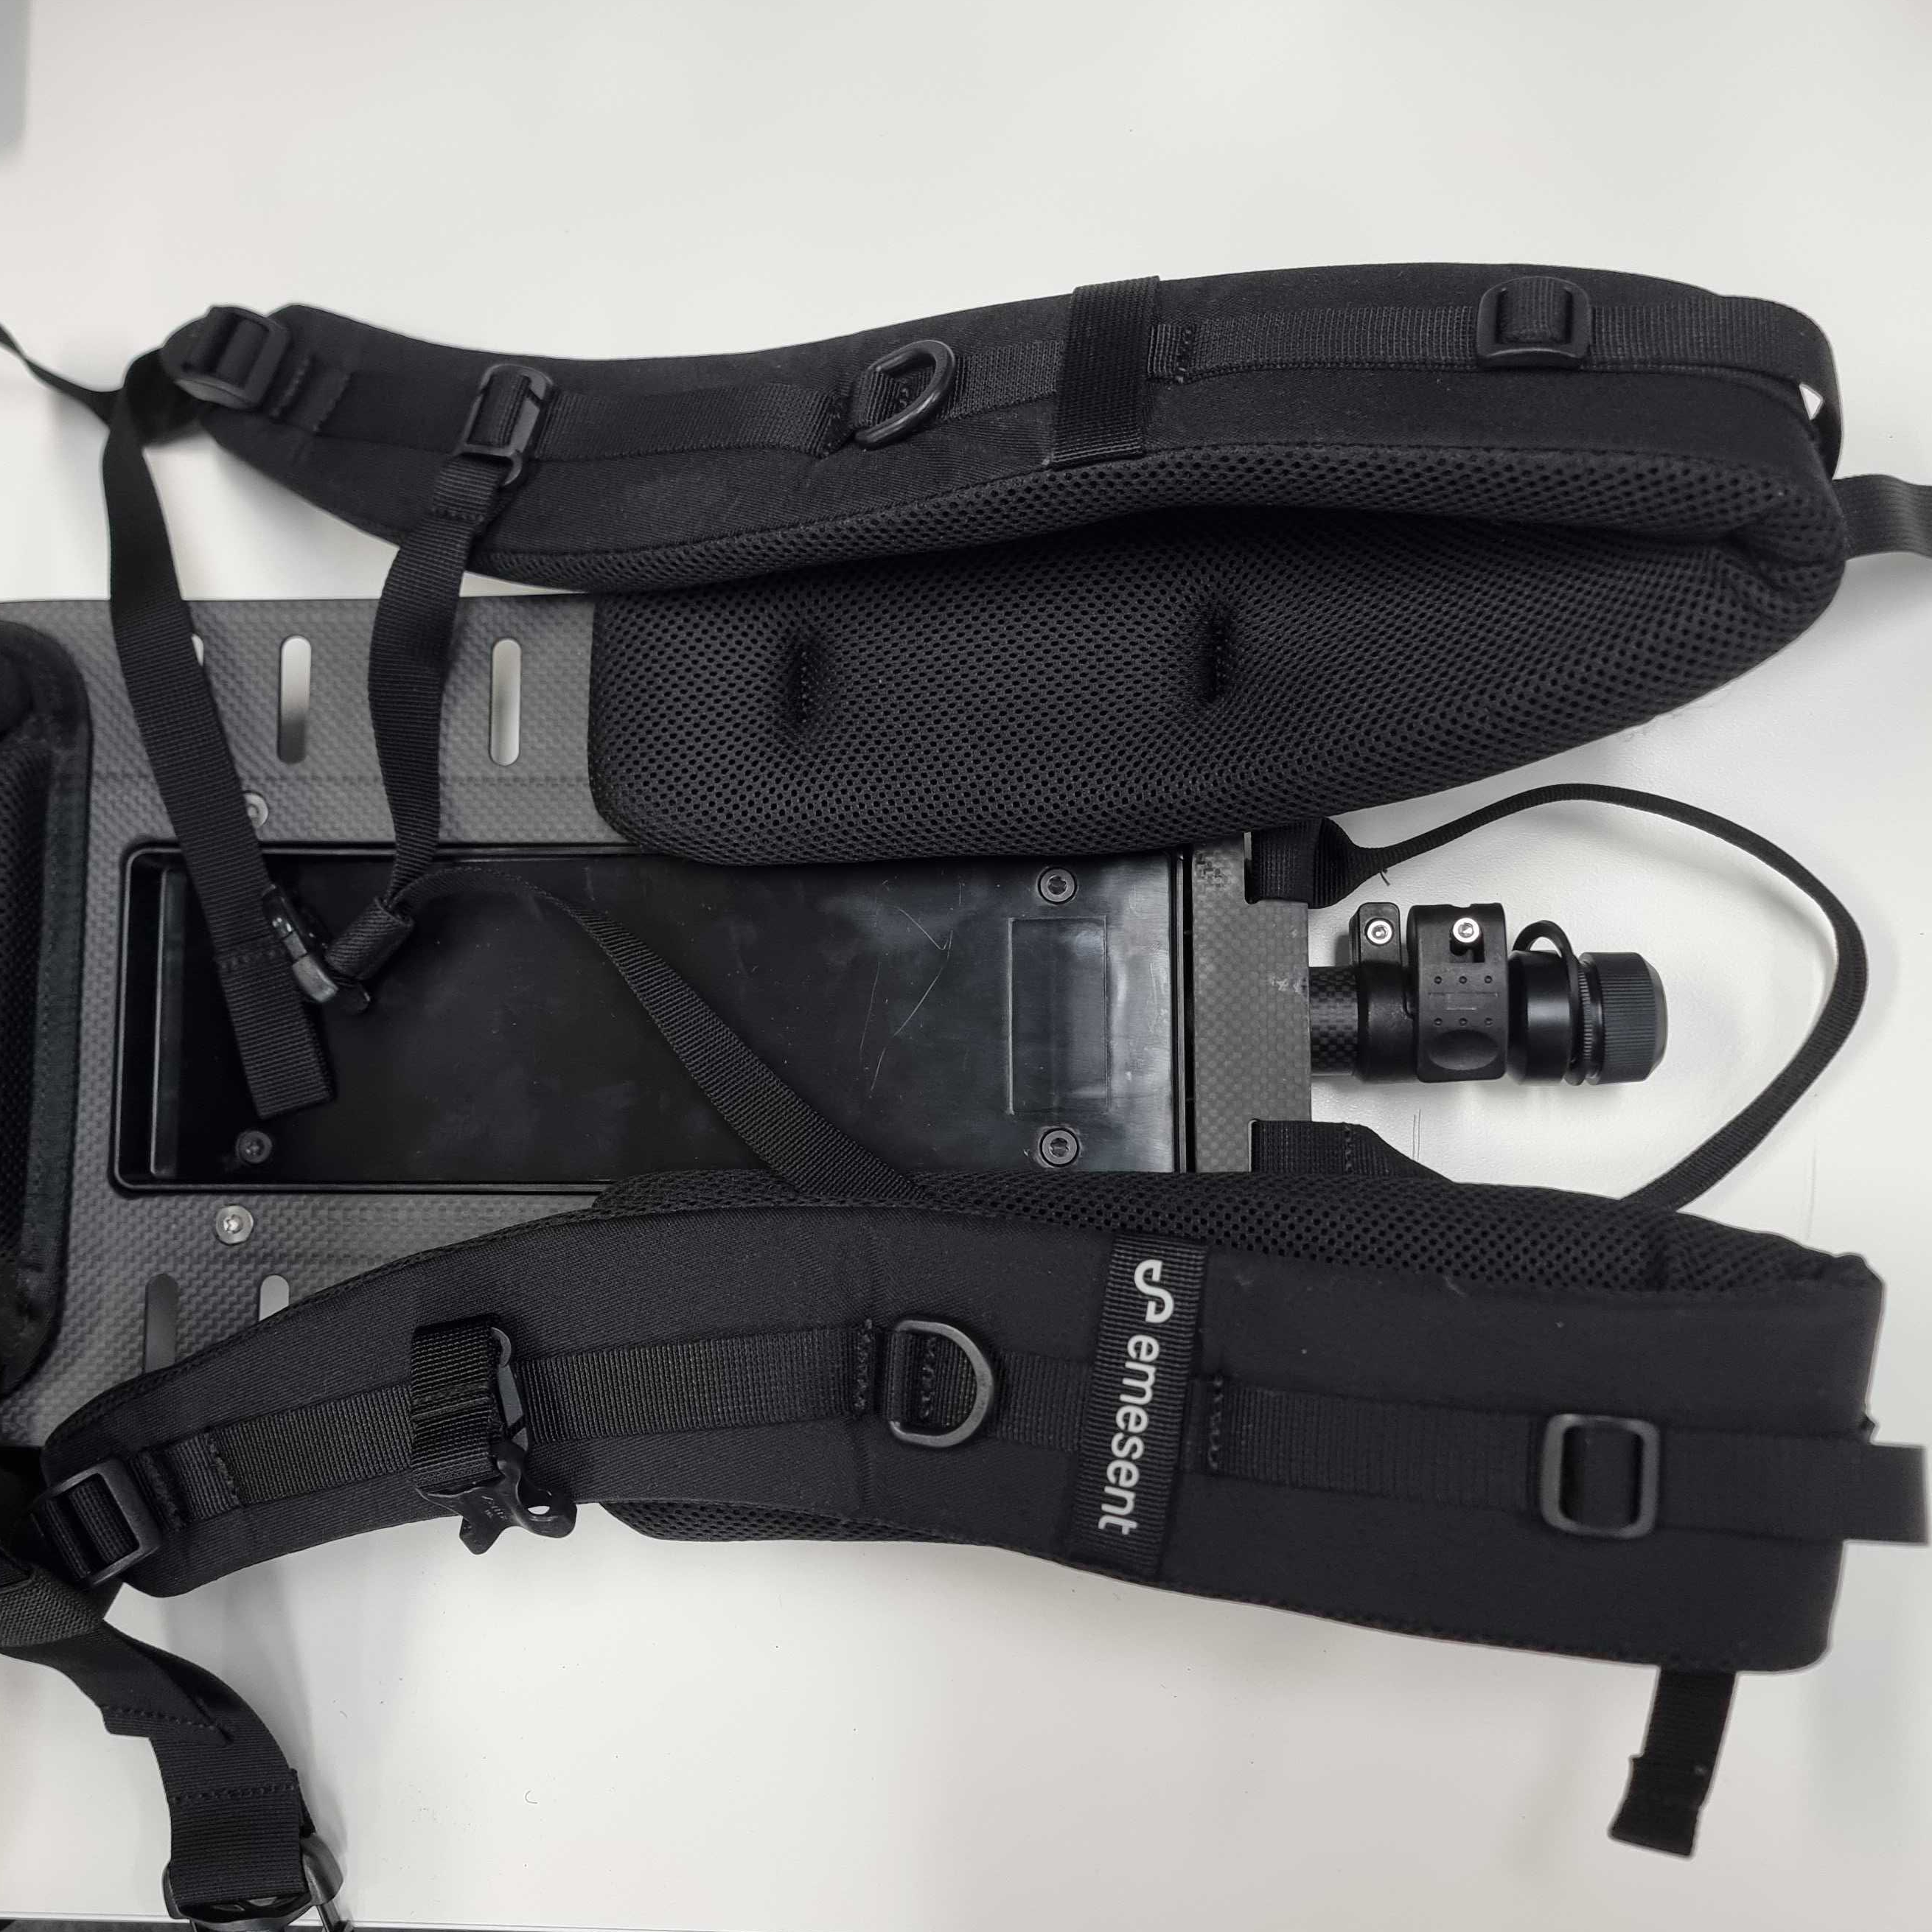
Put the harness on a large flat surface so that the straps face up.
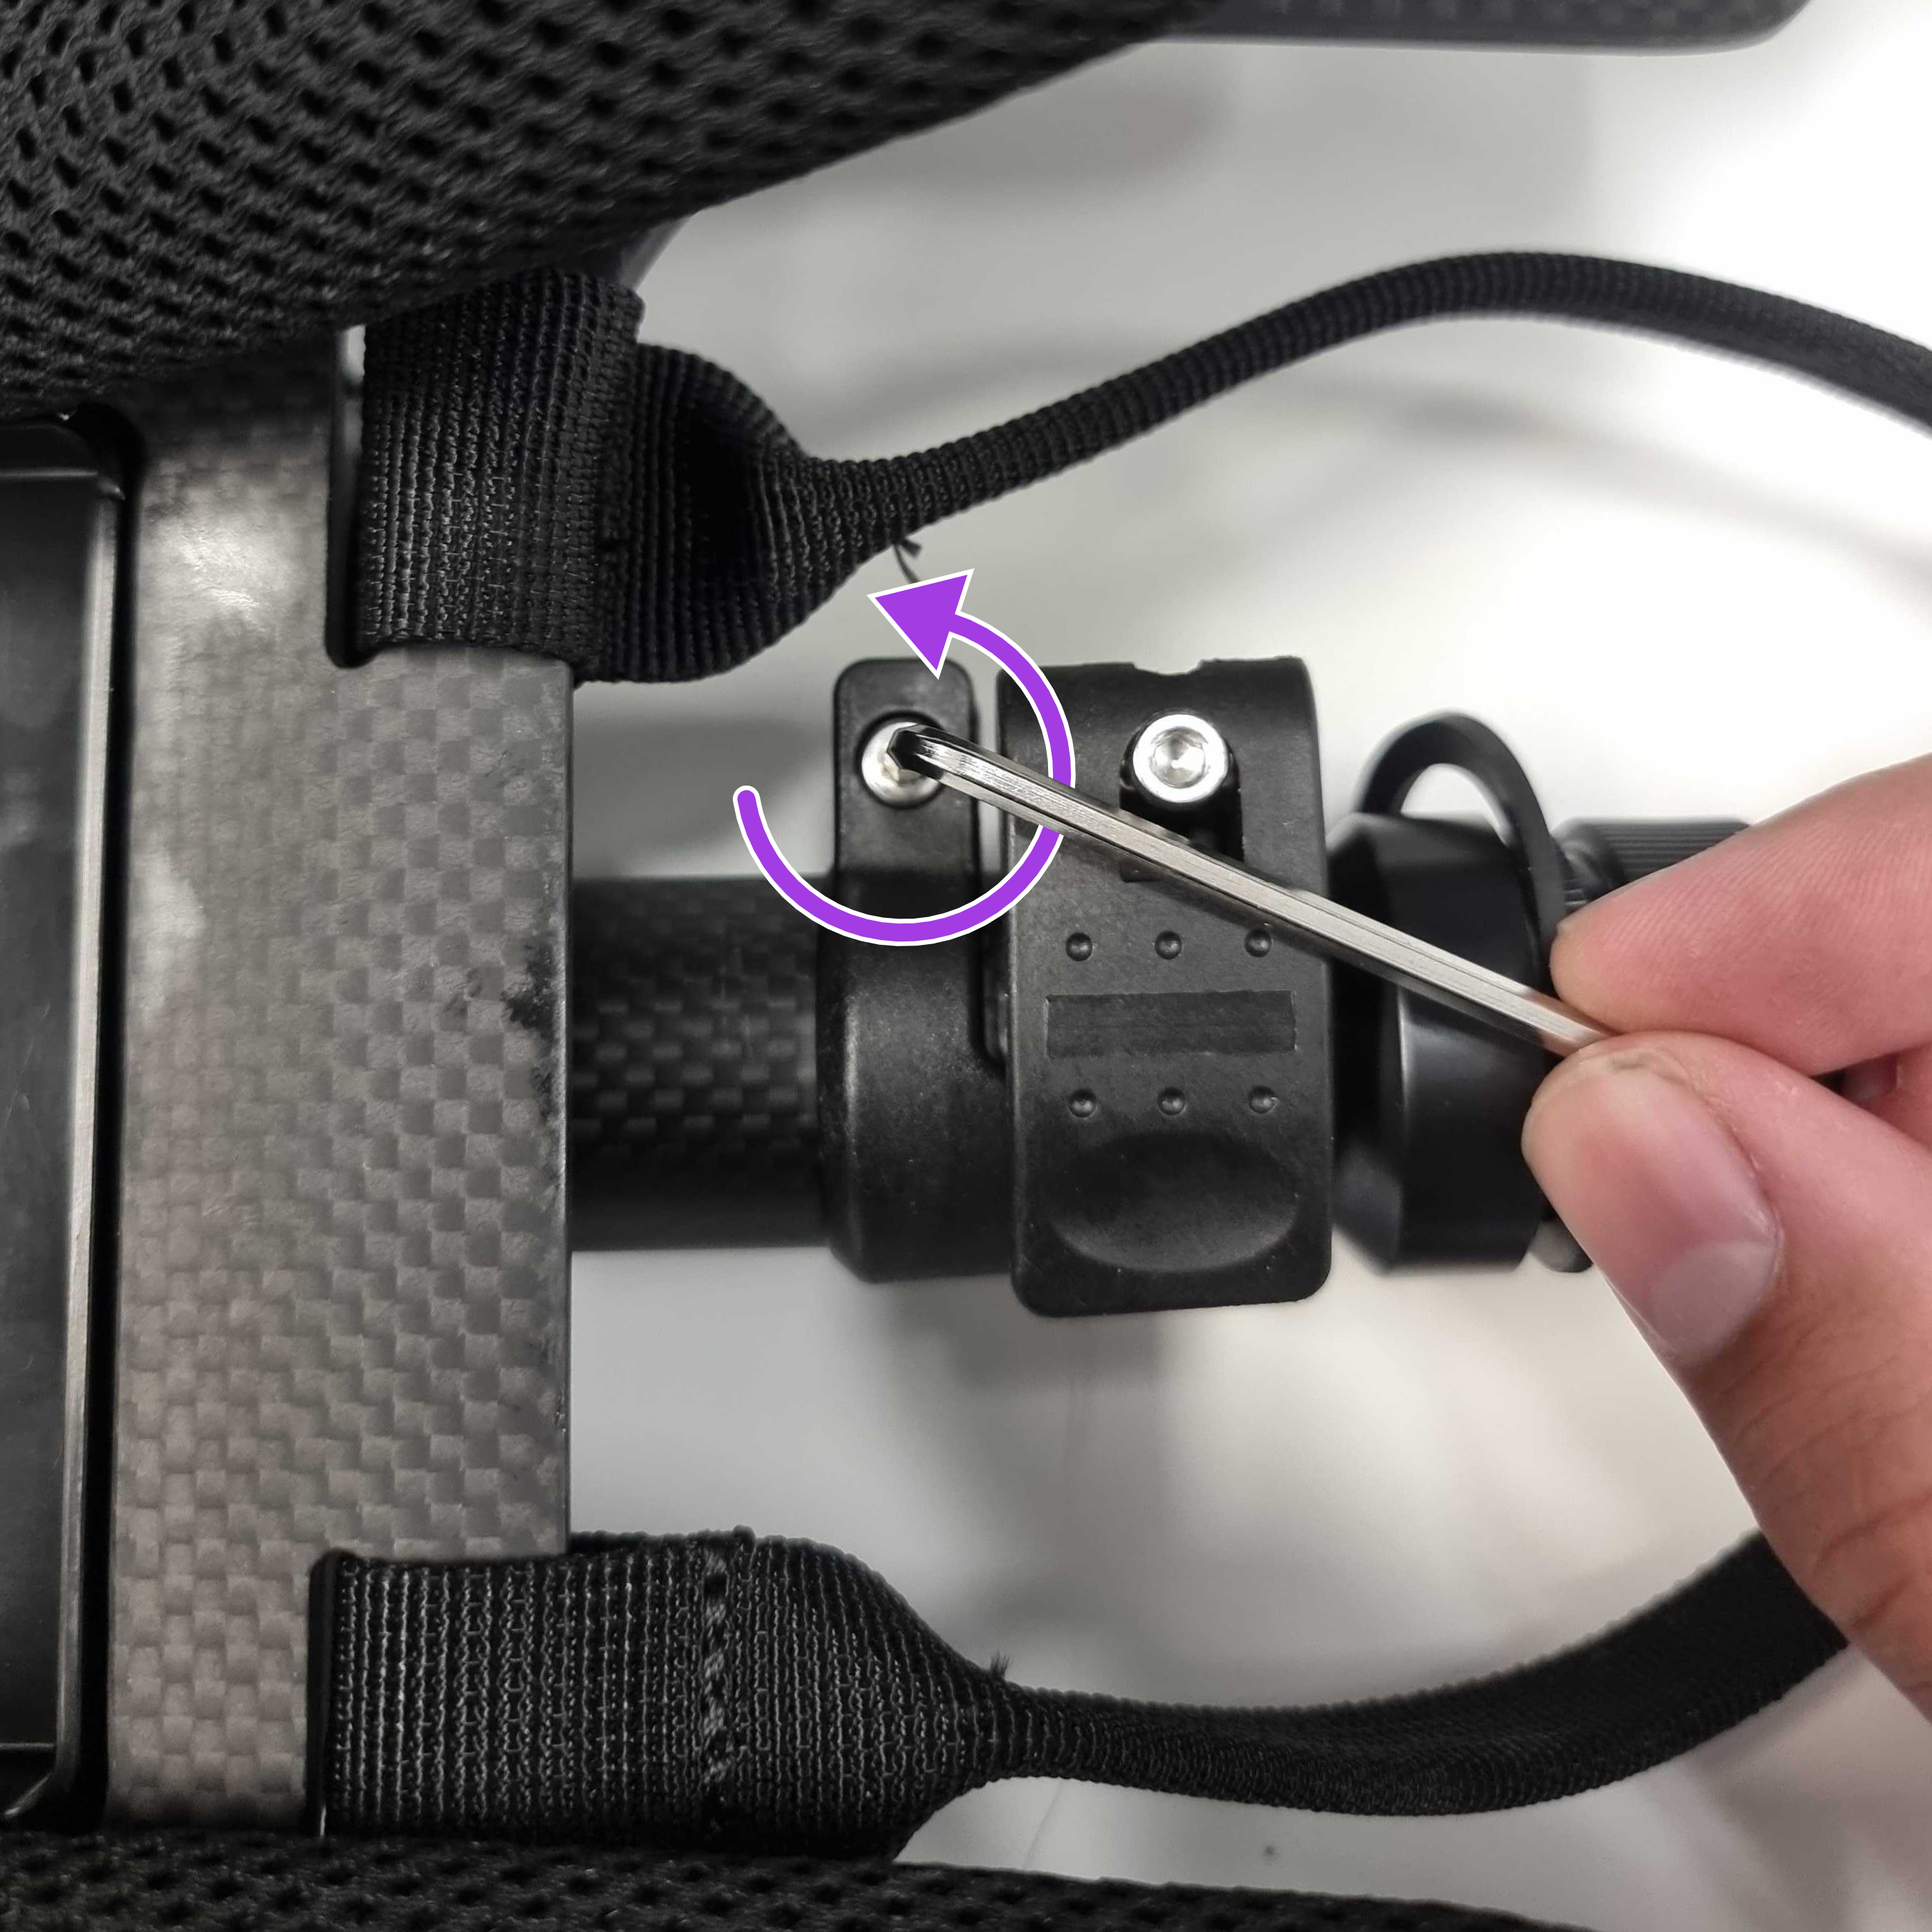
Use the 3 mm hex key to remove the Pole Clamp screw closest to the body of the harness.
Collect the M4 nyloc nut from the underside and put it with the screw in a safe place.
|
|
Step 2: Turn the harness over and extend the Inner Pole
Turn the GX1 Backpack Harness over so that the straps face down.
Open the Cam Lock Lever.
Extend the Inner Pole part way.
|
|
|
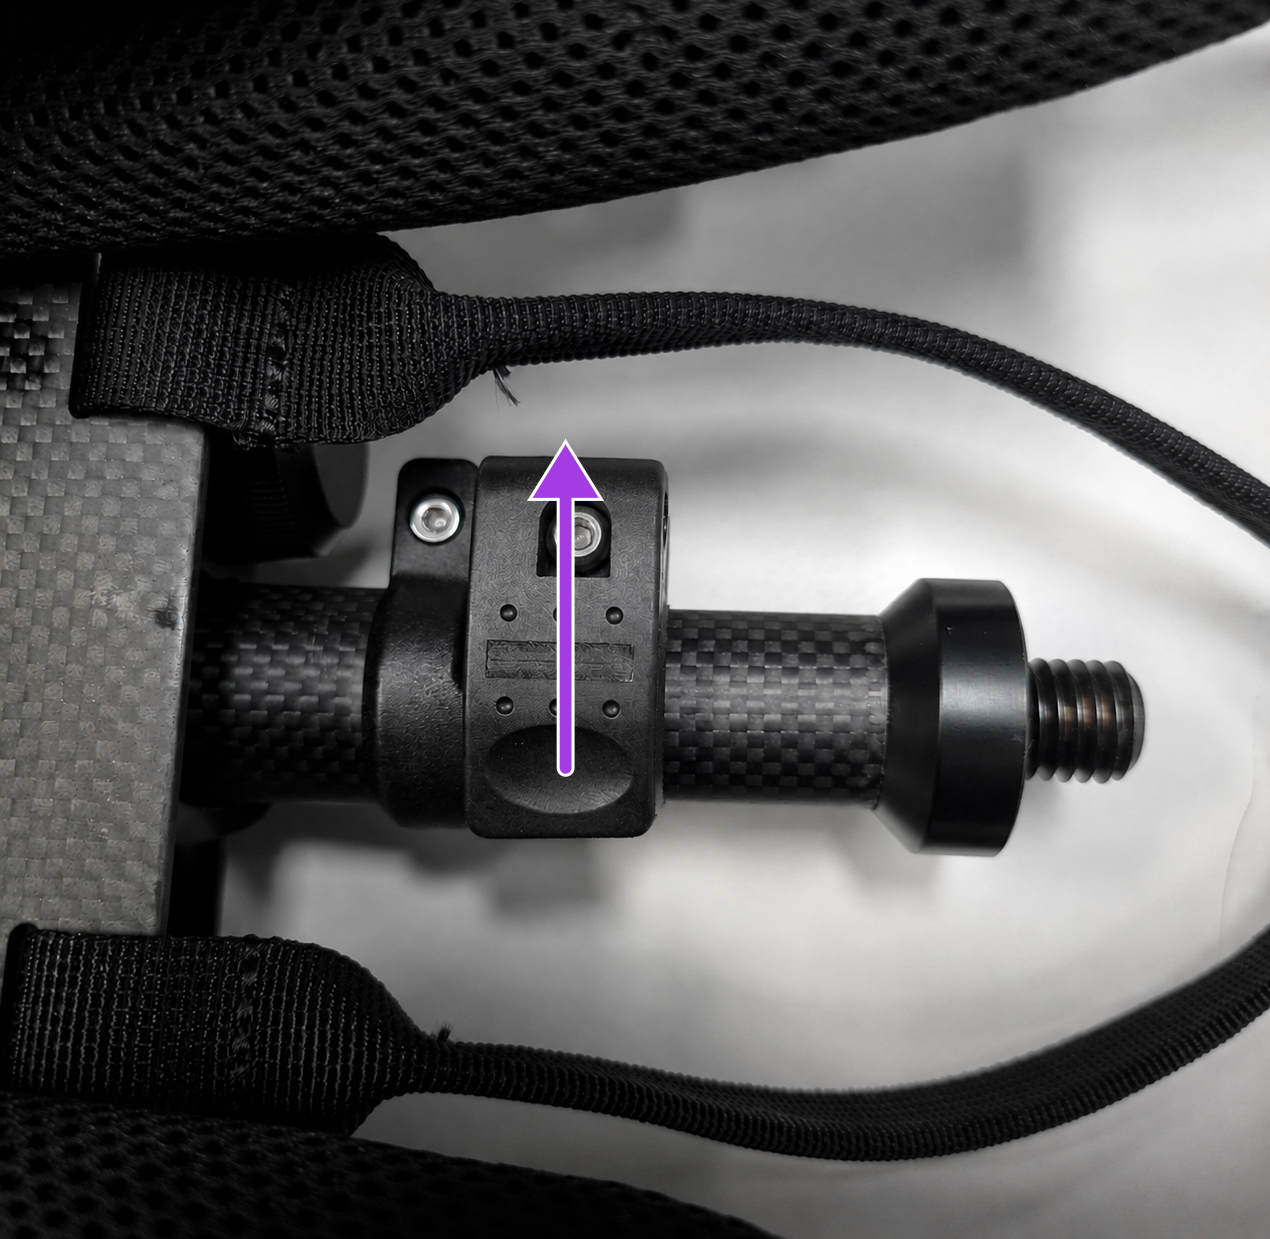
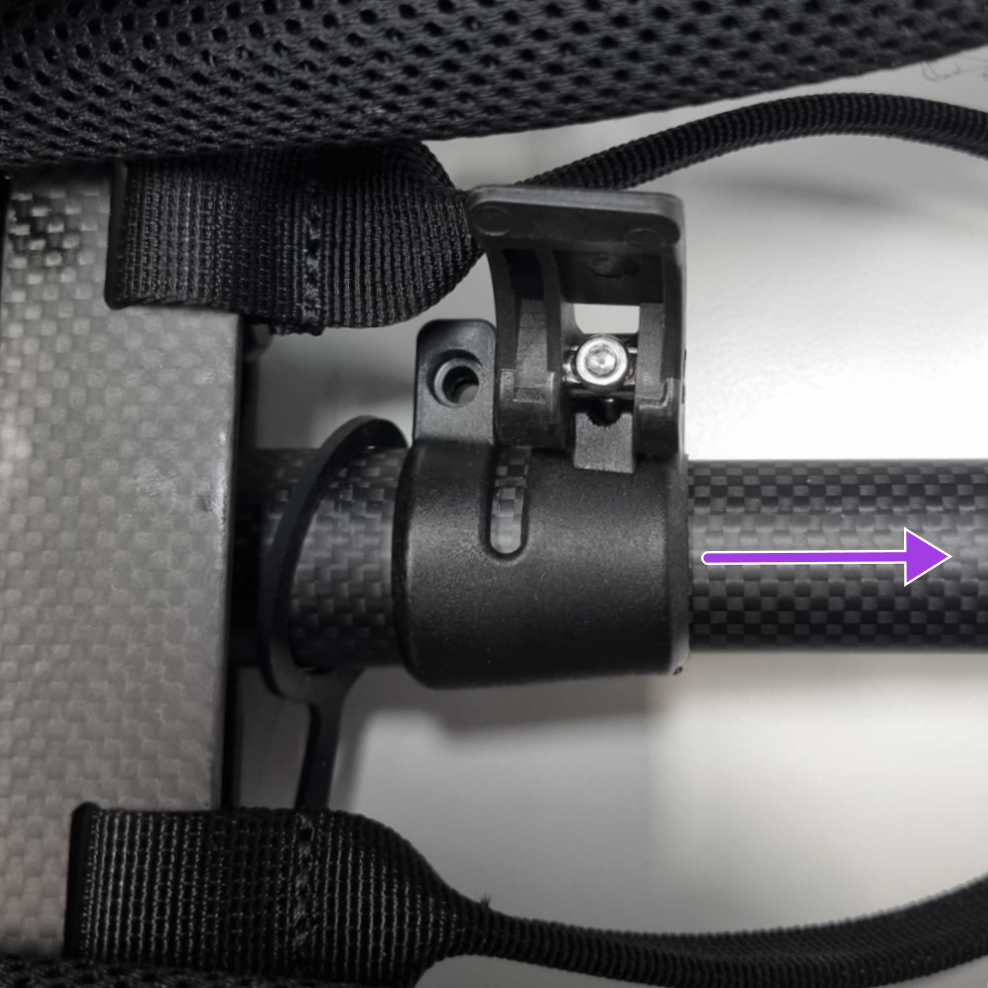
Step 3: Release the Pole Clamp from the Outer Pole
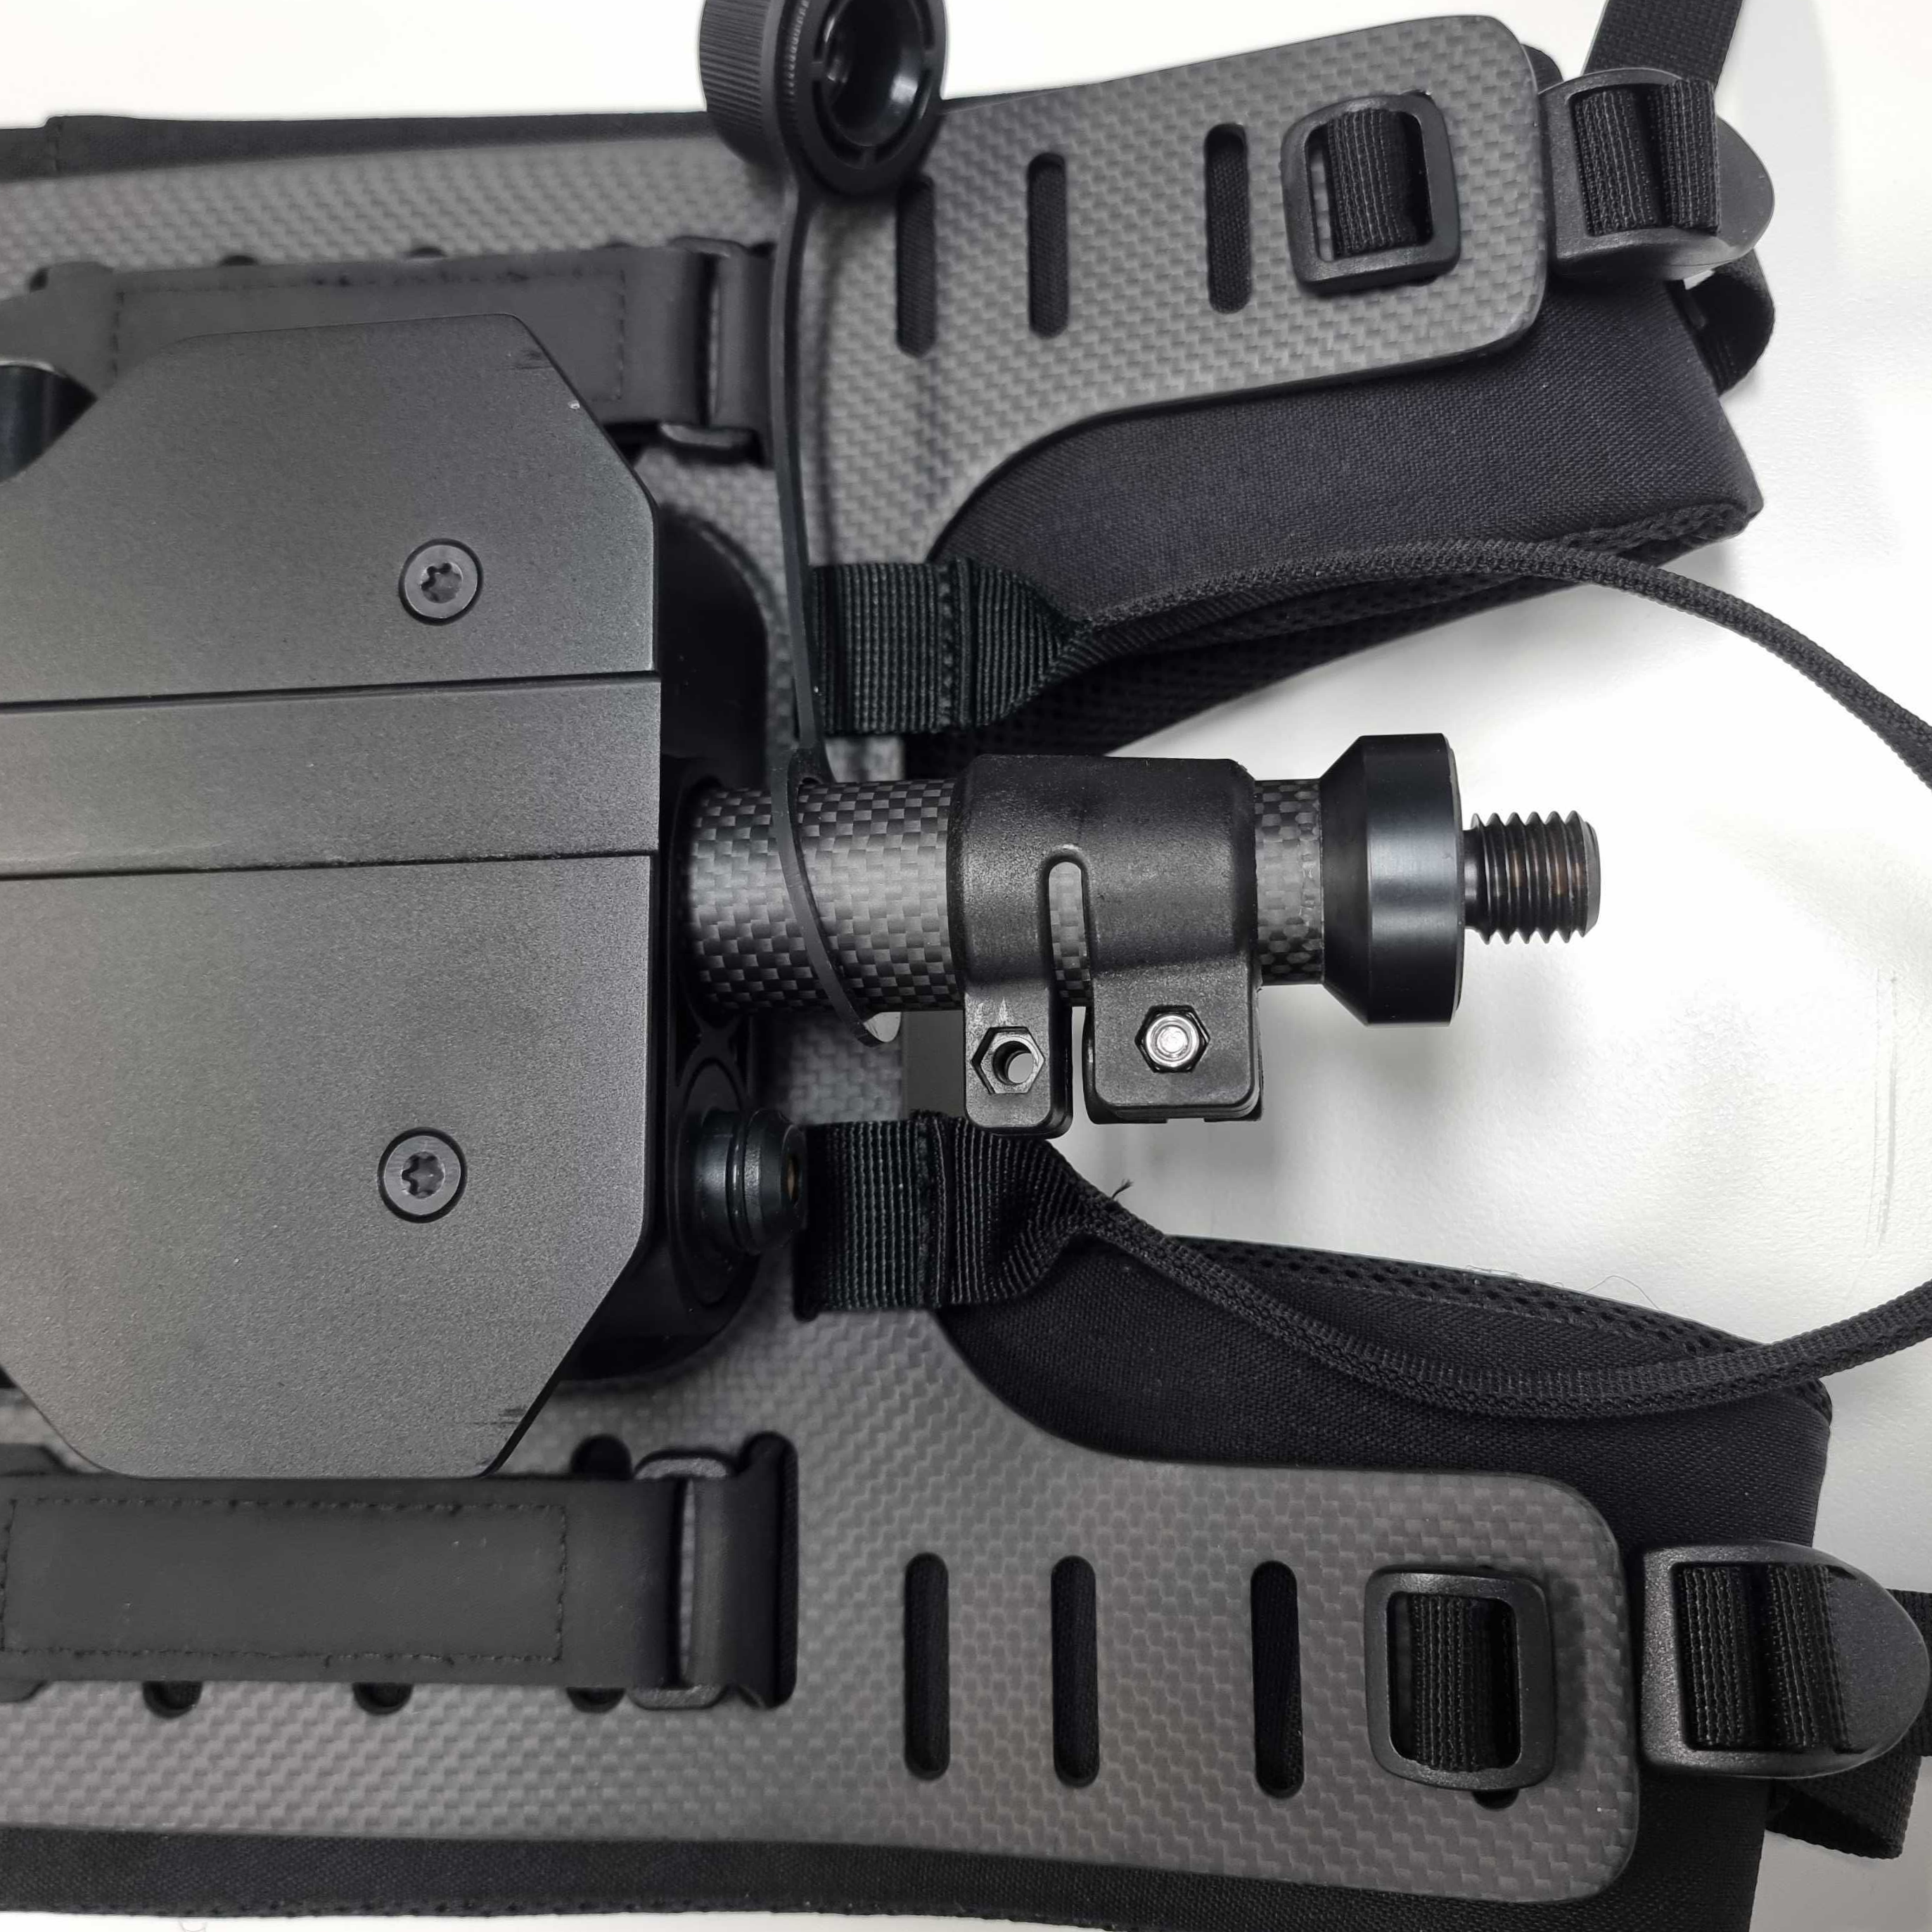
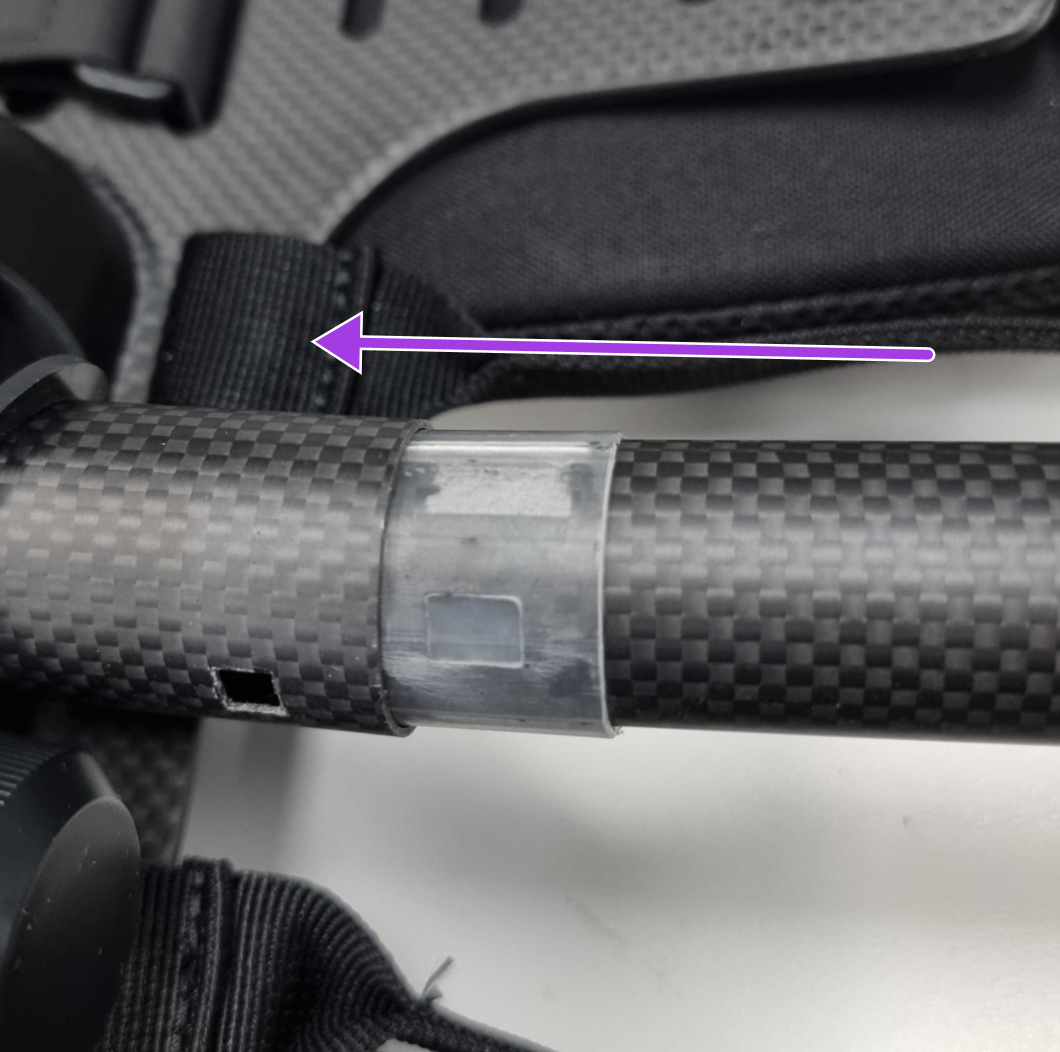
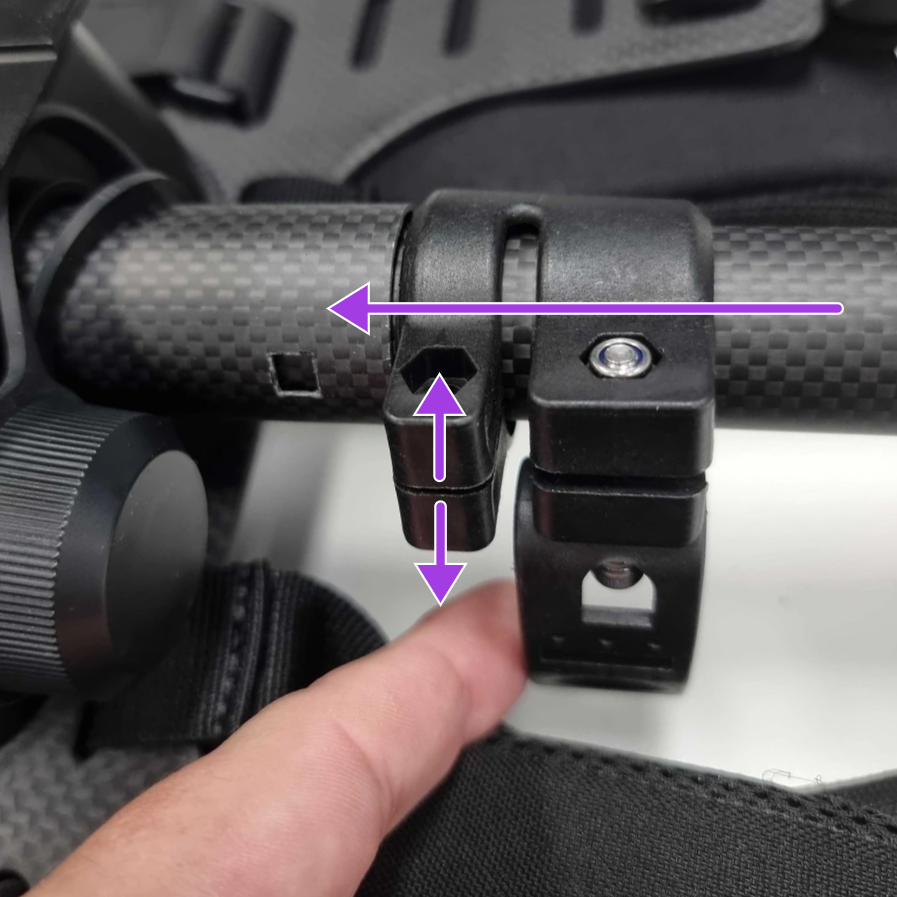
The Pole Clamp has a notch that keys into the Outer Pole.
Use the fingers to spread the Pole Clamp open gently.
Pull the Pole Clamp away from the Outer Pole at the same time.
Slide the Pole Clamp off the end of the Outer Pole after the notch releases.
|
|
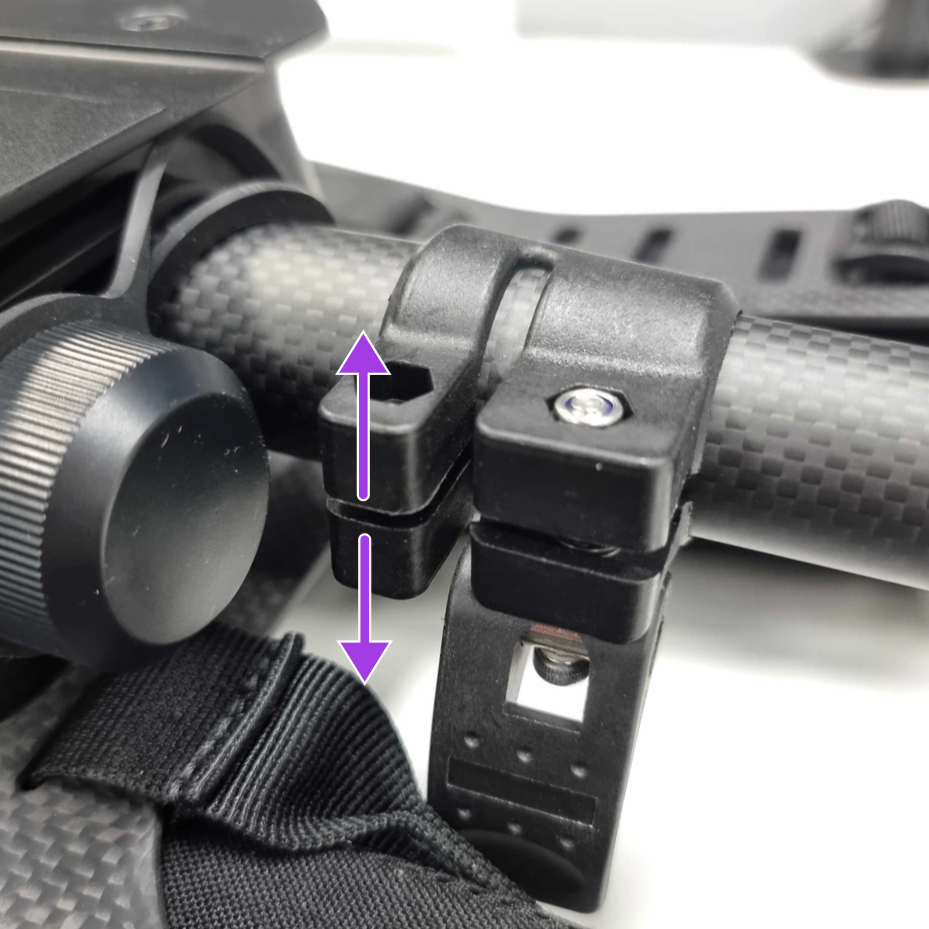
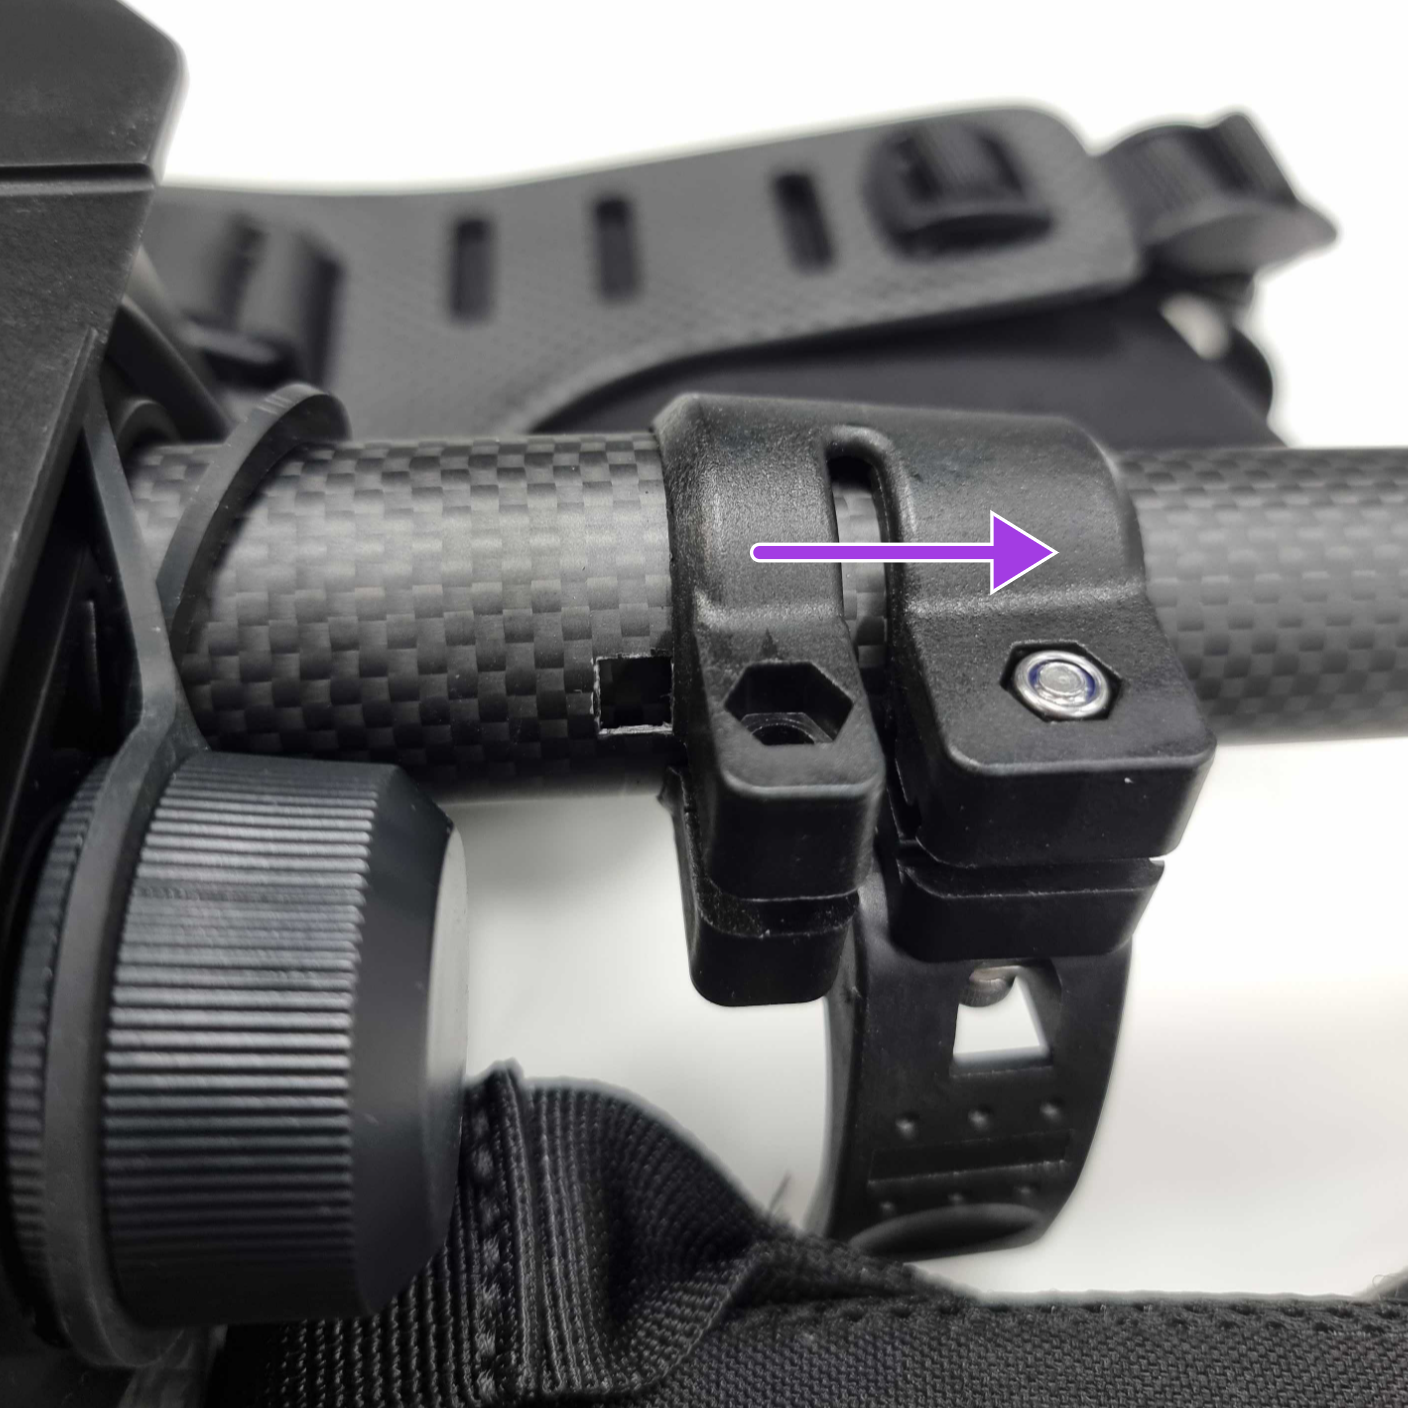
Step 4: Remove the old Inner Pole
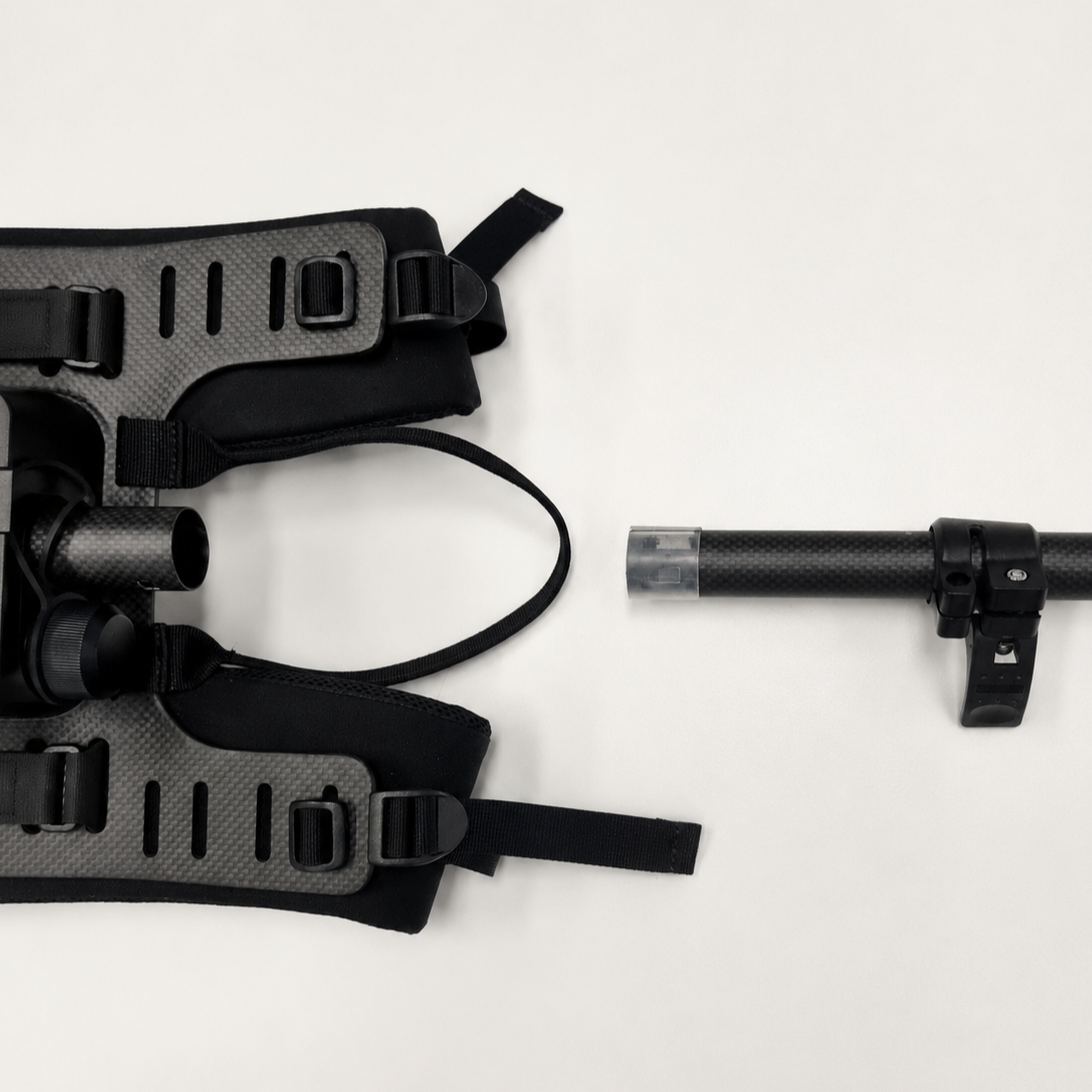
Pull the Inner Pole and the Pole Clamp completely out of the Outer Pole.
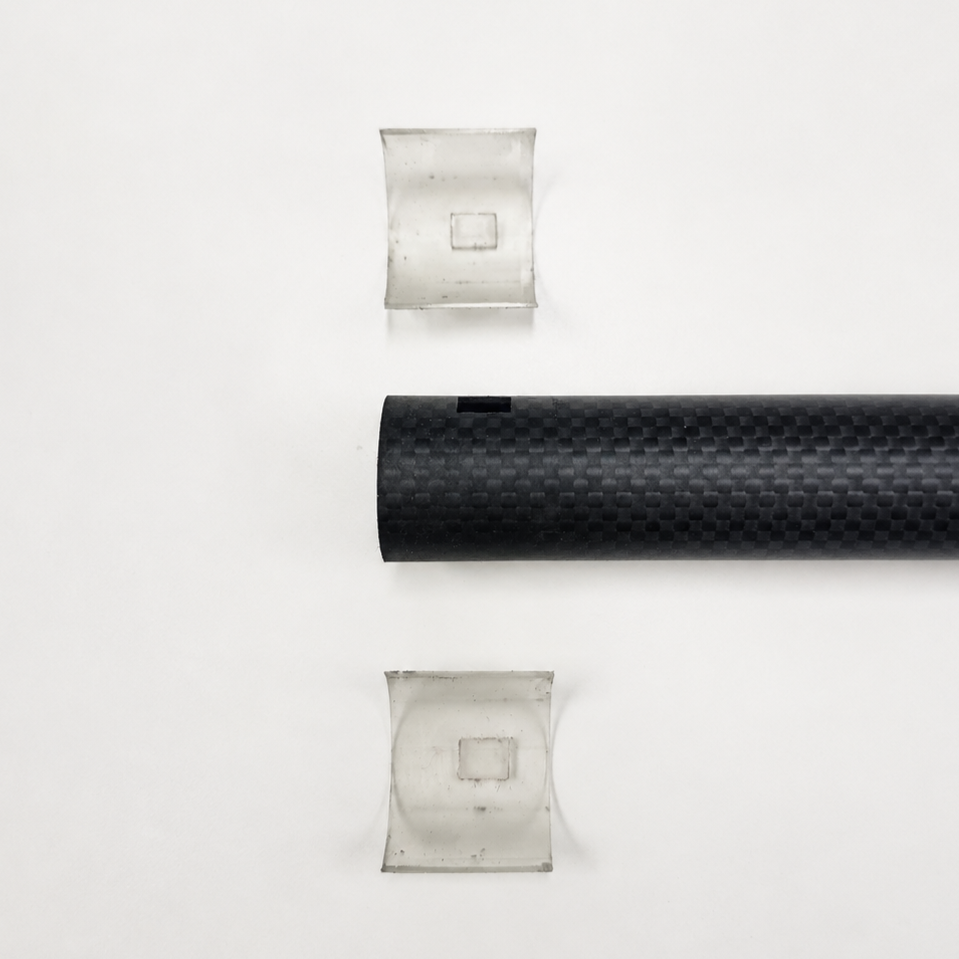
Remove the two End-Stops from the end of the Inner Pole.
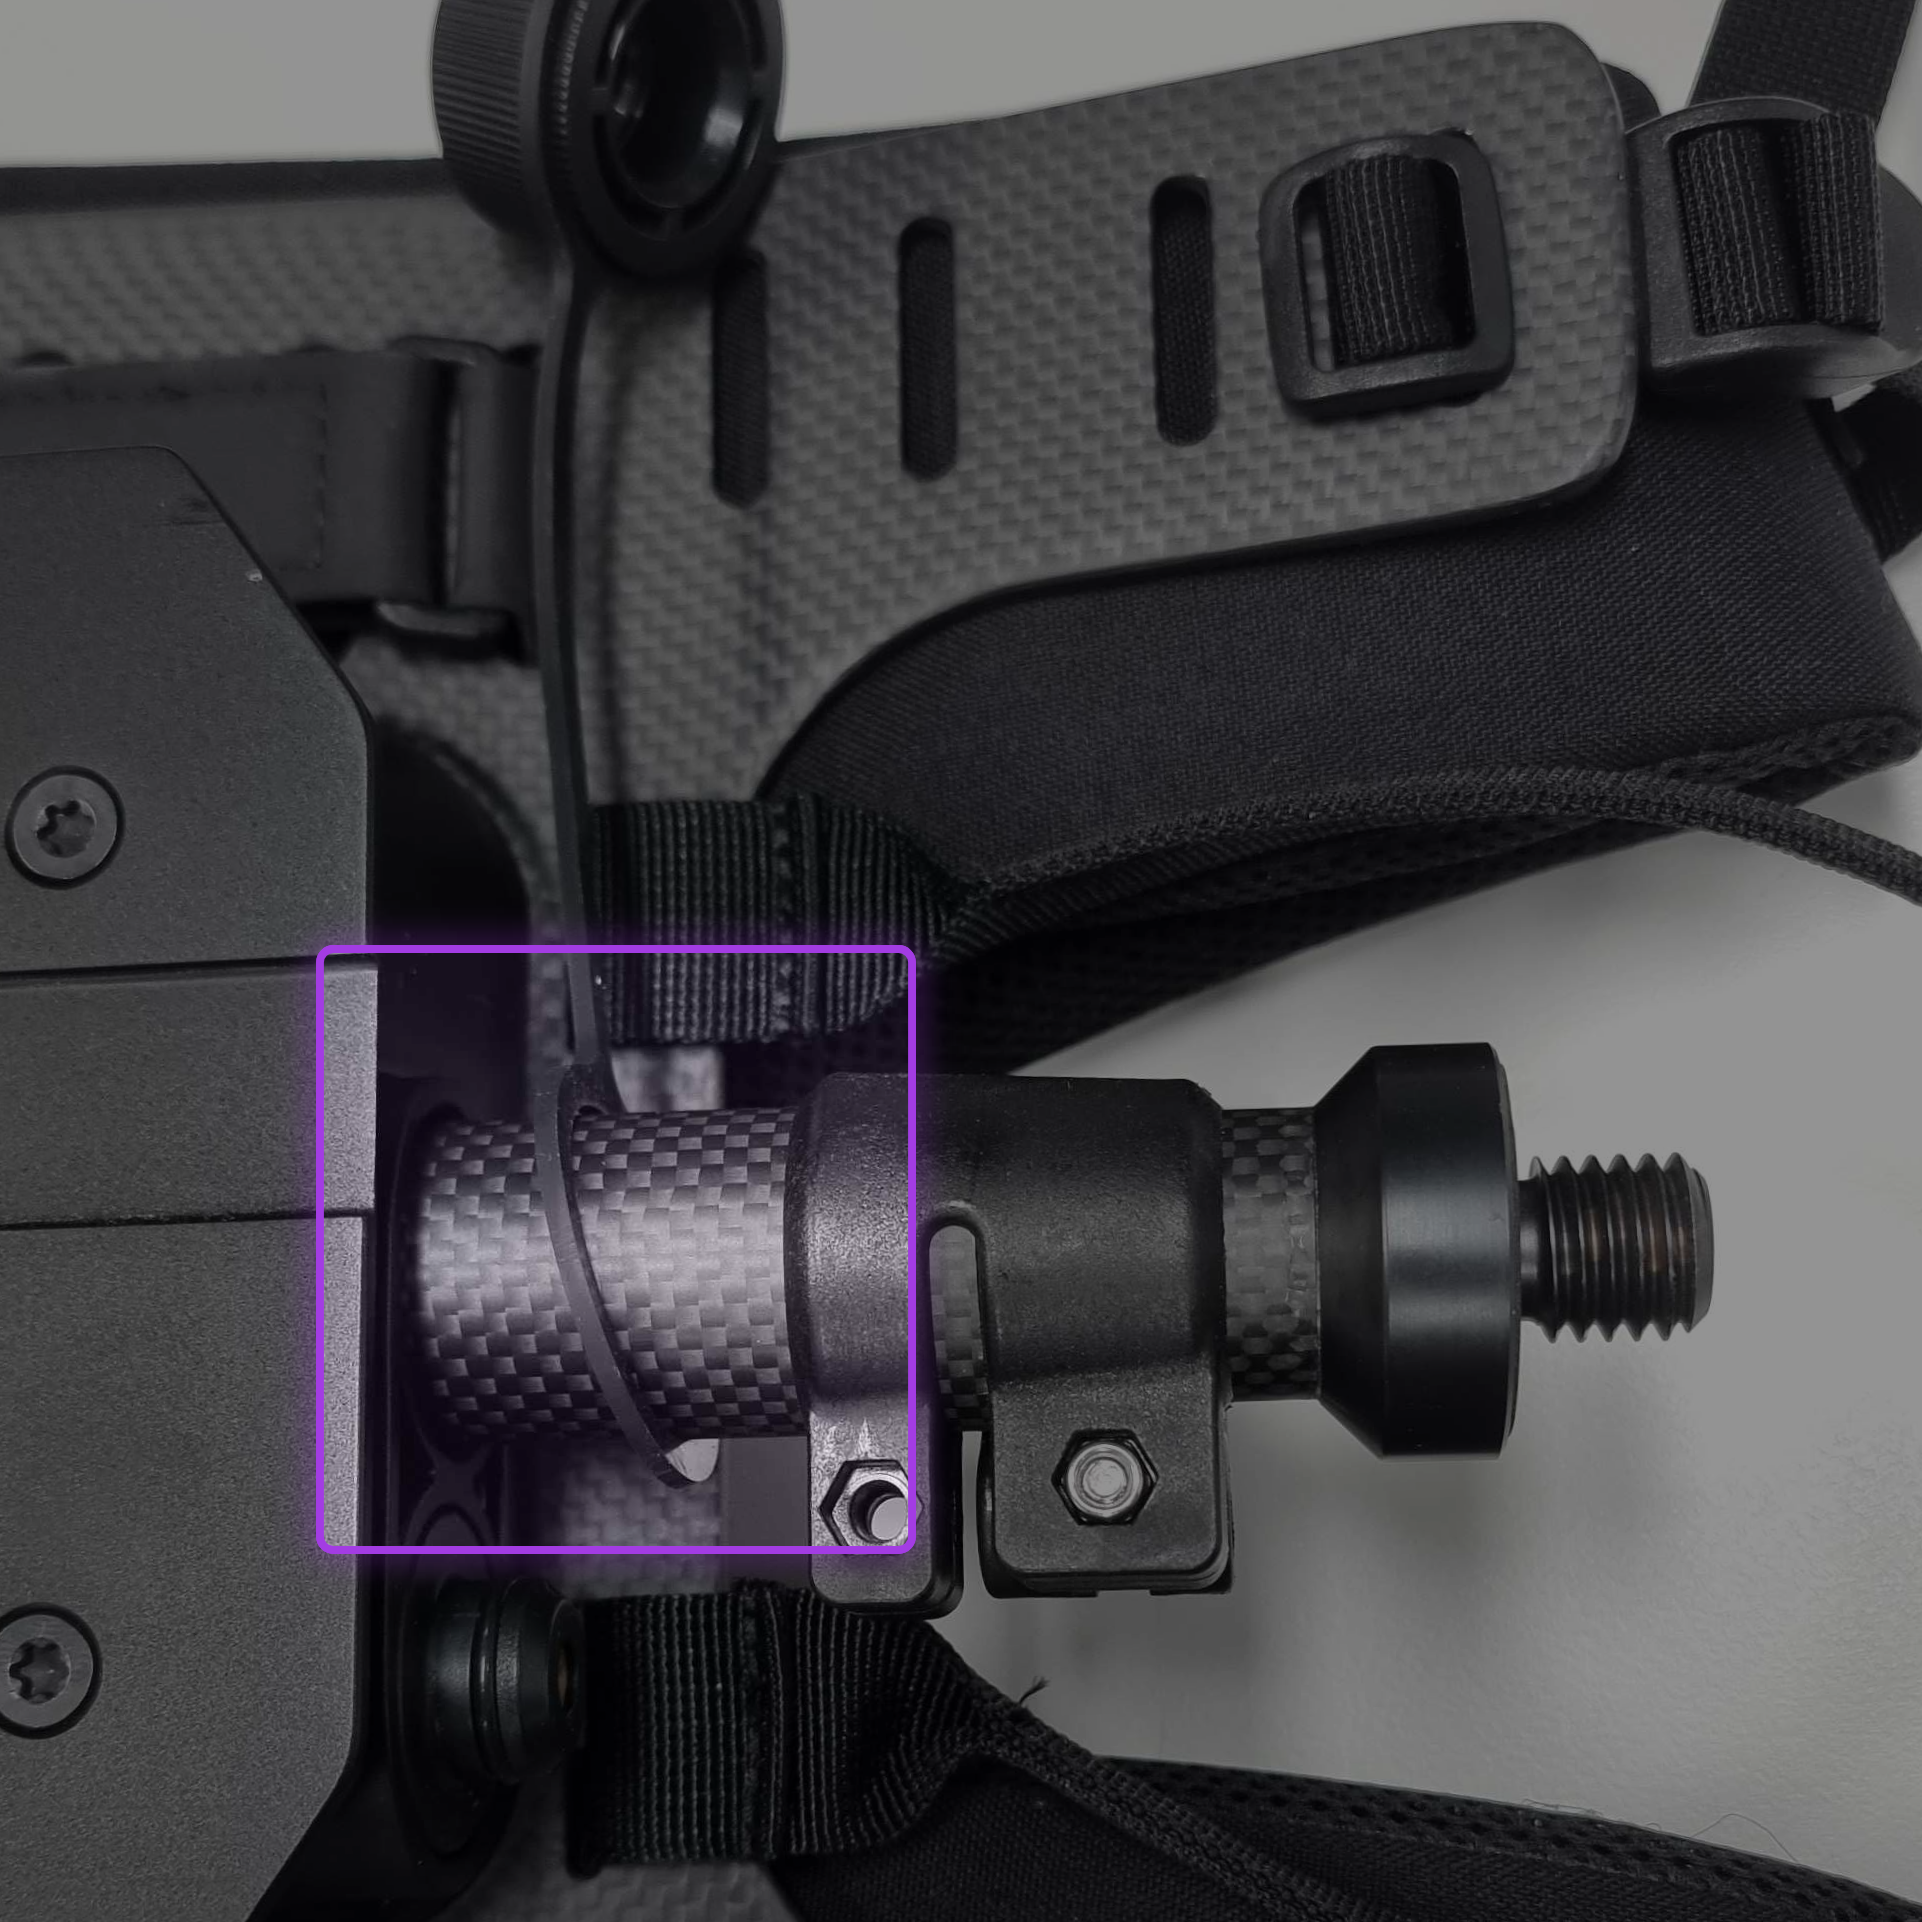
Keep the Thread Cap with Tether secured around the Outer Pole during Inner Pole removal. If the Thread Cap with Tether comes off, thread the Outer Pole through the loop in the Tether before the next step.
|
|
|
Step 5: Remove the Pole Clamp from the Inner Pole
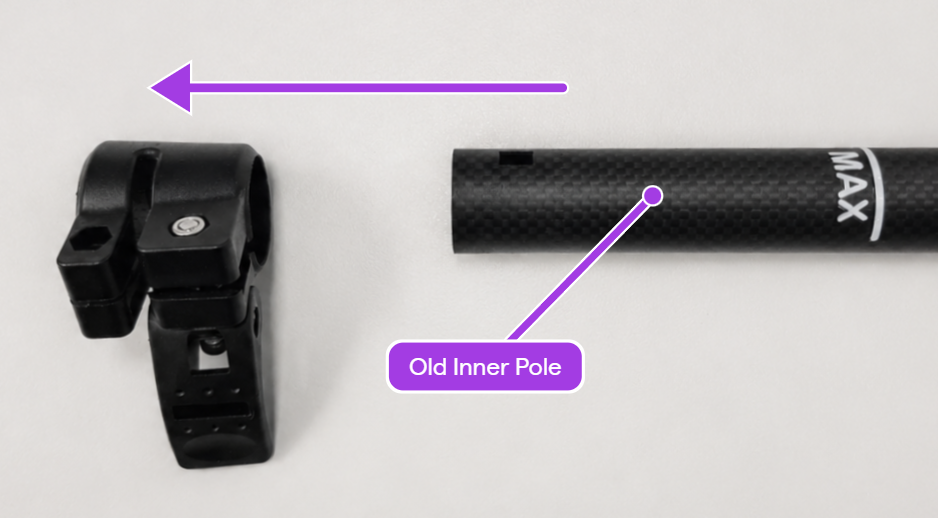
Slide the Pole Clamp off the Inner Pole.
Put the Pole Clamp aside for use on the replacement Inner Pole.
Dispose of the old Inner Pole now. This prevents a mix-up with the replacement Inner Pole.
Step 6: Install the Pole Clamp on the replacement Inner Pole
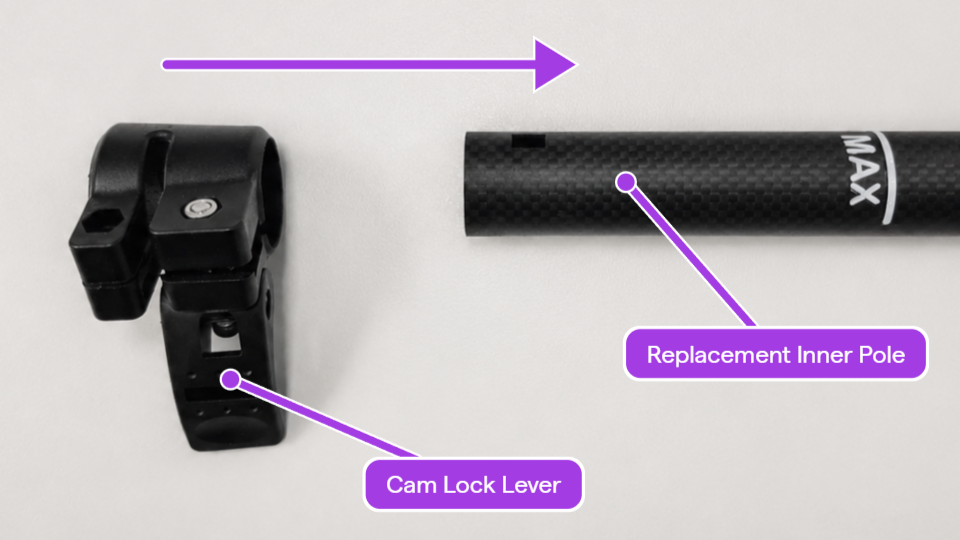
Slide the Pole Clamp onto the replacement Inner Pole, Cam Lock Lever end first, past the MAX mark.
Step 7: Install the End-Stops on the replacement Inner Pole
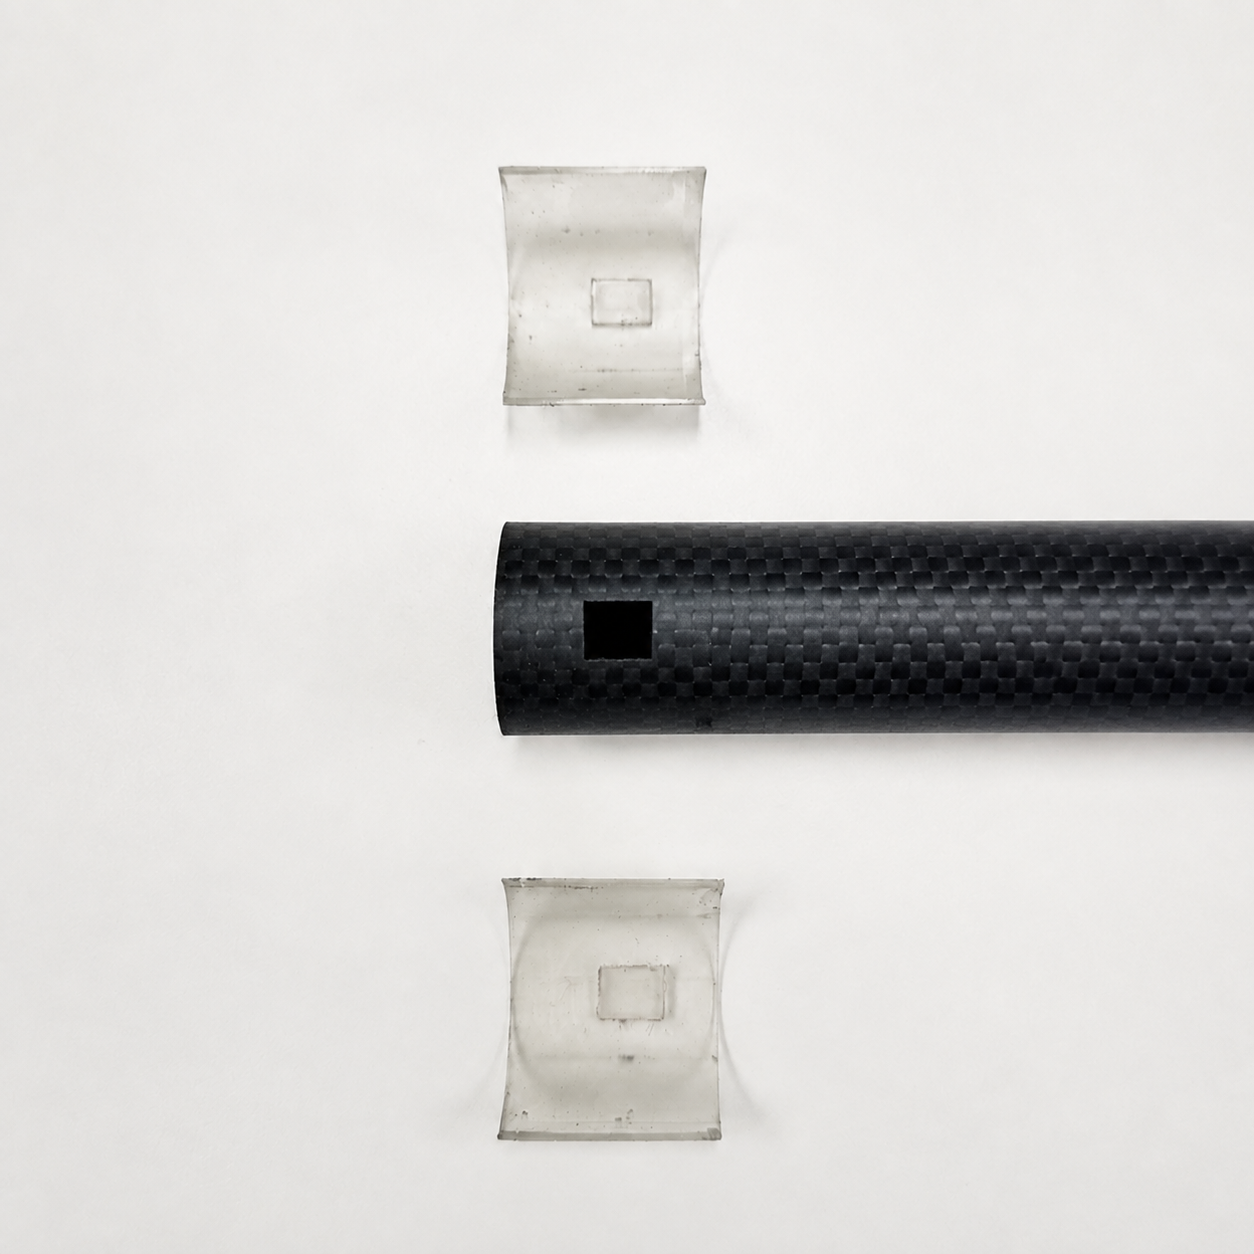
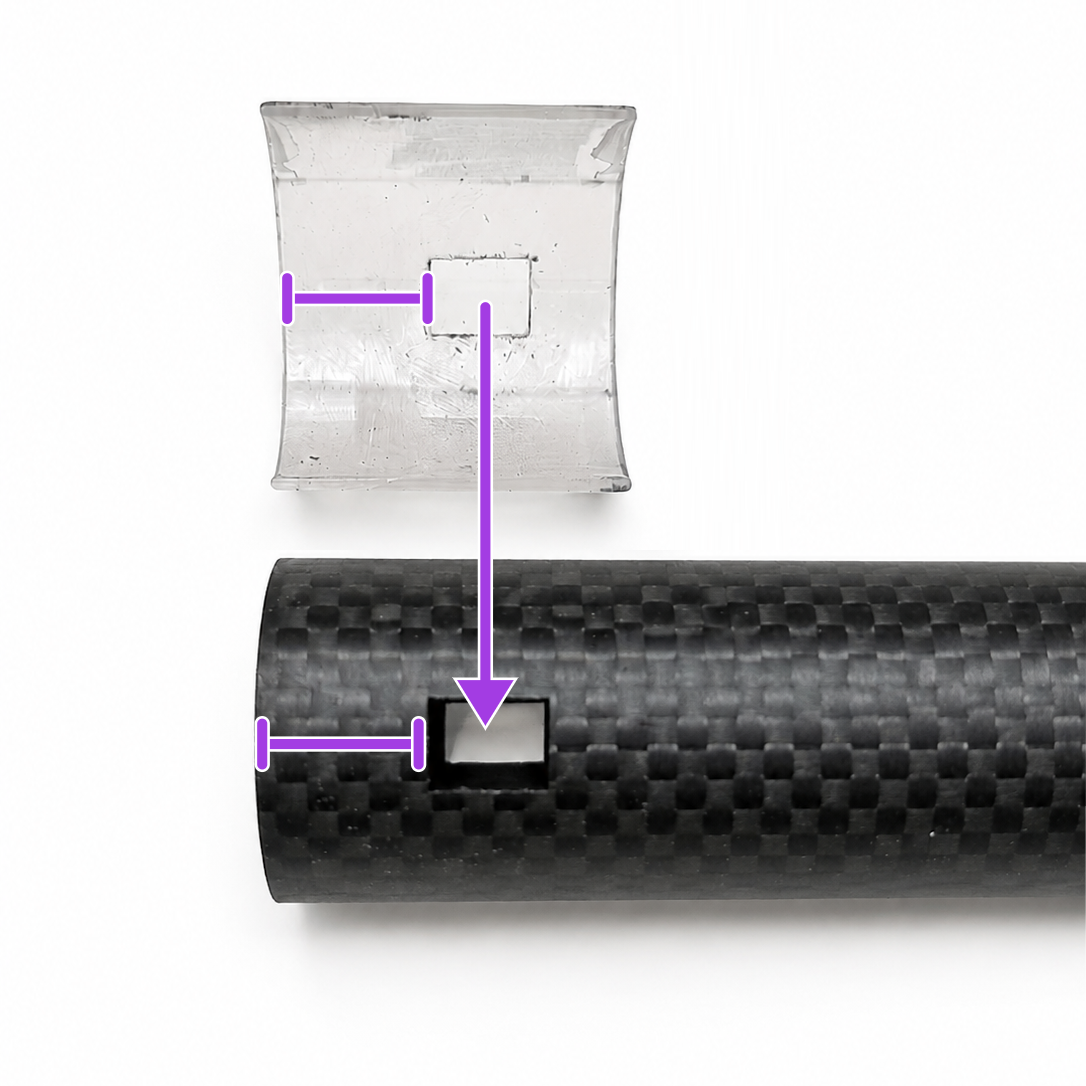
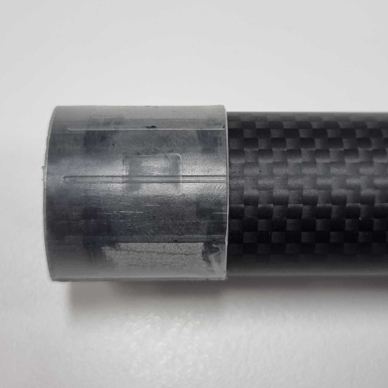
Install the two End-Stops onto the end of the replacement Inner Pole.
Put the square tab of each End-Stop into a square slot.
Make sure both End-Stops sit flush, because the square tab is not centered.
|
|
|
Step 8: Insert the Inner Pole and position the Pole Clamp
Insert the replacement Inner Pole into the Outer Pole, with the End-Stops attached.
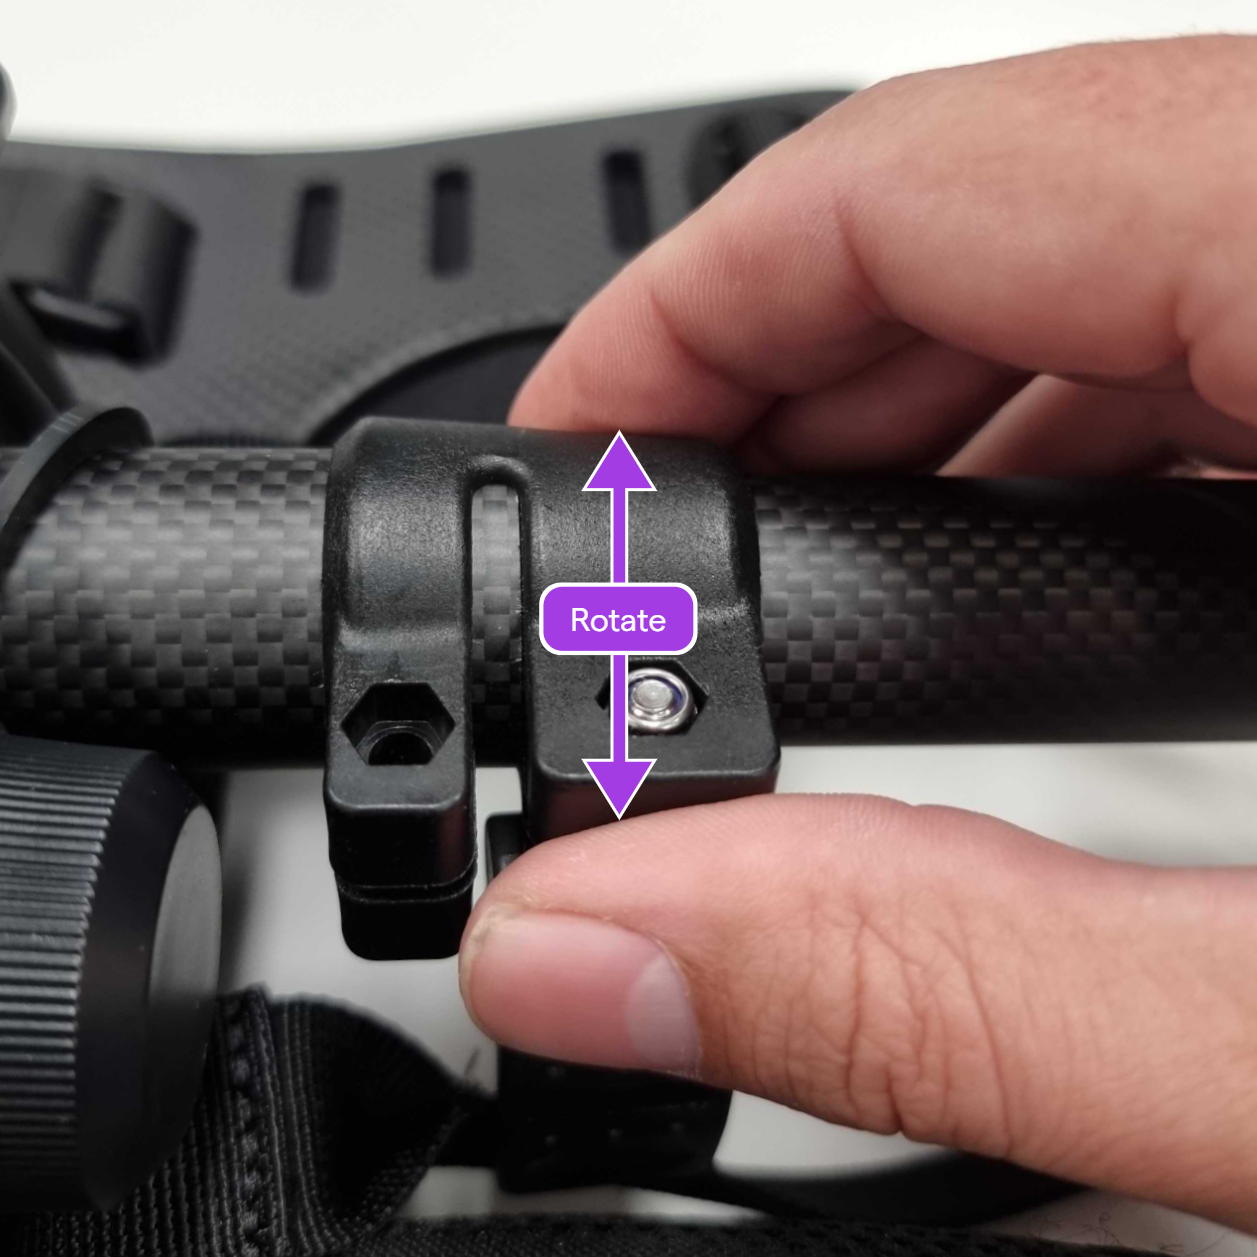
Spread the Pole Clamp open gently.
Slide the Pole Clamp over the Outer Pole.
Turn the Pole Clamp until the square tab on its inner surface locks into the square socket.
|
|
|
Step 9: Install and tighten the Pole Clamp screw
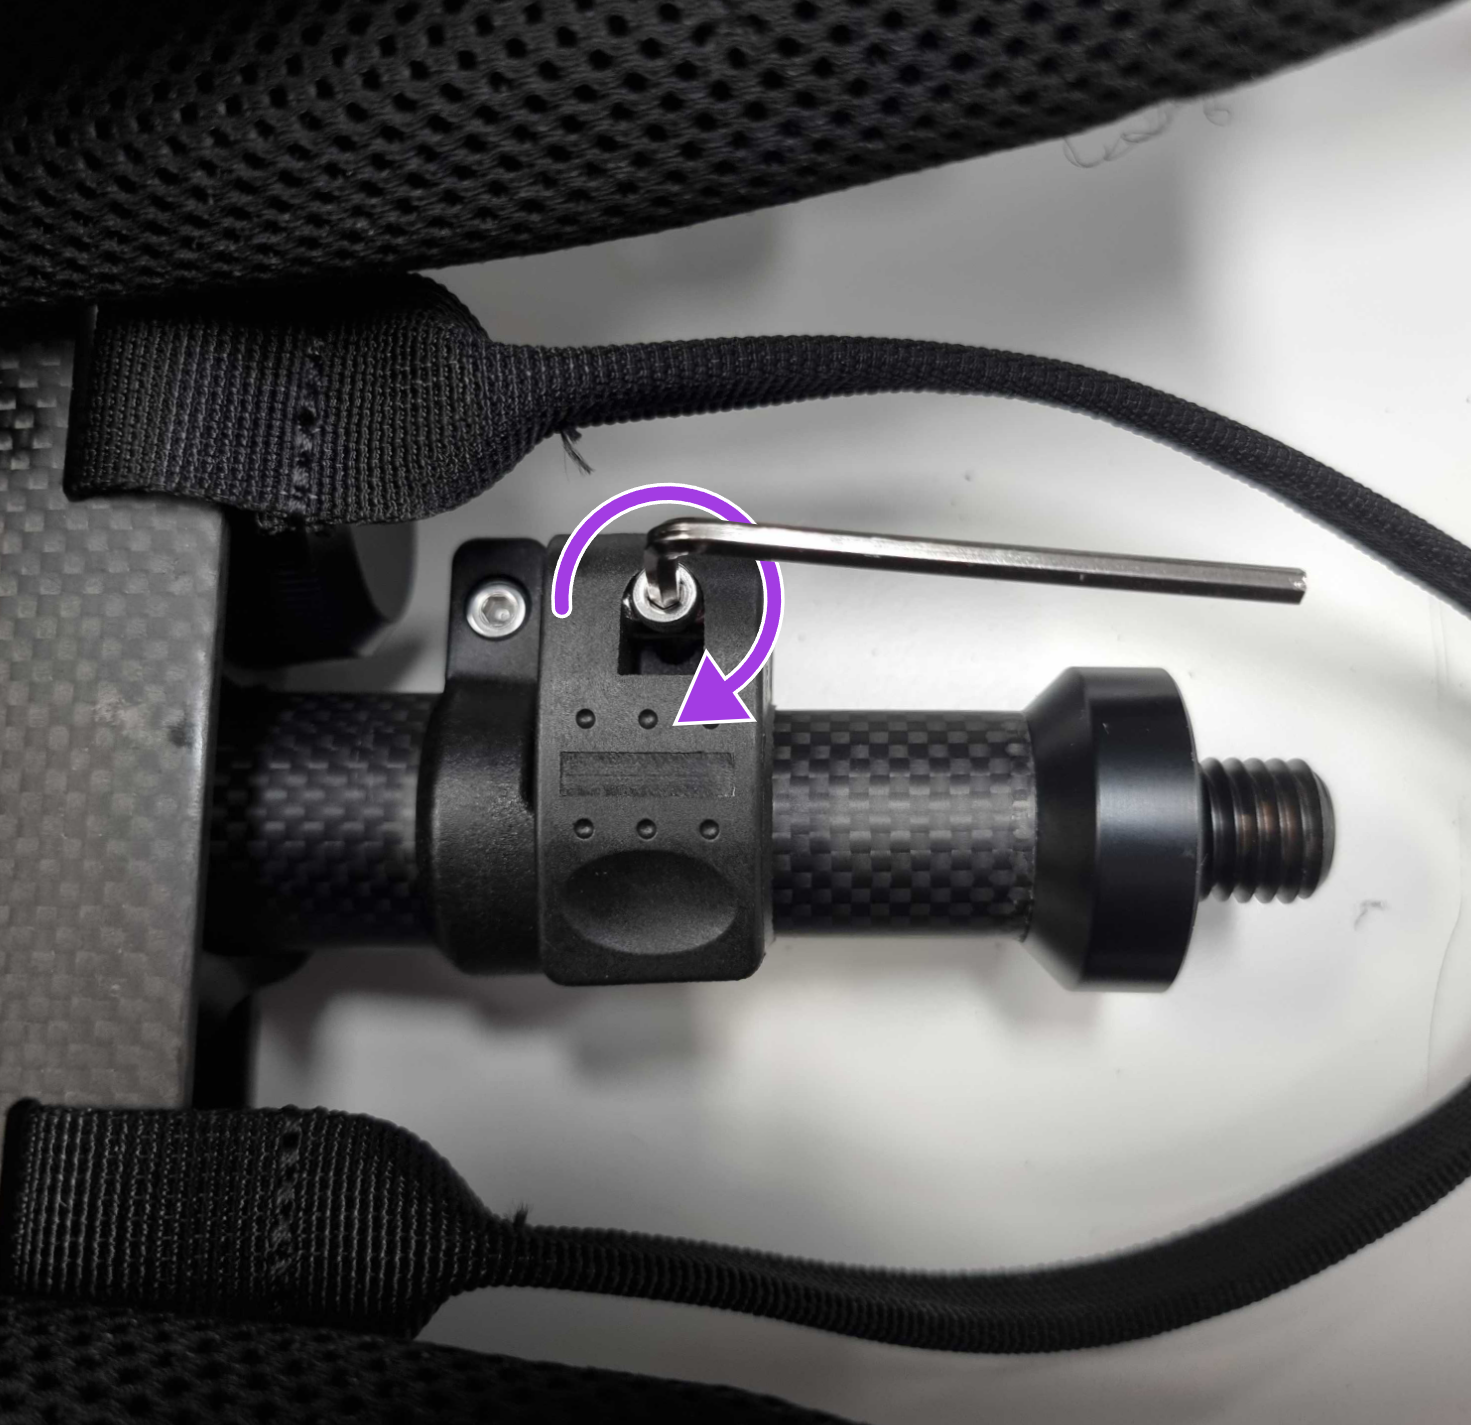
Tighten the Pole Clamp screw to finger tight only, approximately 1 Nm. Too much torque can damage the Pole Clamp.
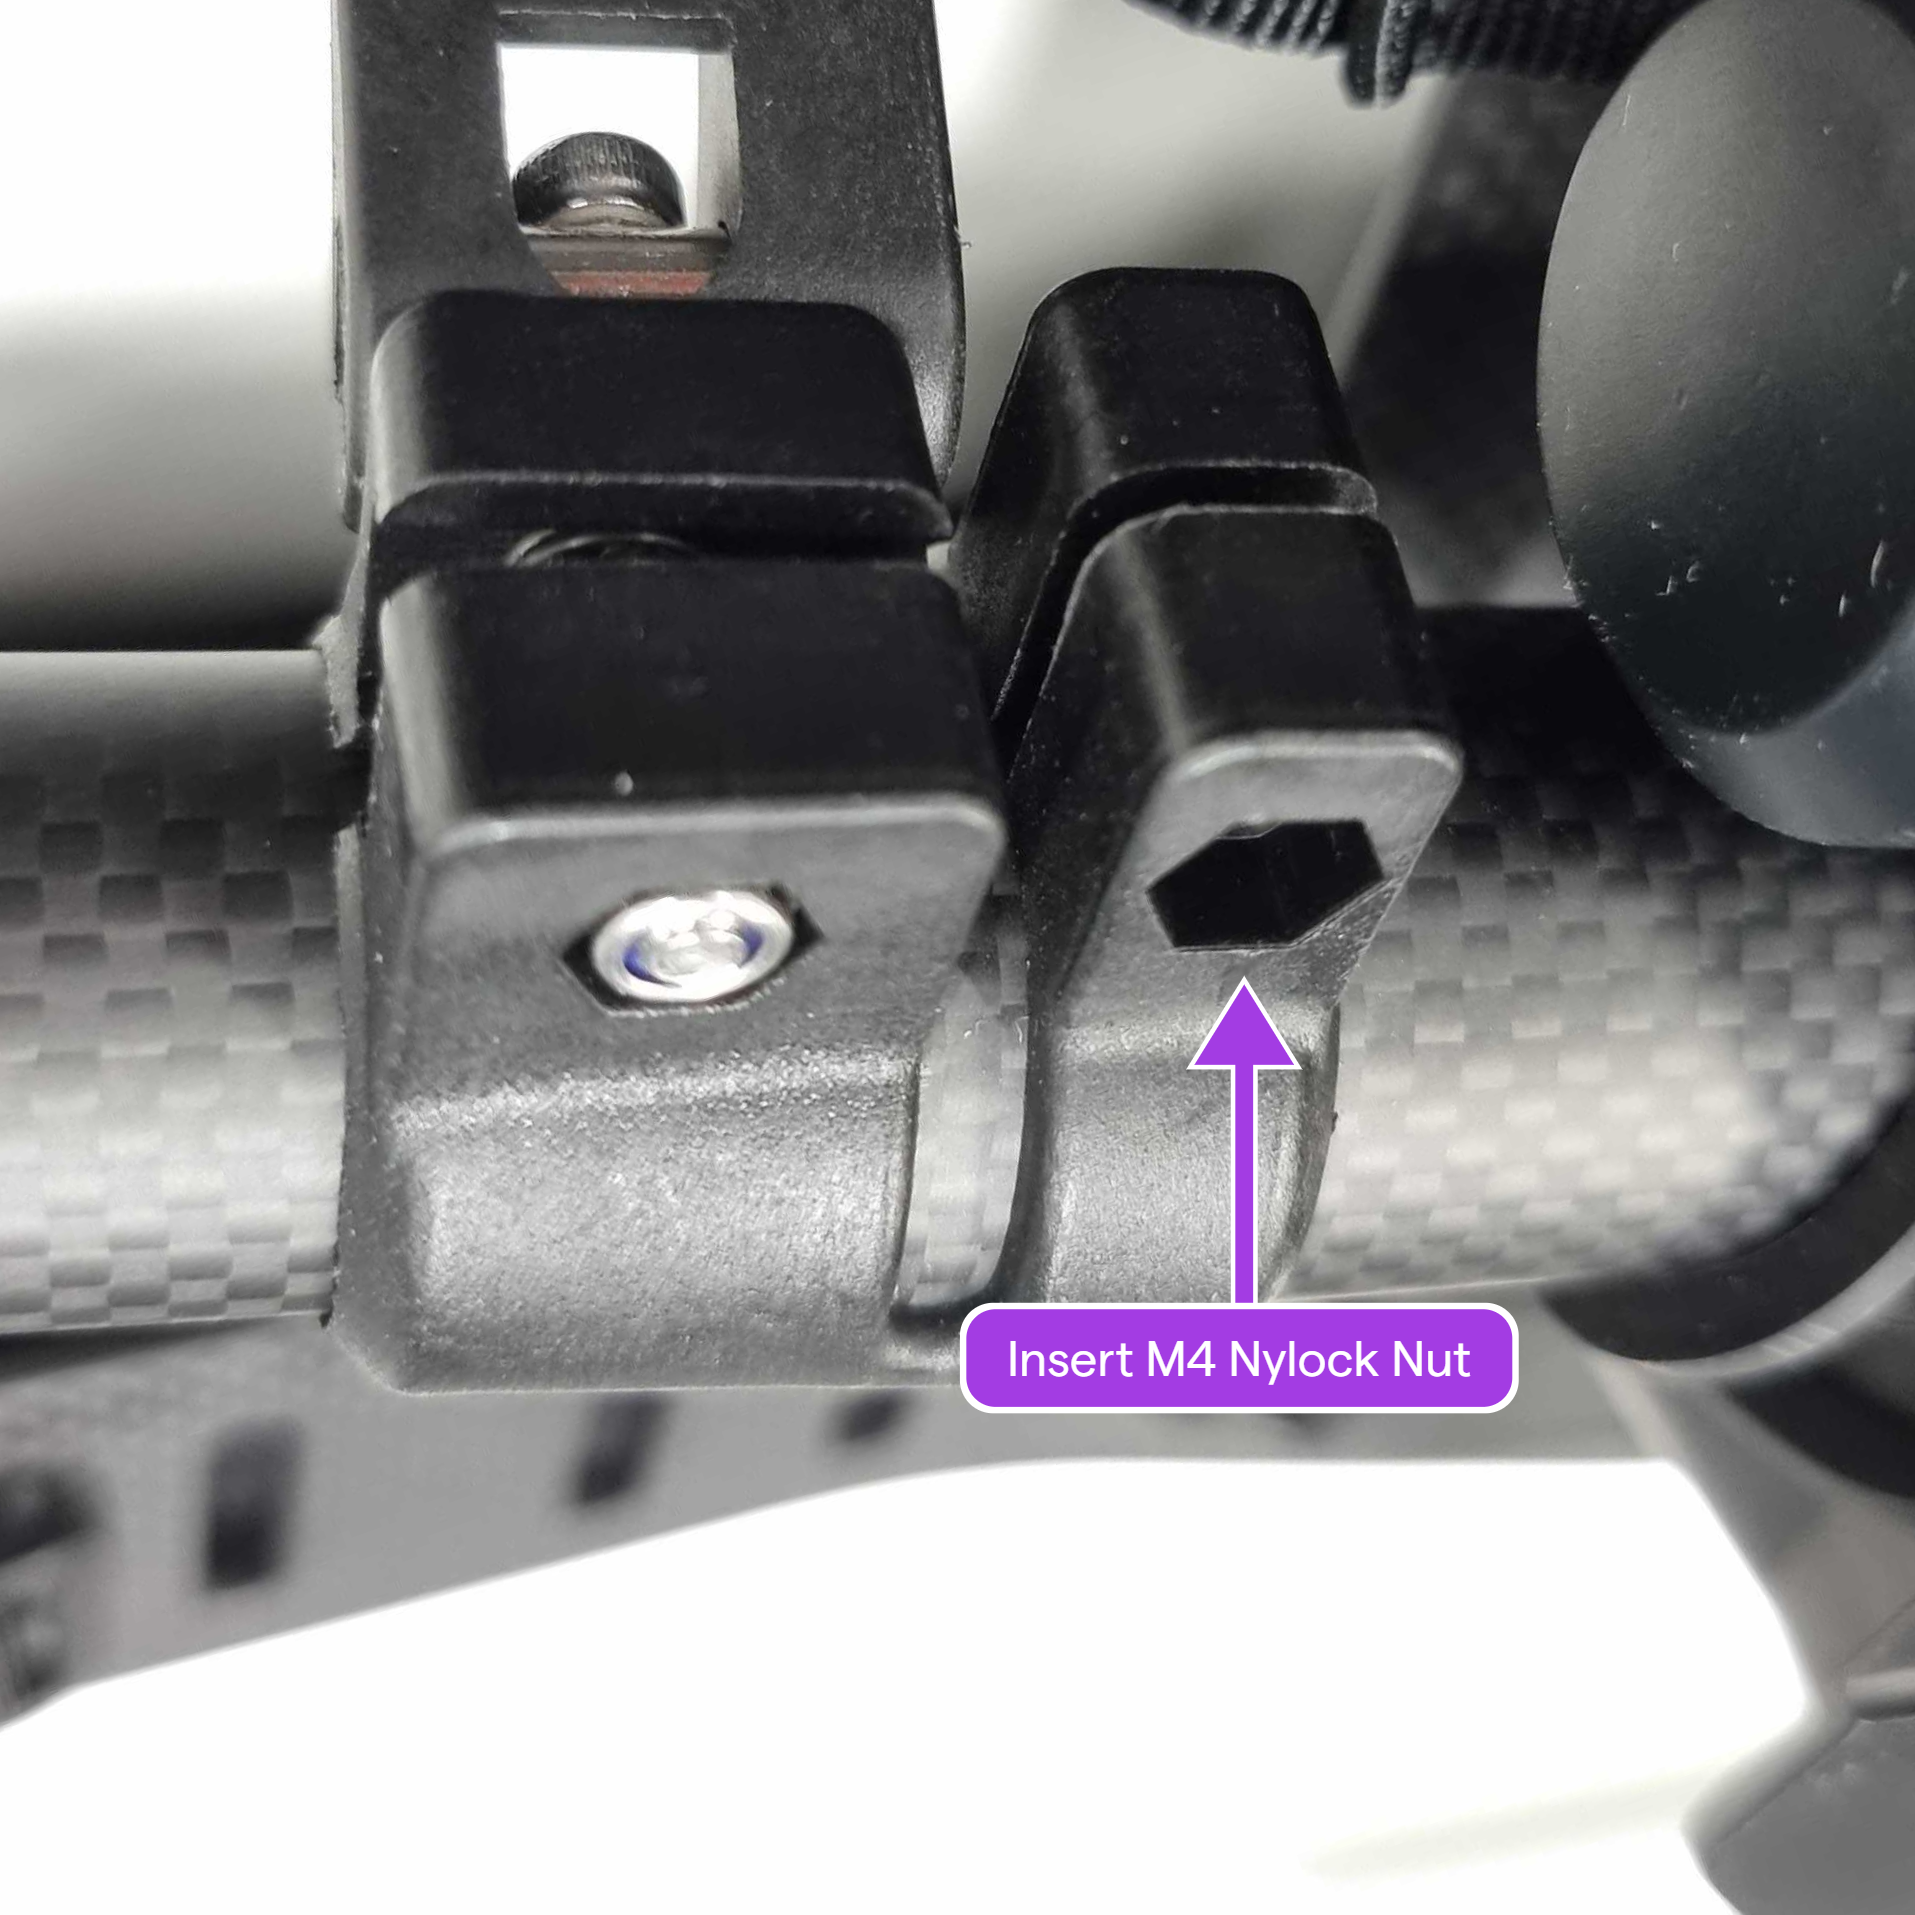
Put the M4 nyloc nut into the Pole Clamp.
Hold the nut in position with a finger.
Put the M4 screw into the Pole Clamp.
Engage the thread of the screw in the M4 nyloc nut.
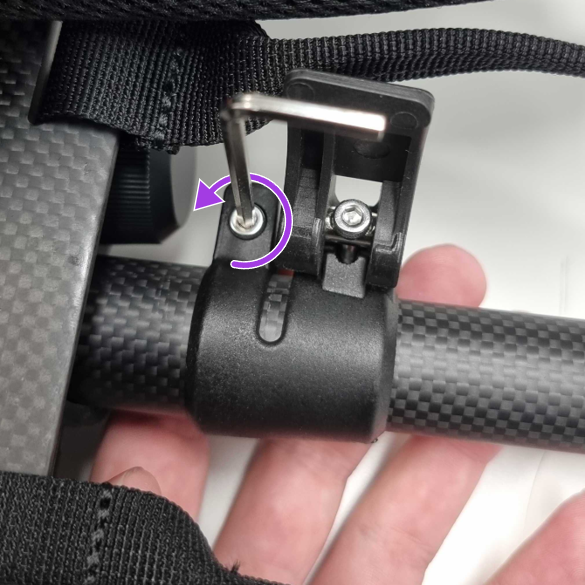
Tighten the screw with the short end of the 3 mm hex key as a handle.
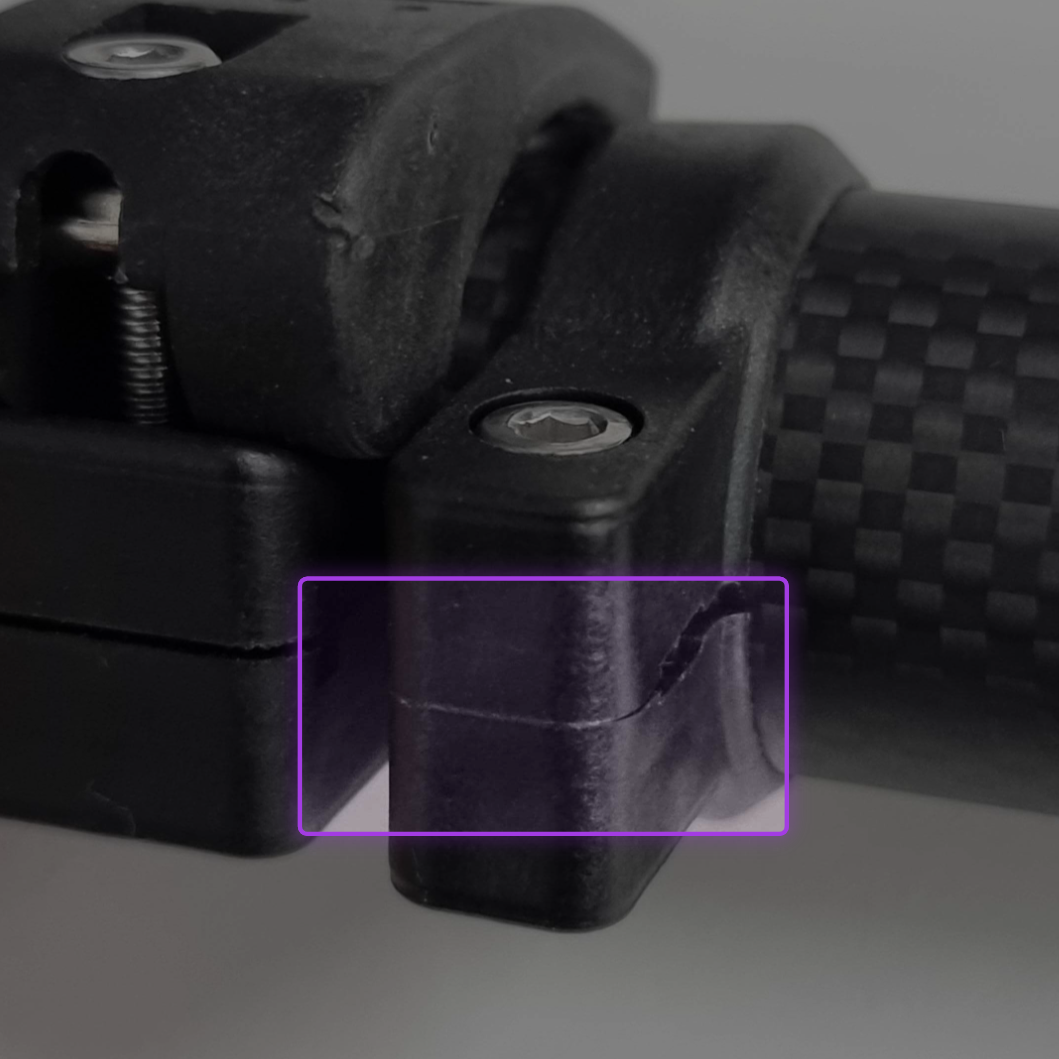
Make sure that the two halves of the Pole Clamp touch together.
|
|
|
Step 10: Check the Inner Pole and End-Stops
Extend the Inner Pole past the MAX mark.
Pull the Inner Pole firmly.
Make sure that the Pole Clamp is seated and that the End-Stops are correct.
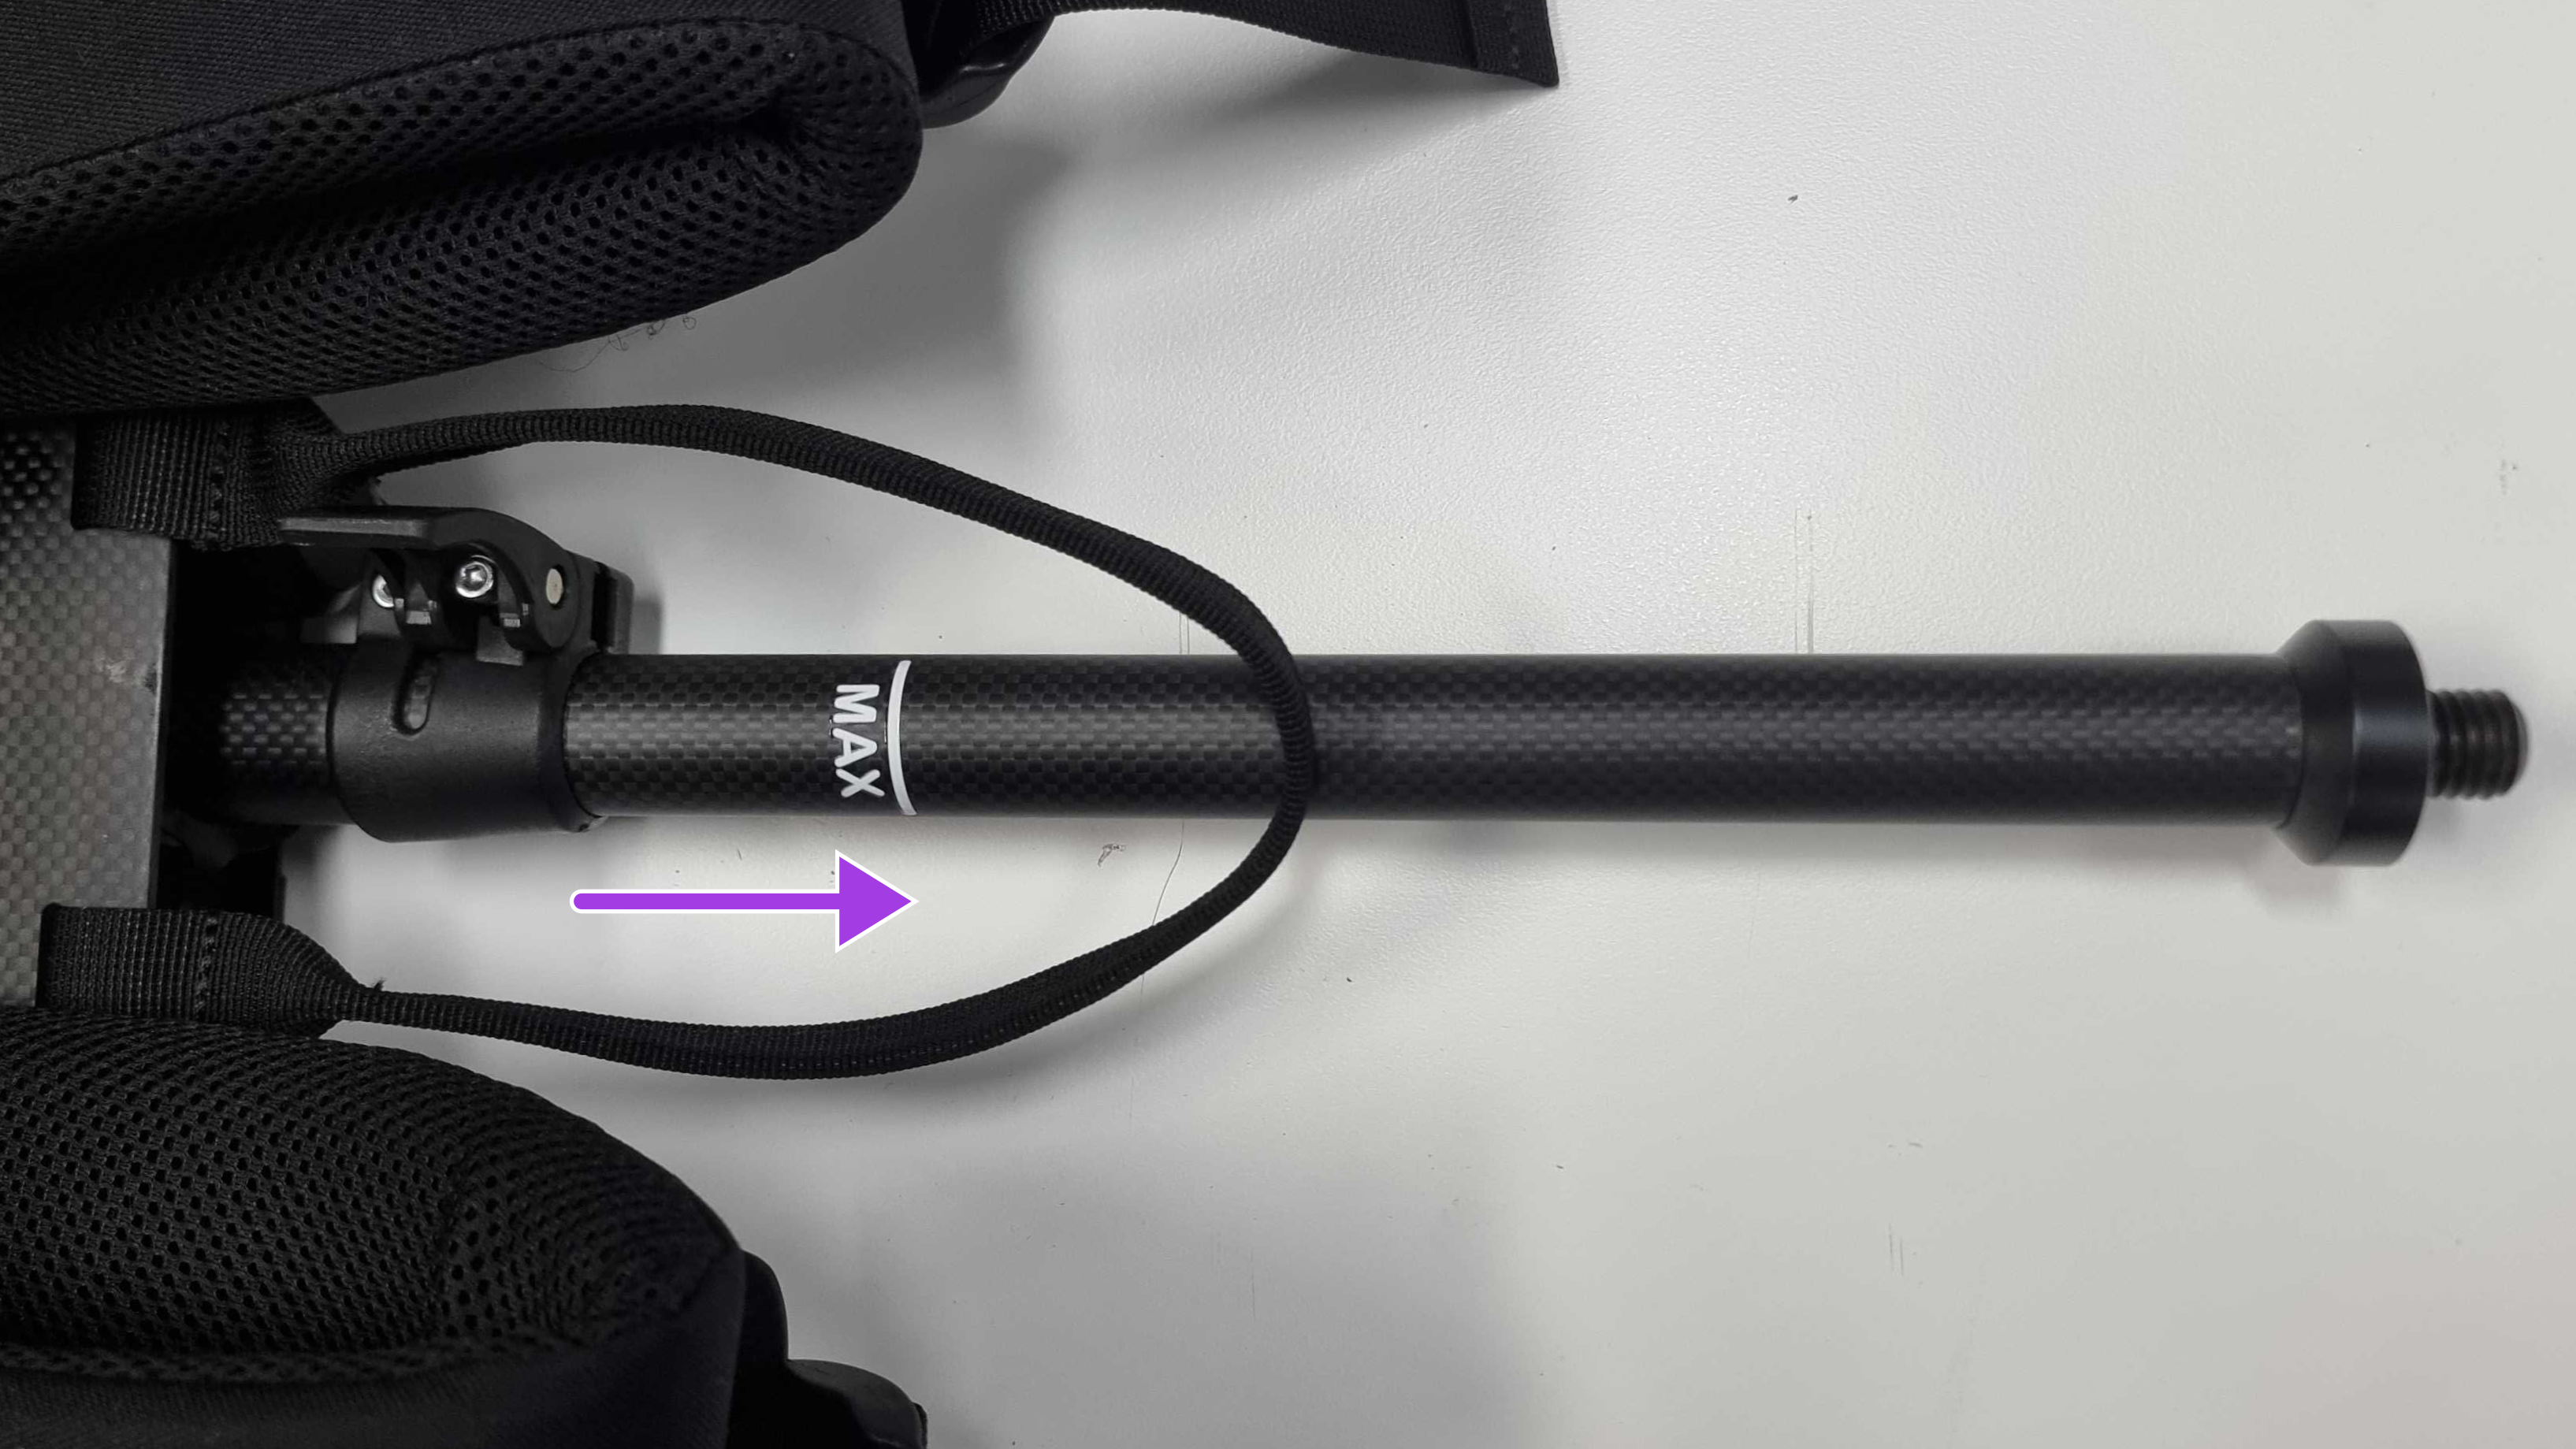
If the Inner Pole does not stay in the Outer Pole, remove it and install the End-Stops again.
Step 11: Close the Cam Lock Lever
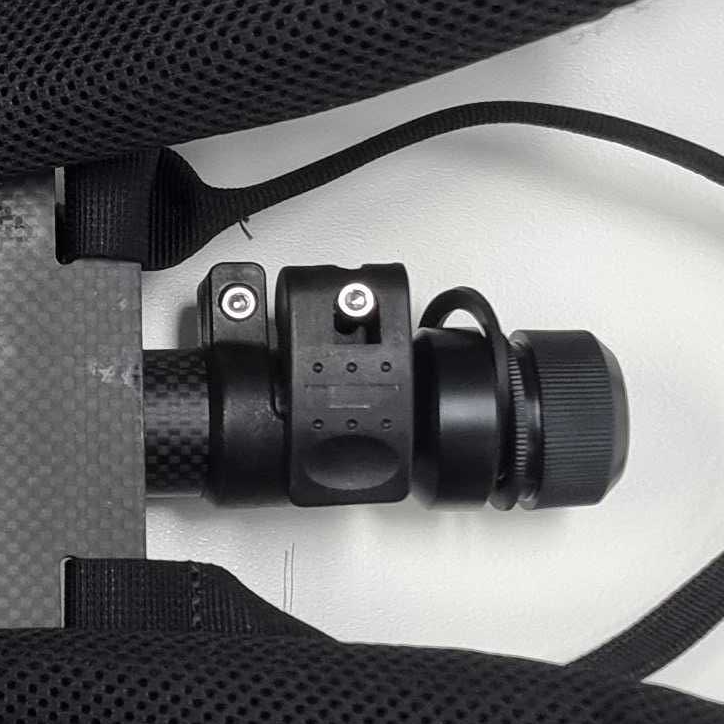
Close the Cam Lock Lever.
Make sure that the Inner Pole is clamped firmly.
To adjust the compression, turn the screw on the Cam Lock Lever pivot nut with the hex key.
|
|
Outcome
The GX1 Backpack Harness has a replacement Inner Pole. The Inner Pole clamps firmly at any extension up to the MAX mark, and the harness is ready for use.
Additional information
The kit contains spare End-Stops. Use a spare if an original End-Stop is damaged.